How to connect LED strips together
Today we can see beautiful LED light-emitting diodes in many places: on the facades of buildings, shops, boutiques, supermarkets, etc. They blink with colorful or one-color bright lights, illuminating billboards and billboards. Such LED-strips can be of various sizes and take various forms, as well as create the desired lighting effects. How can I connect the segments of LED strips with each other in order to get a long canvas, if they are produced only 5 meters in a skein, we will now consider.
Content
Why is it necessary to connect LED strips?
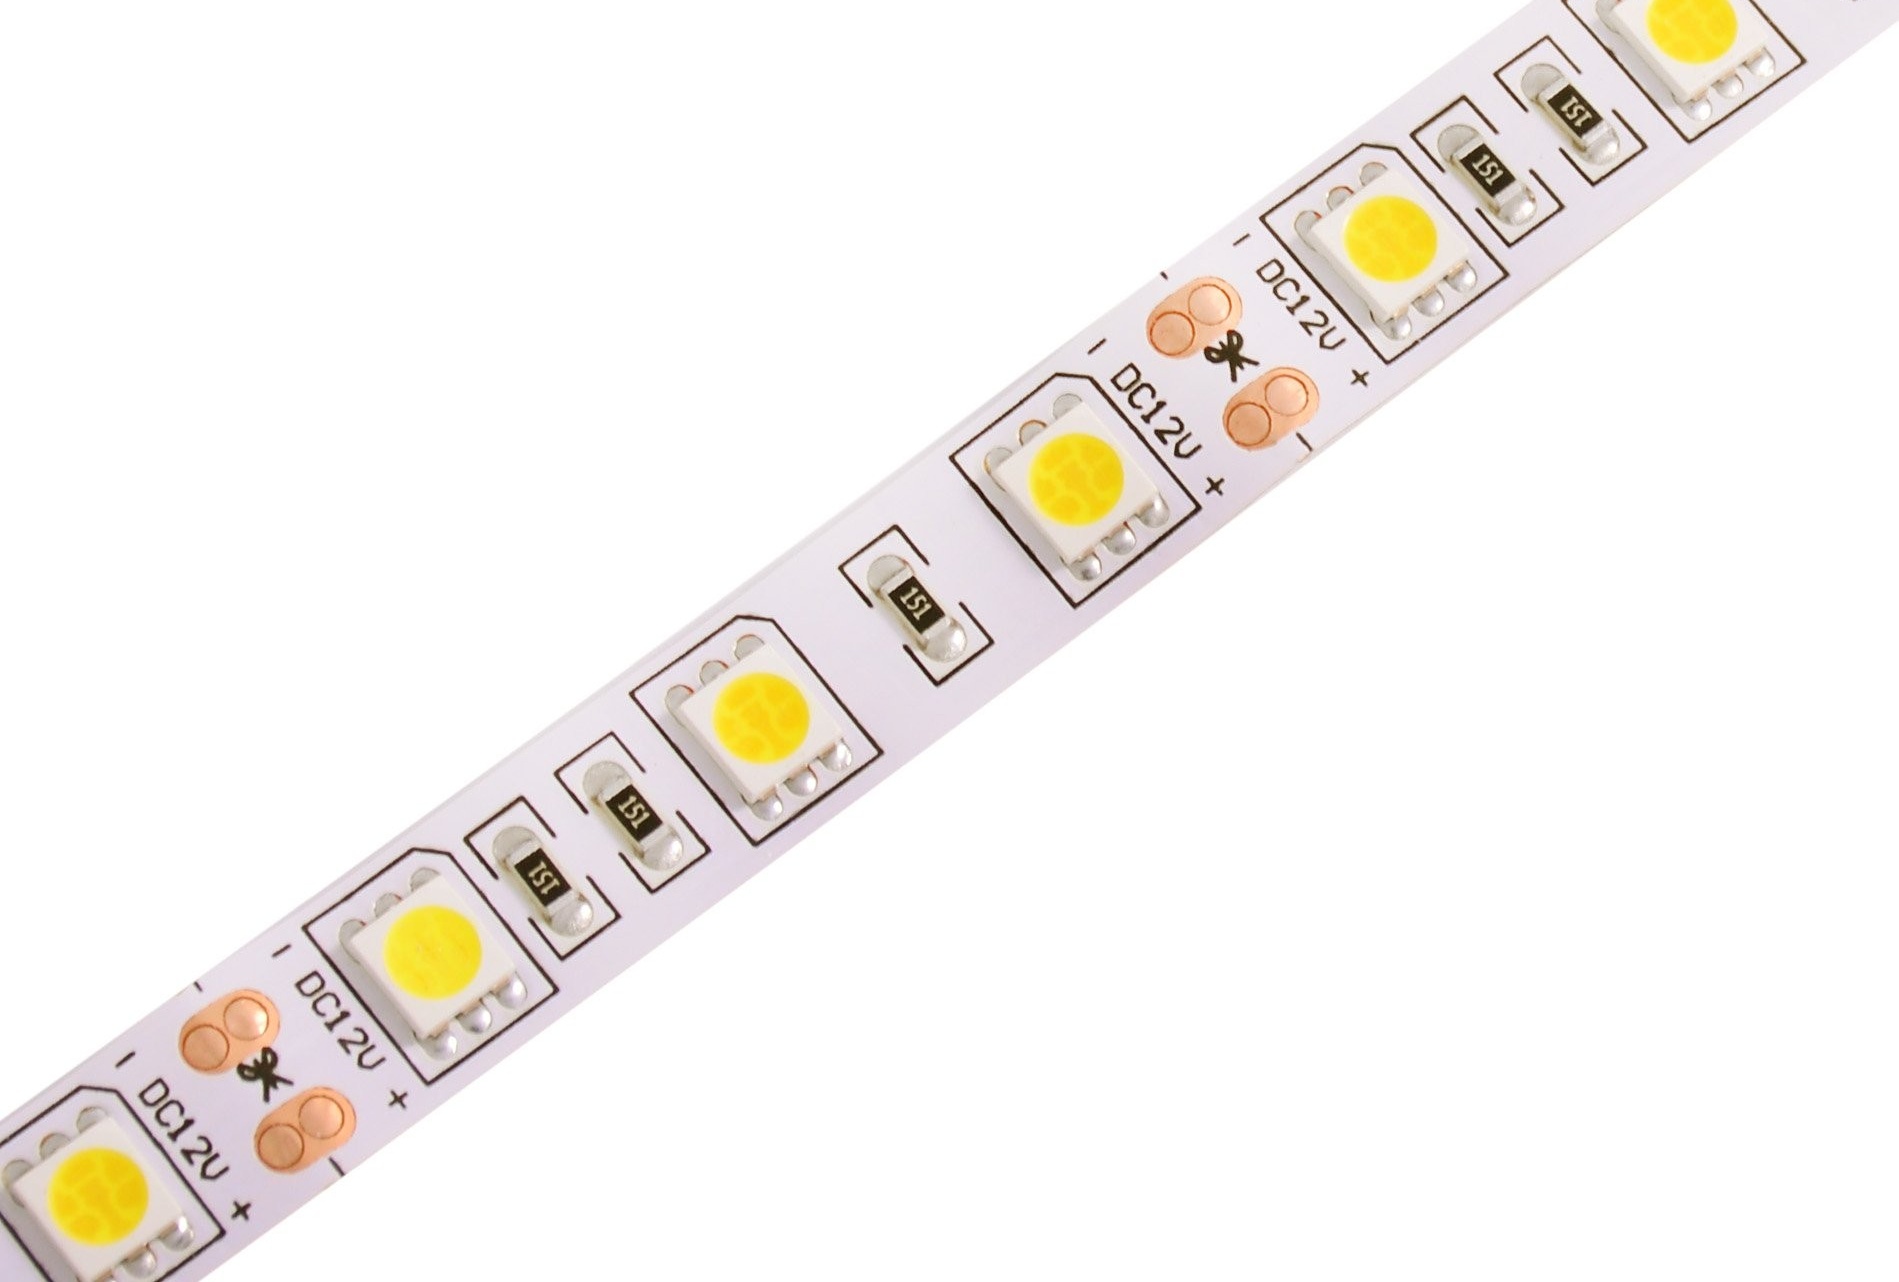
The LED strip is based on a flexible strip, along the entire length of which light diodes are placed at certain equal intervals. They are connected by a special serial circuit running along electric flexible tracks. They allow the tape to be cut into identical pieces, multiples of three in the number of diodes. On each diode tape there is a marking for the cut, and nearby are small “patch” areas for connecting wires.

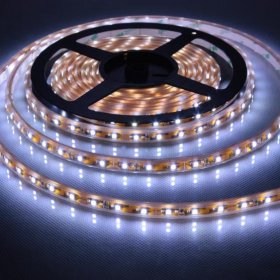
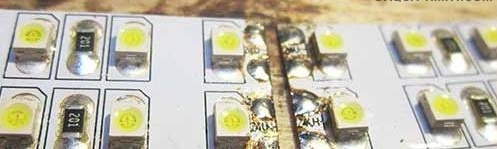
Beautiful LED strip in reel
On the reverse side of the diode tape, an adhesive tape with a protective film is glued, with which you can fix it on almost any surface.
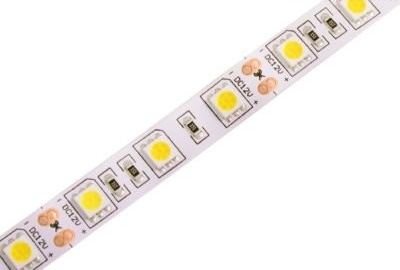
Today, there are a large number of different types of LED strips, which differ in the type of glow, color characteristics, as well as in the number of LEDs located on 1 meter of tape.
But since LED strips are sold 5 meters each in one reel, often this length is not enough to create the necessary figure from the strip, place it with continuous decoration of the facade of a store or other object. Therefore, you have to increase it, that is, lengthen by the required number of meters or even centimeters. With the help of LED strips, it is possible to decorate suspended ceilings, aquariums, arches, etc. LEDs can be arranged in one or two rows, they are coated with a special coating to protect them from moisture, but they can also be without it.
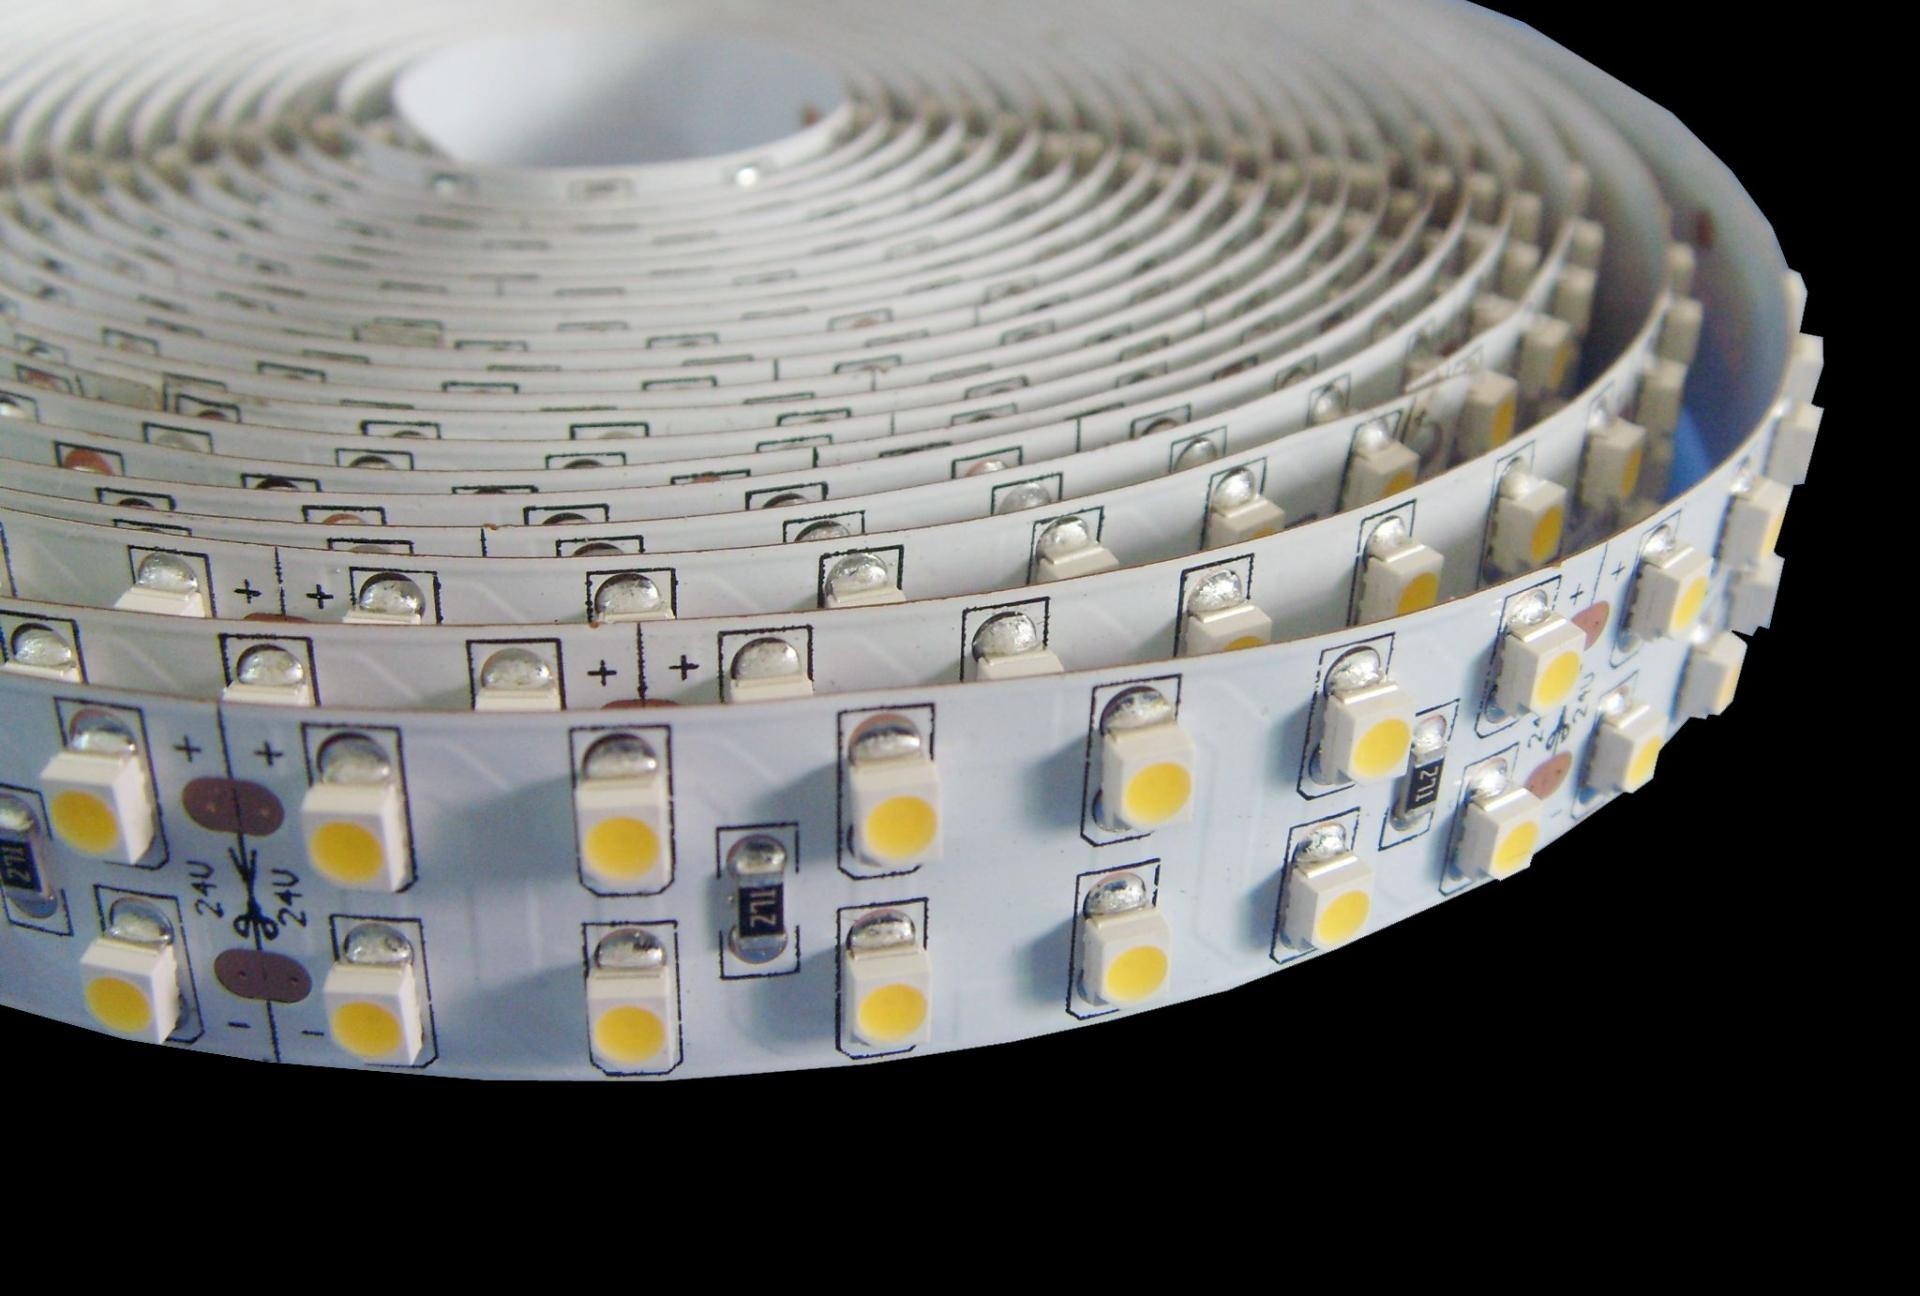
LED strip with two rows of diodes
LED strips are powered from the network at 12 or 24 V, so when you purchase them, you must get a transformer that reduces the voltage.
Connection methods: solder and connector
The connection is carried out in two ways known to us: soldering and removable plastic connectors.
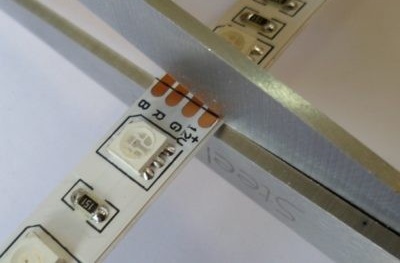
- Soldering a tape is cheaper and more reliable than any other method. On a tape prepared in advance, cut in a specific place for this and stripped in solder spots, two contacts are exposed, to which wires will be soldered or two tapes will be connected directly.

Cutting line of LED strip for soldering
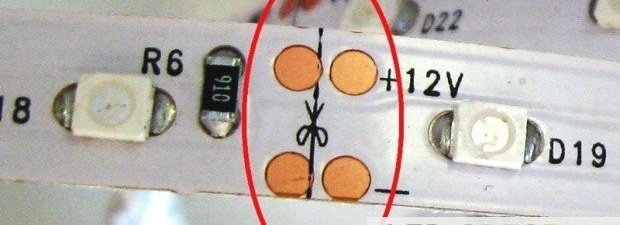
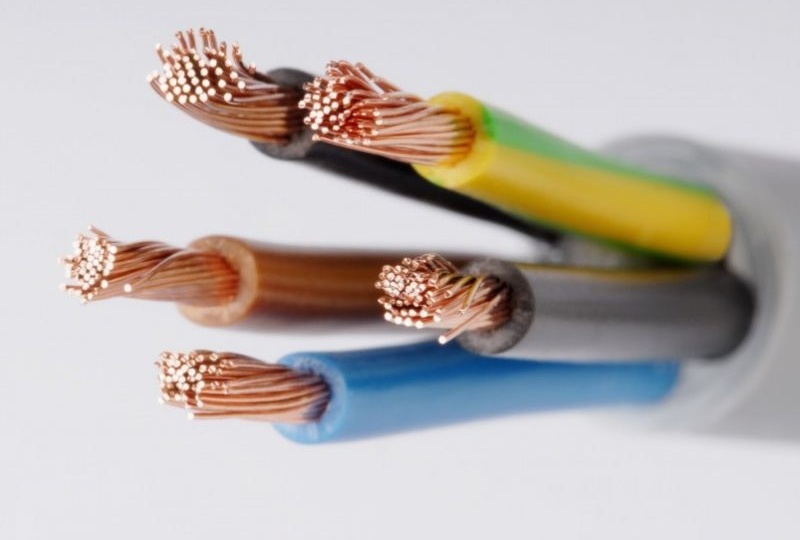
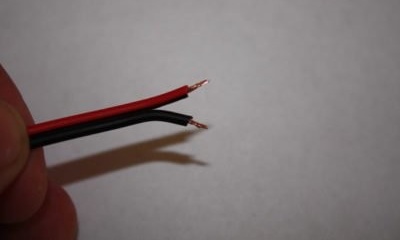
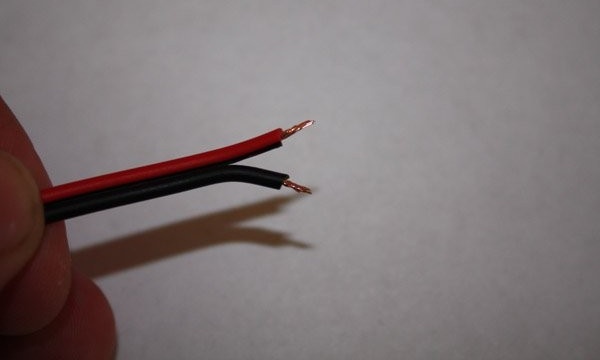
If this is a multi-colored RGB tape, then there will be 4 contacts. For soldering, it is recommended to take multicore multi-colored flexible wires of about 0.75-0.8 mm in diameter. For each color, it is necessary to take a wire with the same insulation color, and for any general output, any unclaimed color is selected.
For a colorless LED strip, wires of 2 colors are taken, but for the plus and minus their own color is assumed. This must be done in order not to accidentally confuse the poles (+ and -).
The LED strip boards are very compact, so everything is located next to each other. LEDs and tracks themselves have a high degree of sensitivity to high temperature: the tracks can simply peel off, and the diodes lose most of their "life energy". At high soldering temperatures, there is a violation of the crystal structure of the diodes, as a result of which the LEDs will quickly fail. Therefore, soldering should be carried out only with a thin soldering iron with a power of 25 to 60 W and not more than a couple of seconds. For soldering, it is necessary to remove only 5 mm of the sheath at the ends of the wires, and to make them more soldered to the contacts on the tape, it is necessary to tin these tips well. We will also need rosin with thin solder.
It is recommended to merge the tape only up to 5 meters, since the cross-section of the tracks on it is quite small, and if the tape is longer, then the voltage on them will decrease. In principle, there will be nothing wrong, but the LEDs at the very end of the LED strip will not be able to glow at 100% brightness.
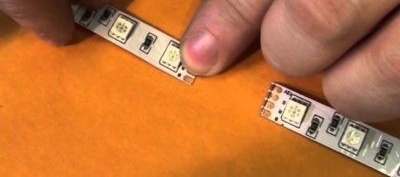
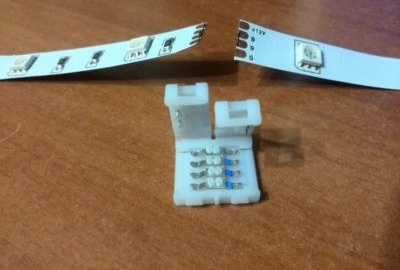
- Connecting LED strips with connectors is also one of the ways in which there is no need to solder the contacts. The connectors are small plastic clips and are available for ordinary and multi-colored tapes for two and four contacts.
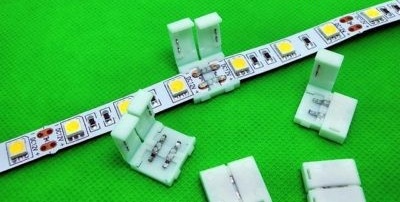
Plastic connectors for quick connection of LED strips
Sometimes there are times when the LED strip has to be connected in uncomfortable positions, when it is simply impossible to solder it, and then the connectors come to the rescue. Using the latch on the case, the contacts are reliably clamped, and the tape is connected mechanically. It is the most affordable, simple and easy. But for this type of compound, as well as for all similar compounds, a transition resistance is assumed, and the likelihood of an oxidation process is not excluded. Thus, we can say that soldering is the best type of connection, although more complex, and also requires a person to have some experience working with miniature elements.
Instructions for soldering LED strip
There are several ways to connect the tape, which we now consider in more detail.
Soldering iron tape without wires
- We prepare a soldering iron with adjustable temperature conditions from 250 to 350 ° C. When using a powerful soldering iron, it is necessary to control the temperature, since too high a temperature can damage the elements of the tape. We recommend using a thin solder with rosin. Before work, we clean the thin “tip” of the soldering iron with a metal brush from unnecessary elements and wipe it with a wet sponge.
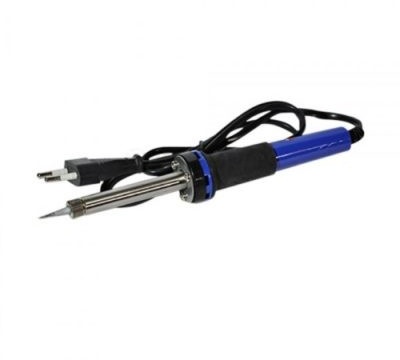
Low power thin tip soldering iron for LED strip
- We fix the LED tape on a flat surface with adhesive tape so that it does not move during operation.
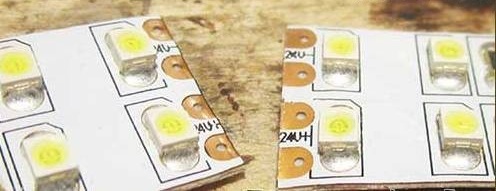
We prepare two pieces of the connected tape
- In order to connect the two segments using a soldering iron, you must first remove the silicone coating (if any) and get to the point of contact at all ends. Otherwise, a quality connection will be simply impossible. Stripping can be done with a sharp clerical knife.
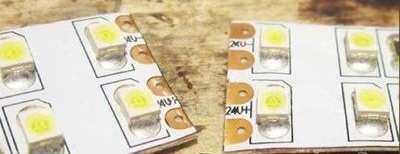
Cut tape with stripped contacts
- Then we tin the contacts on the two joined tapes and for this we need to put a little solder on them with a very thin layer.
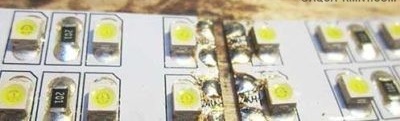
Cut LED strip with solder applied to the contacts
- We connect two ribbons with each other a little overlap. To do this, we impose ribbons on top of each other, observing the location of the plus and minus. Then we warm well with a soldering iron sting all the places of soldering contacts until the solder is completely melted. The heating temperature should be optimal so that the “cold soldering” method does not work out.

Soldered led strip
Such poor-quality adhesion occurs if it warms up, as it should be only one tape.
- After the tapes have dried, we connect them to the network with the required voltage. LEDs should burn well on soldered tapes on both sides. If sparking occurs or smoke develops, this means that a cross or incorrect arc connection has occurred.

Soldered 20 meter LED strip


Wire connection
- In order for the soldering to be of high quality, it is necessary to carefully cut the tape just like we said above and prepare the surfaces for soldering, covering them with a small layer of thin solder.

Correctly cut the LED strip
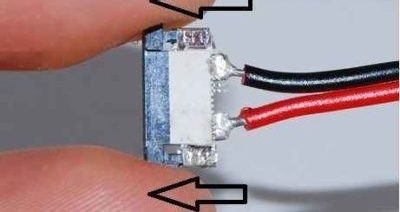
- Then you need to take a wire (any one will do, but most importantly, with the desired cross section). In principle, you can take a copper wire Ø 0.8 mm. We clear the shell and tin its ends. The connecting wire can be of any length, but not less than 1 centimeter.
Two-color wires for soldering segments of LED strips
- Since the contacts for connecting are paired with each other, for greater reliability, it is necessary to solder the ends of the wires to two pair contacts at once. To do this, they must be bent at an angle of 90 °.
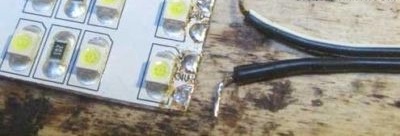
Bend wires for soldering at an angle
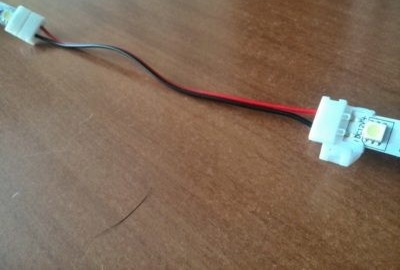
- The other end of the wire is soldered in the same way to the other stripped piece of diode tape.
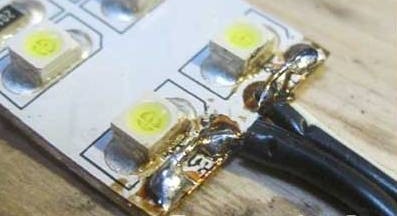
Soldered to LED strip wires
- At the end, we put on a special heat-shrink tube that will protect the weld points.
Heat shrink tube for soldering wire and LED strip
- It should also be noted that if we took rosin for soldering, then it can be left on soldered contacts, since it is a kind of dielectric. But if necessary, the rosin is removed with ordinary alcohol. After we have connected two pieces of tape, it can be attached to the desired surface, bending in any direction.
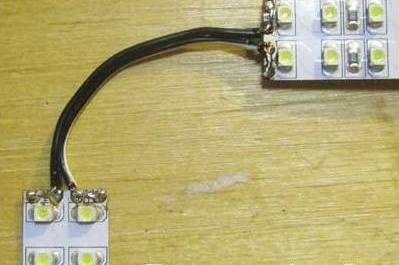
Two pieces of LED strip connected by soldering with two wires

Video: How to solder an LED strip
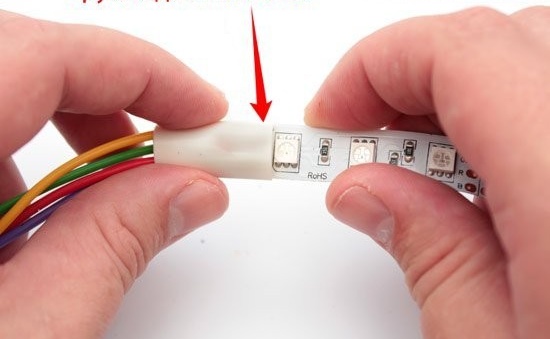
Connecting LED strip with plastic connectors
Connectors made of plastic or plastic are the fastest and most convenient way to connect LED strips and help in cases where it is not possible to solder the contacts with a soldering iron.
Types of connectors
A connector is a small plastic or plastic device that has pins to allow easy and quick alignment of LED strips. There are such types:
- Without bending. Such devices are designed to quickly connect diode strips of any type in straight sections. Allows you to make the junction almost invisible.
- With a bend. These are connectors that consist of 2 elements with wires. They are designed to connect tapes with diodes in various directions. Due to this structural feature of the connector, any form can be created from LED strips.
- Corner Connectors. They allow you to connect tapes only at a right angle of 90 °.
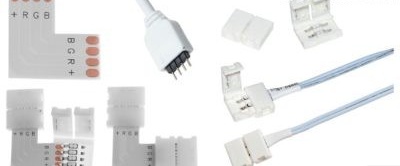
Types of connectors for connecting LED strip
Step-by-step connection instructions
- Joining with tape connectors does not require any tools other than sharp scissors.
We cut the LED strip into two parts
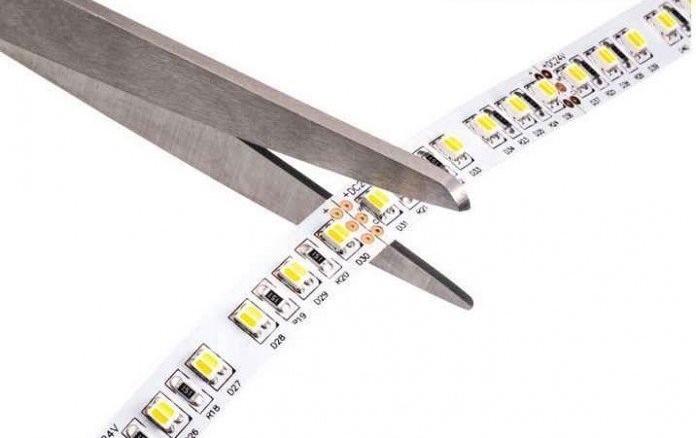
- Before cutting the LED strip, it is necessary to accurately measure the desired length of the segment, taking into account the fact that in each segment of the diodes there must be a multiple of 3 (6, 9, 12, 15, 18, etc.). Therefore, the segments are usually obtained is not always the right size.
6 LED diode strip cut
- On the line indicated by the manufacturer, we make a cut between the adjacent LEDs, so that the installation sites with the same dimensions remain on both sides. Tapes with waterproof silicone coating must be carefully cleaned with a sharp knife from the outer coating of the contact junction.
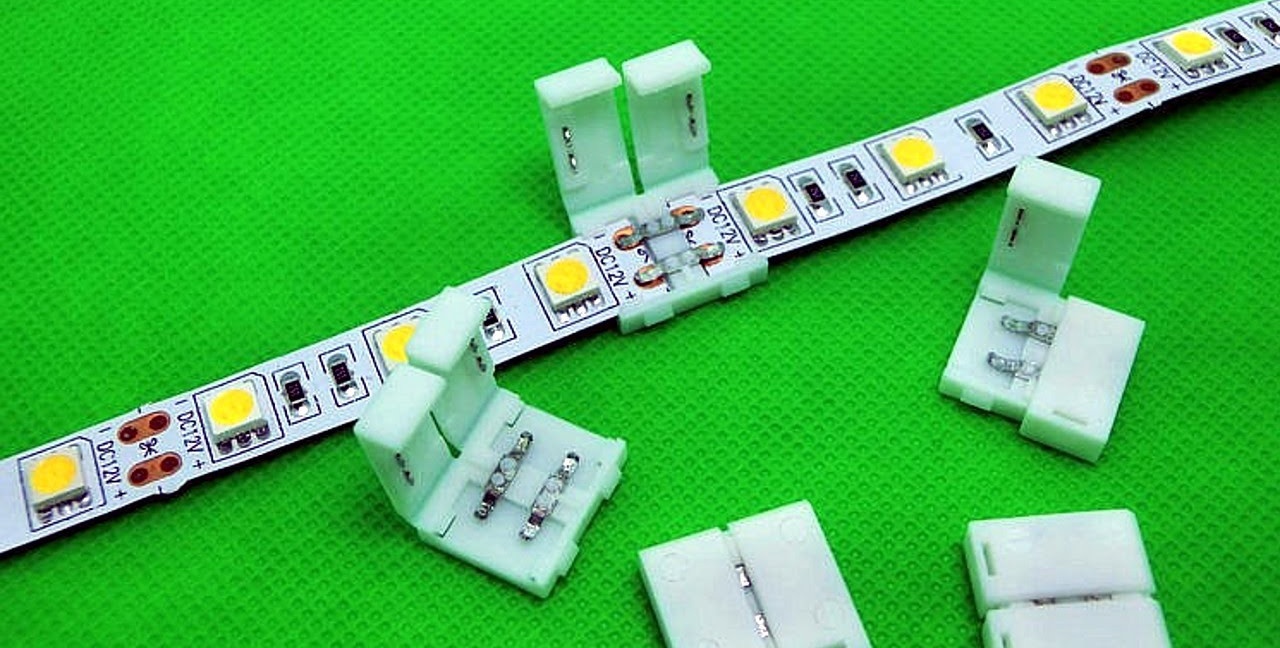
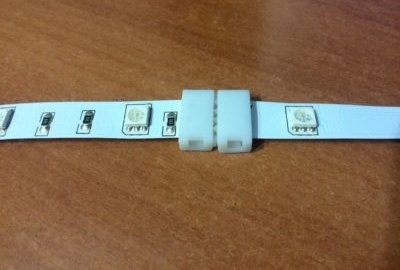
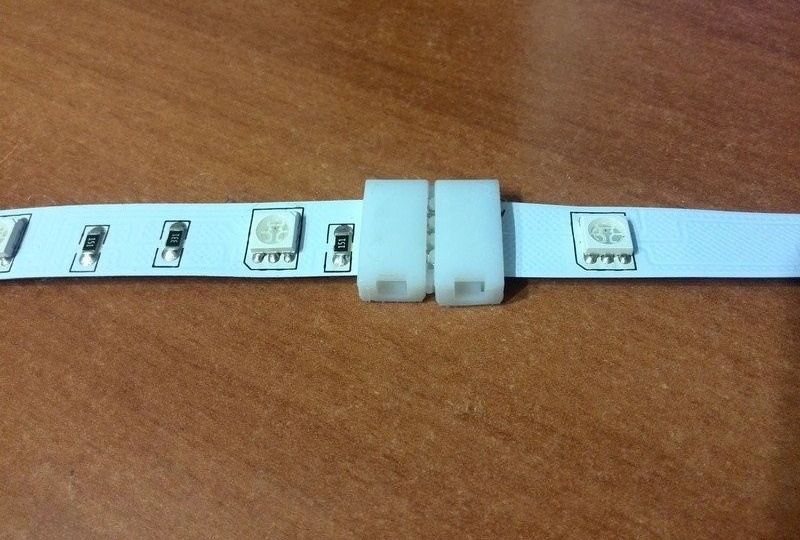
Two pieces of tape prepared for connection and a connector
- We open the connector cover and insert one end of the LED strip inward so that the conductive contacts fit well to the pads. Then we snap the connector cover and carry out the same procedure with the other end of the segment.
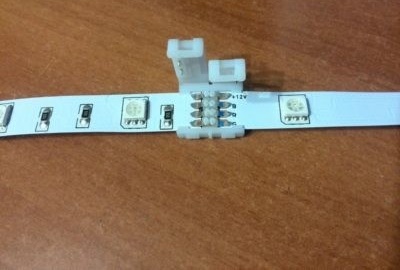
We connect two segments of the LED strip
- At each connection, it is necessary to check the polarity, since the colors of the wires may not match the provided colors for marking the polarity (+ and -) on the tape itself. Such control will help prevent errors during the connection and eliminate the alteration of work.
Two pieces of LED strip connected by a regular straight connector without bending
- After all sections of the tape are connected, it is connected to the electrical network and the operation is checked.
Luminous LED strip connected by connectors
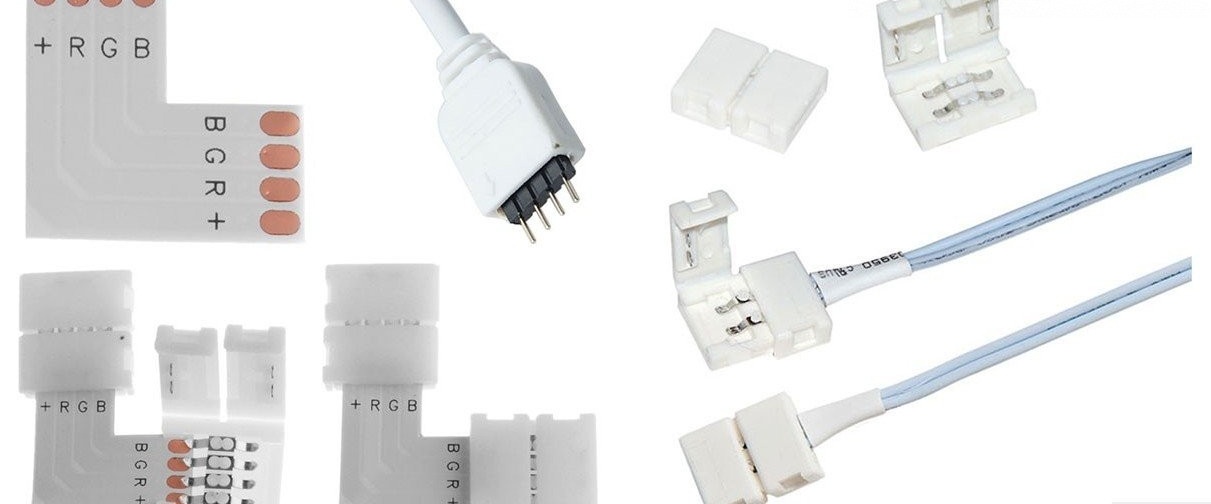
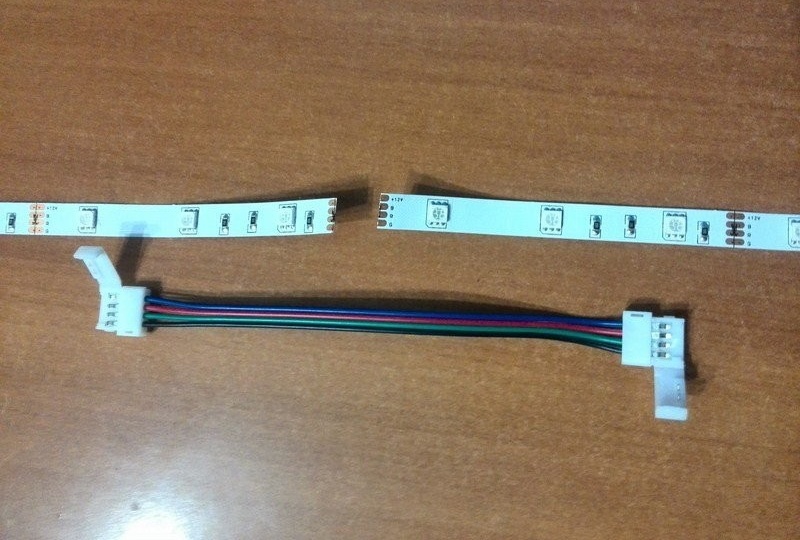
- If it is necessary to connect not two, but more segments of a multi-colored LED strip, then for this you need a special connector such as RGB.

Connector for connecting a multi-colored RGB tape
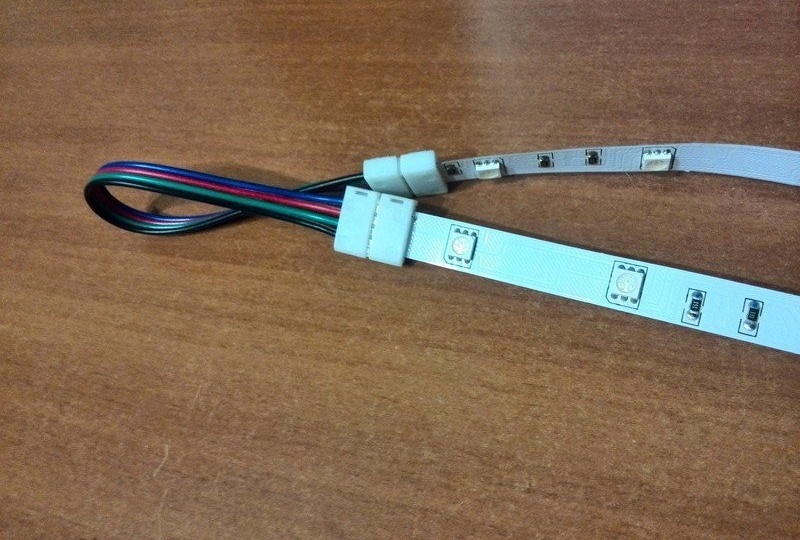
- It is equipped inside with not two, but four contacts. It can also be a bend connector, which is equipped with four multi-colored wires.

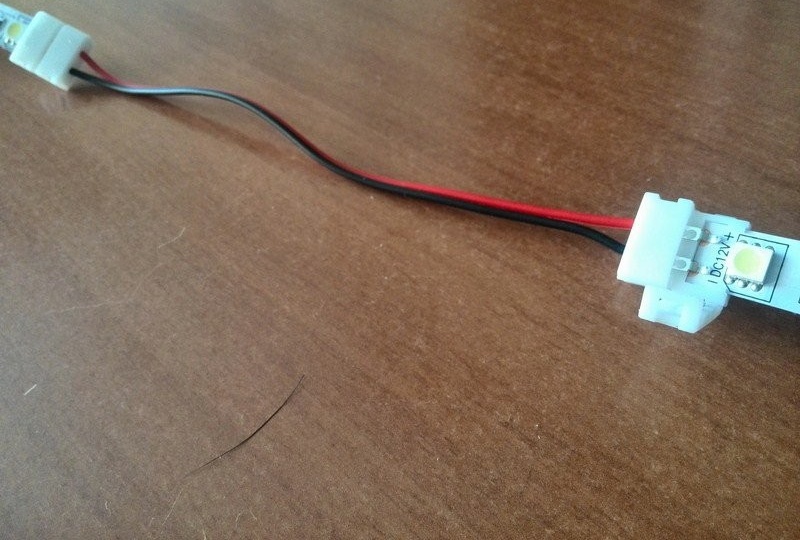
Two multi-colored ribbons connected by a special multi-core connector


Installing a diode strip in a fast wired connector
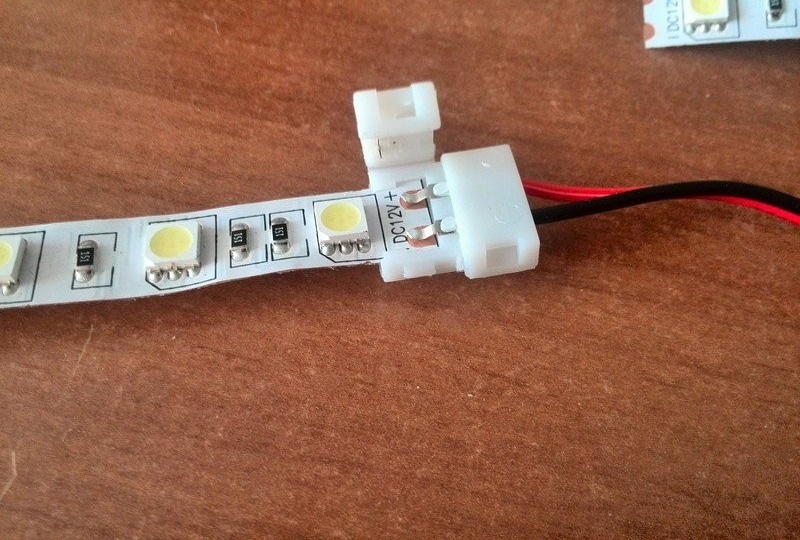
There are also quick connectors with wires for connecting diode strips.
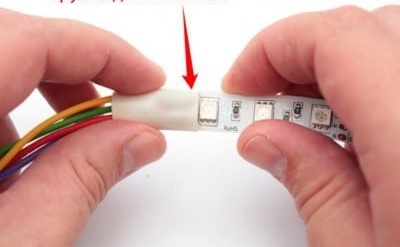
- We take two ribbons that we will connect, as well as a connector with wires and turn it over with a wide strip of white color up.
How to hold the connector when connecting tapes
- Then we pull a little by the tips of the second plastic latch. You cannot hold onto the wires themselves.

Connector for LED strip with wires
- When connecting, we check the polarity, since often the colors of the wires simply do not match.

Connector with wires
- After we inserted the tape into the connector, return the latch to its previous position and check the quality of fixation. If everything is correct, then you can connect the diode tape to the network.
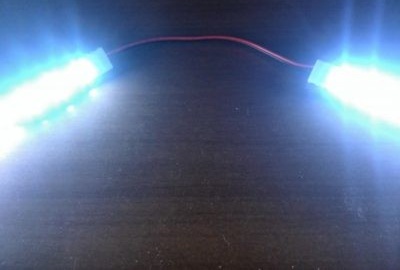
Two connected LED stripes, single color


Tips for using and installing tape
- Since the tape with light diodes is not a completely reliable device, it is recommended to carry out installation taking into account the subsequent possible dismantling in case of its complete failure and the impossibility of repair.
- On the reverse side, the tape has an adhesive layer with a removable protective film. In order to fix the tape in the selected area, you just need to remove this film and strongly press the tape to the place of its fastening. If the surface has roughness, then the tape will stick poorly and after a while may fall off. Therefore, for reliability, you can simply glue a strip of double-sided tape in advance at the place of installation of the tape, and then attach the tape itself to it.
- There are also special aluminum profiles that are attached to the surface with self-tapping screws, and then the tape is glued to it.A plastic diffuser is attached to such profiles, which allows you to hide the LEDs and create a more uniform light stream. Such profiles can cost much more than the tape itself, so you can use an inexpensive plastic corner, which is attached to the surface with ordinary liquid nails.
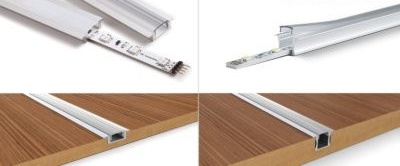
LED Strip Mounting Profiles
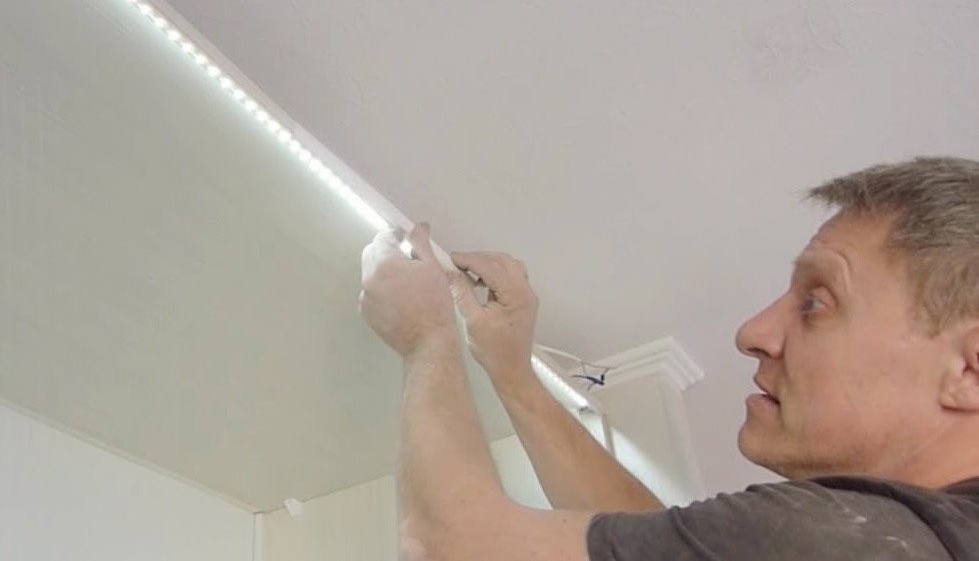
- When highlighting stretch or conventional ceilings, it is best to hide the tape behind a baguette, molding or baseboard. Depending on the design project, the LEDs can be directed parallel to the ceiling surface or at some angle to it. In order to use the luminous flux to the maximum and get uniform ceiling lighting, it is recommended that the tape be placed at a distance of at least 5 cm from it.

Mounting a single-color LED strip on the ceiling
- When arranging lighting with LEDs for shop windows, shelves, interior space of wardrobes and other objects, it is necessary to make sure that the light from the tape does not “hit” directly into the eyes of customers. Otherwise, the effect of such a backlight will not be as expected, but rather, because of the bright light, consumers simply will not be able to see the goods in the store well.

LED strip in the interior of the bar
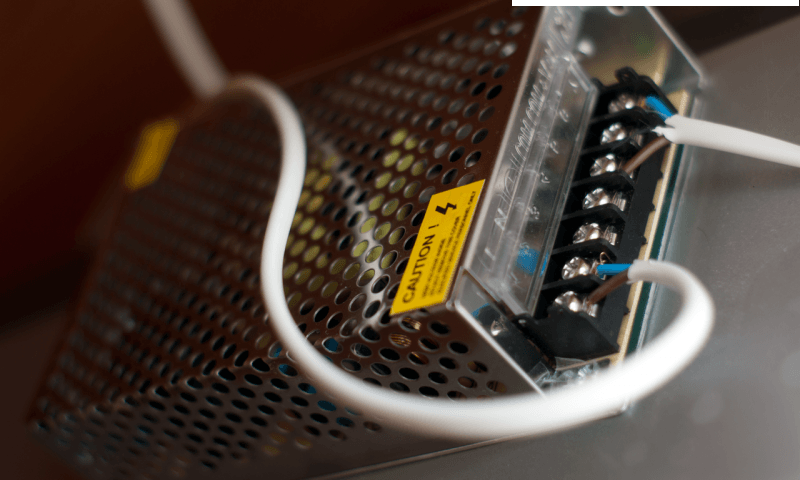
- Power supplies of high power are often equipped with fans, which during operation create unpleasant noise, which increases over time. This feature must be taken into account if the LEDs are mounted in a room where such a noise curtain can cause irritation to people. It can be a bedroom or a nursery. Therefore, you just need to take the unit to another technical room, where the noise will not interfere with anyone.

Power supply for connecting LED strips


Pros and cons of various compounds
Let's look at some of the advantages and disadvantages of connecting diode tapes in the two above ways, in order to see which way is still best to connect these lighting devices.
Connector Connector
| Benefits | disadvantages |
| Easy to assemble and dismantle | Fear of high humidity rooms |
| They have many different types. | Quick oxidation of contacts |
| Tapes can be combined in various forms. | Poor-quality connectors (if you buy bad connectors, then there simply will not be contact and the tape will not even light up) |
| No additional insulation required | The junction of two pieces of tape |
| Available for sale | |
| Low cost |
Solder connection
| Benefits | disadvantages |
| Soldering allows you to make tapes, which can then be bent in any direction | The difficulty of soldering without experience |
| Connection reliability | Fear of high temperature tape |
| Contacts are not oxidized | It is necessary to have a soldering iron with a thin tip, thin rosin and solder |
| Free connection | |
| Invisible tape junction |
Video: Soldering LED Stripes
Video: What is LED strip
Video: How to connect LED strip connectors
LED tapes are one-color and multi-colored, very beautiful and spectacular, so they can often be seen in many places. When choosing a connection method, you must first be guided by factors in which the LED strip will be used, and also understand what you want to get in the end. If you need a good and high-quality connection for a long time, then you must try to use the soldering method, as it is more reliable and durable. But if this is not possible, then the connectors will always come to your aid and will also be able to qualitatively connect segments of tapes.