Assessment of heat loss at home: how to properly conduct thermal imaging inspection

“My house is my fortress,” says folk wisdom. And you really want housing to be the place where you will feel completely safe, which will reliably hide both from the summer heat and from the winter cold. One of the most pressing issues for each owner is the ability of the house to keep warm, because the comfort of staying in the house during the cold season and the efficiency of the heating system directly depend on this, which means the health of family members and the “well-being” of the wallet. Is it possible to assess the quality of thermal protection of a building, to find places of hidden defects and damage that contribute to heat leakage? Of course. And with the help of a simple and affordable method - thermal imaging diagnostics.
Content
Why do you need a heat analysis?
Thermal imaging allows you to work to reduce heat loss correctly and economically. Due to the clarity, efficiency and reliability of the results obtained, it has established itself as one of the most optimal and objective methods for diagnosing buildings at the end of their construction or reconstruction, as well as during operation.
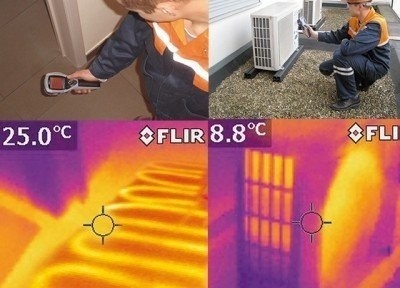
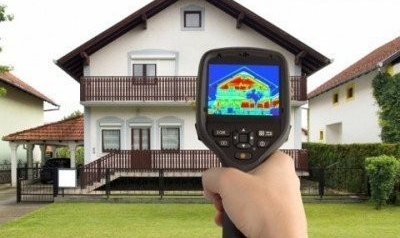
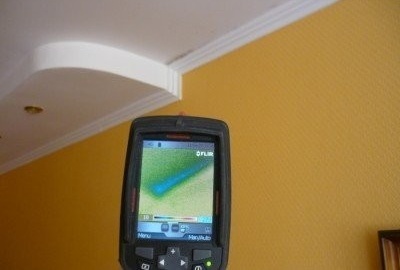
Such an examination is carried out using a thermal imager. This is a special device that “sees” the temperature of objects. By registering infrared radiation of objects, he converts it into an image visible to the human eye. The “picture” obtained during the energy audit of the building helps to recognize where the problem areas are in the house.
As a result of well-made thermal imaging diagnostics, the homeowner receives comprehensive information about the flaws of the building envelope and can clearly plan its work on insulation and insulation of housing.

Thermal imaging diagnostics of housing is only useful if it is followed by a set of measures to correct identified deficiencies
Thermal imaging diagnostics guard the budget
If you are on the verge of a "global acquisition" - buying a cottage, or planning to build a country house, a thermal imaging survey of the building to check the quality of the work performed will not only be desirable, but a very necessary procedure.
Why? Judge for yourselves, modern construction is an abundance of new technologies and materials, allowing designers and craftsmen to realize the most incredible "architectural forms", to erect buildings faster and faster. But not all “trending” materials are of good quality, and specialists often only care about the presentability of their work, completely forgetting about issues of thermal comfort and energy saving. And in the end it turns out that the house is beautiful, but unsuitable for life.

Order thermal imaging diagnostics only from trusted companies and specialists, since unreliable examination results completely depreciate the whole point of the event
Thermal imaging inspection of the building envelope of a country house is not an expensive service, but it pays for all 100. If the diagnostics are performed immediately after the house is built, before the start of the interior decoration, then all possible defects will be identified in a timely manner and there will be no need to spend money on unscheduled alterations and alterations to cold rooms. When you buy a ready-made cottage, a thermal imager will save you from a bad deal or allow you to raise the issue of discounts.
Surprisingly, in our "advanced" time, a very small percentage of owners are aware of the possibilities and advantages of thermal imaging diagnostics at home. Confident in their professionalism, builders often themselves recommend that customers conduct such a control, but those who are unscrupulous about such a test prefer to remain silent.
Specificity and technology of inspection
Optimal for diagnosis is the cold season. The heating system at home should be functional for at least 2 days at the time of testing. The minimum allowable difference between the temperature in the house and "overboard" is 15 degrees (preferably about 20). Examination is carried out exclusively by high-class devices that demonstrate a clear thermal picture and allow detecting the maximum number of defects.

External insulation of the walls of this apartment is poorly done - a thermogram is a confirmation of this. Thermal insulation is not just ineffective, it provokes even greater heat loss
A complete thermal imaging diagnostics consists of the following stages:
- Indoor shooting. The most important stage, allowing to identify more than 85% of defects. Shooting is done carefully, in no case selectively, each wall, every window or door is examined. Indeed, even in one room, one window can be installed correctly, and the other with a violation of technology, one corner is dry, the other is damp, etc.
- External shooting. Effective in detecting defects in the roof and insulated facades.
- Processing the results.
- Computer processing of thermograms.
- Creation of a report with a detailed classification of defects, an indication of the causes of their occurrence, recommendations for elimination.
Thermal imaging involves a phased thermographic survey of various areas of the building envelope, which must be open for shooting. Therefore, before the arrival of specialists, make sure that the window sills are free, there is access to the skirting boards and the corners formed by the external wall or the external wall and partition are not cluttered.
Room humidity analysis
Thanks to multi-mode thermal imaging, you can detect all possible violations of the thermal protection of a house or apartment. However, not always even a detailed analysis of thermograms can give an unambiguous answer about the causes of problems.

Even single “foci” of mold on the walls and ceiling indicate that there are significant problems with the thermal state of housing. Timely thermal imaging at home will help prevent a worsening situation.
For example, air permeability defects are a favorable “environment” for the formation of condensate. And the fact of the presence of the latter can be reliably established exclusively using a humidity scanner with high sensitivity. Therefore, surface areas on which temperature anomalies were observed must necessarily be checked with an “auxiliary device” as well. It is especially important to use the scanner when examining wooden and frame structures: the presence of moisture in the building envelopes is especially detrimental to them, if it is detected, repairs should be started immediately.
When planning work on home insulation, it is also very important to have information about the presence of moisture, since the use of vapor-tight materials can preserve water in walls and ceilings with all the negative consequences arising from this.
DIY thermal imager - is it worth it?
The thermal imager is a device with "great capabilities." Indeed, in addition to searching for heat losses, he still knows how to evaluate the performance of equipment and heating systems, to find defects and areas of electrical equipment overload, etc. No homeowner would refuse to own such a device. But the price of such a miracle of technology cannot but upset.
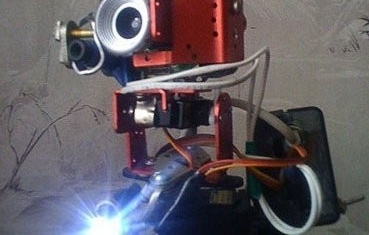
If you have the desire, dexterity and the necessary "components", you can try to design a thermal imager with your own hands, and quite a budget one. Does this seem impossible to you? In 2010, two students from Germany M. Cole and M. Ritter proved the opposite with their unique development. Their brainchild based on the Arduino microcontroller turned out to be quite simple to manufacture and required a cost of only about $ 100.

One of the main disadvantages of a homemade thermal imager is the long wait time for the image, but given the ridiculous cost of the device against the background of the original device, you can safely close your eyes to this
So armed with an old webcam, microcontroller, servo drives, temperature sensor, laser pointer and finding detailed instructions for assembling from the "pioneers" on the network, you can build a device that is far from visual and technical perfection, but very useful in the "household".


