DIY Toilet Repair: A Complete Guide
Damage to the plumbing happens in every apartment, such a malfunction needs to be eliminated quickly, because there is a risk of flooding the neighbors from below. Fortunately, the design of the toilet is so simple that you can cope with the problem yourself without calling an emergency brigade. How to fix the toilet with your own hands? Consider the causes of the most frequent breakdowns and steps to address them.
Content
Toilet device
In order to correctly find the malfunction and carry out repairs, you need to study the device and the scheme of the toilet, determine the replaced parts and components.
Toilet elements:
- the bowl is fixed to the floor or wall, the seat and the lid are mounted on top, which is closed mechanically or by means of a micro-lift;
- water from the bowl goes into the exhaust pipe, which connects to the sewer with a special cuff;
- the tank is filled with water for washing the bowl and can be mounted either on a stand on top of the bowl (compact), or hide in the wall.

Before proceeding with the repair, it is recommended to study the scheme of the toilet
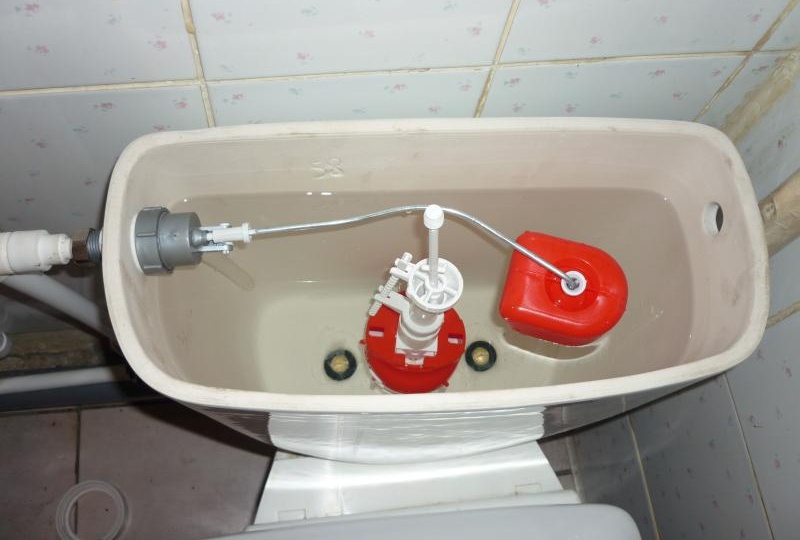
The accessories installed in the drain tank can be located in two places:
- flexible hose connects to the side;
- water supply is carried out from below.
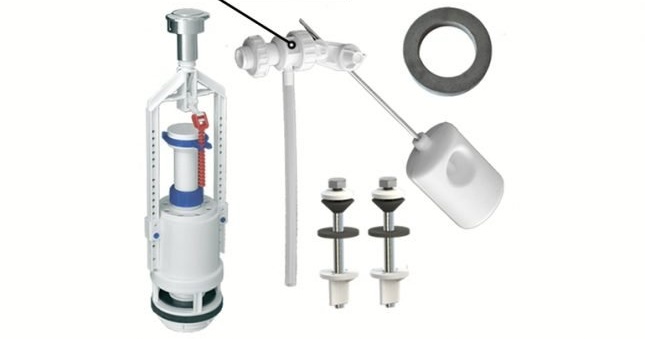
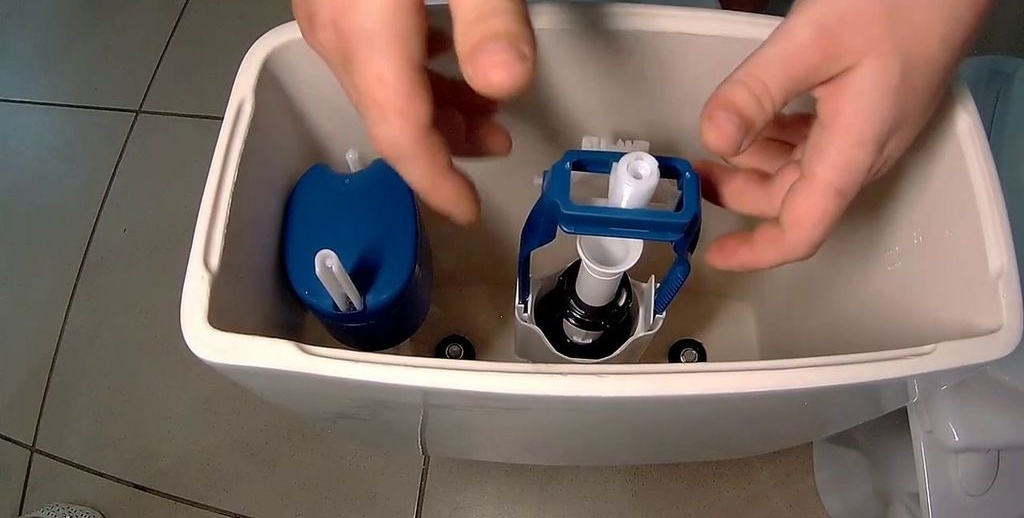
The fittings of the tank consists of the following parts:
- the trigger, is actuated by one or two drain buttons, which release 3 or 6 liters of flowing water and allow you to adjust the flow;
- the inlet valve through which the tank is filled, the float is connected to the shutoff valve, it blocks the water when it reaches the upper level;
- rubber seals that ensure complete tightness of the system.
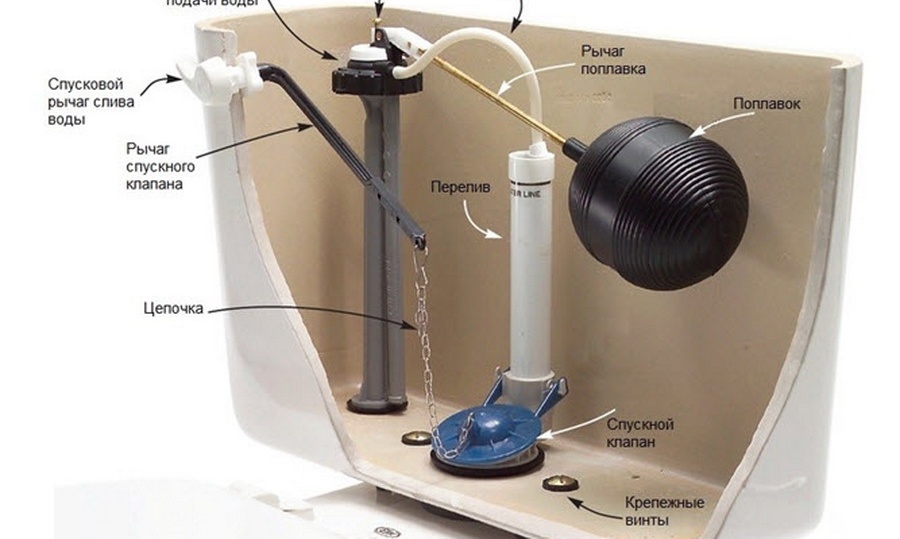
The drain tank consists of several elements.
The toilet is attached to the floor or wall with bolts, installed on a special frame built into the wall. In this case, water enters the bowl from the tank through the connecting pipe. The drain tank is hidden in the wall, and for free access, if necessary, a false panel or door is disguised as a general finish. Outside, only buttons or levers for draining are visible.
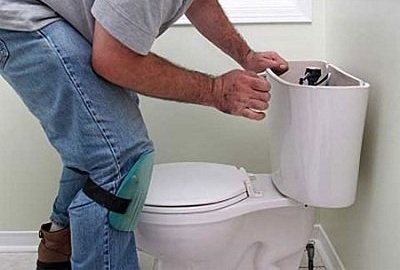
DIY toilet repair: a practical guide
With troubleshooting the bowl and the drain mechanism, it is better not to tighten, and before working, it is necessary to shut off the water by turning the inlet valve, prepare the necessary materials and tools:
- open-end wrenches;
- screwdriver;
- fumlent;
- silicone sealant;
- pliers or pliers.
The most common toilet breakdowns:
- water leakage, noise, constant discharge;
- no water is collected in the tank;
- shutoff valves do not work;
- microlift breakage;
- drain buttons do not work;
- buttons are pressed, but no flushing occurs.
These problems are easily resolved by replacing components that are broken, it is important to make the correct diagnosis.
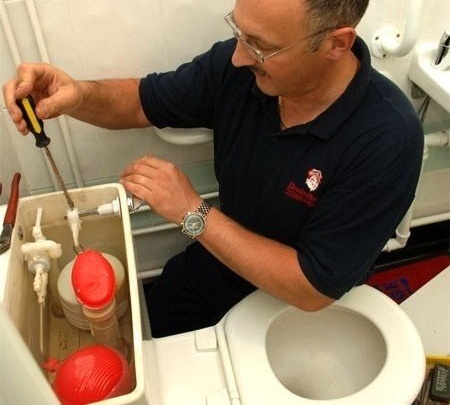
Tank problems
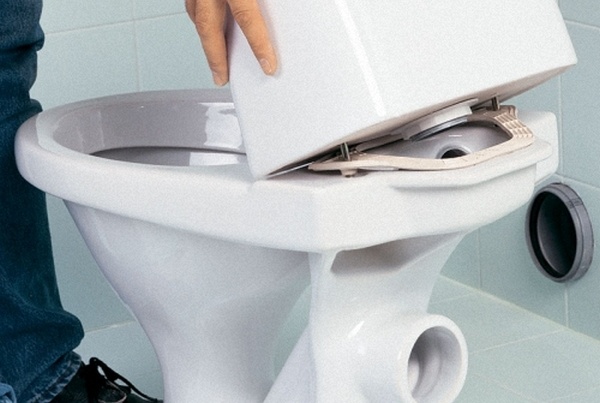
The lid of the tank is made of ceramic or sanitary ware, it is fragile and heavy. For a preliminary inspection, carefully remove the cover to identify defective parts. If water is constantly being drawn into the tank, the worn intake valve must be changed. If water flows slowly into the bowl all the time, the cause is a malfunction of the drain valve, which works spontaneously.
If no water is collected at all, then the inlet hose or connection pipe may be clogged. The cause of leaks lies in the wear of the gaskets and the violation of the tightness.
Water volume adjustment
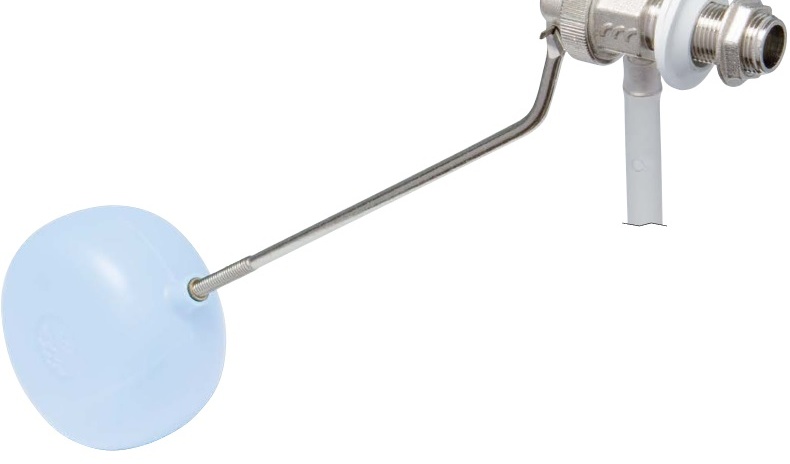
The water level in the tank, upon reaching which the shut-off valve is turned on, is determined and regulated using a special float sensor, which can be set and adjusted as desired. In Soviet times, the float was held on a thick wire that could simply be bent so that less water was collected.
You can regulate the volume of water in the tank using a float sensor
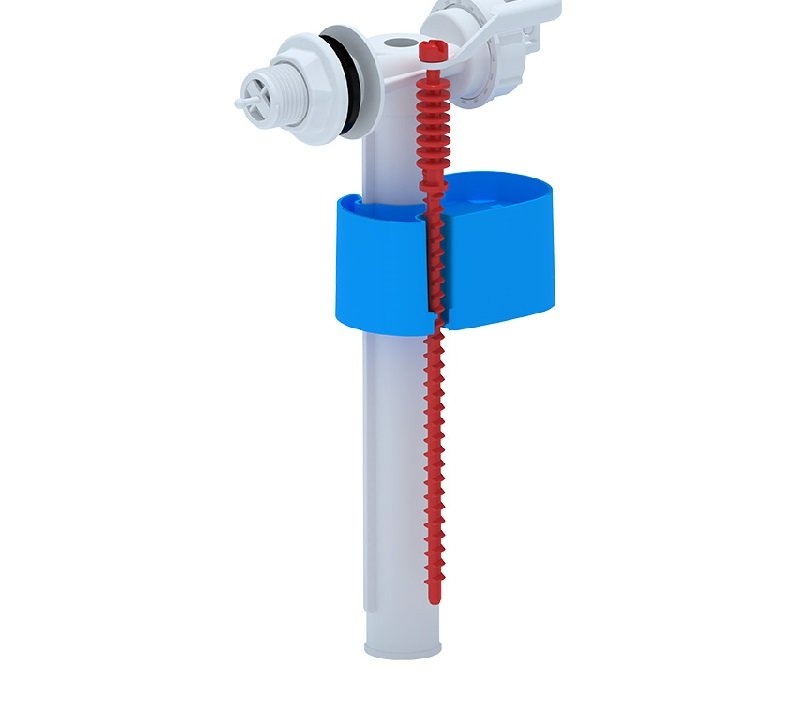
In modern models, the float is adjustable using a screw or moves along the guides down.
You can adjust the volume of water by moving the special stop up or down
If the toilet bowl was bought recently, then most likely the water is supplied from below, in such models the inlet diaphragm valve is located inside a special tube in the tank. You can adjust the volume of water by moving the overflow pipe, which is located in the middle of the mechanism. To do this, first it is raised to the very top and, after waiting for a full tank to be set, set to a height of about 0.5 cm above the water level.
In modern toilets, just move the overflow pipe to increase or decrease the volume of water in the tank
No water is collected in the tank
It will take less than an hour to fix this problem, first collect water from the tap in a bucket and pour it into the bowl.
Here is the procedure:
- Close the inlet valve, unscrew the button, remove the tank cap, disconnect the hose and inspect. It can clog due to poor quality tap water, rust.

Be sure to shut off the water before proceeding with the repair.
- Clean hose and pipe with a thin nail or cable.
- If water flows freely through the nozzle, then the reason lies in the drain fittings, rusty leaks on the walls of the toilet indicate a malfunction, they show that the gaskets are leaking.
- Replace the locking mechanism if necessary.
Check the locking armature; replace if necessary

Direct current of water
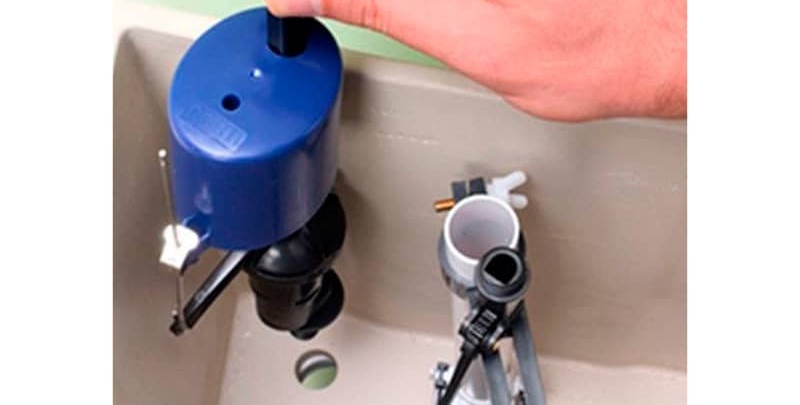
The inverse problem, when water constantly flows into the tank, requires the drain valve to be replaced if it leaks. Perhaps the float is skewed, you just need to return the float to its working position. You can buy a new valve in a plumbing store. Procedure for replacing the drain valve:
- Close the inlet valve, unscrew the drain buttons and open the lid and drain the water from the tank.

The button is easy to unscrew without tools
- Unscrew fittings from hose and valve.
- Disengage the lever and unscrew the clamps, remove the valve.
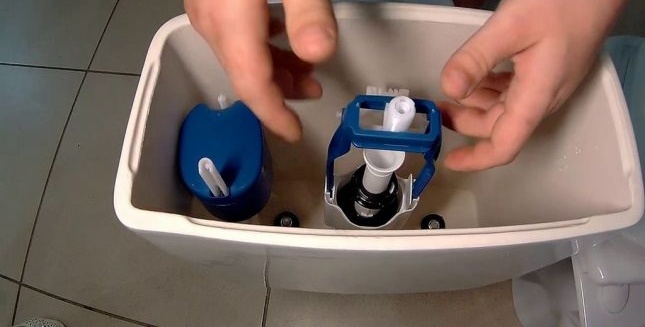
Remove the clips and valves.
- Install a new valve, tighten the nuts, connect the lever.
- Connect the pipe and hose to the valve tightly, open the valve and check how the water comes in, set the float in working position.
If the pressure in the water supply is very strong, then even with serviceable parts there will be a slight leak.
Noise when filling the tank
The problem of increased noise or extraneous sounds, for example, squeaking, whistling or splashing, gurgling, is due to the possible disconnection of the internal water supply pipe, to solve this breakdown, you must reconnect the pipe to the fitting.Also, the filter may become clogged, especially if the whistle is accompanied by a slow intake of water into the tank. Filter cleaning procedure:
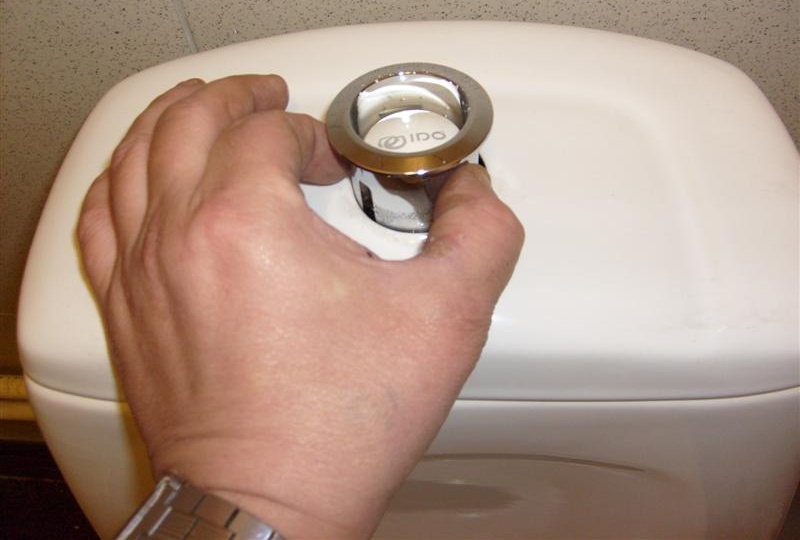
- Shut off water, remove buttons and tank cap.

Remove the cap from the tank
- Unscrew the clamping nut securing the filter under the float, remove it. Rinse the filter and inlet valve with clean water.

Rinse all parts with clean water.
- With a constant repetition of this problem, it is advisable to install an additional filter on the water supply hose.
Elimination of internal and external leakage
This problem is the most dangerous, in the best case it threatens huge expenses for utilities, and in the worst - flooding of neighbors and your apartment. If water flows to the floor, then you need to act quickly. The most vulnerable places are connections in which the tightness is broken.
In compacts, the tank is installed on top of the bowl, between them a rubber gasket. Over time, the gasket collapses and a leak occurs, and the initially poor-quality installation of the structure may become the cause.
Gasket Replacement:
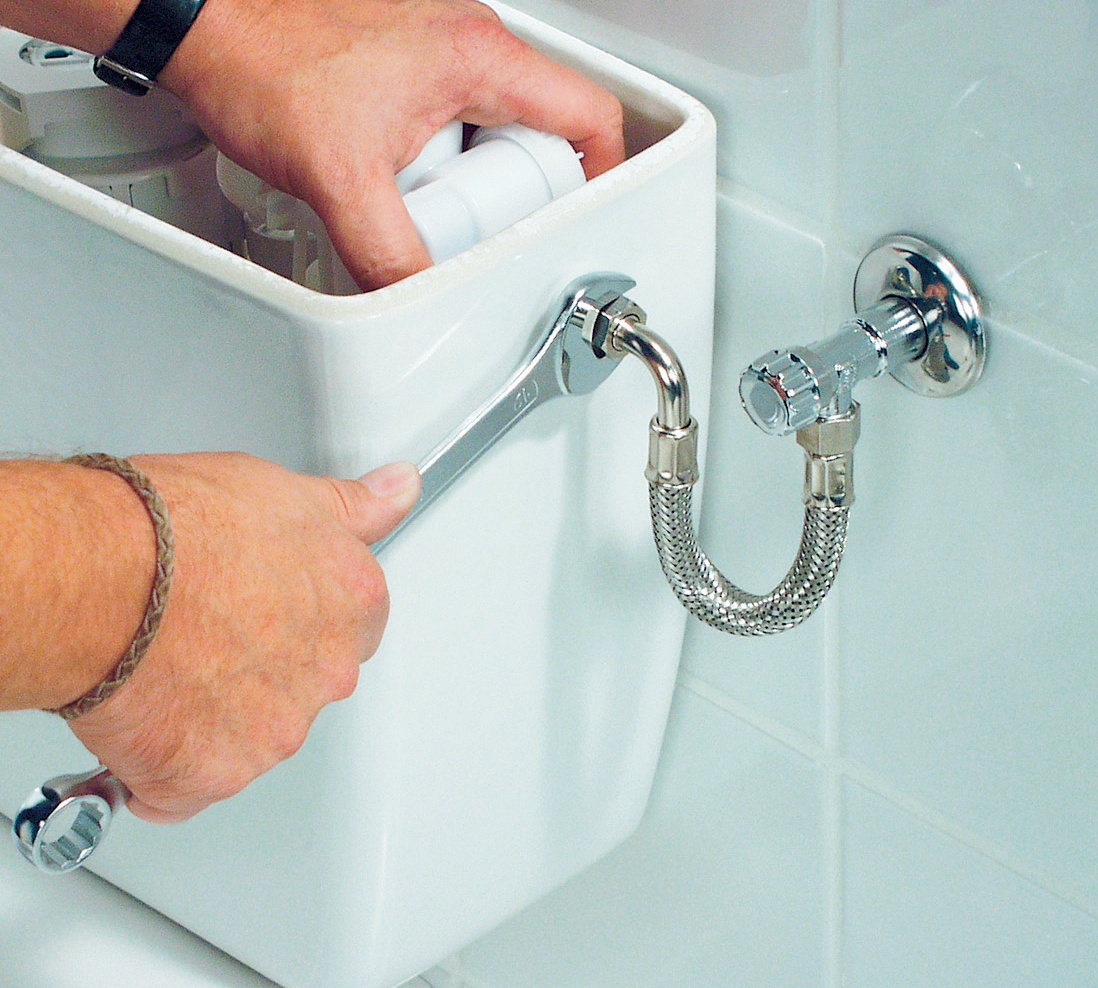
- Turn off the valve supplying water to the tank, drain and dry the tank with a rag.
- Unscrew the feed hose from the nozzle with a key.
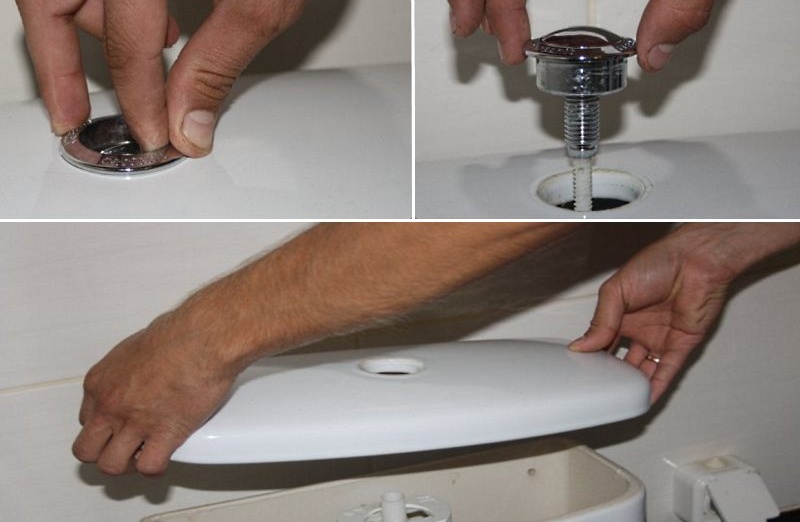
- Remove the tank securing screws on the toilet shelf.
Carefully remove the reservoir.
- Raise the tank and change the gasket, assemble all the parts, grease the connection with silicone sealant and make a test run of water to check for leaks.
Replace seal
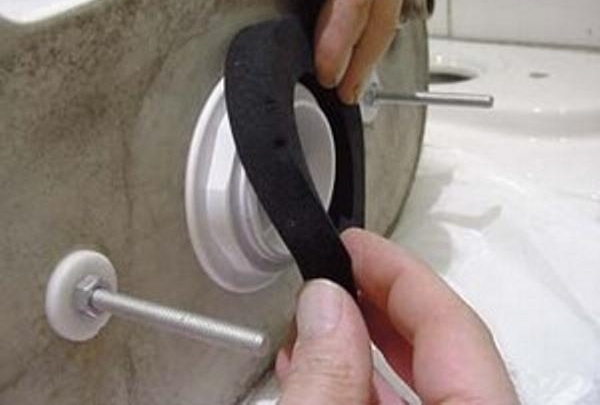
Leak may occur at the junction of the outlet cuff with the sewer pipe, the reason is the incorrect installation of the toilet bowl, a movable mount that destroys the sealed layer or the wear of the sealing element. In this case, you need to make a high-quality fastening of the toilet to the floor and replace the gasket. Lubricate the connection with silicone sealant.
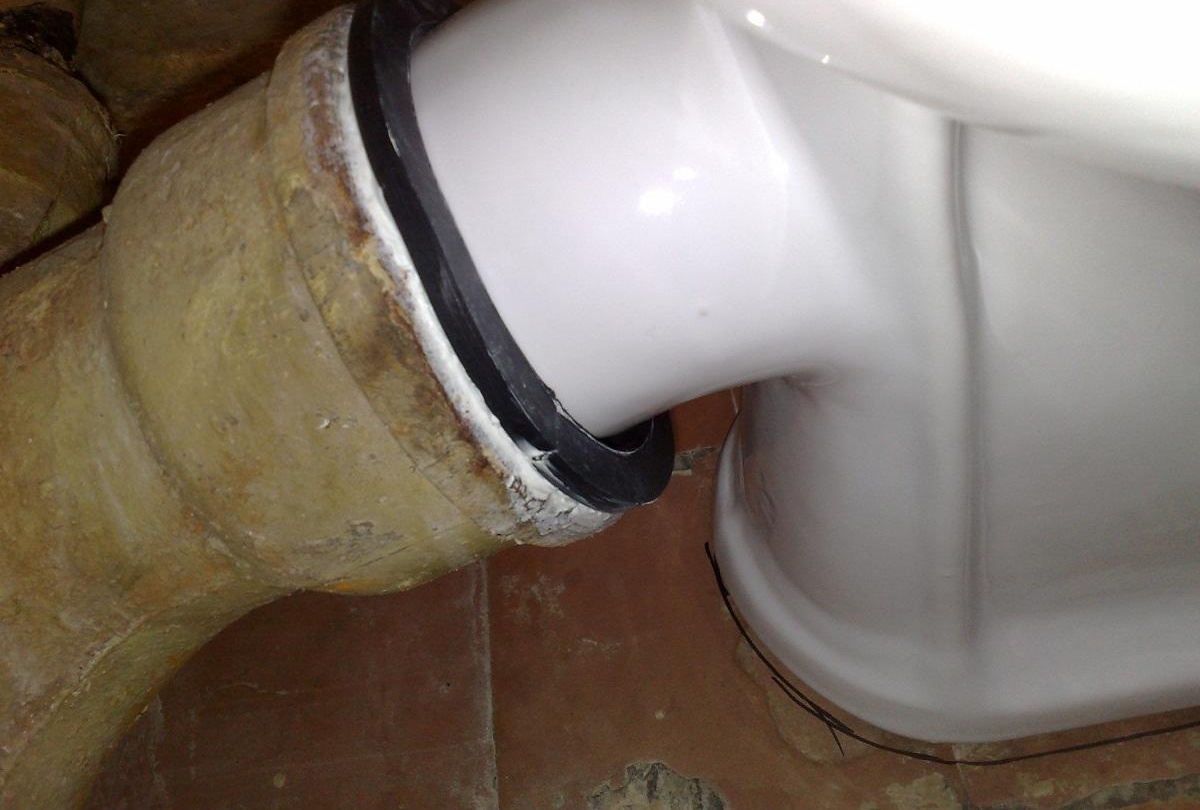
If a leak occurs, check all connections
If water flows over the top of the tank, the problem is with the shut-off valve ajar. It is solved by adjusting the float or replacing the locking mechanism.
Troubleshooting Button Issues
The buttons are attached with special rods to the lever of the locking mechanism, when pressed, the drain valve rises, and the drain hole opens, water is released. If a malfunction occurs in the operation of the buttons, they either fail when pressed, or they stick and do not drain the water. It will be quite difficult to find spare parts separately, so replacing the entire push-button mechanism will be the best solution.
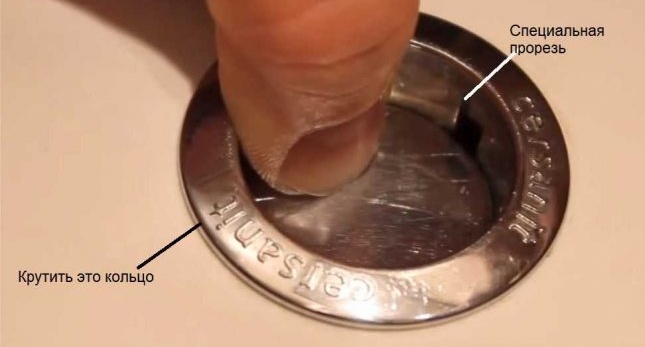
- Remove the decorative ring on the toilet lid or unscrew it, remove the lid, disconnect the push-button mechanism from the drain valve.
Buttons may sink
- Install a new mechanism and close the tank cap, lock the buttons.

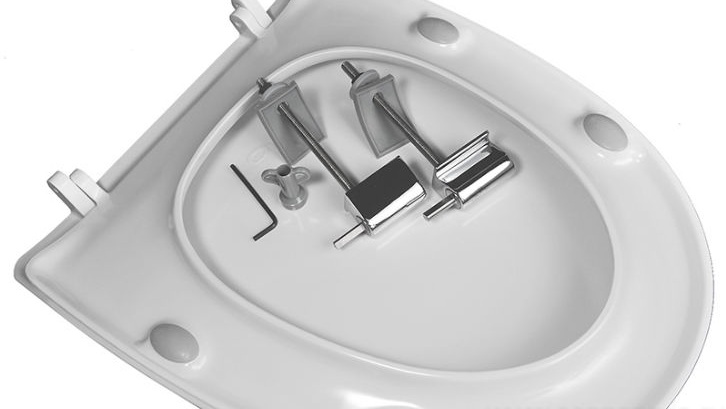
Button mechanism sold complete


Repair (replacement) of the microlift
The micro-lift smoothly lowers the seat and the toilet lid, without unnecessary noise and the risk of chips and cracks. A micro-lift works according to the principle of a door closer, the device can be extremely simple, as well as with presence sensors and remote control. The hinge mechanism with a spring and a rod can be disassembled, and the piston mechanism with cylinders - non-separable. Incorrect use or wear and tear from prolonged use can lead to damage, most often the micro-lift breaks when the cover is slammed shut “out of habit”, in which case the cover either falls off or closes jerkily.
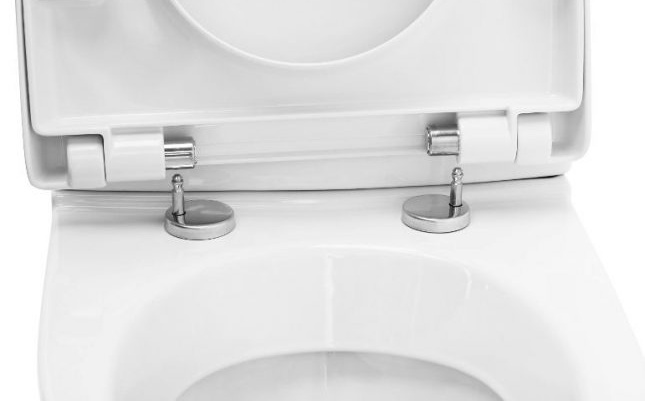
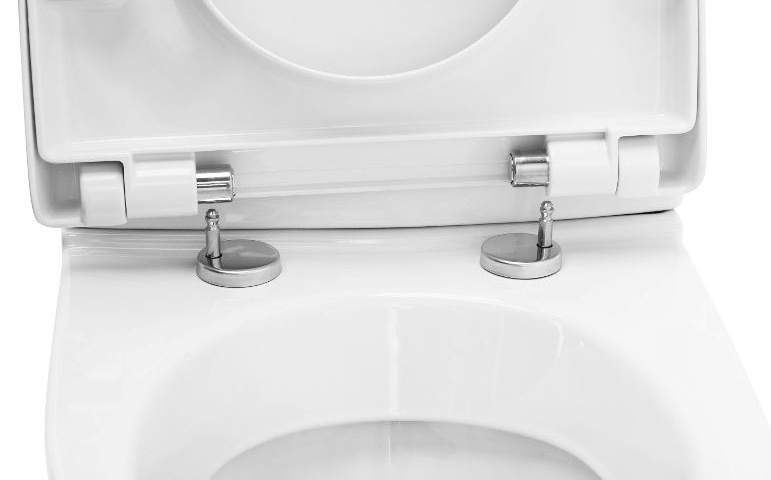
Complete with toilet lid there are special mounts
In case of a serious breakdown, it is better to change the entire cover with a seat and an elevator:
- Put a little technical oil on the bolts if they are coked. Unscrew, and if the thread is very clogged, then cut it with a hacksaw for metal.
- Install a new seat, align the holes with the grooves in the shelf, insert the fasteners.
- Adjust the position of the cover by moving it forward and backward, tighten the nuts with care so as not to damage the threads of the bolts.
Lid position can be adjusted
The simplest malfunction that you can fix with your own hands - a lingering creaking sound when the lid moves means that you need to lubricate the moving elements of the mechanism.
If the mounting bolts are broken, then they must be replaced:
- Unscrew the nuts that secure the bolts on the back and fasten the back of the toilet lid with a micro-lift.
- Remove the defective and install new bolts, reassemble the system in the reverse order, tighten the nuts carefully, you can put soft rubber washers.

Faulty mechanism easy to replace on your own
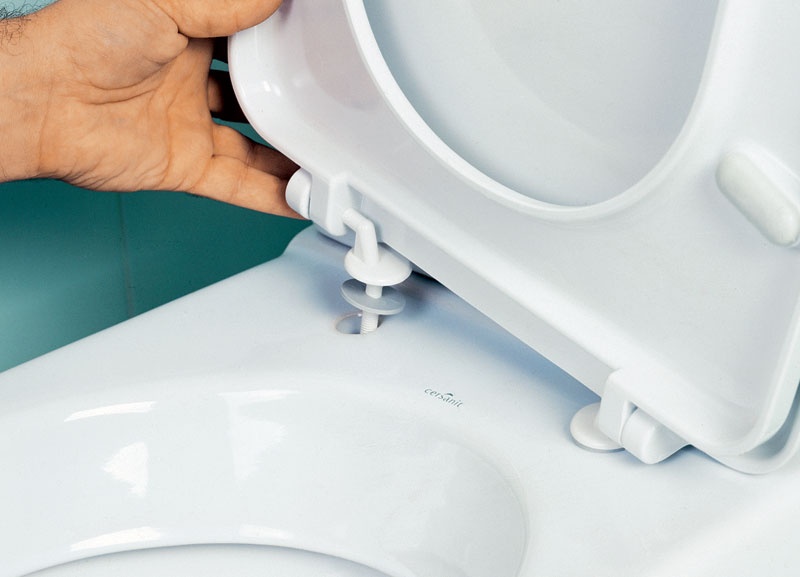
You can tighten the loose supports like this:
- Remove the decorative caps on the mounting legs.
- Open the cover and seat and carefully lift it up, remove from the fasteners.
- Move the fasteners to the desired position and tighten the nuts or screws, do not touch the closer mechanism, then reinstall the cover.
Replacing valves
It is recommended that the failed locking mechanism be completely replaced, it costs a little, you just need to choose the identical one in the store.
Operating procedure:
- Before installation, it is necessary to set the shut-off valve in height, comparing it with a broken one. If the height of the rod is sufficient, then the drain button will work properly. On the sides are two guide bars with divisions, they must be lowered or raised to the desired height.

If in the shut-off valve one part fails, then the mechanism must be completely changed
- To dismantle the valve, simply remove it from the clamps.
- Install the new valve and snap it into place.
The design of the toilet is simple, most of the faults can be eliminated independently, and spare parts are inexpensive. In exclusive models, non-separable mechanisms are used, it is better to entrust the specialists with the repair of such toilets with additional options.