How can I make an air conditioner with my own hands at home?

Not all people calmly endure the summer heat, being indoors. For many, it negatively affects performance, reduces appetite and impairs well-being. The solution is to install an air conditioner or split system, but for various reasons this option is not available to everyone. Therefore, savvy home craftsmen came up with several ways, how to make an air conditioner yourself with minimal financial costs and using improvised means. Those who suffer greatly from heat are invited to consider these methods, choose the right one and make a cooler with their own hands.
Content
How does a regular air conditioner work?
To identify the strengths and weaknesses of home-made coolers, for starters, it does not hurt to understand the design of traditional split systems and understand how they work. Such a climate system consists of several parts and assemblies:
- external and internal radiator called a heat exchanger;
- radiators are interconnected by copper tubes, where a gaseous substance circulates - freon (technical name - refrigerant);
- a compressor is installed on one line, creating excessive pressure and causing freon to move through the tubes and condense;
- a special expansion valve is embedded in the second line.
Split system device
Important. The principle of operation of the refrigeration machine, which is also an air conditioner, is based on the ability of freon to evaporate at low temperatures, due to which thermal energy is transferred from the room to the street.
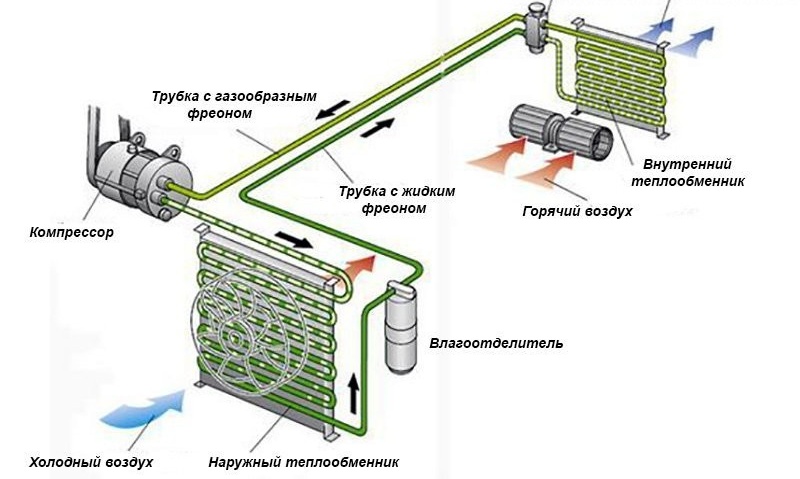
The refrigerant constantly moves in a closed loop, evaporating in one heat exchanger and condensing in another. The heat transfer algorithm looks like this:
- Freon enters the internal radiator (aka the internal module of the split system) in liquid form. The flow of room air pumped by the fan passes through the fins of the heat exchanger, which makes the refrigerant heat and evaporate. At this moment, intense heat is taken from the indoor air.
- Further, gaseous freon enters the compressor, increasing its pressure. The goal is to compress the substance to such an extent that it condenses in a street radiator, where the temperature is even higher than in a room.
- Once in the external heat exchanger, blown by its fan, the refrigerant goes into a liquid state and moves through the tube back to the room.At the moment of transition, he gives the street air heat taken from the room.
- On the way back, the liquid freon passes through an expansion valve that lowers the pressure so that it can evaporate in the internal radiator. After which the cycle repeats.
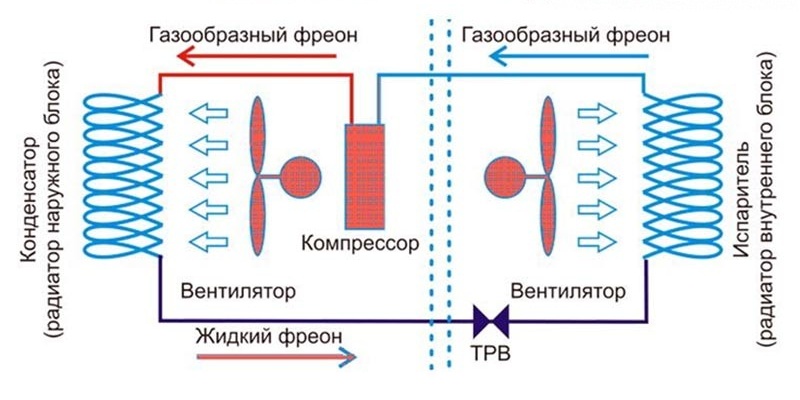
The scheme of the air conditioner
Note. All processes in the split system are controlled by an electronic unit using various sensors.
As you can see, the device of the factory air conditioner and the principle of operation are quite complex. To implement it at home can be technically competent specialist in this field, but not an ordinary user. Yes, and parts will have to be spent. Home-made designs of cooling devices are much simpler and cheaper to manufacture.
Homemade Air Conditioner Options
From improvised means and materials, home craftsmen make the following varieties of air coolers:
- devices working in cold water;
- devices that extract cold from ice;
- Homemade air conditioners from portable or old household refrigerators.
In the first two variants, the source of cold is water and ice, blown by a simple axial fan from a household appliance (for example, a computer). The third method allows you to assemble a device that is similar in principle to a full-fledged air conditioner, but with certain limitations. How these options are implemented technically is worth considering in more detail.
Assembly of a cooler from a car radiator
Units of this type operate according to the old proven principle in practice and are identical in design to industrial heaters, otherwise to water heaters. The bottom line is that water of the required temperature is passed through a radiator, blown outside by a fan. The air passing through the edges of the heat exchanger is cooled by 5-15 ° C depending on the temperature of the running water.
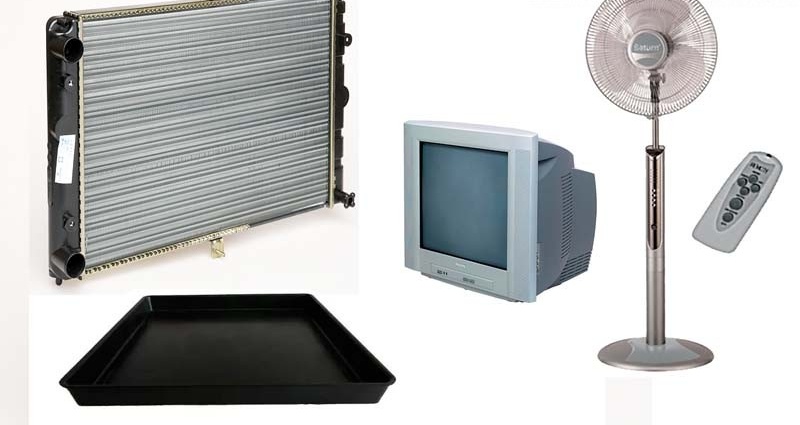
Component parts for air conditioner assembly
An important point. Calorifiers have one valuable advantage: they are able to function in the summer for cooling, and in winter for heating the air flow. To change the mode, it is enough to send hot water from the heating system to the radiator instead of cold.
To make an impromptu air conditioner winter - summer at home, you will need:
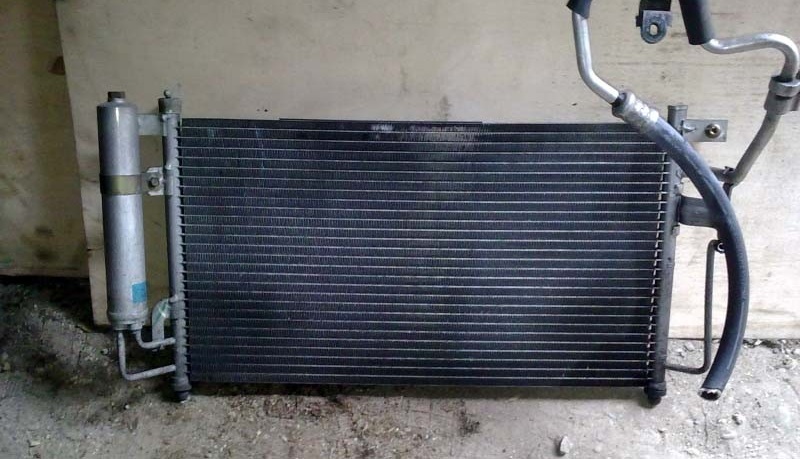
- radiator of the vehicle cooling system in good condition;
- floor fan with large impeller;
- a plastic or metal pallet with low sides, equal in length to the size of the radiator;
- a housing where you can embed the listed elements (for example, from an old TV);
- connecting hoses and adapters;
- clamps and fasteners.
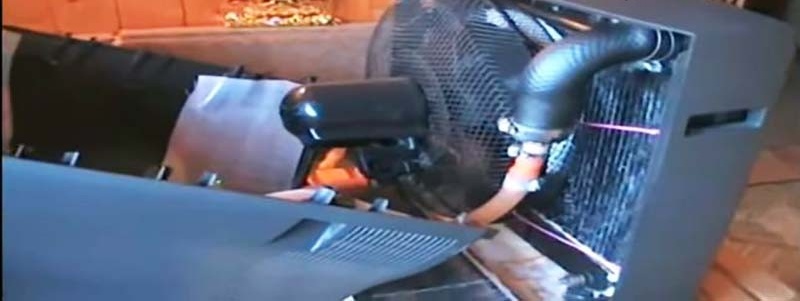
The radiator and fan are housed in a TV case
Tip. If you want more comfort when operating the air conditioner, then take a fan with a remote control.
Water hoses must be connected to the radiator
You can make the case for the cooler and the pallet yourself from the materials available in the household. The purpose of the latter is to collect condensate formed on the radiator fins from the temperature difference between the passing stream and the circulating water. Assembly is performed in the following order:
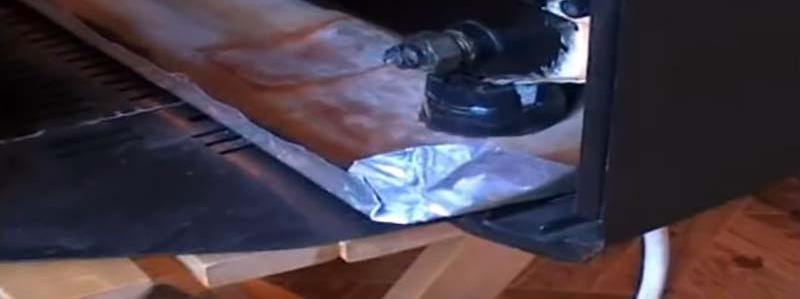
- Check the car radiator for leaks, if necessary, seal the leaks or seal them with cold welding. Then install its body and fasten using steel angles and screws (bolts).
- From below under a radiator fasten the pallet. If the sides come out too low and the tank will quickly fill up with condensate, attach a pipe to it to drain the water into the sewer.
- Install a fan wheel behind the heat exchanger, separating it from the rack with the control buttons.
- Attach hoses to the radiator pipes for supplying and discharging water. On this assembly is over.
There should be a condensate pan under the radiator
To start a home-made air conditioner, connect the fan to the mains, and the hoses to the source of cold water. Such can be a domestic water supply or a pump that raises water from a well or well. The last 2 options are preferable, since the temperature of the underground aquifers is just acceptable - 8-14 ° С. Direct the return to the sewer, a large collection barrel or use to water the garden.
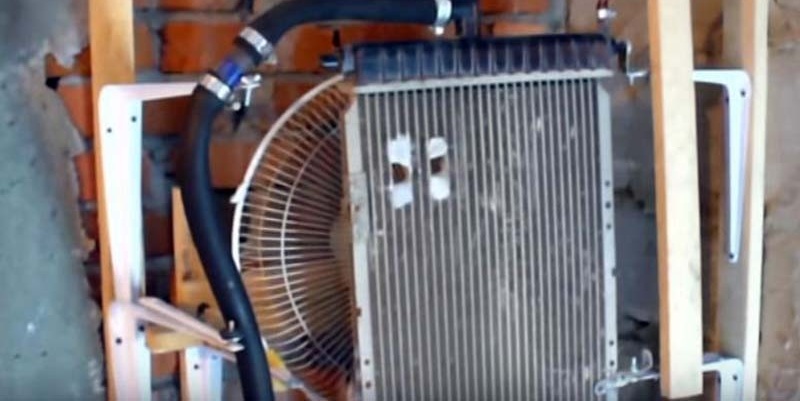
In the garage, the entire system can simply be attached to the wall
Reference. It is extremely undesirable in the summer to water plants with cold water from the well. Passing it through a radiator, you will kill two birds with one stone: cool the room and heat the water for the garden.
Homemade unit from a radiator - video
Compact air conditioner from a plastic bottle
For the operation of this home-made device, you will need ice, and you can not do without a working refrigerator or freezer. But the cooler will come out compact and quite effective for a small room, for example, in an apartment. The principle is simple: the ice is placed in a container, and the fan blows air through it, due to which the latter is well cooled. To assemble the air conditioner, you will need:
- a large plastic bottle with a capacity of 5, and preferably 9 liters;
- household duct fan, which are used for hoods in the bathroom;
- thin clothesline;
- plastic folder;
- knife and drill with a drill of 8-10 mm.
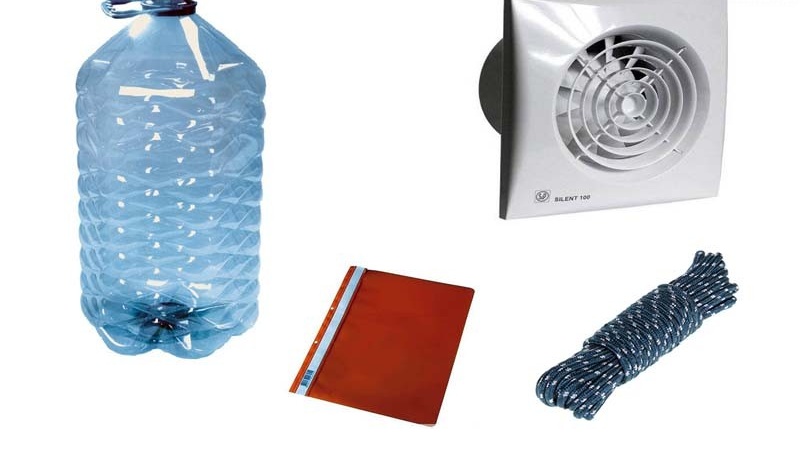
A set of parts for the manufacture of a cooler
Tip. The requirements for the fan are simple - it should be cheap and small in size. If desired, you can adapt the cooler from the computer, but then the performance of the cooler will significantly decrease.

The neck is cut off in the bottle, and the second bottom is made from the rope
The manufacture of an air conditioner takes no more than an hour and is carried out in several stages:
- Cut the neck of the bottle with a knife so that the fan housing fits as tightly as possible into the opening.
- At a height of 7-10 cm from the bottom of the bottle, drill a wall in a circle. The distance between the holes is not more than 5 cm.
- Passing the clothesline through the holes, make a net covering the section of the container.
- Cut a circle from a plastic folder whose diameter is equal to the size of the bottle. Drill holes in it, and then lay it inside the tank on a grid of rope.

A circle of plastic is laid on top of the rope and the body is ready for this
To start the cooler, you need to put more ice on the second bottom, made of a plastic folder, insert a fan into the cut-out neck and turn it on. The air injected inside will pass through the ice, cool and exit through the side openings.
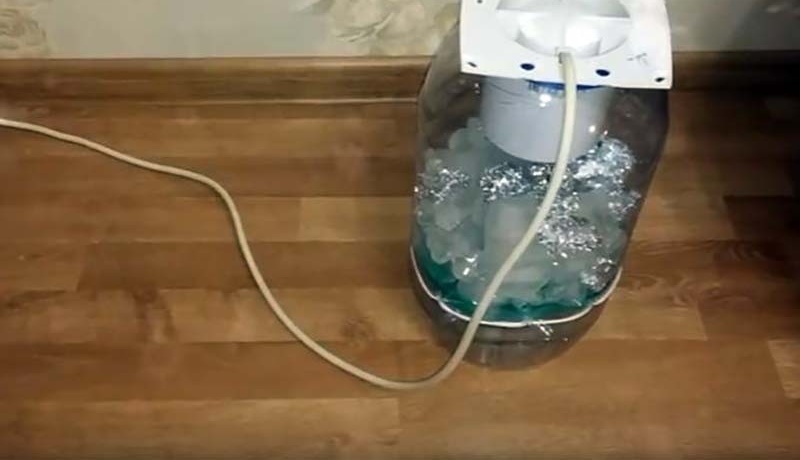
To work, ice is placed inside the case, and a fan is inserted on top
Tip. In order to have enough ice for a long time, freeze it not in a special mold, but in plastic cups. You get big pieces that melt longer. Another option is to use commercially available cold batteries instead of ice.

If a fan and a nozzle are integrated in the lid of the portable refrigerator, then we get air conditioning
In the same way, a cooling device is made from a portable refrigerator. Its insulated case is used instead of a plastic bottle, and cold accumulators or frozen water in small containers are placed inside.
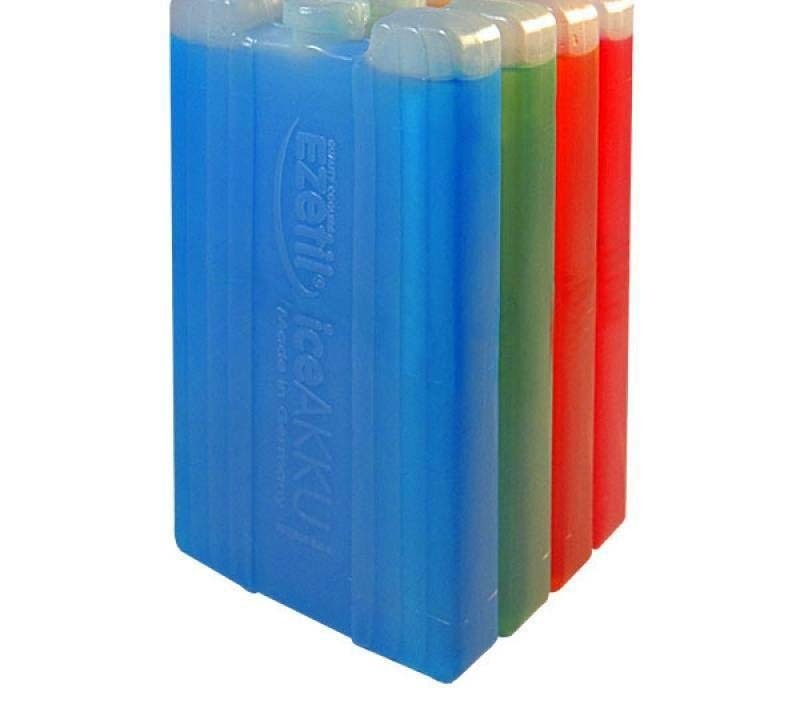
Ready-made cold storage
DIY cooler making video
https://youtube.com/watch?v=pe5fpvbmAbw
Air conditioning from an old refrigerator
Since air conditioning and a refrigerator operate on the same principle, the latter can be used to cool a room. The main thing is that the compressor and heat exchangers of the old refrigerator remain in working condition, otherwise you will have to spend money on repair and pumping in freon. What else is needed:
- household fan;
- 2 coolers from the computer;
- fasteners;
- locksmith tool for disassembling an old refrigerator.
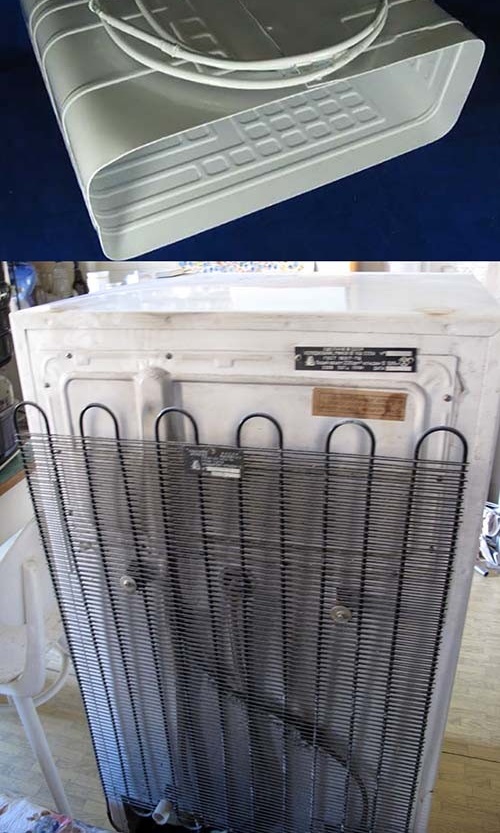
Heat exchangers must be removed without disturbing the freon tubes
Note. To assemble a similar design will turn out only in a private house, for residents of apartments this option is not available. Then you will understand why.
Coolers must be put inside the freezer
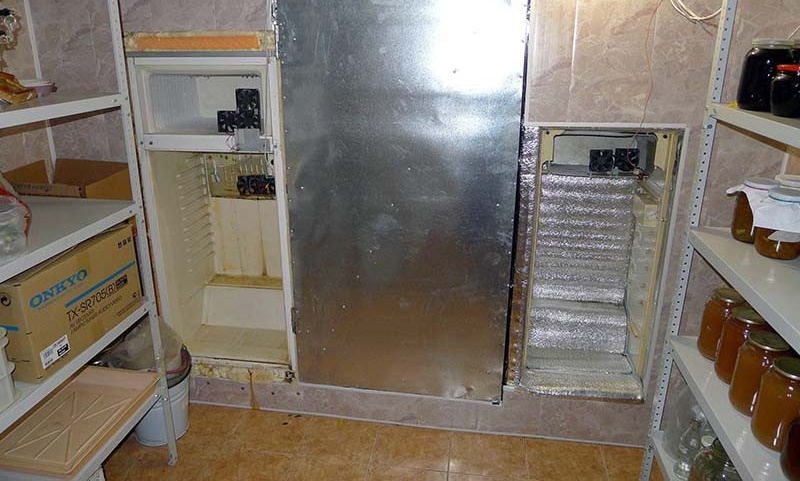
In the manufacture, you can go in two ways: remove the heat exchangers, compressor and tubes, or leave them in the old case. The task is to bring to the street an external black radiator along with a compressor. If the wall has an opening of sufficient size, then you can integrate the entire refrigerator into it and not take out the insides. When the wall opening is small, only the internal heat exchanger will pass into it. To remove it without violating the tightness of the tubes, the refrigerator body must be carefully cut. Then proceed as follows:
- Fix the black external radiator to the wall on the street, and the internal radiator - indoors. To make the latter look decent, make a decorative case for it.
- Fix the impeller of the domestic fan so that it blows around the compressor and external radiator.
- Place the coolers inside the heat exchanger that used to be the freezer.
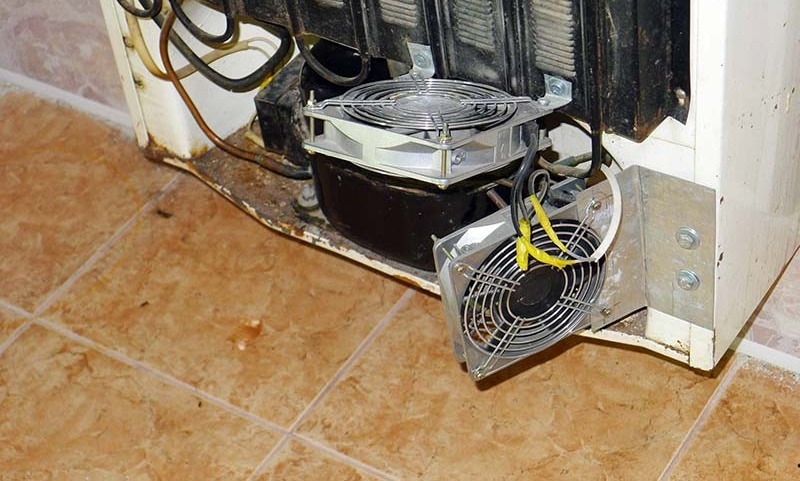
The fan must blow the heat exchanger and compressor
The air conditioner from the old refrigerator will never turn off until you do it yourself. The reason is that the automation is set to turn off the compressor at an internal module temperature of minus 5 ° C, which is not possible in the middle of summer. The second nuance: the unit is not designed to cool large volumes of air, so it makes no sense to install it in large rooms, there will be no sense from it.
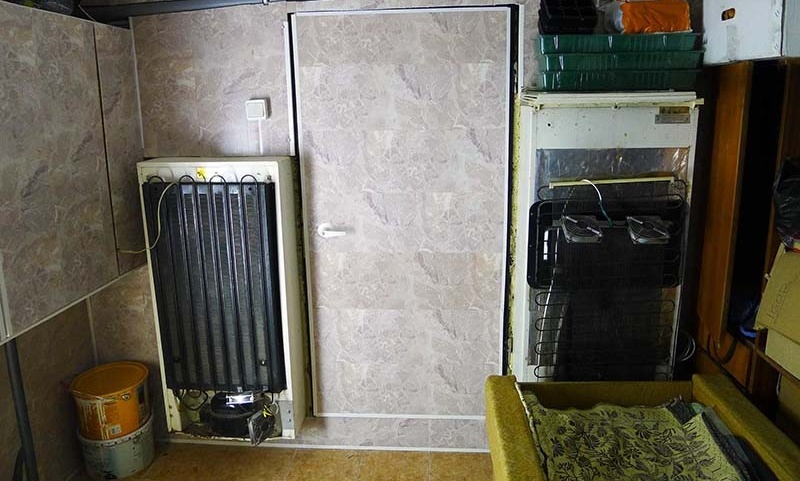
Refrigerators integrated in openings - rear view
Important. Before connecting to the mains, be sure to provide grounding for the device, so that in the event of a breakdown or short circuit, none of your loved ones will be shocked.
Air conditioning from the refrigerator on video
Simplified home designs
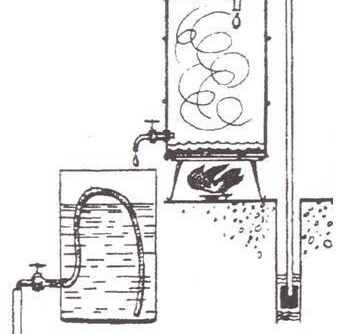
One such design is a water heat exchanger combined with a conventional floor fan. To make such a primitive cooler, you need to take a copper tube and roll it into a spiral, attaching it to the fan guard. For installation, you can use plastic clamps used to secure the wiring in cars. The ends of the tube are connected to the water supply, and the fan is connected to the network.
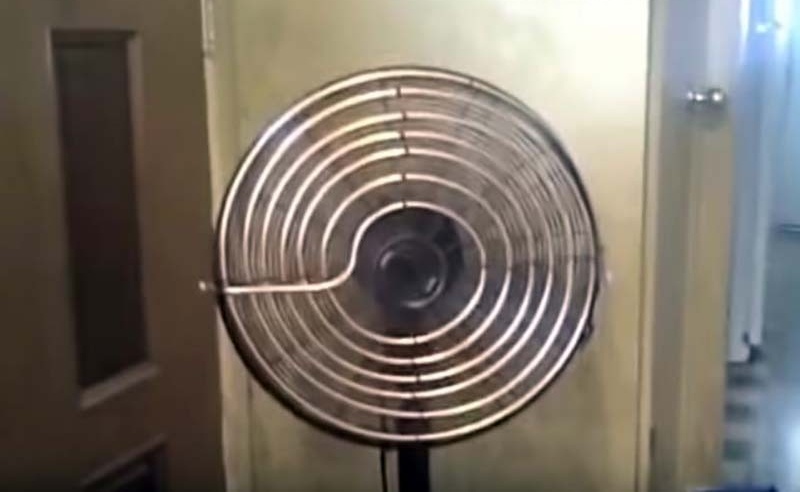
The copper tube is attached directly to the fan grill.
Note. The described design is ineffective, since tap water is not cold enough, and the useful area of the copper heat exchanger is too small. The air flow from the impeller is slightly cooled and nothing more.
Bottle conditioner is placed in a window opening
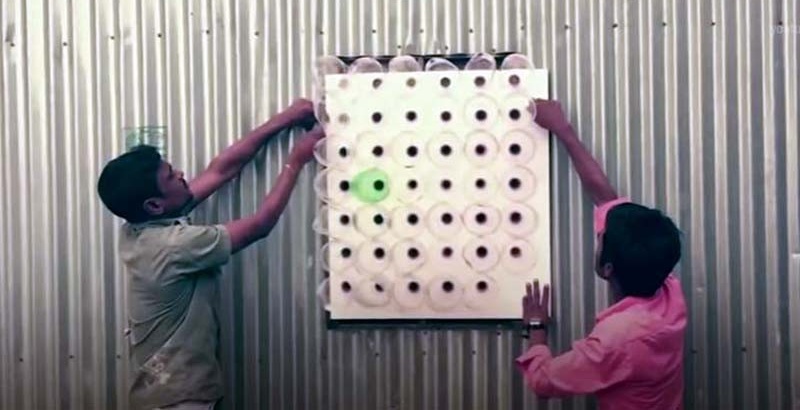
The original design was invented in one of the countries of Africa, where the heat is traditionally standing and in addition there is no power supply. The device operates on the basis of the law of physics, which states that the temperature of a gas passing through a sudden narrowing and expansion drops by several degrees (up to 5 ° C). The neck of the same plastic bottle acts as such a narrowing, and in order to get more chilled air, you need to use a dozen of these necks.

For manufacturing, you need to drill plywood and cut the bottles
Non-volatile air conditioning is done as follows:
- Cut a piece of plywood or fiberboard the size of an openable window opening. Check how many bottles can be placed close to each other.
- Cut off all bottles of the neck and twist the cork. Then place them on a sheet of plywood and mark the centers of the holes with a pencil.
- Make holes with a core drill whose diameter matches the neck. Insert the cut bottles into them.
- Attach the plywood outside the window opening so that the bottles stick out into the street.
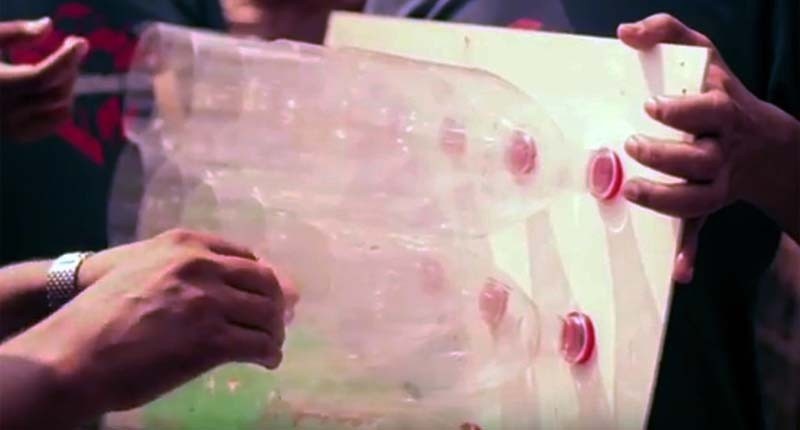
Assembly is simple - bottles are inserted into holes
The device is suitable for a country house, where other options cannot be applied due to the lack of the required amount of water or interruptions in electricity.
Video instruction for assembling a non-volatile cooling device
Pros and Cons of Homemade Coolers
The undoubted advantage of improvised air conditioners made at home is cheapness. As a rule, most of the components needed for assembly can be found in your own pantry or garage. The remaining parts are purchased in the retail network for relatively little money.
Assembling any of the proposed varieties of coolers with your own hands, you need to understand that you have to put up with the numerous shortcomings of such units:
- Models using running water do not work efficiently when connected to cold water pipes. The reason is that the temperature of the supplied water is too high. In addition, the air conditioner “wraps” cubic meters on the meter, and you have to pay for it.
- When using well and borehole versions of water installations, the question arises of where to put the water pumped through the radiator.
- Ice devices cool the rooms well, but at the same time humidify the air. When saturated with moisture, the heat in the room turns into stuffiness after turning off the device.
- Ice needs to be frozen in the refrigerator, that is, to spend electricity and pay for it. The nuance of the second: while you are cooling one room with a homemade air conditioner, the heat generated during freezing of water is caught up in the next refrigerator.
- Cooling with the Freon circuit from an old refrigerator is inefficient, because the system is not designed to operate in this mode. Again, a continuously operating compressor “winds up” an electricity meter.
Note. The only model whose manufacturing and operating costs correspond to the effect obtained is an air conditioner made of bottles inserted in a plywood sheet. It reduces the temperature in the room by a maximum of 5 ° C, partly due to the overlap of the light opening.
Home-made air conditioners that operate with cold water and ice are a temporary means of rescuing from heat until you buy a split system. The same goes for the old fridge option. Yes, they are easy to manufacture, but at the same time they suffer from poor cooling capacity, and there is no need to talk about comfortable operation. The use of such sources of cold is appropriate in the country or in the garage, where you are from time to time, so putting a split there is pointless.

1 comment