Rules and procedure for installing meters on water: how to put and seal correctly
The installation of individual and common house consumption metering devices by residents of cold and hot water can significantly reduce the cost of paying for housing and communal services. With this approach, it makes sense in the rational use of water, because the amount indicated in the receipt will directly depend on the number of cubic meters saved. The widespread use of water meters also disciplines workers of water utilities, as it becomes impossible to write off losses from the operation of worn-out networks to ordinary consumers of water. In the regions, rules have been developed for the installation of water meters, which specify the requirements for organizations involved in the installation of these metering devices, as well as the procedure for commissioning installed water meters. If you want to do the installation of the meter yourself, then first consult with those who seal the water meters about the possibility of self-installation.
The video below will be of interest to those who decided to personally understand the features of the installation of this type of equipment. In the video, the wizard tells in detail about how to install water meters yourself.
How to prepare a water meter for tapping into a pipe?
Before installing the water meter, it is necessary to connect a coarse filter to it. This device will protect the water meter mechanism from large particles of debris, the ingress of which can shorten the life of the device.
In addition to the filter, a check valve must be connected to the water meter, which acts as a protection against unwinding of indications. Inspectors of a water utility pay attention to the presence of a check valve and do not accept the device into operation without this plumbing device.

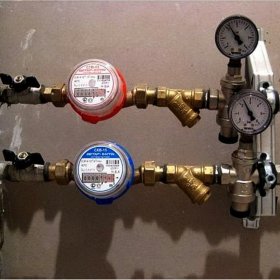
Together with a water meter, a coarse water filter and a check valve are installed, which prevents the counter from being unwound
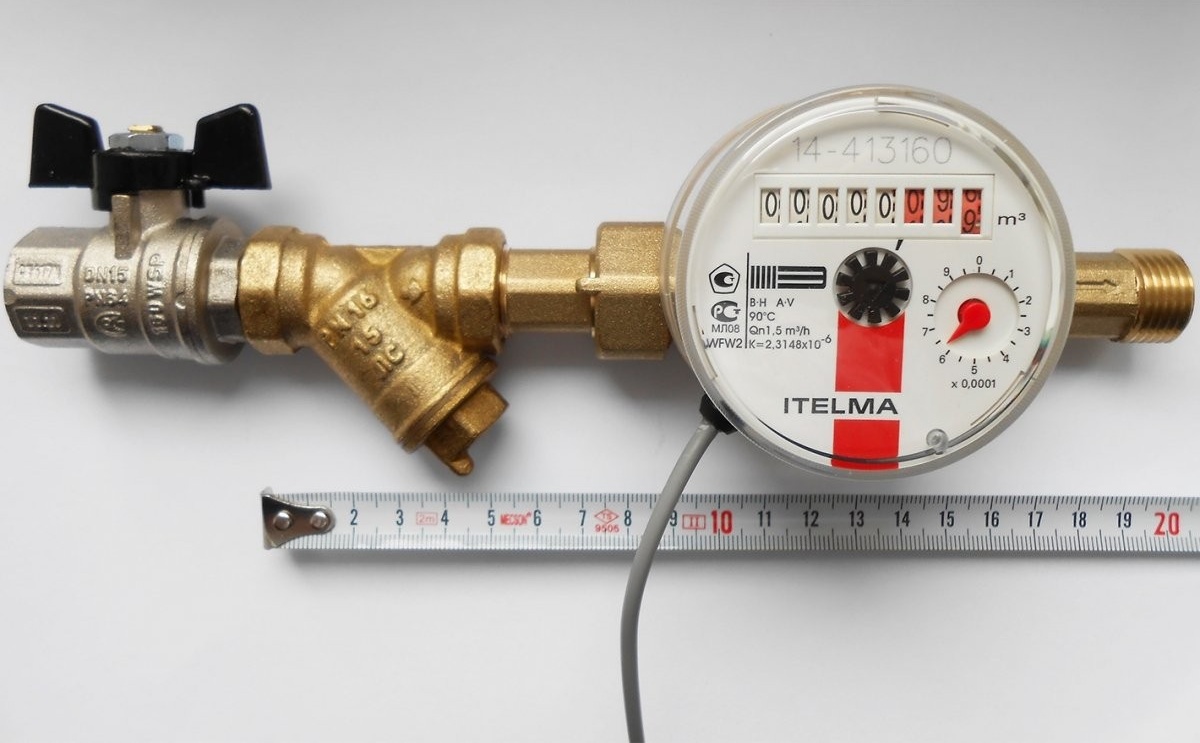
Together with the counter, the union nuts (American women) should go in the kit, allowing, if necessary, to remove the meter without harm to pipes and other elements of the water supply system. The tightness of the union of the union nuts with the non-return valve and the filter is ensured by means of FUM tape or tow.
When assembling the water consumption metering unit yourself, you must follow the direction of the arrows placed by the manufacturer on each component. Arrow marks indicate the direction in which water should flow through the meter. The American is screwed to the filter from the sharp end of the arrow, to the check valve from the back (arrow tail).

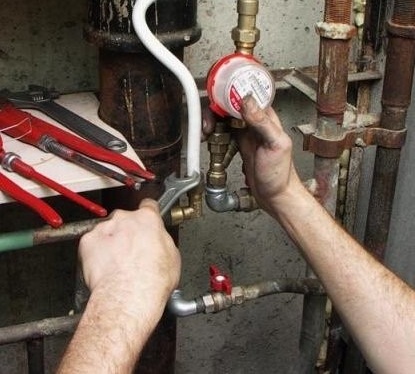
If you confuse during assembly the direction of the arrows on the filter, non-return valve and the water meter itself, then you won’t be able to seal the meter. The representative of the water utility will verify the correct installation of each element of the block
On the water meter, the manufacturer also indicates with the arrow the desired water direction. If you ignore this mark, then the correct operation of the device cannot be guaranteed. Depending on the design of the water meter, the flow of water to the plumbing fixtures may cease altogether. The arrow on the device must be oriented in the direction from the shut-off tap, which is cut into the water riser. The instructions attached by the manufacturer to the water meter indicate the connection scheme of the water meter to the water system. For self-assembly, these recommendations should be considered.
How to install a meter in a water supply system?
The easiest way is to install a water meter with your own hands in a water supply system made of polypropylene or plastic pipes. Polypropylene can be easily cut with a special tool or an ordinary kitchen knife. The connection of the elements of the polypropylene pipeline is carried out using a compact soldering iron, the technology of use of which is quite simple. Installation is carried out in the following order:
- The pipe is cut and a connection is made to the shut-off water tap of the pre-assembled block of the water meter. The density of the connection is ensured by wrapping the FUM tape or tow.
- After the operation on the capital connection to the meter tap is completed, they begin to measure the exact location of the reciprocal thread.
- The excess pipe is cut off and a thread is cut at the end or a special fitting is installed. The connection of the polypropylene parts is carried out using a soldering iron.
- Then, the check valve with the American screwed on is disconnected from the collected water meter and screwed onto the prepared thread.
- After reconnecting the union nut (American) with the meter.
- Open the tap that cuts off the water supply system of the apartment from the riser, and check the tightness of all threaded joints made during installation.
- In the absence of leaks, it can be considered that the installation of the water meter was successful.
- It remains to wait for the inspector of the water utility, who will arrive at the request for the facility and seal the meter.
The work on inserting a meter for measuring the flow of water into a metal water pipe is much more complicated, since a pipe and a machine will be used to cut the pipe to cut the pipe.
Criteria for choosing a company for installation
If you plan to involve a specialized company in the installation work, then take the choice of contractors seriously. About the seriousness of the company says:
- the presence of a license for this type of work, which guarantees the professionalism of employees and the organization of the organization with the necessary equipment;
- providing the customer with warranty service of the installed equipment and its free repair (replacement) in case of breakage during the warranty period;
- Documentation of works (installation contract, certificate of completion), facilitating the registration of the device and its registration, as well as service.
A company that has passed the licensing procedure for the installation of water consumption meters is responsible in accordance with the contract for the correct installation of water meters and their suitability for operation. The company's specialists will develop a water meter installation scheme, in accordance with which all work will be performed. The list of verified companies can be taken at the directorate of a single customer (DEZ).
When contacting professionals, you don’t have to puzzle over how to put meters on the water. Specialists will do everything quickly and in accordance with the requirements of regulatory authorities.
What documents should be in your hands?
After the installation of the water meter is completed, three parties draw up an acceptance certificate for the mounted water metering unit.
In this document, the serial numbers of metering devices, the date of their installation, data on the water consumer, representatives of the installation company and DESA are indicated. The act is signed by all parties. In addition to the act, the tenant must have:
- technical passport for the water meter, which indicates the primary value of the flow, as well as the date of installation and commissioning;
- verification certificate of the water meter, which indicates the date of the next test of the device (depending on the model, subsequent verification is carried out after 4-6 years);
For verification, the device is dismantled and transported to a specialized company. This work can be entrusted to the installation company, which will carry out after-sales service of the meter, and monitor compliance with the verification deadlines.
This is how the installation of water meters looks approximately. Depending on the regional policy, there may be slight deviations from the described mechanism. Specialized licensed companies will save you from the hassle of installing metering devices. In this case, you do not have to think about how to seal the water meters, because the company you hired to carry out the work will think about all this.

19 comments