How to make a heater yourself: an overview of 2 home-made options
Housing and communal services are in no hurry to start the heating season and it is cold in the apartments, you need to heat the garage or the greenhouse, but there are not many reasons for the need for a heater. On sale you can find devices for every taste and budget. Nevertheless, many people prefer to assemble a heater with their own hands, while saving significant money.
Homemade appliance requirements
Most of those who want to try their hand at self-made heater, are unlikely to seek too complicated work.
And the purchase of a large number of various technical elements and assemblies, whose cost is quite comparable with the price of the finished product, is hardly economically justified. Thus, the future device should be:
- easy to install;
- productive;
- economical in energy consumption;
- safe;
- profitable, that is, the cost of its production should be minimal;
- convenient;
- compact.
Considering existing heaters manufactured by industry, we can conclude that all these requirements correspond to devices operating on the principle of infrared radiation. More precisely, the so-called thermofilms. The material generates thermal energy transmitted to objects, which, in turn, heat the environment. This method of heating is considered the most effective, since the generated heat is not wasted. Accordingly, the efficiency of such a device is very high.
Homemade # 1 - based on the heater “Good heat”
According to the so-called "thermal film principle", many heating devices work. For example, the well-known “Good warmth”. To collect its analogue at home is not difficult. To do this, you will need:
- Laminated paper plastic. Two identical-sized sheets with an area of about 1 square. m
- Graphite powder. You can grind graphite yourself, for example, old graphite trolleybus brushes.
- Epoxy adhesive.
- A piece of serviceable wire with a plug on the end.

Heater Good heat - a prototype for many home-made devices
The work is carried out in stages:
- We mix glue with graphite powder and carefully mix the resulting mixture. Thus, we get not just an adhesive composition, but a graphite conductor with high resistance. The amount of graphite in the adhesive directly affects the maximum temperature of the future heater. On average, it is about 65 ° C.
- On a plastic sheet with zigzag wide strokes, apply the prepared composition. For processing, we use the rougher side of the sheet.
- We connect plastic sheets with each other using epoxy glue.
- For greater structural strength, we construct a wooden frame that securely fixes the sheets.
- From different sides of the structure we attach copper terminals to graphite conductors.As an option, you can also connect a simple thermostat, which will allow you to set the most comfortable heating mode. However, this is not necessary.
- Dry the structure thoroughly. Even a little humidity will damage a home-made heater at the first attempt to turn it on.
- We conduct tests, measure the resistance of the device. Based on the obtained value, we calculate the power and determine whether it is possible to connect the heater to the network without fear.
The appliance is ready for use. It can be placed either on the floor or on the wall, does not take up much space, is quite effective and safe, provided that it is of good insulation.

Graphite is crushed and mixed with epoxy glue - this is how the graphite conductor turns out

Scheme of the device for the future heating device
Homemade # 2 - mini heater made of foil and glass
The following home-made device works in a manner similar to the previous principle. To make it you will need:
- two pieces of glass of the same size;
- aluminium foil;
- sealant;
- ordinary paraffin candle;
- a wire with a plug at the end;
- epoxy adhesive.
A device for holding a candle during operation, cotton buds for removing soot and a cloth for cleaning glass are also useful.

The inner surface of the glass is coated with soot to create a conductive layer
Getting to the assembly:
- Thoroughly clean the glass from all kinds of contaminants: traces of paint, dust, grease, etc.
- We form a conductive surface. To do this, with a candle on one side of each glass billet evenly apply soot, which will act as a conductor. To facilitate the process, it is better to cool the glass before the operation - so the soot settles more evenly.
- Carefully remove excess soot from the edges of the workpiece with a cotton swab, so that a transparent edging with a width of about half a centimeter is obtained.
- We cut two strips of aluminum foil, the width of which corresponds to the size of the conductive surface. They are designed to act as electrodes.
- We lay the blank covered with soot side up and apply epoxy glue to it. We arrange the foil electrodes along the edges so that their edges extend beyond the workpiece.
- We cover the part with a second sheet, directed by the smoked layer inward, carefully press and glue. All connections are well sealed.
We conduct tests and measure the resistance of the conductive layer. Now you can calculate the power of the device, which will be equal to the product of the surface resistance by the square of the current strength. If the obtained value is within the limits allowed by the regulatory documentation, the device can be plugged into an outlet. If not, you will have to reassemble it. It should be borne in mind that the wider the soot layer, the lower the resistance of the device and, accordingly, the higher the temperature of heating the glass.

Model of a homemade heater from glass plates
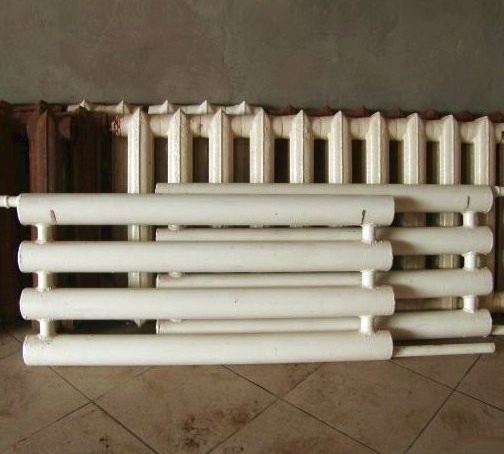
According to the principle of using infrared radiation, another simple homemade device works, which can be assembled in a few minutes. This device consists of a sheet of aluminum foil mounted on a battery and oriented to the room. The heat coming from the radiator is collected by the mirror of the foil and reflected into the room, without unnecessary losses for heating the walls.
There are many ways to make a heater with your own hands. You can choose different operating principles of the devices and materials from which they will be made. The main thing is not to forget that the devices must be safe. No need to be lazy to measure resistance and calculate power to determine whether it is permissible to connect a homemade product to a wall outlet or not. All device contacts, wires, conductive parts must be carefully insulated. A safe, efficient and practical heater will please you with its impeccable service for many years.
2 comments