DIY stationary pool construction
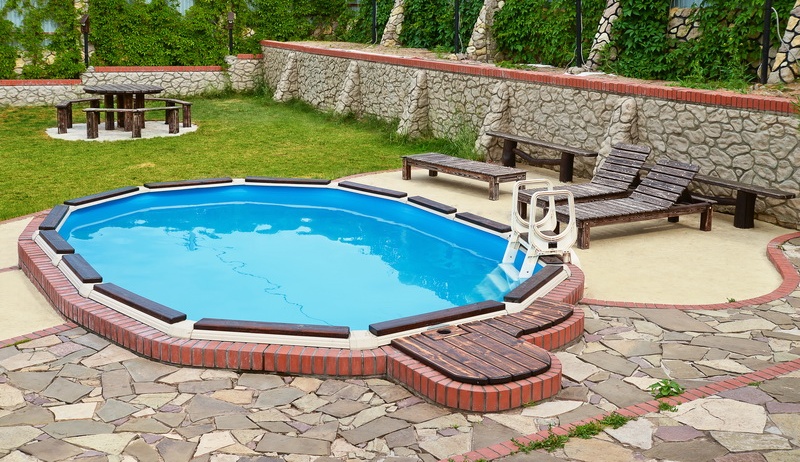
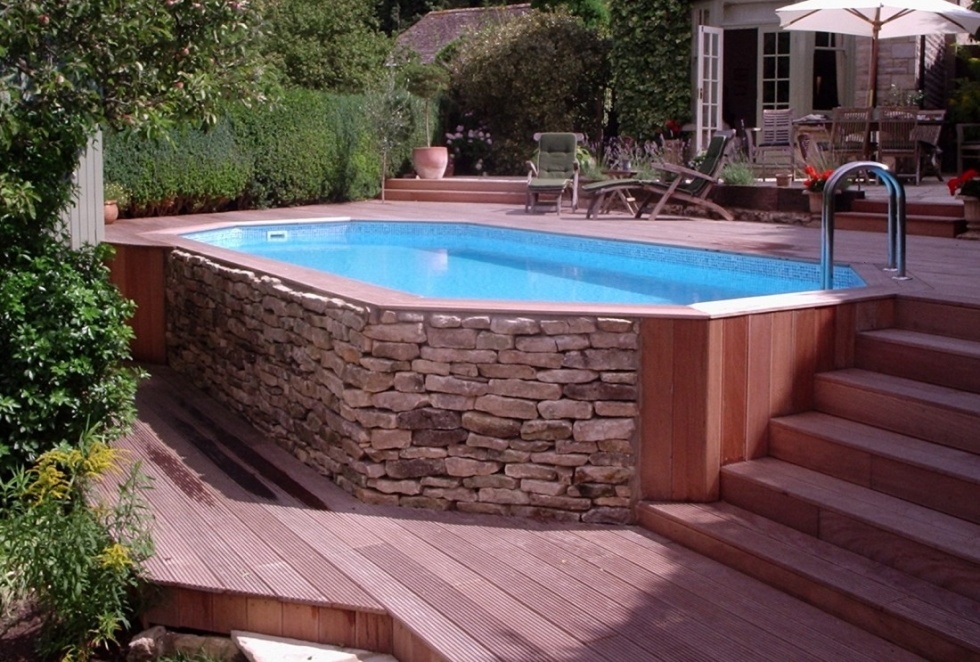
With the development of building technologies and materials, more and more people decide to build a pool on their site with their own hands to swim and refresh themselves in the summer heat, to please children and grandchildren, to decorate private estates and give them greater comfort. Properly designed and manufactured strictly according to technology, located on a well-chosen location and beautifully decorated, the reservoir will become a favorite vacation spot for the whole family.
Content
Advantages and disadvantages of stationary pools
The design of stationary pools is fundamentally different from collapsible species, it has its own characteristics:
- strength and durability;
- the ability to create any complex and multi-level forms, small or huge dimensions and volumes;
- placement both indoors and outdoors, use in winter;
- a large selection of building and decoration materials and decor allows you to realize the most daring design fantasies;
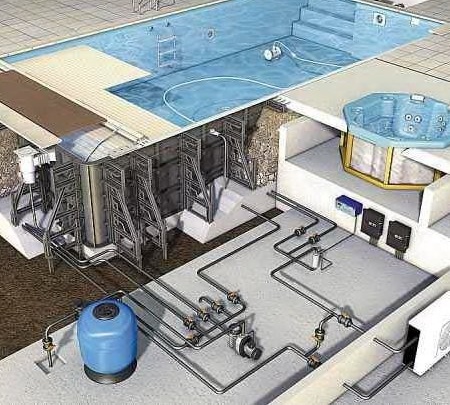
- the ability to connect communications and additional options and devices: hydromassage zones, fountains and waterfalls, slides, lights, water purification and filtering systems, drain and automatic heating;
- such an object is built once and for all, its dismantling is impossible without destruction and will require significant financial and labor costs;
- during the winter period, the bath should be preserved so that frost does not damage the walls;
- unlike lightweight inflatable and frame low-budget models that are quickly mounted, stationary reservoirs are built in compliance with all construction standards, the drying time of materials, errors and omissions here are unacceptable and can lead to serious problems.
Stationary structures have both advantages and disadvantages
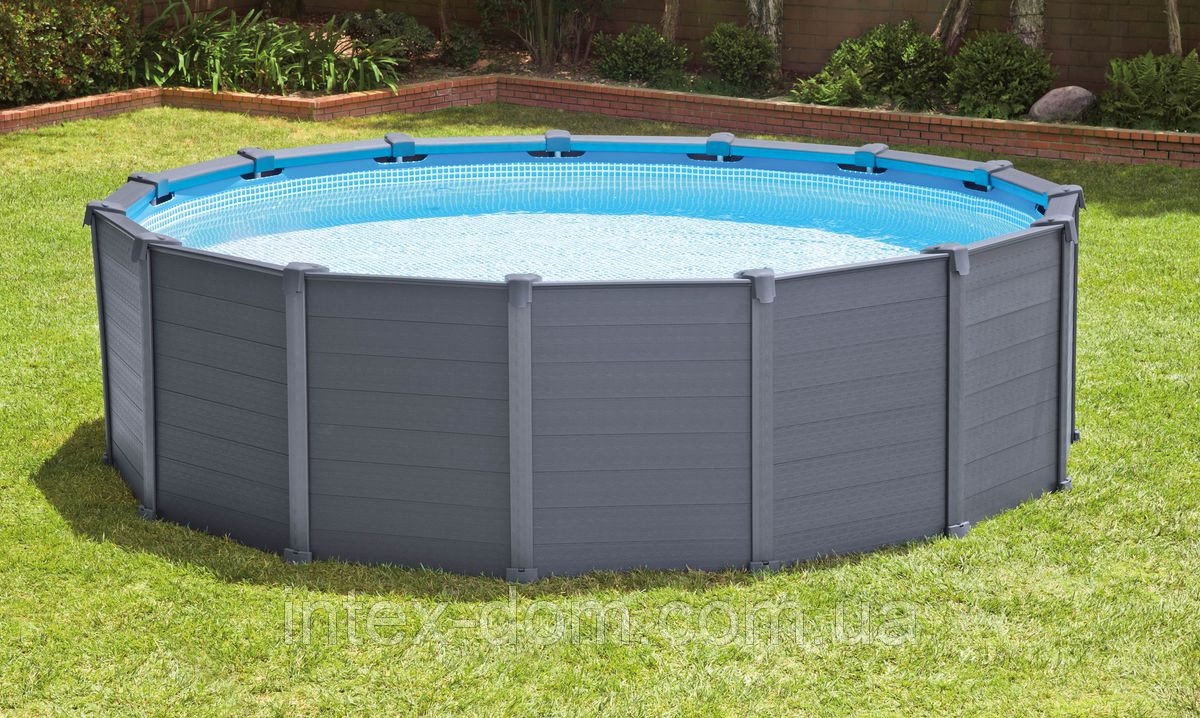
How to make a stationary pool with your own hands
There is a huge assortment of finished pools on the market, various prefabricated models from various materials, accessories for them. You can buy a ready-made composite bowl and dig it near the house, or you can build a monolithic pool of reinforced concrete or lay it out of brick. In any case, you must first create a project and draw a plan of the pool with dimensions, calculate the estimate and quantity of materials, prepare tools and equipment for work.
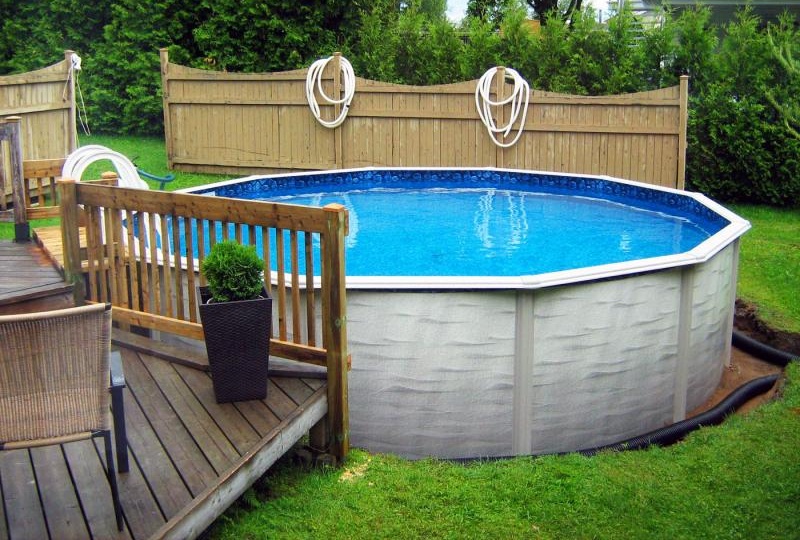
It is no longer possible to move the finished object, so it is important to choose a suitable place and determine the area allocated for the recreation area, following simple rules:
- An open sunny area promotes the natural heating of water. This arrangement will save on electricity;
- the bowl should be strictly horizontal, therefore it is recommended to choose flat areas without relief;
- large trees can damage or deform the bottom and walls, especially undesirable species such as willow, poplar, chestnut, whose root system is developed. Transplanting or removing a tree from a site is much cheaper than repairing a pool;
- a slight slope can be used to simplify draining;
- Shrubs growing nearby and stunted and fruit trees lose their foliage throughout the season, which means that you have to constantly collect fallen leaves and perishable fruits and berries from the surface of the water;
- the site should be protected from wind and prying eyes, you can choose a place near the fence, wall, hedge, the distance to the fence is preferably at least 2 m;
- the risk of accident and leakage, moisture under the foundation of the house or flooding of the basement should be taken into account;
- it is important the convenience of summing up communications and equipment placement, discharge;
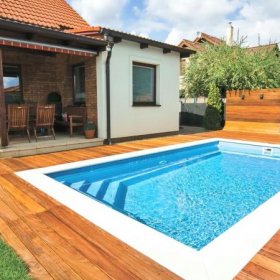
- if the footage allows, then it is worth allocating a place for a recreation area where you can sunbathe;
- you can not make a pit on moving or unstable soils, if the groundwater level is high, then deepening the pond is not recommended, it is better to choose a model for installation on the surface.
It is recommended to place the pool on a site with a slight slope to ensure quick drainage of water
Next, you need to determine the size and shape of the reservoir, these parameters depend on the purpose of the pool. For swimming, elongated shapes are more suitable, and for relaxing with children - round bowls. For self-construction it is better to choose simple outlines - a rectangle or a circle, less labor-intensive in execution.
The depth of the bowl varies from 0.5 m for children to 1.5 m for adults. If ski jumping is planned, then the depth must be increased to 2.3 m, in order to avoid hitting the bottom. It is possible to divide the bottom into children's and adult zones with a gentle difference in depth or to build two bowls separated by a partition to prevent children from entering the deep part.
Concrete
The most solid and long-lasting construction technology is considered to be made of concrete reinforced with steel bars. For beginners, it is convenient to use polystyrene blocks as fixed formwork, they are inexpensive.
List of necessary tools and materials:
- cement grade at least M-300;
- concrete mixer, if you need a lot of concrete, it makes sense to order a ready-made concrete machine in the mixer;
- roulette;
- pegs;
- cord for marking on the site;
- shovel;
- a hammer;
- screwdriver;
- self-tapping screws;
- formwork boards or polystyrene foam blocks;
- sand;
- crushed stone;
- geotextiles;
- insulation;
- rebar in the form of steel bars;
- finishing materials and decor elements.
Work Stages:
- Mark the site, mark the dimensions with pegs, pull the cord around the perimeter. The boundaries of the pit should be larger than the size of the bowl by about 1 m on each side. Dig a pit, it needs to be deepened by 50 cm from the size of the pool. The bottom must be carefully tamped and leveled, remove clods of earth, stones, uproot the roots. Then pour a layer of rubble 25-30 cm.
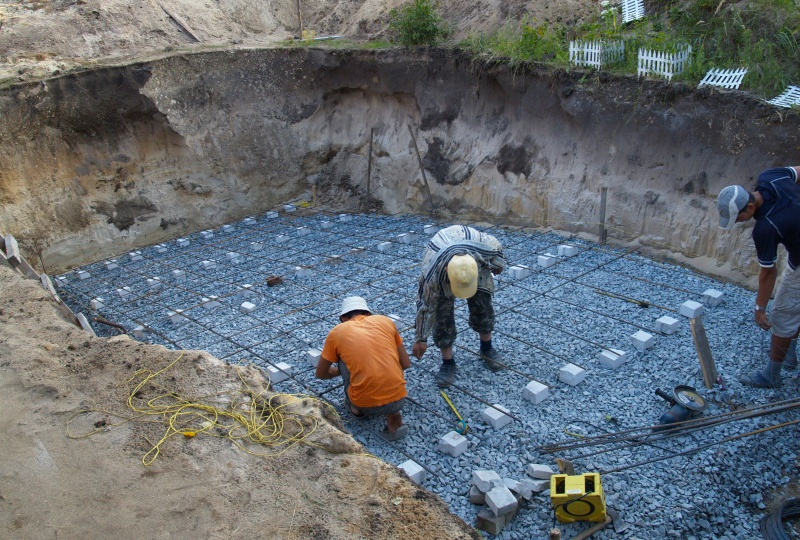
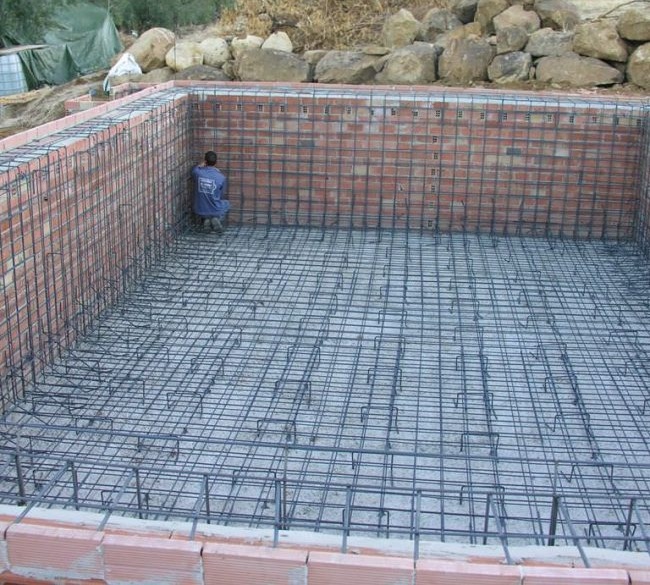
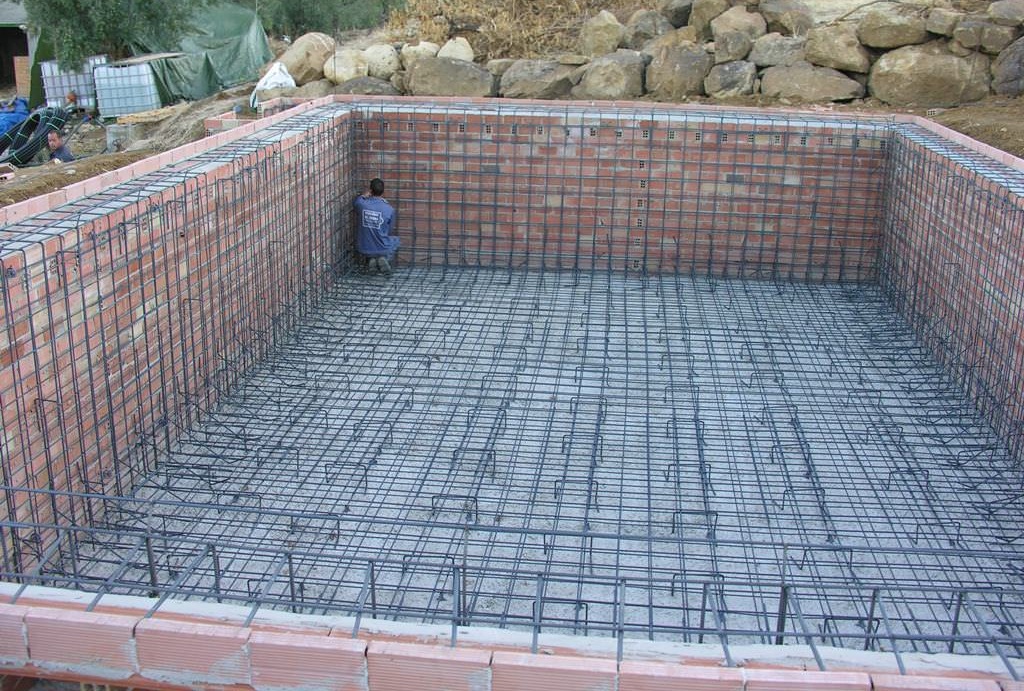
- Place the reinforcement on special supports so that the reinforcing grating after pouring the mortar is in the thickness of the concrete layer. This will ensure structural strength. Put together formwork from boards, make reinforcing supports.
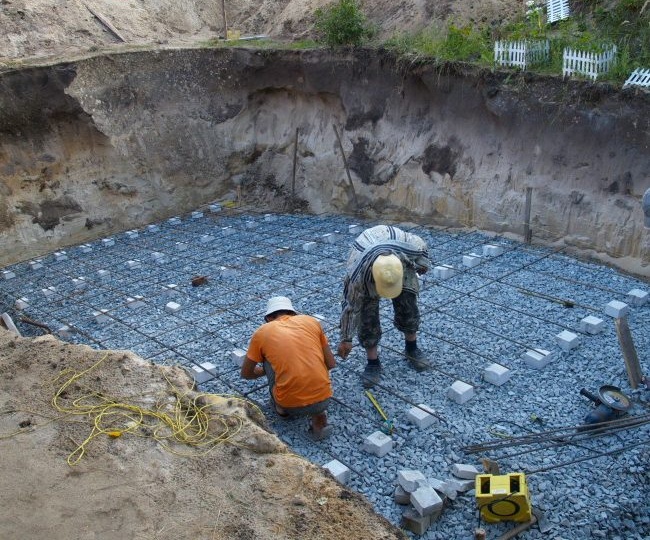
Fill the bottom of the pit with crushed stone and install the screed
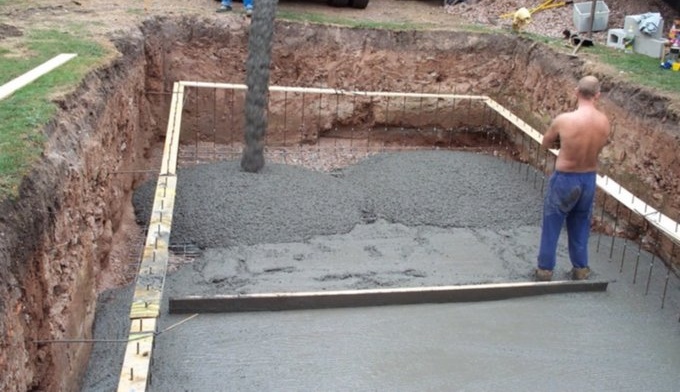
- Pour concrete screed in one step. The layer thickness is 25 cm, level with a vibrating machine or simply pierce the layer several times with a bar to expel air bubbles.
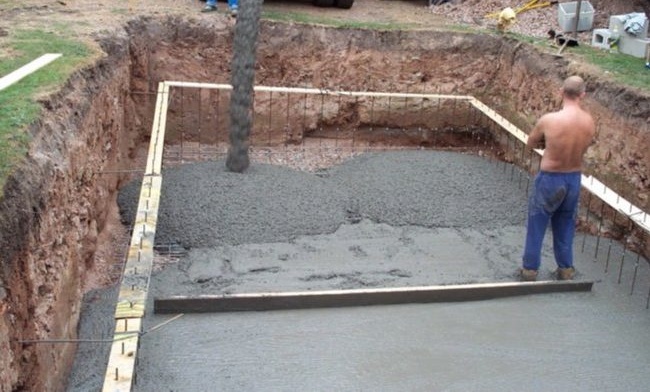
Pour concrete mortar
- Wait for the screed to dry and a set of design strength to set, periodically moistening the surface, this will help the concrete not crack when dried. Drying takes 7-14 days.
- Line the pool with geotextiles or thick polyethylene. The best solution is to treat the concrete surface with a penetrating waterproofing agent or a layer of liquid rubber.
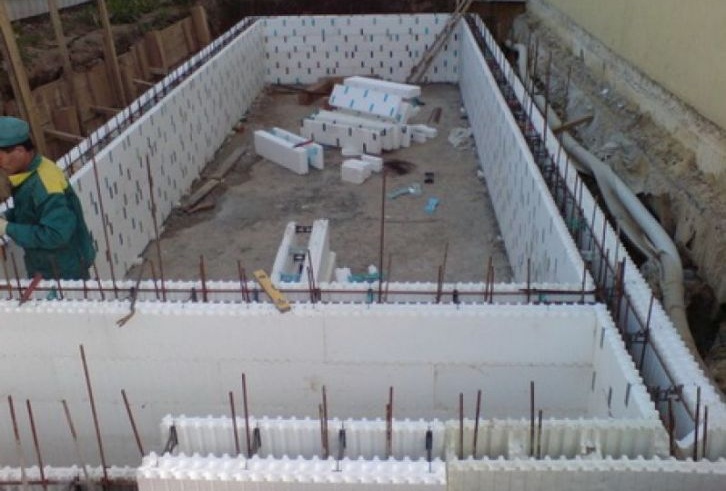
- On top lay a heater or polystyrene blocks, fasten them with tape. Lay out the walls of the formwork by inserting a reinforcing rod into each section of the block.
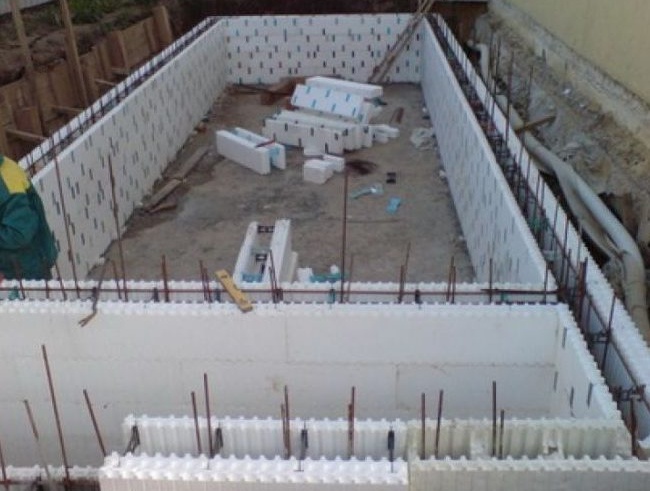
Install formwork
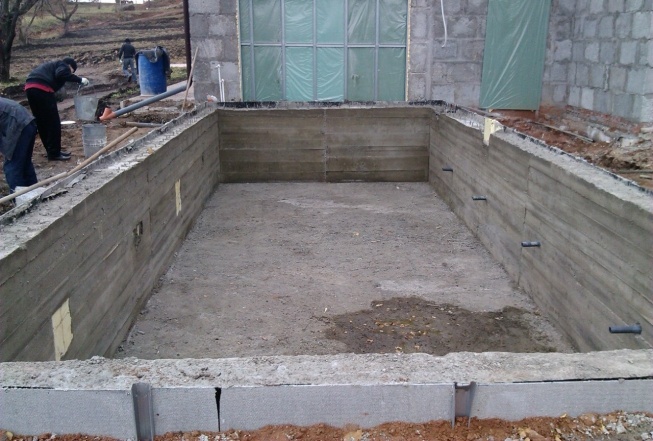
- Install a ladder and recesses for additional equipment. Pour concrete into the formwork and wait for the drying time.
Pour concrete and wait for it to solidify
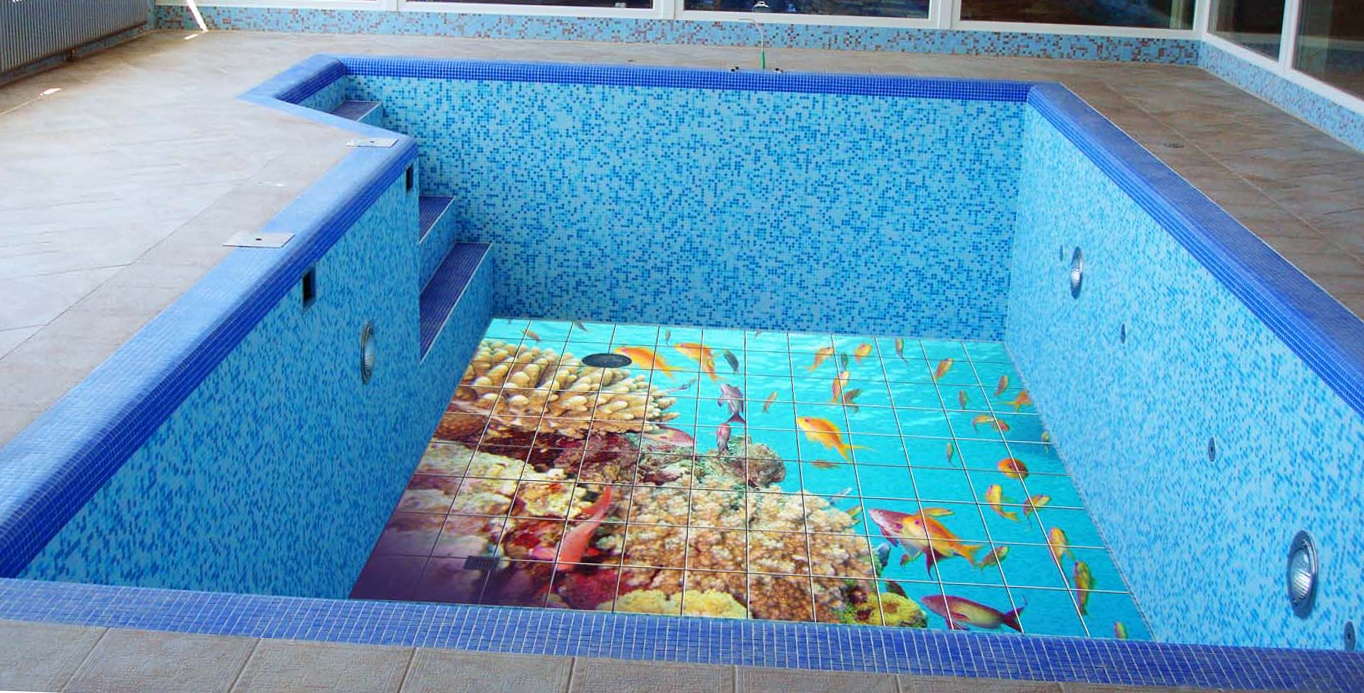
- The finish of the bowl from the inside is done with ceramic tiles, mosaics, special films, if necessary, they are primed and coated with waterproof paint for pools.
- From the outside of the pit, they fill up and trim the sides, install the necessary filtering equipment and connect the water supply and drain.
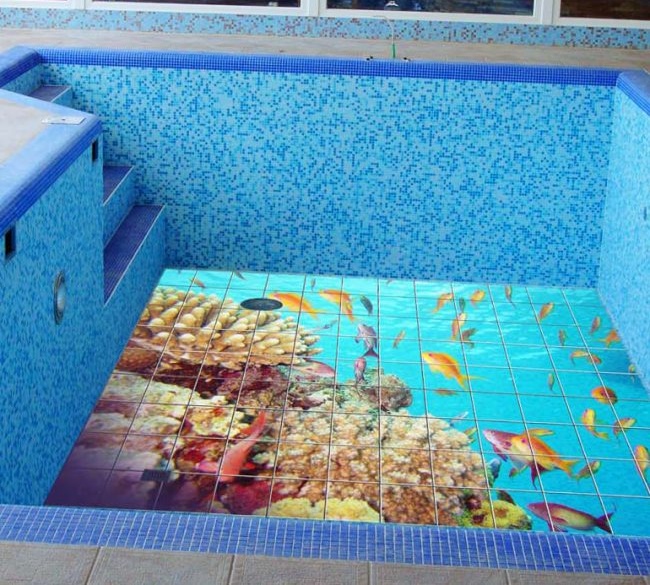
Finish the bowl with ceramic tiles
Made of bricks
Another popular building material is brick. The advantages of this method:
- reliability and structural strength, long service life;
- the possibility of laying out various shapes and sizes of the bowl;
- ease of installation of stairs, slides and other additional equipment;
There are also disadvantages:
- the need for insulation due to low thermal conductivity;
- long construction period and sophisticated technology;
- high cost of material.
To work, you need the following tools and materials:
- container for mixing cement-sand mixture;
- drill with nozzle mixer;
- brick;
- cement;
- sand;
- crushed stone;
- liquid soap or cheap dishwashing detergent as a plasticizer; reinforcement in the form of a rod and mesh;
- plaster mix for finishing;
- coating compound for waterproofing;
- geotextiles;
- Master OK;
- putty knife;
- level;
- roulette;
- shovel.
Here is a sequence of technological steps.
- Prepare a site for the pit, dig a hole according to the marking with a gap of 1 m from all sides for free access to the object. Then you need to create a sand and gravel pillow, laying geotextiles between the layers, then the sand will not mix with gravel and the pillow will not sag over time.
- To put waterproofing, it is recommended to use a roll membrane for this, which is rolled out in strips with an overlap of 20 cm and leave a wide edge folded up for better protection against moisture.
- Assemble the wooden formwork for the screed and install the supports so that the boards can withstand the pressure of concrete. Then it is necessary to mount a reinforcing mesh from a steel rod with a thickness of at least 1 cm. The reinforcement grid should be buried in the thickness of the concrete screed, so we put the rods on supports from improvised materials or on finished plastic clips.
Assemble fittings
- Concrete for screed should include water-repellent components for greater strength, the finished solution needs to be poured quickly before it has frozen, it is better to do this operation together. For uniform hardening without deformation, the surface of the screed should be constantly moist, it is desirable to cover the concrete with a plastic film. Drying time is 2 weeks, after which you can proceed to the construction of walls.
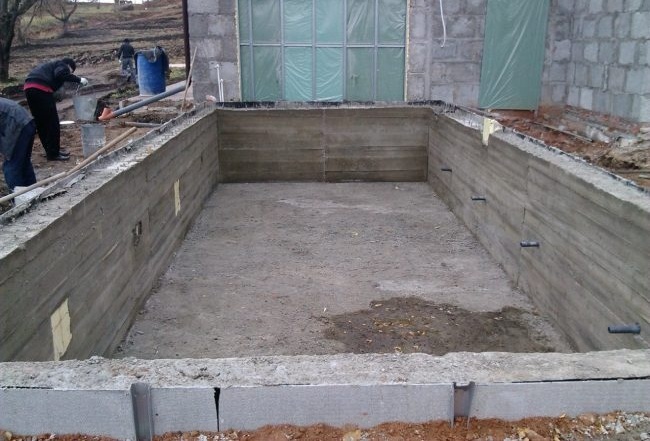
- Masonry is done with red ceramic bricks, which are the most resistant to water, the width of the walls is 2 bricks. Every two rows you need to lay a reinforcing mesh. For joints, use a solution with a plasticizer or liquid glass. On the inner side of the seams, you must leave cracks for better fastening of the finish.
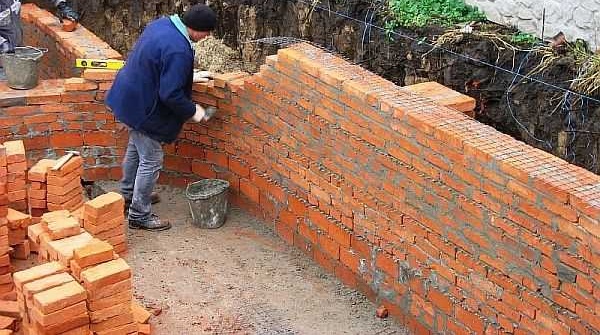
Make brick walls
- Next, you can apply plaster on the inner walls of the pool, which must contain water-repellent additives, put a netting under the finish layer, and after completely hardening from the top, treat it with a penetrating antibacterial and waterproof primer mixture.
- Install skimmers, filters, nozzles and other equipment at specified locations. As the finish use rubber paint, ceramic or mosaic tiles, decor elements, connect communications.
- Outside, the tank must be insulated with polystyrene plates and waterproofed with a coating compound. Then fill the foundation pit and tamp the soil.
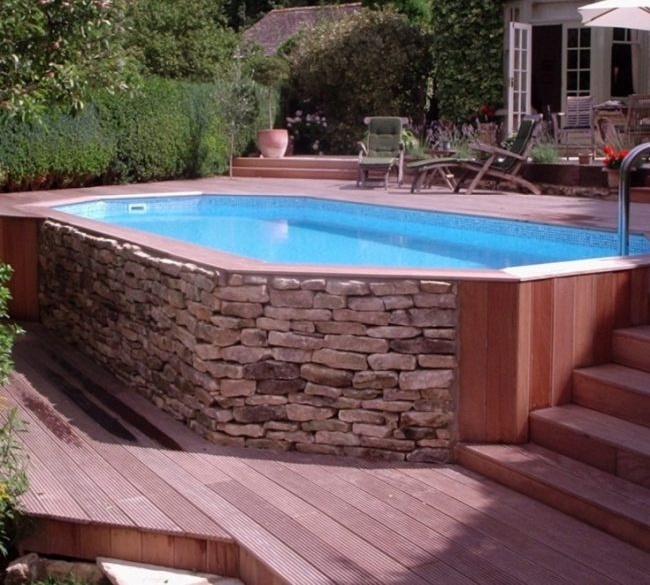
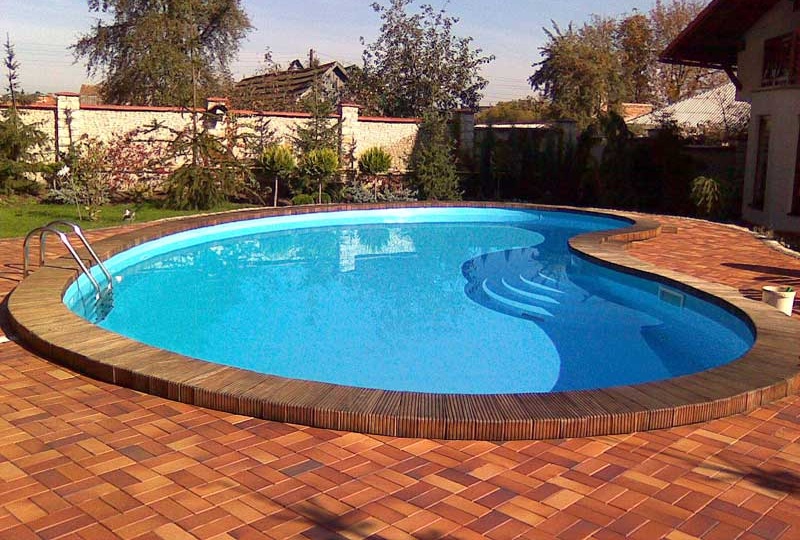
Facing the pool and arranging the area around
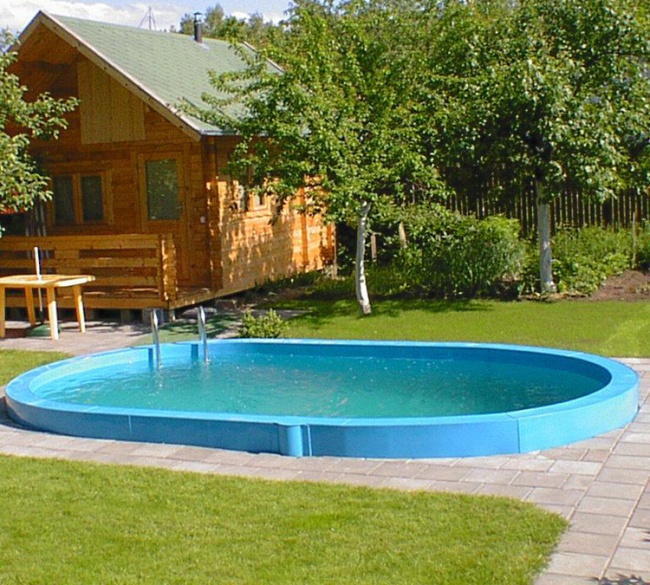
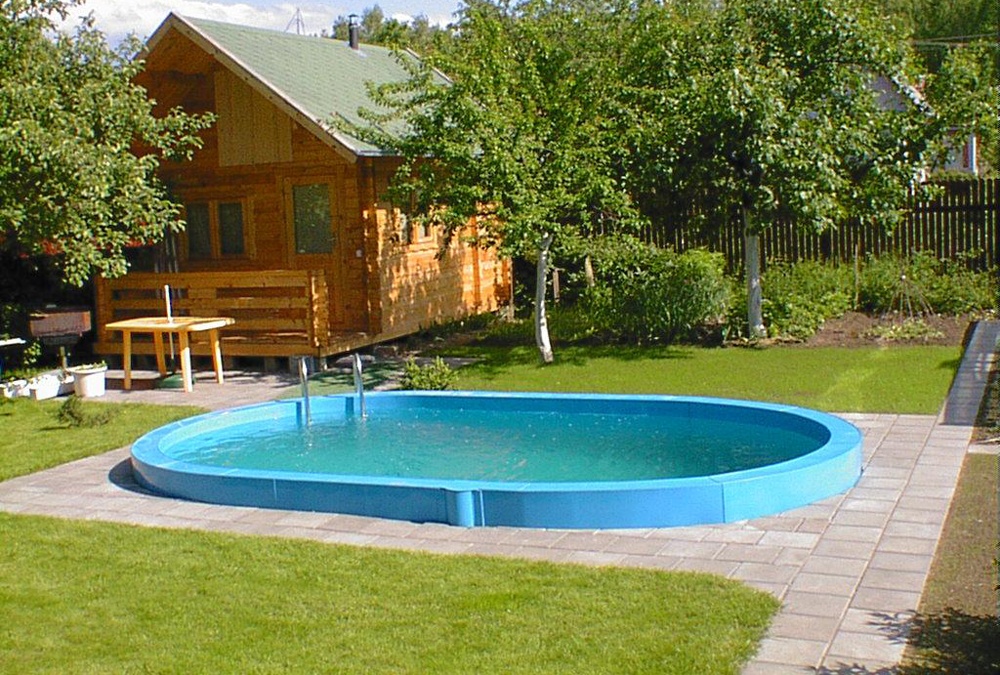
Made of polypropylene
This relatively recently invented material has properties that can be successfully used in swimming pool construction:
- easy to process;
- fastened by welding with tight continuous seams;
- does not require the creation of formwork or frame;
- safe for humans;
- has a smooth and non-slip surface;
- keeps warm for a long time.
Of the minuses, we can note the darkening of the surface with time.

Polypropylene structures are easy to handle and install.
First you need to prepare the equipment and components:
- polypropylene sheets with a thickness of at least 8 mm;
- an extruder for welding them;
- construction hair dryer for joint correction;
- PVC film;
- shovel;
- level;
- roulette;
- fittings for screed;
- concrete mortar;
- sand;
- crushed stone;
- geotextiles.
Installation steps:
- Dig a pit; clay soils that hold water are best suited for this. Expand the geotextile and pour crushed stone and sand with a layer of 30 cm.
- Run a concrete screed with metal reinforcement. The cell size of the rod should be 20x20 cm. After drying, lay a heater, for example, polystyrene.
- Weld together polypropylene sheets using an extruder and align with a hot air gun. Cut and lay the bottom of the pool. Weld the bowl and solder stiffeners to it vertically from the outside every 50–70 cm.
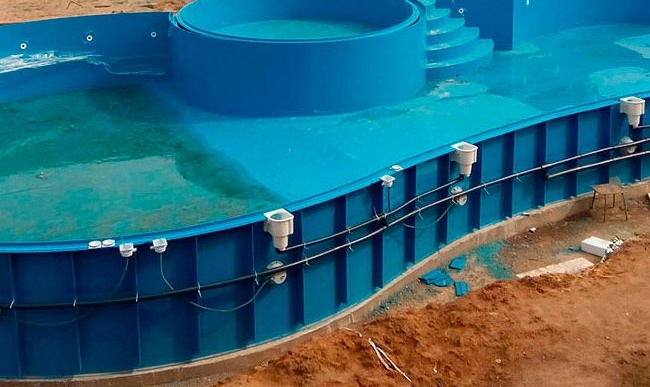
Weld and align polypropylene sheets
- In the finished design, drill holes for installing the drain and other necessary devices. The gap between the pit and the bowl must be filled with concrete, which will strengthen the walls of the tank.
- A PVC film joined into a single fabric by cold welding will be an excellent finish on the inside.
Sheathe the pool bowl from the inside with PVC film

Care Rules
All types of pools need systematic maintenance and cleaning. Recommendations will help keep the pond in order.
- Garbage and foliage can be collected from the surface with a skimmer or a simple net with a fine mesh, bottom vacuum cleaners or brushes are used to clean the bottom.
- To change the huge volume of water less often, it is possible to use disinfectants based on chlorine and active oxygen, ionizing plants.
- For the winter period, the tank must be preserved.
- You can protect the surface of the water from dirt by covering it with a special film.
- Regularly check the integrity and performance of filter elements, communications, and tightness of the finish.
- You can close the pond with a polycarbonate roof or build a pavilion around the bathhouse.
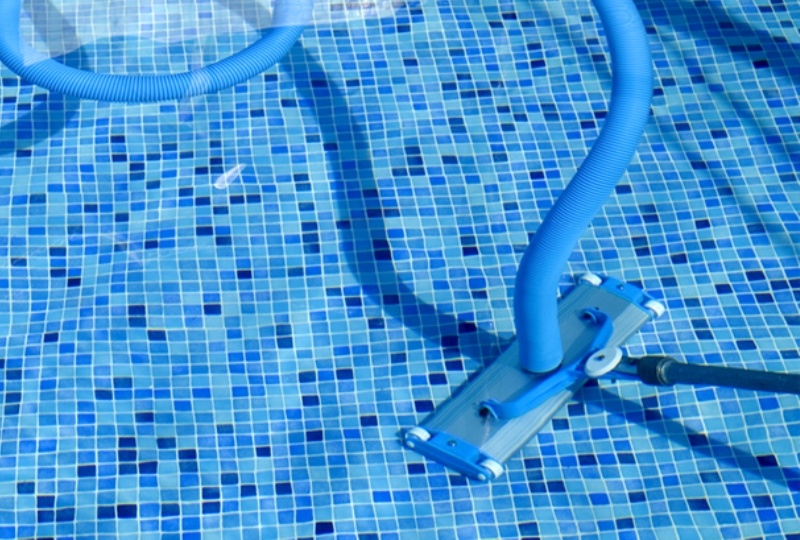
The pool should be cleaned regularly.
Many people associate a pool with luxury and wealth, but to create it, you just need hard work and technology. And if you have creative imagination, you can turn an ordinary concrete or brick tank into a real decoration of the site, a bright element of the landscape and a great place to relax.