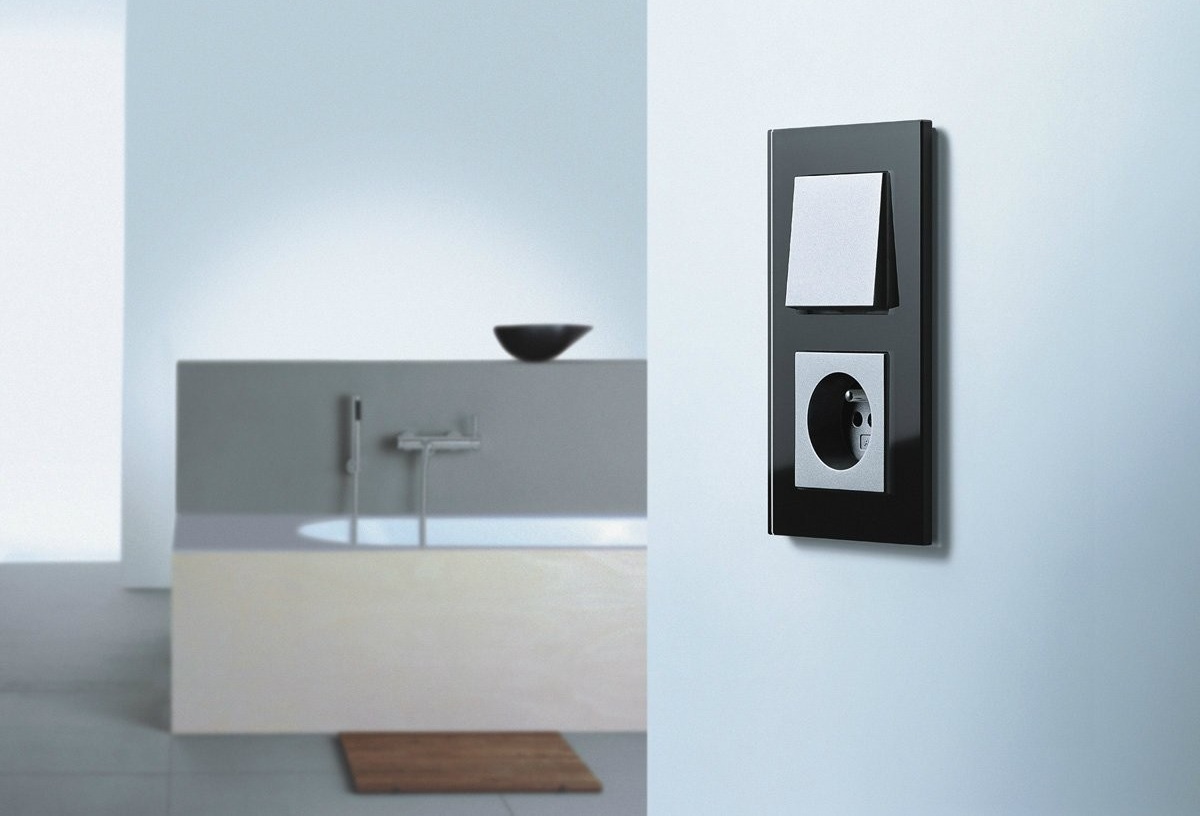
Do it yourself do-it-yourself switch
The standard switch is located stationary and turns on / off the light from one point. This is not always convenient, especially if the area of the room is large, so walk-through switches come to the rescue. They help regulate the on and off light independently from different places, and you can make such devices with your own hands.
Content
We make a passage switch on our own
Not everyone knows that you can control light sources from different points. This is true for long corridors, walkways or internal stairs, living rooms and large bedrooms. Agree, it is convenient when you can not return to the switch to turn off the light. The standard unmodified switch does not have such a function. The passage switch is also called a switch, as well as a backup switch. The secret is that you can not buy this device, but do it yourself.
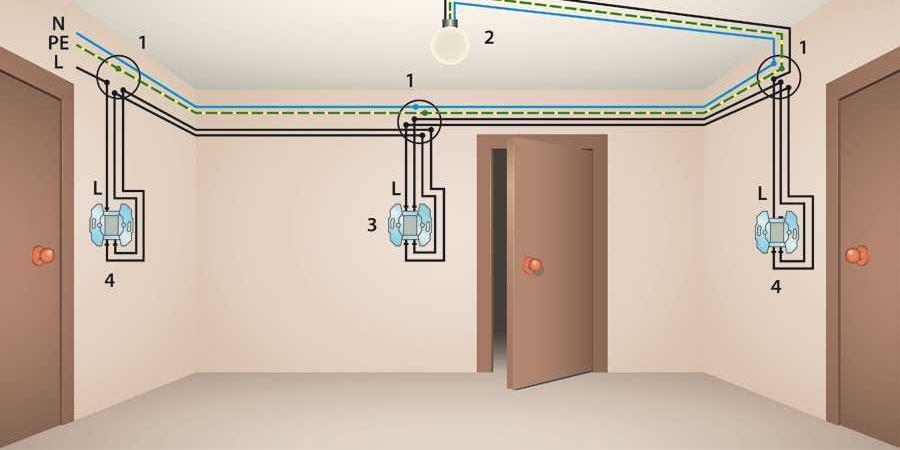
The layout of the switches in the room
See also the material on the technology of connecting the cross circuit breaker:https://aquatech.tomathouse.com/en/ehlektrosnabzhenie/perekryostnyj-vyklyuchatel-dlya-chego-nuzhen-i-kak-ego-podklyuchit.html.
The difference between a simple switch and a loop-through
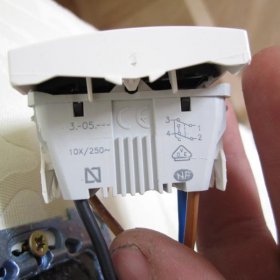
A simple switch differs from a pass switch in that the latter has three electrical contacts with a switching mechanism located between them. In addition to the main convenience - the ability to turn off the light from different points, the use of such a switch can significantly save energy, and this is a definite plus. A three-wire wire is laid in the strob or outside between the switches. When connecting the two-key passage switches, there should be two such wires. Not many apartments have such wiring, so to equip the house with such a switch, you need to lay the wire at the stage of repair work, or ditch the wall again under three-core cables. As light sources, all types of lamps can be used - from LED to incandescent lamps. In addition to lamps, according to this scheme, it is possible to connect other electrical appliances that need to be controlled from different places, for example, a boiler.
Varieties of passage switches
- Single-key (with or without backlight)
- Two-key (with or without backlight)
- Three-key
- Intermediate
- Overhead
- Built in
These mechanisms have two drawbacks:
- The buttons cannot determine in which position the device is.
- At the same time, at several points the light does not turn on.
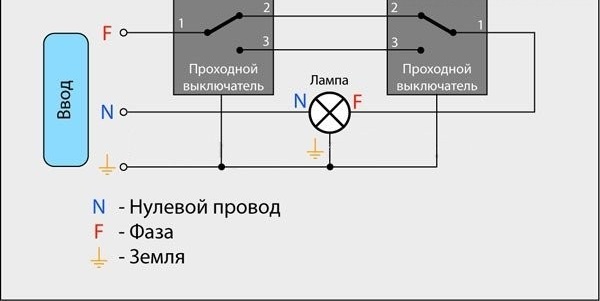
Connection diagram for two-point control
There is nothing complicated in the circuit; any person who can hold a screwdriver can connect the wires. The difference is only in the number of connecting terminals and conductive wires. The switch itself is connected so that the phase goes to it, and not to the light source, to which zero is supplied. Two passage switches of the same size and a junction box are needed. A three-wire cable of the switch and an electric wire of the lamp are led into the junction box. At the same time, the light does not turn on at two points.
Connection of passage switches for one lighting point
Walkthrough
Step 1. Joining the phase. From the junction box, the phase is led to the input electrical contact of the first switch.
Step 2. Both output electrical contacts are connected to similar electrical contacts of another mechanism.
Step 3. The input electrical contact of the second switch is connected to the lamp connecting wire.
Step 4. The second wiring from the lamp is plugged with the junction box zero.
Important! The cable for switching is purchased taking into account the power of lighting devices.

It looks like switching devices
Connection diagram for three-point control
Sometimes it is necessary to provide three control points for light sources. For example, on stairs, in spacious rooms or corridors. This scheme can also be implemented if, in addition to the pass-through switches, cross-over ones are also used. They have four contacts - two input and output, making up two pairs of simultaneously switching electrical contacts. For such a wiring, you will need a four-wire electrical cable.

Not only walk-through, but also cross-over switches are used
Installation of this circuit takes place in the following sequence:
Step 1. Mounting switches are mounted, and three-wire wires are output from them.
Step 2. Fixtures to be used in parallel are fixed in place, and their wires are led to the box.
Step 3. In a convenient place, a box is installed in which all communications are given. Due to the considerable number of electrical wires, switching is quite complicated, so it is important to immediately understand their labeling.
The connection looks like this:
The input pair of electrical contacts of the first switch is connected to the wires leading to the second pair of the parallel cross-switch, and so on in series to the lamp. The phase is brought to the input electrical contact of the first switch, and the second wiring of the lighting device to zero the mounting box. Three-core cables are carried to already screwed-through passage switches, to four-core ones to cross-type ones.
About the standards for installing switches and sockets in the apartment, as well as about safety measures, read our article:https://aquatech.tomathouse.com/en/ehlektrosnabzhenie/ustanovka-rozetok-i-vyiklyuchateley.html.
Connection without mounting box
You can connect the switches without using a junction box.
There are two options:
- Using pulse relays. In cases where the electrical panel is located within the apartment, and there is a place for a module in it, a pulse relay is installed on the DIN rail. The switches themselves are connected in parallel, and the wires from them and from the light source are fed into the electrical panel directly. The relay will control the load, but no current will flow to the switch itself, so you can select a smaller wire. If there is no place in the shield, you can purchase a relay for the socket or mounting box in the ceiling.
- Use of passage switches. They close and open the phase wire from the lamp holder, and current flows through their contacts, for which a wire corresponding to the load is needed. But instead of a junction box, all communications (power from the shield, the wire of the lighting device and from the second switch) are fed into the first socket coming in first. It should be made deeper than usual.For example, cut the bottom of a standard box to fit the twists of all wires. Earth and zero wires from the electrical panel are connected to the zero and ground of the lamp, isolated and hidden in the socket. The lamp phase is connected to the phase of the second socket and is also isolated there. All other wires are connected to the switch terminals.
Video: how to connect a passage switch
To easily find the switch in the dark, you need a backlight. Such devices are in specialized stores, and you can connect it yourself. Learn how to do this in our article:https://aquatech.tomathouse.com/en/ehlektrosnabzhenie/kak-podklyuchit-vyiklyuchatel-s-podsvetkoy.html.
How to make a passage switch from an ordinary
Two switches of the same company are purchased - with one and two keys. It is more convenient to use switches designed for open wiring.
To remake the standard switch in the entrance, a model is purchased in which it is possible to swap the terminals. This will open and close the circuit independently of each other. Thus, in one position one circuit will be activated, and in another another. A single key is installed on the front panel, instead of a double one, and the pass switch is ready.
Video: do-it-yourself circuit breaker
With the help of wiring diagrams and instructions, it will not be difficult to understand the tricks of installing through-passage switches. The main thing is not to get confused in the labeling of wires and observe the connection sequence.