Do-it-yourself shower tray
The dimensions of a typical bathroom in a panel house allow you to install only a strictly defined set of plumbing devices. Often, apartment owners refuse a bath in favor of a shower, while gaining some free space. Current SNiPs do not prohibit replacing bathtubs with showers, therefore, no problems with supervisory authorities are expected in this case. The purchase of a ready-made shower is an expensive undertaking; moreover, its dimensions do not always fit the existing room. The issue is solved by installing a pallet and light curtains, screens or doors that prevent splashing water. It is much cheaper and makes it possible to more effectively use a certain place in the room. The main element is a pallet, the purchase of which is much cheaper than buying a finished shower. Many people prefer to make a shower tray with their own hands, getting a booth of the desired shape and area. The task is not the most difficult, but it requires some knowledge and skills.
Content
Is it necessary to make a shower tray
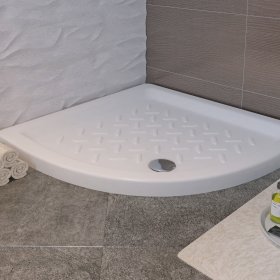
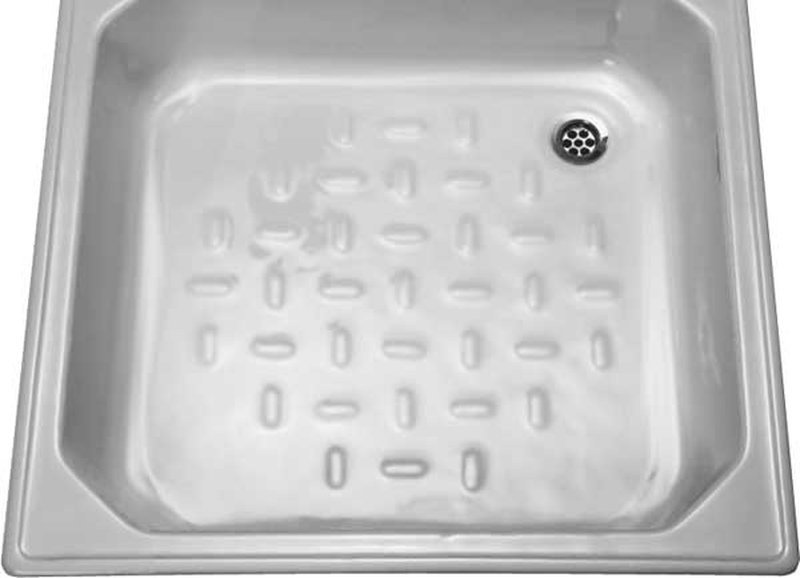
The pallet is the base shower stall. It consists of a platform limited along the perimeter by the sides, in which a hole is equipped for draining water into the sewer. Without a pallet, the use of a shower cabin is impossible, since water will spread throughout the room. The design is not of significant complexity, the whole point is to organize the disposal of used water. To do this, install the exhaust headset and connect it to the sewer pipe. Since for normal outflow of water it is necessary that the level of the floor of the pan is slightly higher than the sewage system, the height of the entire structure is the sum of the height of the sides, the size of the outlet (minimum 12 cm), the height of the sewer pipe above the bathroom floor. At the same time, a too high design is inconvenient for use, therefore, during manufacture, the dimensions of the structure should be optimally organized. The advantage of independent production of the pallet is the ability to get the right size and shape, the options for which can be very many.
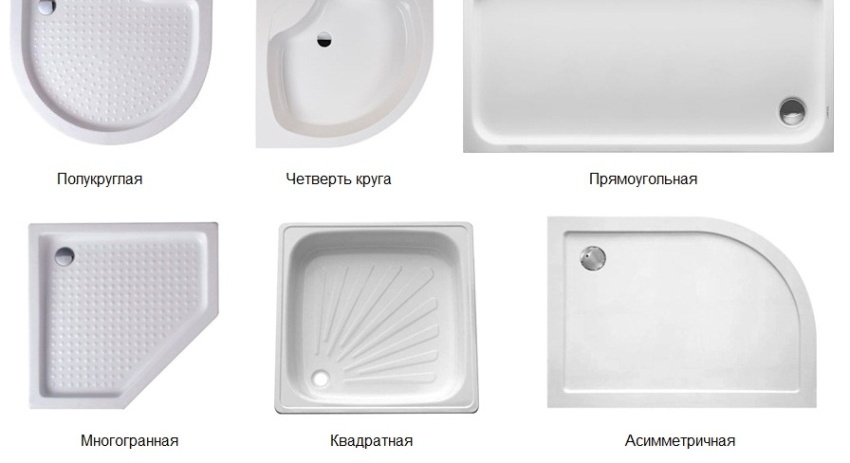
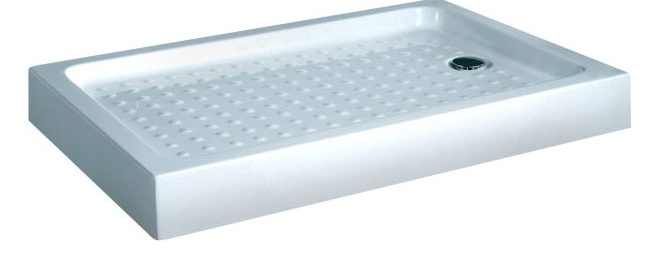
Shower trays can be of different configurations
Finished samples are also made in different configurations and sizes, but it is much more difficult to choose the best fit for the existing conditions.
Types of shower trays
The choice of material for the pallet is determined by personal preferences, skills and financial capabilities of the owner of the apartment.The same applies to the shape, size of the structure. The purchase of a finished pallet does not solve all the problems completely, therefore, choosing the best option, you should consider the cost of installing the product. In some cases, manufacturing a pallet from scratch is much cheaper and simpler than installing a purchased factory sample. Consider the common options for shower trays:
Acrylic
Acrylic pallets have many advantages - they are attractive in appearance, have a smooth surface, perfect lines and outlines. Acrylic practically does not make noise when water flows fall, it does not chill legs, it always seems warm enough.
One of the advantages of acrylic is its sound insulation.
The disadvantages of the material are high elasticity, requiring the installation of a reliable and durable support structure, and a rather high price. An illiterate installation of an acrylic pallet can cause deformation and destruction of the housing.
Steel
The steel pallet is strong enough, but you cannot use it without a supporting structure. It can be of various shapes and sizes, the lines are smooth, there are no roughnesses or irregularities. The steel pan rumbles under the stream of water, therefore, during installation, it is necessary to install a soundproof gasket. Its main advantage can be called low cost in combination with an attractive appearance.
When installing a steel pallet, it is necessary to make noise insulation
The disadvantage is the need to carefully handle the surface - the breakaway enamel will expose the steel, because of which the corrosion process will begin. Alternatively, you can use a stainless steel product that is more resistant to mechanical stress.
Cast iron
The cast-iron tray resembles the well-known cast-iron bathtub - it is massive, looks solid and solid, it has a lot of weight. There are practically no ideal surface lines for cast-iron pallets, but the enamel layer allows you to significantly align the front side of the product.
Cast iron pallets are heavy and massive, but fragile
The disadvantage of cast iron samples is fragility, high weight and relatively high prices. The main advantage is that the surface holds heat for a long time, does not rattle when the water flow drops.
Ceramic
Ceramics (sanitary ware) - tested and proven material for the bathroom. It is resistant to moisture, has an attractive appearance, perfect lines and a smooth surface.
Under ceramic pallets you need to make a good base
The main disadvantage is the high cost of the product. In addition, ceramic products need a reliable basis, since the bearing capacity of the material is limited, the presence of some flaws in the array can cause the destruction of the pallet. The sharp edges of the earthenware fragments are extremely traumatic, therefore, installation should be done carefully and accurately.
Made of artificial stone
Artificial stone pallets are a relatively recent option for designing a shower cabin. Casting marble, onyx, granite or other manufacturing options are used. The finished pallet is characterized by a cold surface, it is solid and very durable.
Artificial stone pallets will last much longer than steel, acrylic or plastic
The service life of the product exceeds 25 years, leaving even cast-iron samples far behind. They have a solid appearance, do not make noise, are perfectly combined with any interior of a bathroom. The disadvantages include the relatively high cost of pallets, especially large sizes.
Concrete
A concrete pallet is made by casting into a prefabricated formwork. This option applies to fully home-made samples, in contrast to those discussed above. Concrete is a universal material that allows you to create products of any shape and size. The manufacture of concrete pallets will cost inexpensively, the main costs are the purchase of cement.The disadvantage is the inability to use it without finishing, as the material absorbs water and is able to soak through it.
Installation of a concrete pallet will cost inexpensively
For the manufacture of such a pallet some skill is required, the work is quite dirty and takes time to solidify the material.
Made of bricks
This option is optimal for self-manufacturing. Red ceramic brick is not afraid of moisture, and laying is simple and does not require high qualifications. The amount of material is small, the whole task is to create a water outlet and ensure the tightness of the structure.
The brick is not afraid of moisture, and the installation of the pallet is simple
The creation costs are small, the manufacturing time is much shorter than when pouring a concrete pallet. The disadvantages include the need for finishing.
Made of plastic
It is impossible to make plastic products on your own, but finishing the finished base from concrete or brick is a simple and affordable option. The advantage is the tightness of the material, which with proper installation is able to form an absolute barrier to water.
Plastic is one of the simplest and most affordable materials.
ABC plastic or a similar finishing material is used that is resistant to moisture and allows easy processing, cutting and joining.
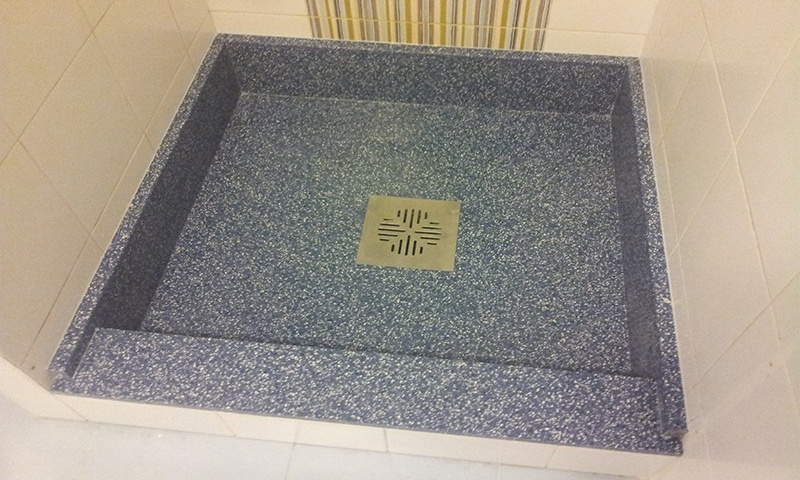
Ceramic tile
Ceramic tile is a finishing material. It is not able to serve as the basis for the pallet, but can be an excellent finish. The material has a large selection of colors, shapes and sizes, which allows you to create a pallet that blends harmoniously with the basic finish of the bathroom.
Tiles are often used as a finishing finishing material.
The costs of acquiring and installing are relatively small, given the small size of the pallet. Laying requires skill, but it is not of significant complexity and is available to everyone.
Proper care of the shower is a guarantee of its long service. To answer the question, what means to use for washing, this article will help:https://aquatech.tomathouse.com/en/santehnika/vanna/kak-uxazhivat-za-dushevoj-kabinoj.html
How to make a pallet with your own hands
Making a bowl is not particularly difficult. It is necessary to make a platform equipped with a hole for draining water and surrounded by a rim on the edges. At the same time, the use of different materials to some extent changes the installation technology. Consider the procedure for making a shower tray with your own hands:
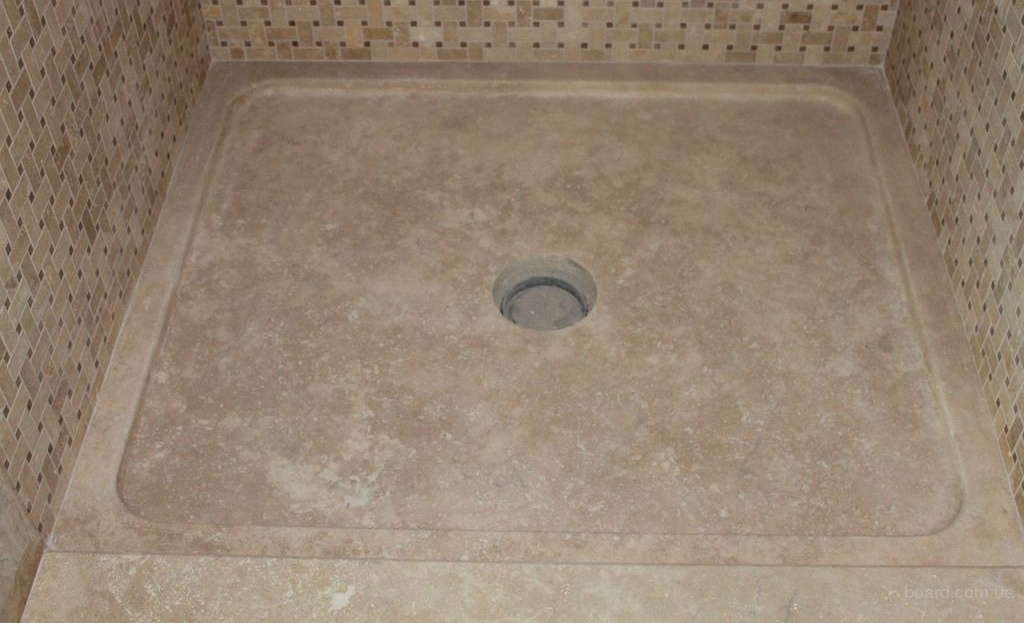
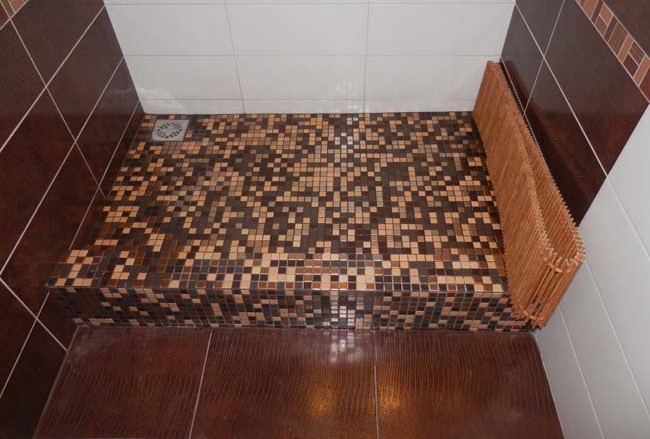
From tiles
Ceramic tiles are laid on the finished base. To do this, you need to have a ready-made pallet made of brick or concrete, with an equipped drainage system and sides. The tile is a topcoat that allows you to get attractive in appearance and impervious to water pallet. The most common option is a small tile on the grid - a mosaic. It allows you to trim the semicircular sides, to form a small slope of the base to the release for better water flow.
The technology for installing tiles is no different from conventional. Standard tile adhesive is used, which is applied to the surface of the base, after which the tile is laid. You should start from the bottom of the pallet, after which the sides are finished, starting from the inside. When laying, it is necessary to take into account the specifics of using the pallet and not leave open edges of the material. After laying, all seams are wiped with a special waterproof composition, of which there are many on sale.
A properly connected shower trap is a guarantee of continued operation of the system. Installation instructions for the drain can be found here:https://aquatech.tomathouse.com/en/santehnika/vanna/sifon-sliv-dlya-dushevoj-kabiny.html
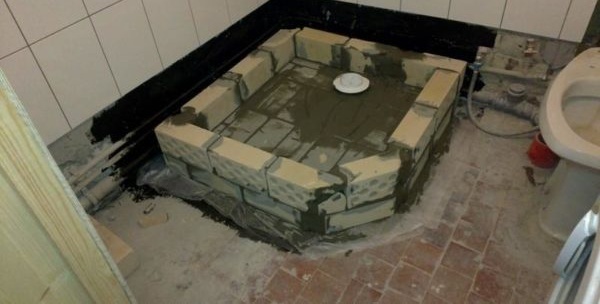
Made of bricks
The manufacture of a brick pallet is carried out in stages:
- A water drainage system is installed - a drain to the sewer pipe and a drain headset (outlet) connection.This is necessary so as not to make a mistake with the height of the pallet.
- The sides are built. Their height is selected so that a sufficient elevation relative to the bottom of the pallet is obtained.
- On one side of the side near the wall, an inspection hole is made so that it is possible to access the outlet headset if necessary.
- A waterproofing sheet is placed inside the sides. Different options can be used, from roofing material to more modern rolled materials. It is necessary to ensure the tightness of the canvas, laying is done with an overlap on the sides.
- Brick support posts are installed. Alternatively, the entire internal cavity is filled with brick. It is necessary to monitor the position of the drain pipe so as not to violate its integrity.
- A reinforcing mesh is laid on top of the brick layer and a layer of screed is poured. The drain hole is plugged with a wooden cork or in another way so that concrete does not get into it.
- Finishing is done.
Over time, the diverter for the mixer begins to junk. The procedure for replacing this device is studied in detail in the following material:https://aquatech.tomathouse.com/en/santehnika/kran/kak-razobrat-divertor-smesitelya.html
Video: installation of a shower tray made of brick and concrete
A brick pallet is made in 1 day and requires the lowest possible manufacturing costs, so this method is the most common among users.
How to pour from concrete
Concrete version of the design requires the creation of formwork. For it, you can use boards, pieces of plywood or chipboard, other sheet materials. It is necessary to attach a branch to the sewer pipe and install an exhaust headset on it. Then they are fixed in a stationary state between the planks of the supporting structure, which is easiest to make of wood. The main task is to ensure the position of the drain and the drain hole slightly higher than the sewer pipe, otherwise either the pan will be too high, or the water will not leave the pan. The magnitude of the slope of the outlet in relation to the sewer is about 3 ° or a little more. In the thickness of the screed of the bottom, it is recommended to lay a warm water floor, which will increase comfort and prevent colds. The best option is to connect it to a shower hose, so you can save water and ensure the best base temperature.
Procedure:
- An outlet for sewage and an outlet is installed.
- The formwork for the sides is mounted. Their height should be done taking into account the position of the drain hole. The thickness should not be too large to save the space of the bathroom, but not too small to ensure the strength and reliability of the pallet. A reinforcing mesh is placed inside the sides, increasing the strength of the structure.
- The sides are poured and aged for complete solidification.
- The formwork is dismantled, waterproofing is laid inside the pallet.
- Underfloor heating pipes are laid and connected to the mixer (regulator).
- The bottom of the product is poured. The layer thickness should correspond to the position of the outlet, taking into account the finish.
- After the bottom hardens, the casting is finished with tiles or other materials at the request of the owner.
There is an option in which the entire structure is filled at a time. It saves time, but has great complexity and a high chance of making mistakes. It is recommended to spend one or two days more, but to ensure the quality and reliability of the work.
Video: installing a concrete pallet
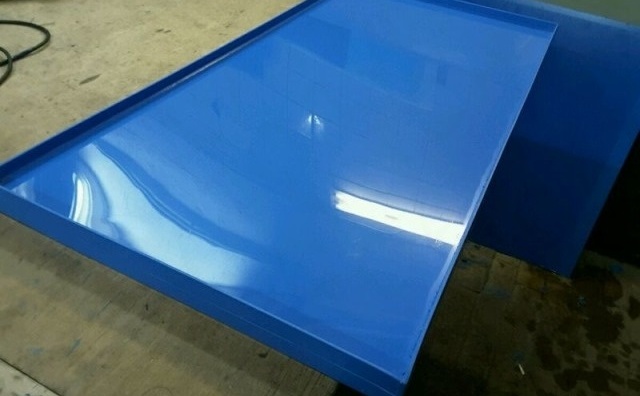
Installing an Acrylic Pallet
Acrylic products are usually equipped with supporting structures that provide strength and stability of the structure to mechanical stress. Before starting work, it is necessary to carefully study the installation instructions, which detail the procedure. This will help to avoid mistakes and perform all the actions in the desired sequence.If the device is not equipped with a support structure, as is the case with some cheap models, it will have to be manufactured independently, which will take time and skills.
- For assembly, the bowl is turned upside down. A frame is installed to which the legs are attached. Usually they are from 3 to 5.
- The drain system joins. The branch pipe is installed through an adapter, which must be coated with glue to eliminate the possibility of leaks.
- The pallet is installed on the floor, the height of the legs is adjusted. They put the building level on the side, adjust the position of the product on it, rotating the legs in one direction or another. As a result, full stability, horizontal position should be provided.
- The situation is checked on all sides.
- To increase reliability, as well as sealing all elements, the space under the product is recommended to be filled with polyurethane foam.
- Operation can begin after 6-10 hours, necessary for the crystallization of the foam or adhesives used in the assembly.
Video: installing an acrylic pallet
https://www.youtube.com/embed/vnz7AiSyQUo https://www.youtube.com/embed/LakJGgOdi3g
The shower tray helps save a lot of money in the space of the bathroom. Do-it-yourself installation of the product allows you to get the most suitable result for the owner, to ensure optimal sizes, configuration. All work can be performed at a convenient time for yourself or family members, without adjusting your schedule to the schedule of invited specialists. Quality or operational parameters depend on the thoroughness of the work, the accuracy of the owner.