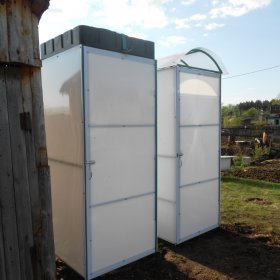
DIY polycarbonate shower
Many owners of a country house or cottage do not stay there for the whole summer just because there is nowhere to take a shower after a hard day. To assemble a simple shower, you do not need to purchase specialized equipment and hire a team of professional builders. This can be done with your own hands in a couple of days.
Content
Polycarbonate Advantages
A quality shower is a very useful design if you plan to stay in the country for a long time. With it, you can refresh yourself and bring yourself back to normal after long work.
There are many varieties of showers. They can be equipped with a door, and a locker room or other room can be attached to them as a bonus. As a building material it is allowed to use wood, polycarbonate, brick.
Wooden shower cubicle is environmentally friendly. However, even treated with various protective compounds, after a while it begins to rot due to excess moisture. The brick structure is too heavy, and it can not be built everywhere.
Polycarbonate is a modern building material that is part of the group of synthetic polymers. In the manufacturing process, the method of extrusion of granules is used, so that the shape of the structure from this material can be easily fixed.
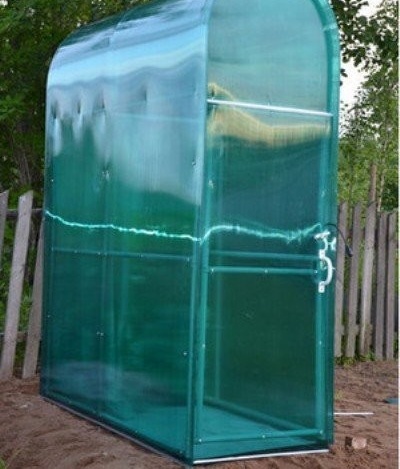
The polycarbonate booth can be made into any shape.
In comparison with other building materials, polycarbonate has several advantages:
- Strength. Advanced molecular structure creates a durable surface. Its impact resistance is an order of magnitude greater than that of glass. The material is able to withstand the effects of strong wind, snow, hail for a long time.
- Ease. The polycarbonate construction is about six times lighter than glass. This greatly facilitates installation work.
- Plastic. Due to the unique flexibility of polycarbonate sheets, you can create structures of any shape and type.
- Excellent heat and sound insulation properties. A shower cabin made of such material can be used even in winter.
- Safety. Unlike, for example, glass, with severe mechanical damage, polycarbonate does not break up into many fragments.
The material is not affected by atmospheric factors and harmful chemicals. If necessary, it can be easily cut and installed.
There are some disadvantages. So, the material is not sufficiently resistant to mechanical stress. It is easily scratched. Then dirt and dust get into the resulting scratch, and as a result, the surface ceases to be integral.Also, polymer materials are poorly affected by aggressive sunlight. This problem is solved by the manufacturer: a protective film is applied to the sheets to prevent destruction.
Tools and materials, structural design
The construction of a shower cabin made of polycarbonate does not require professional tools and rare materials that are sometimes impossible to find even with specialists. For work you will need:
- Profiled metal pipes, corners.
- Wooden bars.
- Base material, e.g. brick.
- If you plan to build a capital shower with arrangement of the foundation, you will need all the necessary ingredients for this: sand, cement, water, gravel.
- Water tank.
- Of the tools you will need a hacksaw for metal, a hammer, a building level, a set of wrenches, a welding machine with a set of electrodes.
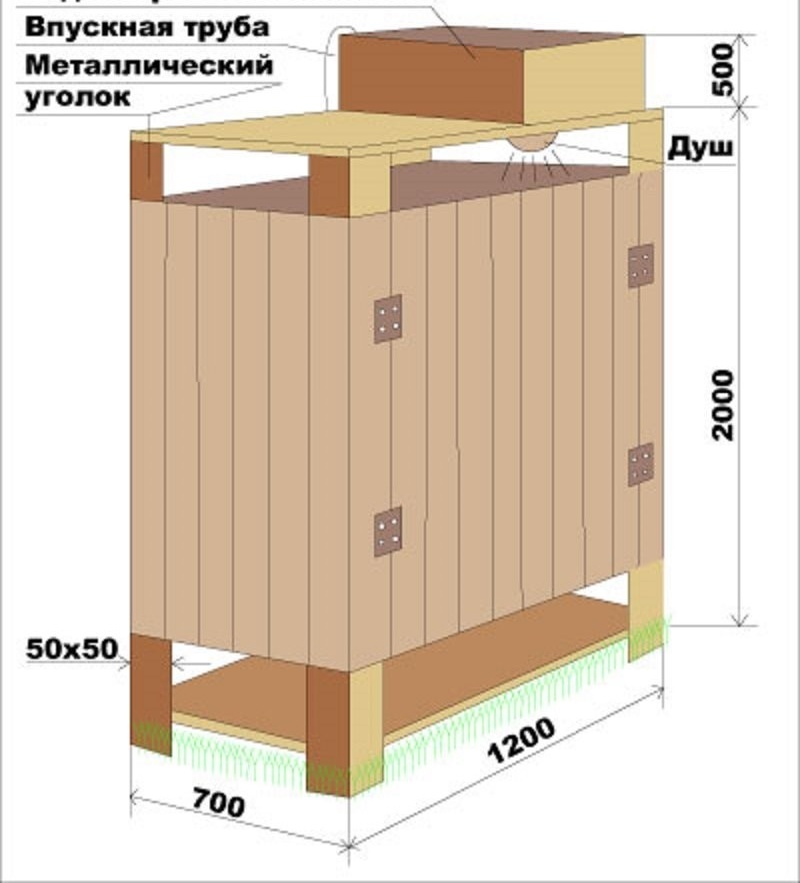
When designing a booth, you need to ensure that it does not turn out to be too cramped. Ideally, a tall person should freely raise his arms or bend over. In most cases, the internal size of the washing chamber is limited to 1 square meter, height - about 2.5 meters. Dimensions of the locker room (if available) - 1 * 0.6m.
Cabins can vary by the method of withdrawing waste water, heating and other points
Each project involves many individual features associated with both the wishes of the owner, and with the features of the area. So, when planning the design, a drainage system should be provided in advance. To avoid odors in the shower, the drain pit is located at some distance from the main structure. Drains are discharged through a pipe.
The roof structure can also be made of polycarbonate. For the construction of the walls of the shower cabin, matte polycarbonate with a thickness of 8-16 mm is suitable. The roof is made of honeycomb (transparent) material of the same dimensions.
All sizes are selected individually, based on the dimensions of the most massive family member
Making a shower cabin do it yourself
The process of independent construction of a summer shower can be divided into several stages. It:
- Selection of the place where the structure will be built.
- Foundation production (optional, can be replaced by the installation of a concrete slab).
- Gathering the frame. This will require vertical posts, horizontal and oblique planks and a welding machine (if desired, other methods of fastening can be used).
- Tank installation. The tank is placed on its own frame, located under the roof of the shower. So that the tank does not roll and move, small restrictive supports are welded to the frame. The distance between the supports is determined by the dimensions of the tank.
- Installation of polycarbonate. For walls, it is better to use opaque opaque sheets.
- Interior decoration.
Seat selection
To begin with, it is worth choosing a place where the cabin will be built. It must meet the following requirements:
- Location on a small hill. This will eliminate the problem with the release of wastewater.
- The terrain must be protected from strong winds.
- The shower must always be in the sun. The protective film minimizes the harmful effects of ultraviolet radiation.
- The possibility of unhindered supply of electrics.
- The place should be spacious enough to fit a shower cubicle, convenient for each member of the family. It is also necessary to provide a place for a compost pit, septic tank or other method of draining water discharge.
Foundation construction
The ease of construction of polycarbonate can be both its advantage and disadvantage. For example, without a reliable foundation, a strong wind will easily knock it over. Therefore, it is worth installing a shower structure on the foundation.
The base for the cabin is built very simply:
- Territory is marked out.
- Digging a hole. Depth - about 80 cm.
- The edges of the pit are aligned, a wooden formwork is installed.
- In previously designated places, metal vertical racks are installed. They are aligned in level and height, if necessary, trimmed.
- The pit is poured with concrete mortar a few centimeters above ground level.
In the future, on the foundation, you can lay a wooden floor, install an acrylic or steel pallet.
During the construction of the foundation, it is also possible to equip the discharge of drains into the drain pit. To do this, before pouring the mortar, it is necessary to install a special pipe, one end of which will be located in the center of the cabin floor, the second - to go into the drain. If possible, waste water should be organized into a centralized sewer system. If not, into the drain hole.
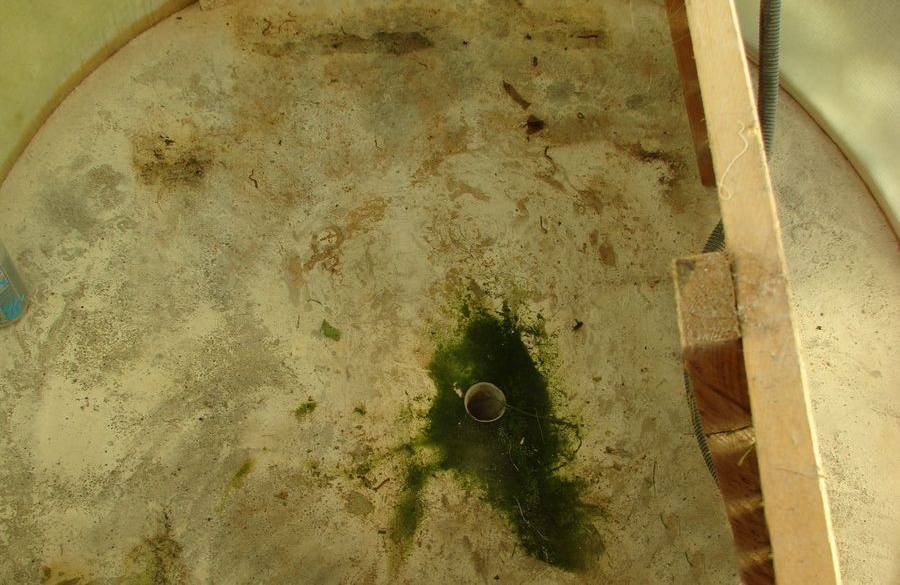
The pipe is installed before pouring the foundation
The pit should be located at some distance from the shower stall - this minimizes the appearance of bacteria and odors in the washing chamber. If you get drinking water from a well or artesian well, it is necessary to take into account the level of groundwater occurrence in the process of creating the pit. Otherwise, drains can get into the well. Alternatively, you can separate the pit from the ground with a waterproof material (for example, a film or roofing material).
Waste industrial water can be used, for example, for washing a car or watering a garden.
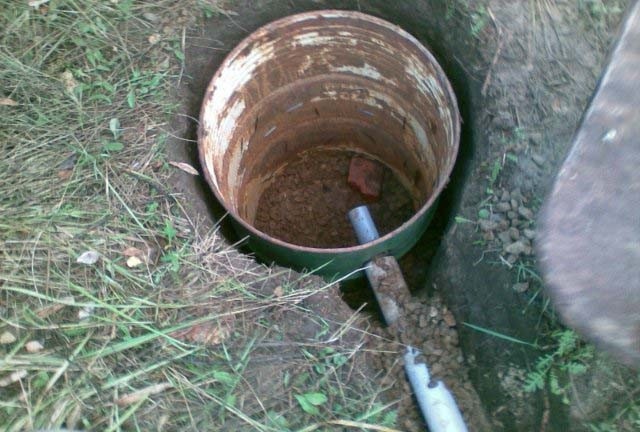
The volume of the drain pit should be slightly larger than that of the tank
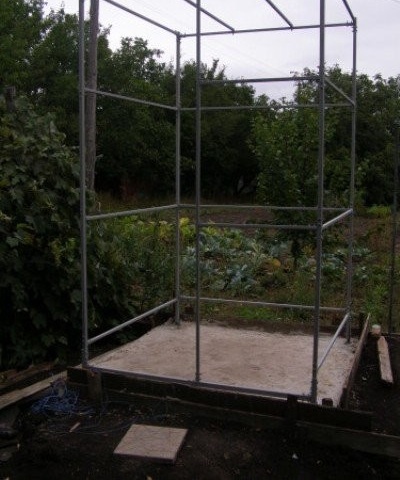
Frame mounting
To the installed vertical racks are attached the lower horizontal bars. There are several ways to do this:
- With the help of couplings.
- Bolted.
- The most reliable way is welding. Requires a welding machine, a set of electrodes and minimal work experience.
Before fastening, all profiled pipes are leveled. Then, the upper crossbars are installed in the same way.
Before installing horizontal pipes, you need to consider where the door will be located. To leave room for the doorway, you can install one of the vertical posts in the center of the line and fasten the horizontal bars to it. The remaining space (about half a meter) will be enough to install a standard door.
In one of the walls you need to leave room for the door
For maximum strength, you can add a few oblique supports. They will make the structure more stable and prevent loosening.
After the frame is assembled, you can hang the door frame. It can be made independently from the same profiled pipes that were used in the installation of the main structure. Two vertical posts and several horizontal bars are welded together, door hinges are fastened to the frame and frame, on which the door is hung.
After assembling the frame and installing the door, you can proceed with the installation of the roof. As a roofing, metal profiles, polycarbonate and other suitable materials can be used. Between the roof and the washing compartment it is necessary to leave a little space for the installation of a container with water.
Choosing a water tank
On the roof of the summer shower is a container with water. Its capacity is determined by the number of consumers. As a material for the tank, plastic or metal is usually used.
The tank can be round, flat, cylindrical. For a summer shower, you can limit yourself to a plastic tank. It is easy to transport and install. The main disadvantage is that in winter it will have to be covered.
The metal tank is very heavy. It is more difficult to transport and mount. The material also requires periodic care and thorough inspection. At the same time, water in a metal container retains heat longer.
The tank should be regularly filled with water, otherwise it will dry out.The water supply can be arranged using automation (if you have an automatic pump) or mechanically (filling the tank from a regular irrigation hose).
To install a water tank, a cross-shaped design of four planks is welded to the upper crossbeams located under the roof. The distance between them is slightly smaller than the size of the tank. A capacity is placed on them. The roof reliably hides it from direct sunlight.
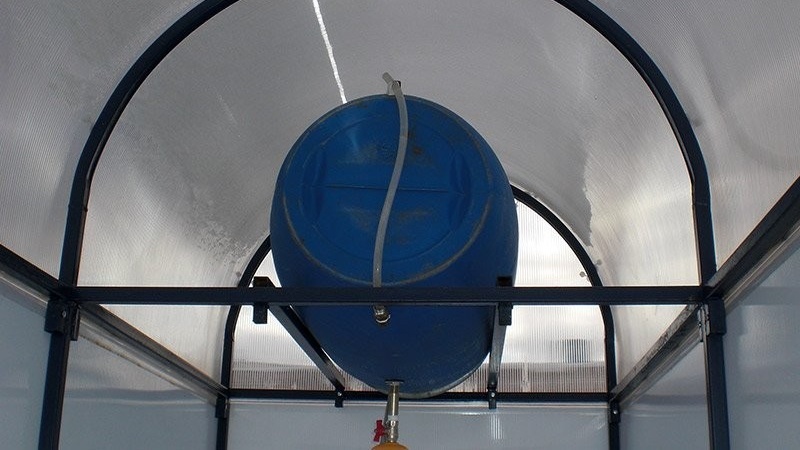
The capacity is installed on its own frame, located under the roof
Polycarbonate lining
Due to the fact that polycarbonate sheets are much lighter than glass and similar materials, carcassing of the frame can be performed alone. This will require matte sheets with a thickness of 8 to 16 mm. Most often, 12 mm polycarbonate is used in construction.
The material is mounted on a metal frame. As fasteners, steel bolts can be used.
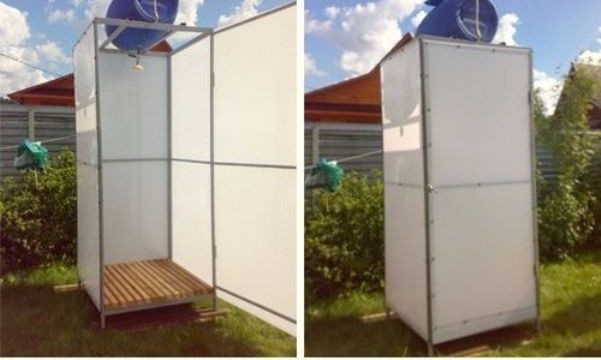
The cabin can be left in this form, if you plan to use it exclusively in the summer
Warming and interior decoration
This step is not considered mandatory. You can skip it if the shower is planned to be used exclusively in the summer..
To insulate the structure between the individual frame rails, sheets of expanded polystyrene are laid. A construction stapler is used to secure it.
Expanded polystyrene is covered with a protective film, which insulates the insulation from the effects of steam and moisture. There are a lot of varieties, it all depends on the planned budget. The film is also attached using a construction stapler.
Any waterproof finishing material is laid on top of the protective layer. It can be linoleum, PVC panels or other suitable coating. The main function of this material is to decorate the room, because its type depends entirely on you. Among other things, it solves the problem of transparency of polycarbonate, if you do not want to be seen by outsiders.
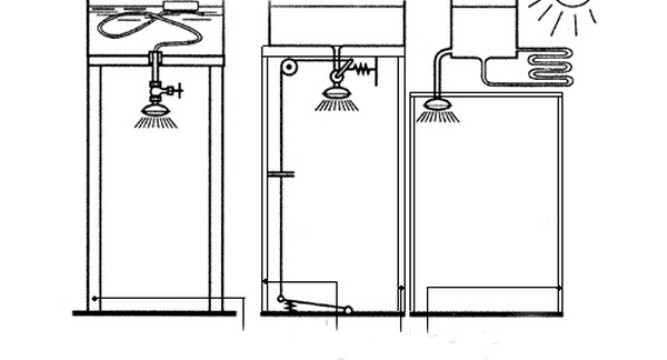
How to heat water?
In the summer, enough sunlight to heat the water in the tank. If you plan to use a shower cabin in the fall and spring, you can stretch a kind of “greenhouse” over the tank - install rails and pull polyethylene on them. This will increase the temperature of the water in the tank by about 8–10 degrees.
It is also possible to equip electric heating of water. For this, a heater and a tank with two compartments are required - separately for hot and cold water. The heating time of 50 liters of liquid is about one and a half hours, the capacity of the water heater should be from 2 kW or more. Also, for electric heating will have to provide unhindered access to a centralized power supply.
Operational Features
Polycarbonate surfaces do not require specific care. However, there are several features, observing which you will extend the life of the shower.
- Possible contaminants can be brought down by a directed stream from a hose.
- Do not rub the surface with hard rags and use abrasive detergents. This will lead to many scratches, damage to the integrity of the surface and accelerated wear.
- Before using a new detergent, make sure all of its components are safe for the polycarbonate surface.
Video: how to make a polycarbonate shower
Using the tips and instructions, you can install polycarbonate showers on the site without resorting to outside help, and in just a few days. It is very important to level all the necessary strips according to the level and check the connections, otherwise the structure will lose stability.