Connection scheme for photo relay for street lighting: DIY installation
It is convenient to control the lighting on the street with the help of a photo relay. The device is practical and has a simple wiring diagram. At the same time, street lighting devices will work in the required mode.
Content
Photorelay and its principle of operation
An effective device allows you to control energy costs, control lighting in the required mode. Photocells are used for timely switching on and off street lamps, which is important for private homes. For this, a light sensitive sensor is provided in the device. The element is connected to the supply circuit. When light rays enter, the sensor becomes an insulator, and the device conducts electricity to the lighting device during the dark. This is how the photo relay works, turning off the lights in daylight and turning them on in the absence of sunlight.
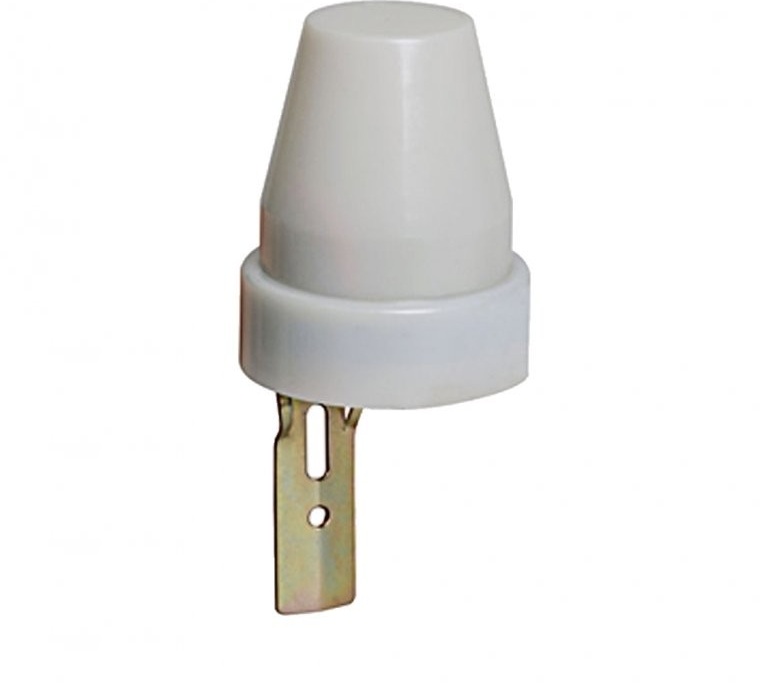
The compact photo relay has a simple design
Lighting: photo relay application
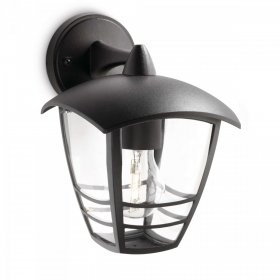
The lighting control device is used in private homes, placed on the lanterns along the paths or near the front door. In the park, a large suburban area and other spacious areas also use photocells. The device is practical for lighting parking lots, courtyards, advertising structures and the visibility range of outdoor surveillance cameras. In all cases, an automated system is created that turns on the light when dark. This saves energy and provides the comfort of the desired zones.

Motion sensor can complement photo relay
Photo relay specifications
When choosing a device for lighting control, its characteristics are taken into account. Manufacturers produce an extensive range of devices that differ in appearance, characteristics, rated supply voltage and other parameters. Therefore, when choosing, it is worth paying attention to the following features of the photo relay:
- weight and dimensions of the device;
- temperature restrictions during operation;
- response sector;
- power and energy consumption;
- network frequency for operation;
- rated voltage for power supply.
Devices are also divided by the type of switched lights. Simple models are often designed to work with conventional incandescent lamps or halogen devices. For other lamp options, a photo relay should be selected whose power and characteristics correspond to the parameters of the light source.
Types of devices
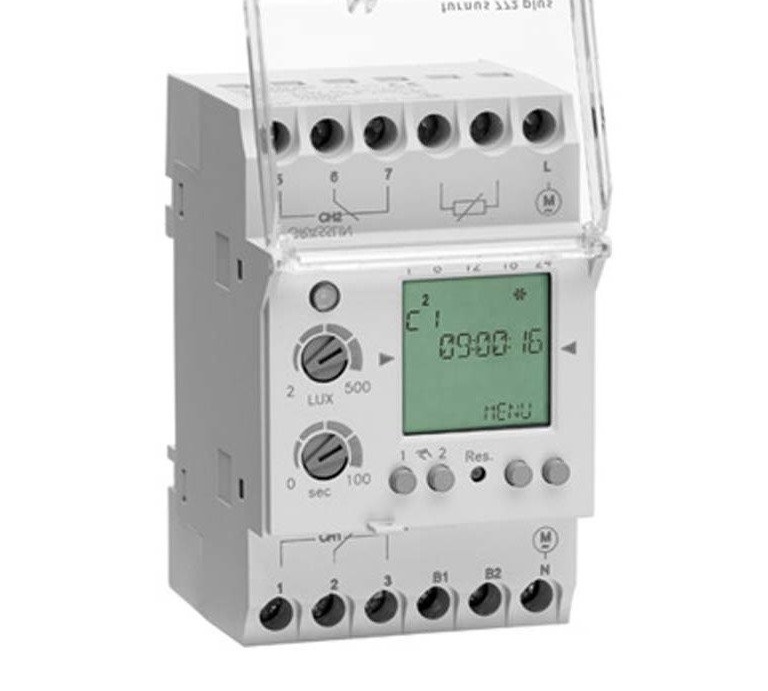
Photorelays are widely used in various fields and, depending on this, the devices are divided into several types. For private use, a photorelay having a built-in photocell is convenient. They represent a single unit, which is fixed on the street. As well as reliable and more functional models, in which there is a built-in photocell and timer. In this case, it is possible to control the lighting for a given time mode.
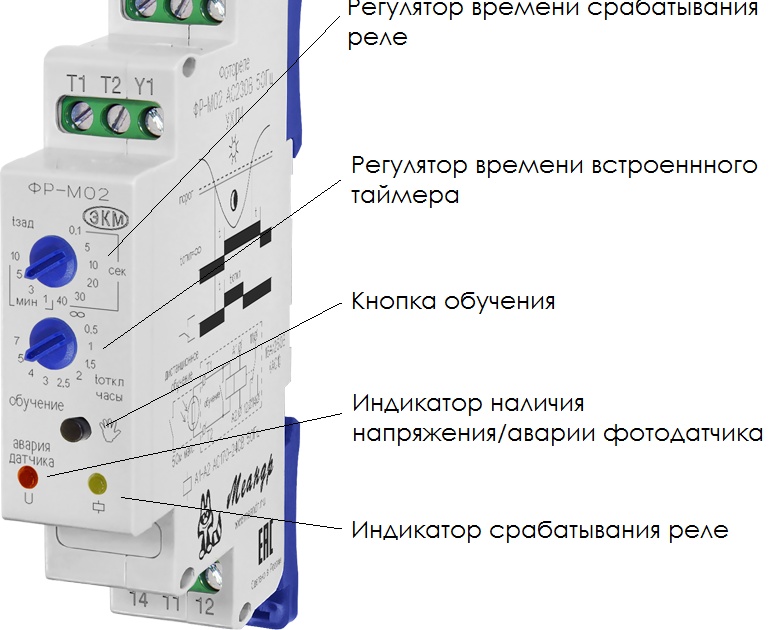
The remote control is easy to use.
Practical devices may be able to control the threshold. Remote control models for easy lighting control. These species are basic, but there are options designed to work in harsh and difficult conditions, for example, in the north.
Instruments that include a motion / presence sensor can save energy. The photorelay turns on the light when an object is approaching, and with a long absence of movement, the lighting turns off.
Manufacturers
High-quality light sensors are produced by manufacturers in many countries of the world. When choosing, it is worth considering that the devices differ in rated supply voltage. Optimal devices that are connected to a network in 220 in.
The main brands are:
- "Frontier";
- EKF;
- TDM
- IEK;
- Horoz;
- Theben
The cost of devices is determined by the type of sensitive element that is included in the design. This part is the most valuable and ensures high-quality operation of the device. The cost of products is also affected by the dimensions, characteristics and brand of the manufacturer.
IEK photorelay FR-601, 602, 606, 603: comparison and features
IEK manufacturer produces an extensive range of light sensors that differ in appearance, characteristics and other parameters. It is easy to compare popular models using the data in the table.
| Type of photo relay | Features |
| FR-601 | For operation in single-phase electrical networks of alternating current voltage of 230 V with a frequency of 50 Hz and according to the characteristics corresponds to GOST R 51324.2.1. Protection against dust and moisture, maximum load and power lamps 2200 W, temperature operating conditions from –25 to +40 ° С, degree of protection IP 44, |
| FR-602 | For operation in single-phase electric networks of alternating current voltage of 230 V with a frequency of 50 Hz, Complies with GOST R 51324.2.1. Max. lamp load and power 4400 W, operating temperature range from –25 to +40 ° С. degree of protection IP 44. |
| FR-603 | To automatically turn on / off the light sources. There is a built-in photocell, and the switching part is presented in the form of an electromechanical relay. IP44 protection, input voltage 220 - 240 V. |
| FR-606 | For automatic control of street lighting depending on natural light. Plastic case, electromechanical relay, operating temperature range from - 40 to + 50, voltage 220 ~ 240 V. Sensors can be used and timers. |
Photo relay models differ in shape and appearance. These four options are optimal for controlling street lighting and feature a simple wiring diagram. Devices are installed outside, but there are models for mounting inside. At the same time, there is only a sensor on the street.
How to connect the device to a street lamp: schemes and principles
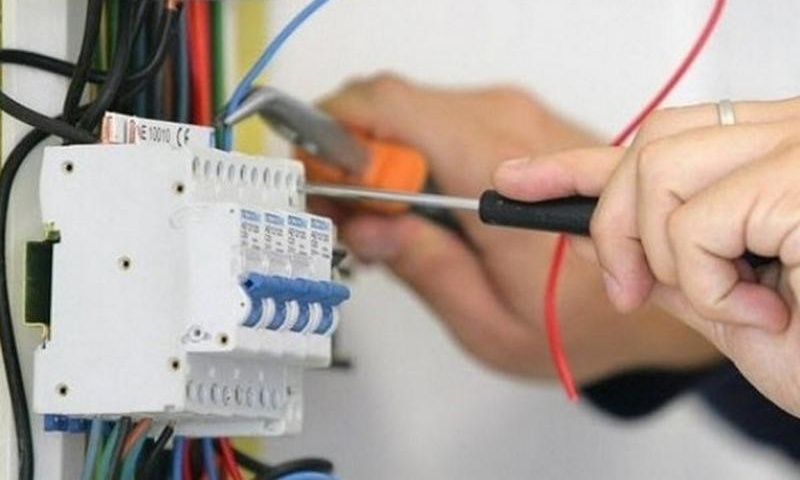
When connecting a simple device, you need to familiarize yourself with its design. The main element is a photodiode, which can be located outside or inside the case. In the first case, the sensor is mounted on the street, and the electronic unit is connected to the electrical panel in the room. With an internal arrangement of the sensitive part, the device is mounted on the street.
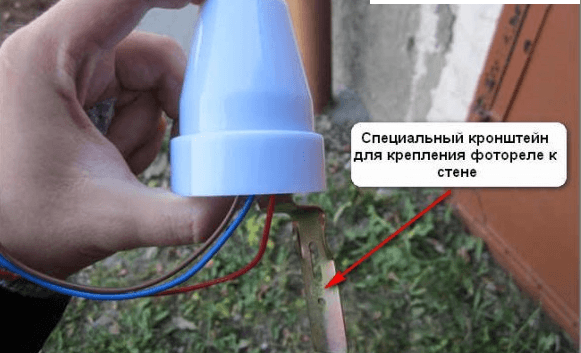
The device is small and easy to mount.
Knowledge of the design features of the device allows you to connect it to the flashlight as efficiently as possible.Therefore, it is important to determine the type of photo relay, purchase a high-quality device, select a circuit, and then proceed with connecting the sensor.
Photo relay on the circuit
The correct connection diagram greatly facilitates the self-installation of the device. On the electrical circuit, the photodiode is presented in the form of a graphical symbol, which is a triangle on the axis of symmetry with arrows pointing up and down. On simple diagrams, the device can be indicated in the form of a circle or a rectangle with the inscription "FR".
The arrows in the diagram symbolize the reflection of light.
Connection
The bracket with the device is mounted in a shaded place. Foliage of trees, sheds, rainfall should not affect the operation of the device. After determining the location, you need to find out the number of fixtures for which control is necessary. One photo relay is mounted on one light source. If a large number of lights are used, it is best to use a controller. It receives a signal from the photosensor and allows you to control multiple fixtures at the same time.
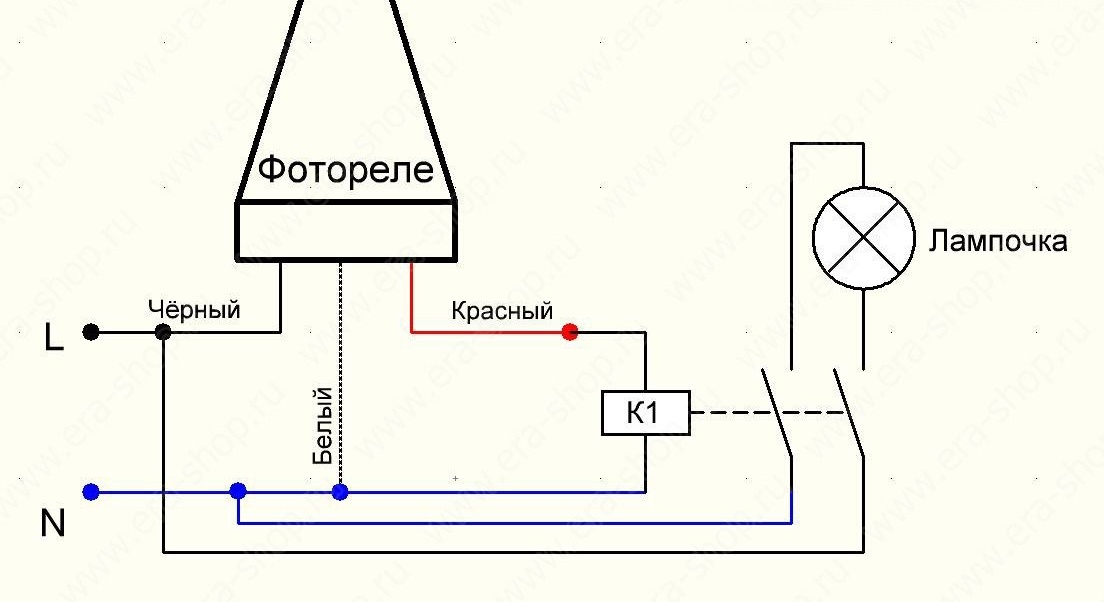
Single lamp connection is very simple.
The design of the device may include terminals, which simplifies the connection. They are necessary for clamping wires. A cable of each color is connected to the corresponding wire of the lamp and the power circuit. If there are no terminals, install a junction box. The device case must be protected from moisture and precipitation. Well-known manufacturers indicate on the packaging or in the instructions the connection diagram of the element.
DIY photocell assembly and connection
Create a simple device for controlling lighting just do it yourself. Depending on the required level of functionality and skills, you can use both simple and complex schemes. In any case, you need to use quality parts and provide for the protection of the element from climatic influences.
Components
For assembly, you need to prepare all the necessary details. A simple version of the photo relay includes components such as:
- photoresistor;
- Q6004LT device;
- conventional type resistor.
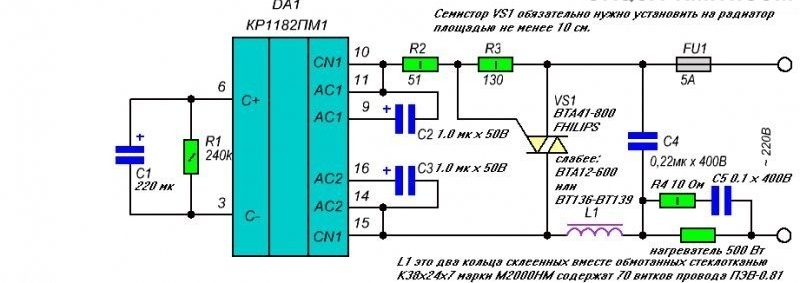
The connection and connection diagram of the device is simple and includes a minimum of parts. The device at the same time receives power from the 220 V network, and the principle of operation is to gradually increase the voltage amplitude to 40 V. When this mark is reached, the photo relay is activated and the light comes on.
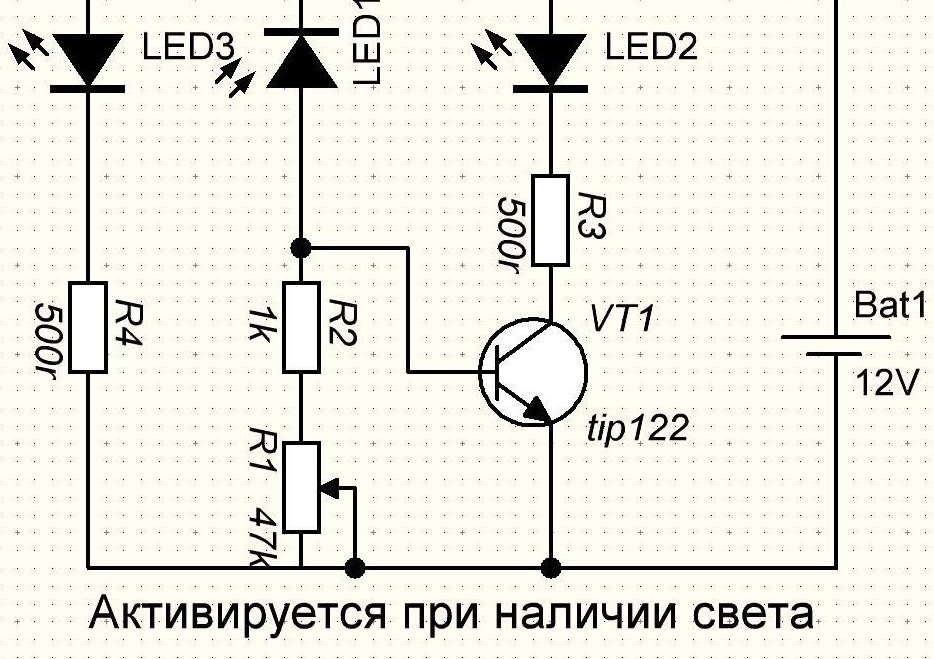
Scheme
Assembling a simple light sensor involves determining the power level and characteristics of the device. Preliminary make a diagram of connections and connections to the lamp. To use one photo relay for several lights, you need to use a controller.
A simple circuit requires minimal knowledge of electricity
Assembly and installation
There is no power supply in this circuit, which makes the assembly process simple. The power level can be increased through the use of a device with higher characteristics. All components are connected using a cable, and a resistor with a resistance of 40 kOhm is used for tuning.
The use of the powerful Q6004LT device makes it possible to connect a load with a power of up to 500 W to the assembled device. And the use of an additional radiator in the circuit will increase power to 750 watts. In the future, you can apply a quadrack, which will have operating currents of 6, 8, 10 or 15 A.
Lighting operation
During the operation of the lighting system in which the photo relay is present, it is important to ensure the reliability of the device housing. Otherwise, precipitation will render the device unusable, and lighting control will be impossible. Therefore, it is important to choose high-quality photo relay with a reliable housing that protects electrical elements from climatic influences.

Photo relay allows you to create a beautiful backlight
When installing, be sure to follow the rules for working with electrical appliances. This avoids injury.As a result, it is easy to create a reliable and cost-effective street lighting system.
To adjust the light sensor, use a special controller located at the bottom of the device. The average position is optimal, but you can increase efficiency. Customization depends on personal preference. For example, with a maximum photocell, it will work at the beginning of sunset and the light will turn on.
Photo relay malfunctions and their elimination
A correctly selected sensor will provide comfortable lighting control, but sometimes malfunctions also arise. One of the most common is the situation when the light on the street turns on in the daytime. A possible reason lies in the fact that some objects interfere with sunlight, either creating a shadow or providing a stream of light.
Photo relay mounted above the lamp
For correct operation, a sensor should be installed above the lighting device. Light from the flashlight must not fall on the device. The ingress of water inside the sensor can cause a variety of problems, for example, breakage, blinking of the element. In this case, you need to replace the device with a new one, but be sure to take into account the reliability and tightness of the case, choose the location.
Advantages and disadvantages
The photo relay is practical for various objects requiring lighting control. The device allows you to save energy by turning off the lamps at the right time. This is the main advantage of the item. And also it is worth considering and easy installation, the ability to connect several lights to one sensor and simple operation. The presence of a timer and a motion sensor makes the device more functional. During use, the sensor does not require constant attention. To get all the benefits, it is important to correctly install the photo relay and choose a high-quality element.
The device with a timer is very convenient
A photorelay is an element of an electrical lighting circuit on a street. Therefore, proper installation is required when connecting. Otherwise, there will be malfunctions, breakdowns and malfunctions that will lead to additional costs. And it is also important to choose a photo sensor that meets the characteristics of the lamps and the required level of functionality.
Video recommendations allow you to more effectively master the features of the choice and operation of the photo relay. The following video shows a simple appliance that is effective for private use.
Video: the principle of choice and the operation of the photo relay
Lighting control using a photo relay is an effective way to reduce energy consumption for street lighting or other objects. The sensor, the parameters of which correspond to the needs, is easy to install and has a number of advantages. A knowledge of the principle of operation of the device will make the right choice.