Construction of a wooden shower cabin for a summer residence: step-by-step instructions from personal experience
A full summer vacation in the country is impossible without daily intake of water procedures. To solve this problem, you can purchase ready-made wooden showers for summer cottages by choosing a model that is suitable for the design, materials used, and most importantly, for the cost. Prices for ready-made shower cubicles are quite high. Costs can be reduced significantly if you take up the construction of this small facility. The simplest design is a rectangular frame, the walls of which are sheathed with lining or other building materials. A tank is installed on the roof, in the lower part of which a watering can is built in with a valve that allows you to adjust the flow of water. The floor is made of boards, installing a pallet, from which they equip the drainage into the drainage ditch.
This video shows the construction of a summer cottage wooden showers with their own hands. When using a modern power tool, work will take only a few days.
Choosing a place to place the building
The choice of place for installing a summer shower cabin must be approached thoroughly, as this affects the degree of convenience of using the structure for its intended purpose. For the construction, an open, unshaded place is chosen, because the water in the tank is heated using sunlight. It is better to drain contaminated water along a straight trench laid with a slight slope. To meet this requirement, it is better to place the structure on an elevated site, if possible.
Important! In the chosen place there should be no drafts, otherwise after taking an evening shower you can easily "catch" a cold illness.
If a large number of people (more than three) plan to use the summer shower, then you will have to think about building a drain pit of sufficient volume to collect waste water. Therefore, when choosing a site for the installation of a summer shower, it is necessary to determine the area on which a drain pit will be built. In this case, the summer shower should be located away from the house and the gazebo, otherwise mosquitoes and other insects, actively breeding in places with stagnant water, will overshadow the evening outdoor recreation.
Important! Landing along the perimeter of the drain pit of hygrophilous plants and shrubs (abutilon, aglaonem, liviston, afelander, coleus, asplenium, etc.) will relieve soil from waterlogging, which will prevent the appearance of unpleasant putrefactive odors on the summer cottage.
We determine the size of the structure
After choosing a place, they are determined with the dimensions of the future structure. In addition to the room for direct reception of water procedures, a locker room can be provided in the booth, in which towels and bathrobes are hung on hooks. The larger the cabin, the more building materials will be required.Therefore, with a lack of financial resources, you can save on comfort by choosing the minimum possible parameters for the length and width of the structure frame. The height of the structure should not be reduced, otherwise it will be inconvenient for tall people to take a shower. Typically, the height of the frame is 2-2.5 meters.

The diagram shows the optimal dimensions of a wooden shower. For greater comfort, the sides of the square base of the cabin should be increased to a meter
Important! The construction of wooden shower cabins is best done according to a pre-drawn diagram. By the way, according to the same scheme, it is necessary to purchase all building materials, then there will be no problems with their shortage during construction works.
The construction process in stages
The stability of the structure, having a small area in the base, is given with the help of support poles dug half a meter into the ground. Supports can be made of timber (100x100), iron or asbestos-cement pipes. Wooden poles are impregnated with resin or antiseptic, which reduces the rate of decay of the material under the influence of moisture. The supports installed in the dug holes in a strictly vertical position, concreted. The vertical installation of the frame elements is checked using a plumb line or a building level. Further work begins two days later, which is sufficient for the initial hardening of the concrete mortar.
Watertight device arrangement
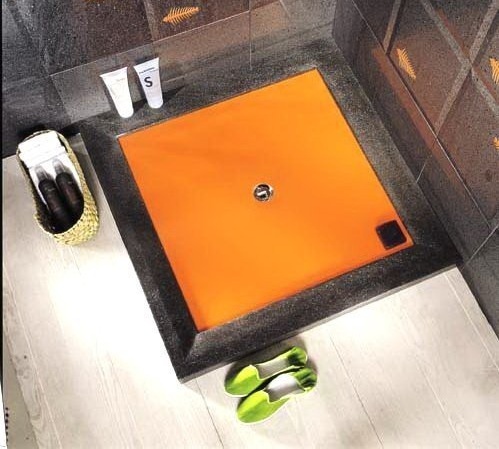
A small recess dug under the shower is covered with a sheet of roofing material, a thick PVC film or concreted. This is the best way to protect the soil from acidification under the constant influence of ingress of moisture. The pan should have a slope towards the drain pipe, which is laid at the same angle on the rammed bottom of the trench dug to the drain pit or septic tank. Thus, the sewage will "go" into the drain pit (septic tank), not staying anywhere in the "route".
Wall sewing and flooring
Above and below, the support posts are connected by a strapping made of a 10 mm beam. The frame must be reliable, since a water tank will be installed on it, the volume of which is usually 200 liters. The lower harness is used for flooring. Small gaps are specially left between the floorboards, through which water will flow out onto the drain pan and further into the drain hole.

The finished plastic water tank has dimensions that correspond to the dimensions of a standard shower. The piers of the summer shower are not deaf, which ensures the "blown through" of the summer shower
The walls of the cabin of the summer shower are also sheathed with a board. All lumber is covered with a layer of drying oil, which protects the wooden elements from dampness and decay. To combat dampness, a ventilation window is provided in one of the cabin walls, which also provides natural light for the interior.
Important! For safety reasons, electric lighting devices are not installed in the summer shower. Installation of outdoor electric lighting will provide ease of use of the structure in the evening and at night.
Water supply system device
An iron barrel painted black or a plastic tank specially purchased for a summer shower is mounted on support pillars. A tap is inserted into the lower part of the container and the shower head is screwed on. Water is supplied to the watering can by gravity, while the pressure is regulated using a tap.

The scheme of embedding a shower head in an iron barrel installed on the supporting posts of a wooden cabin. The regulation of water pressure is carried out using a tap
It is better for a summer shower to use containers made of plastic, which are light weight and flat in shape, increasing the total surface of water heating by sunlight. Some tanks are already sold with an integrated water supply system, including its electric heating.
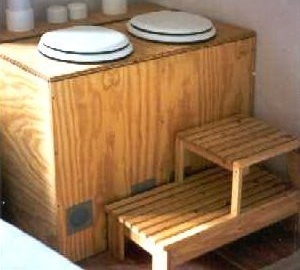
Important! Filling the tank with water can be arranged through a hose using a pump.When pouring water manually, the construction of a ladder will be required, which should be securely attached to the cab frame.
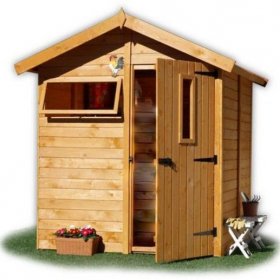
At the last stage, a wooden door is installed, which will also need to be proliferated and painted in the color of the walls. You see, there is nothing complicated in building a summer shower. To build country shower cabins with your own hands is within the power of every person who likes to live outside the city in the summer.

2 comments