DIY stove potbelly stove: detailed assembly guide
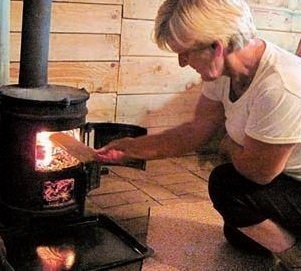
A stove with the name potbelly stove appeared in our country with the outbreak of the Civil War in the twentieth century. A potbelly stove was nicknamed her for a rounded shape resembling a stomach, and her ability to burn through a supply of firewood for 15–20 minutes. Having given all the heat to the walls, the potbelly stove quickly cools down. By the way, in the USA the same oven was called fat bell. The potbelly stove has gained popularity in our country for its ease of manufacture. Bake made from a gas cylinder, from a pipe cut, from a metal barrel, welded from sheets of steel or cast iron. From improvised materials it’s easy to assemble a makeshift with a water circuit, which will faithfully serve years and decades.
Content
What is a potbelly stove with a water circuit: advantages and disadvantages of a popular stove
The stove-potbelly stove is characterized by high heat dissipation and fuel burning rate. These qualities are given to her by the materials from which the furnace is made (cast iron, steel, iron). The potbelly stove quickly flares up and heats up, and if a water circuit is connected to it, then the warm flue gases along the way also manage to heat the water for domestic needs.
When choosing material from which it is better to make a potbelly stove, you need to be guided by the following indicators:
- Thermal conductivity is the property of metals, liquids and gases to conduct heat through itself. The faster heat is transferred, the faster the object heats up or cools. The foam has a low thermal conductivity of 0.036-0.050 W / m * C. Taking it in hand, we immediately feel that it is warm, because the foam does not transfer heat, but accumulates. If you take a metal bar, you can feel the cold due to high heat transfer.
- Heat capacity - the property of a material to accumulate heat. The highest heat capacity near water, in second place is air, at the end of the list are cast iron, steel and iron. Therefore, the metal stove heats up quickly and cools down just as rapidly. In urban homes, central heating batteries are filled with water, which gives off heat for a long time, heating the housing.
List of materials that are used to create a potbelly stove:
- Steel.
- Cast iron.
- Iron.
- Brass.
- Aluminum.
- Copper.
There are many articles on our website that describe instructions for making stoves. In the following material you will find installation instructions for a waste oil stove that uses oil:https://aquatech.tomathouse.com/en/otoplenie/bani-i-garazh/pechka-burzhujka-svoimi-rukami.html.
Table: thermal conductivity, heat capacity and melting point of popular materials for creating a potbelly stove
| Material | Thermal conductivity, W / m *oFROM | Heat capacity, J / kg *oFROM | The melting temperature, oFROM |
| copper | 382–390 | 400 | 1085 |
| aluminum | 232–236 | 920 | 660 |
| brass | 97–117 | 400 | 900 |
| iron | 74 | 460 | 1539 |
| cast iron | 62,8 | 500 | 1200 |
| steel | 47 | 540 | 1500 |
| water | 0,6 | 4200 | — |
| building brick | 0,2–0,7 | 880 | 1000–1100 |
| Styrofoam | 0,036–0,050 | — | 150–200 |
| air | 0,025 | 1100 | — |
Copper is the most thermally conductive material of all listed in the table. Its disadvantages are cost and melting point. The same limitations for aluminum and brass. At high temperatures, a cast iron or steel potbelly stove will only turn red, but will do its job, and copper, aluminum or brass will melt.
Potbelly stoves are most often made of steel, because it has a high melting point and the highest heat capacity among all available materials
The manufacture of a stove made of steel, iron and cast iron is justified due to the prevalence of these materials. From the point of view of thermal conductivity and heat capacity, they need refinement. The heat energy of the stove is more appropriate to use for heating water, otherwise it will simply go into the chimney. To limit heat loss, it is also very important to achieve complete combustion of the fuel.
An ideal option for a stove to work is when barely warm air comes out of the pipe, and all the energy is sent to the hot water supply and heating of the house.
Table: advantages and disadvantages of the stove-potbelly stove
| Advantages | disadvantages |
|
|
As can be seen from the table, the stove has a lot of shortcomings, so if you decide to install this design, you will have to take into account all its weaknesses.
For the garage, you can also make a simple stove in diesel fuel. Our material offers three designs. More details here:https://aquatech.tomathouse.com/en/otoplenie/bani-i-garazh/pechka-na-solyarke-svoimi-rukami.html.
Design of a stove-potbelly stove: features, principle of operation, arrangement of heat exchangers
A potbelly stove with a water circuit works as follows:
- Firewood is loaded into the furnace.
- They kindle fire, heat is transferred directly to the water tank or to the heat exchanger coil.
- Hot water enters the heating or water supply system.
- Residual heat and combustible gases through the chimney are removed from the room.
- Ashes through the grate fall into the ash pan.
The design of the unit with a water circuit uses two principles of energy collection:
- Direct collection of thermal energy. The heat exchanger circuit is located inside the stove. From the contact of an open flame and the boiler tubes, heat transfer immediately begins. Water in the radiator boils and enters the heating system. From there, it is sent to water pipes. The heat exchanger experiences large temperature differences (the contrast between the temperature of the water and the heat inside the furnace).
Direct heat recovery heat exchanger located directly in the core
- Collecting secondary radiation from the heater. The boiler circuit is located outside the heater.From the outside, it collects secondary thermal radiation from a heated metal surface. The degree of heating of the heat exchanger is lower than in the previous case, the temperature differences are not so significant. Water in the circuit of the device begins to heat up after heating the stove.
The water circuit of the heat exchanger is heated by secondary radiation of thermal energy from the furnace body

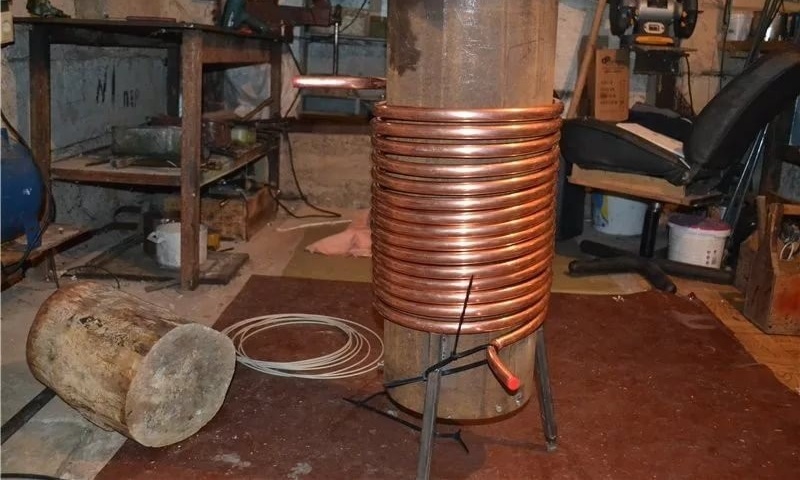
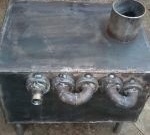
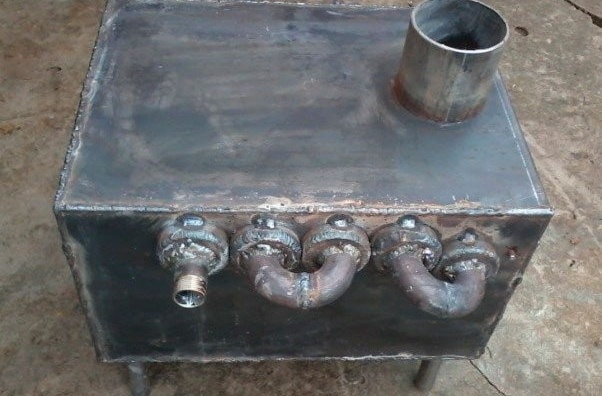
Photo gallery: common types of heat exchangers
-
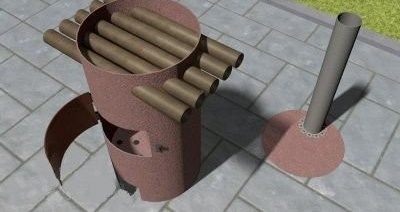
- If you need to heat a small amount of water, the heat exchanger can be installed directly on the chimney
-
- The direct collection heat exchanger is exposed to large temperature differences, so it must be made of thick-walled pipes
-
- In this design, there is no intermediate heat exchanger; water is heated in a tank installed directly on the furnace
-
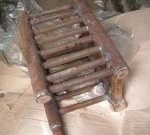
- A heat exchanger with a large area of contact with fire will heat the water as efficiently as possible, but it will burn out faster

-
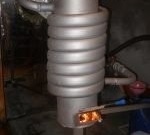
- The pipe wound on the stove body heats the water due to the energy of the hot walls

Mineral salts form inside the boiler. Therefore, instead of water, it is more advisable to use antifreeze or antifreeze, which contain additives that prevent the formation of mineral deposits.
The most common designs of heat exchangers:
- a water tank built into the stove - a capacitive boiler;
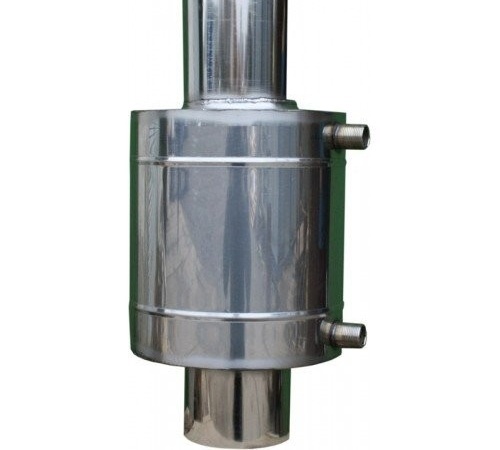
- tube boiler - a tank in the form of a water jacket around a stove or chimney - a capacitive heat exchanger;
- main boilers - a coil of a coil or conduit passing in the active zone of heat transfer.
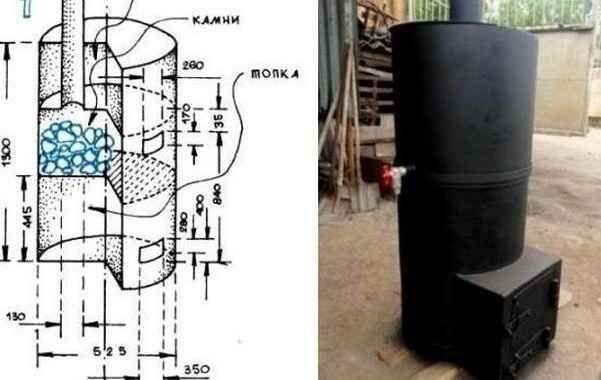
Calculation of the main parameters of a potbelly stove with a water circuit
To calculate the size of the stove with a water circuit, you need a drawing, drawing or sketch of the future device. This will help to avoid manufacturing errors.
Choosing a suitable project, we determine the parameters: length, height, width. We consider the dimensions of the furnace compartment, the length and diameter of the pipe, the height above the floor.
Potbelly stoves are characterized by high temperatures inside the boiler; therefore, metal with a thickness of more than 3 mm should be used. Or every 2-3 years to carry out scheduled repairs.
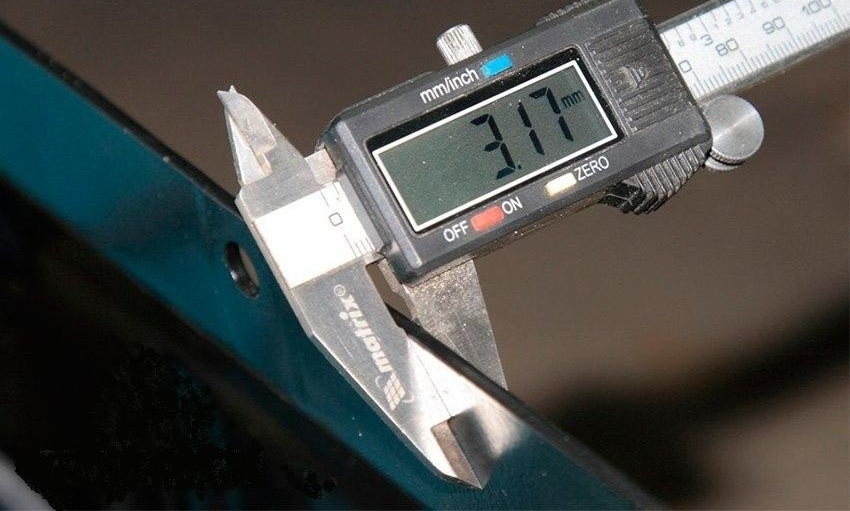
In the manufacture of potbelly stoves use thick-walled alloy metal
You may also be interested in an article about making a metal furnace for a garage:https://aquatech.tomathouse.com/en/otoplenie/pech-svoimi-rukami-iz-metalla.html.
Preparatory work before assembling the heater
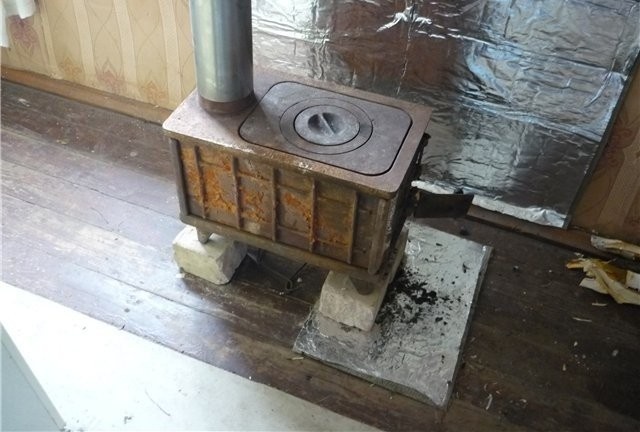
A potbelly stove is a source of increased fire hazard. Therefore, placing it in the corner of the room or near the wall, you must:
- Hang protective shields on the oven.
- Raise it from the floor, and protect the floor below it near the furnace and ash pan doors with tiles or asbestos plates.

The walls and floor at the installation site of the potbelly stove must be protected by fireproof materials, and the stove itself must be lifted to a heat-insulating base
- Mark a chimney hole in the wall. Mark its fastening on external walls.
- Mark the location of the expansion tank.
- Carry out lines with water.
- Choose a boiler model.
Heat removal by the water circuit from the core of the boiler lowers the combustion temperature, reduces the thermal radiation of the furnace. The heat exchanger affects the combustion process like a bucket of water on a fire. A cold zone of the recuperator appears inside the furnace, which does not allow the fuel to burn completely, causing the formation of soot in the chimney and smoke above the chimney. A potbelly stove will constantly smoke.
Necessary materials and tools
For the manufacture of temporary stoves, the following tools and materials will be needed:
- Bulgarian.
- Electric or gas welding.
- Electric drill and drill.
- Hand tools: pliers, hammer, file, sanding paper, ruler, tap.
- Plumbing: American fittings, nuts for fittings, articulated taps, adapters.
- Sealant or silicone for fittings.
- Alloy steel sheet.
As the basis for the manufacture of the furnace can be used:
- Metal barrels with a volume of 20 to 200 liters.
- Car rims from 2 pcs.
- Propane or carbon dioxide cylinders.
- Thick-walled metal pipes with a diameter of 150 to 350 mm.
- Metal flasks for water on 20, 30 or 40 l.
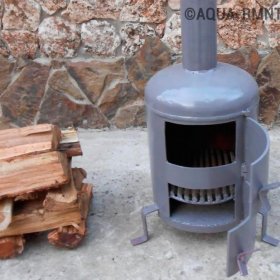
One of the most popular solutions for making do-it-yourself stoves is remaking an old gas cylinder
If these materials are at hand, then 2/3 of the design of the future stove is ready. It remains only to assemble everything into a single device.
The manufacture of the heater and the device of the main boiler in the chimney of a potbelly stove
We select the available material for the manufacture of the device. We take into account that twice as much material is needed for an aluminum heat exchanger than for copper due to the properties of thermal conductivity.
To install a furnace with a heat exchanger 500 mm high you will need:
- A copper or aluminum tube with a diameter of 16 mm and a length of 50 m.
- Gas cylinder or compressed gas cylinder.
- Chimney pipe with a diameter of 150–210 mm.
Step-by-step instructions for making a makeshift with a boiler:
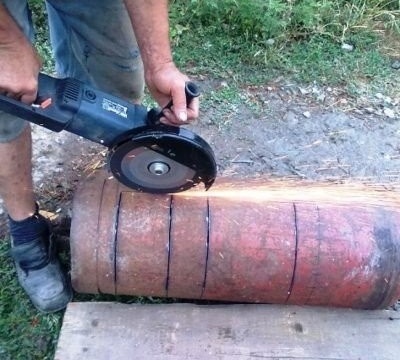
- We cut off the gas cylinder. Weld the legs.
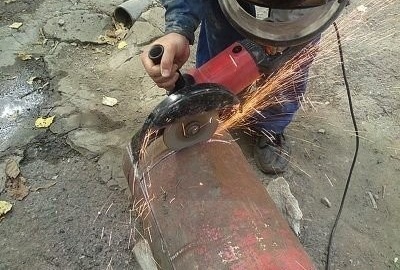
First, cut off the top of the gas cylinder
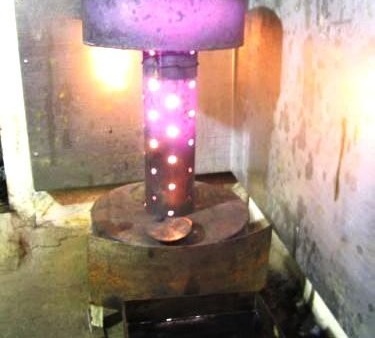
- Cut a hole for the chimney with a diameter of 150–210 mm.
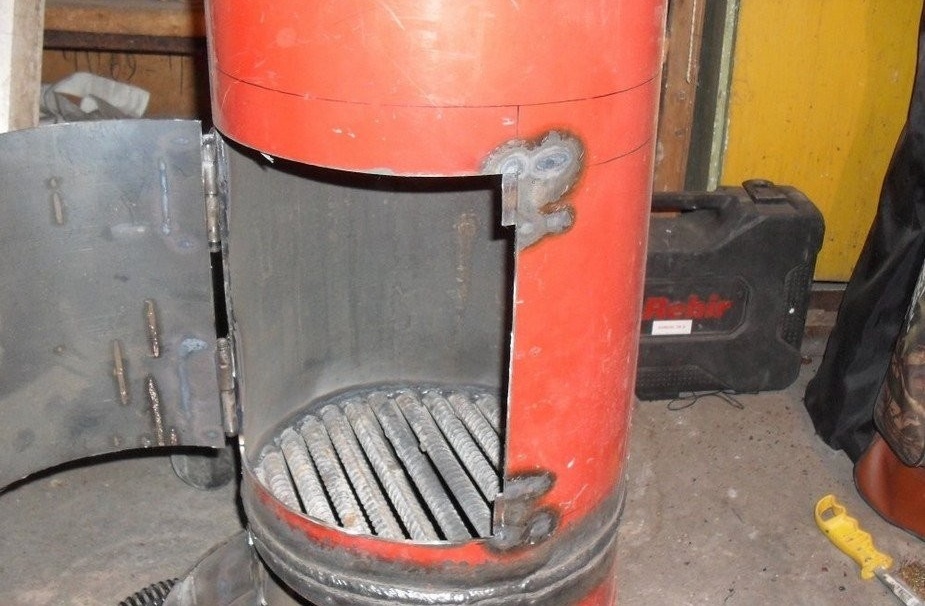
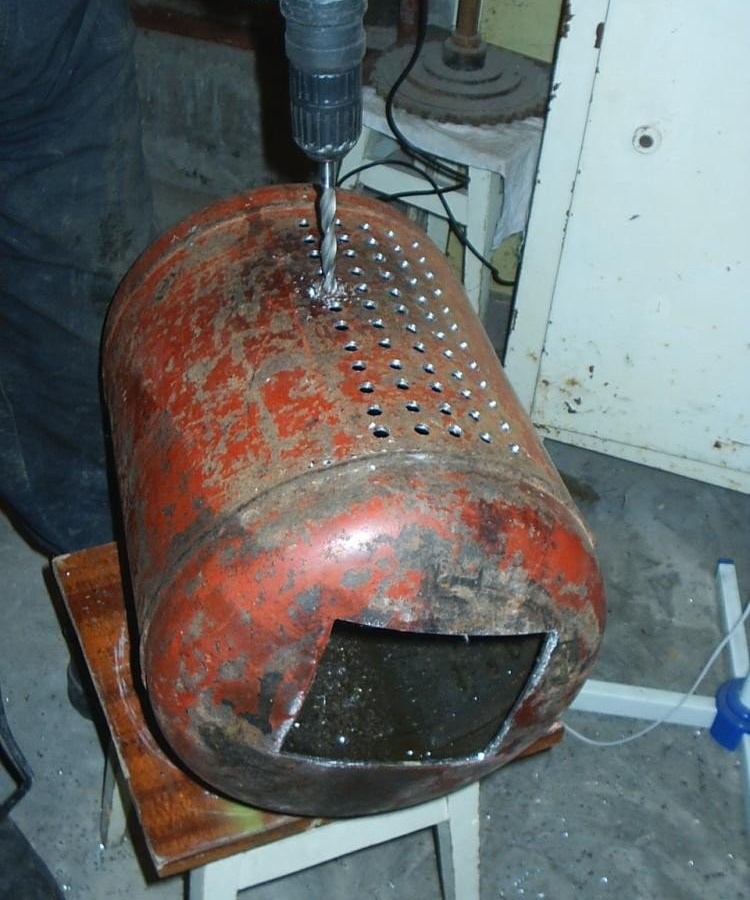
- We make holes for the grate with a diameter of 30 mm (24–25 pcs.) In the lower part of the cylinder. The air flow through the furnace compartment must correspond to the diameter of the chimney.

Openings are made in the lower part of the container to remove ash and traction
- We bend the metal sheet and weld to the bottom or to the legs. So we form an ash pan. If the room allows, you can make a box for collecting ash and put it under a potbelly stove.
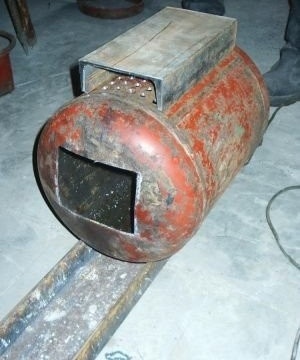
To the surface where the holes are drilled, we weld a metal box for the ash pan
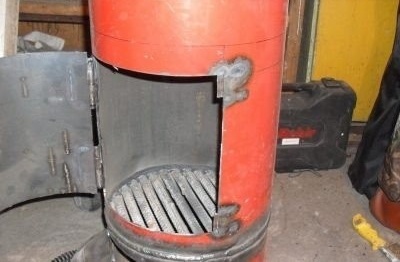
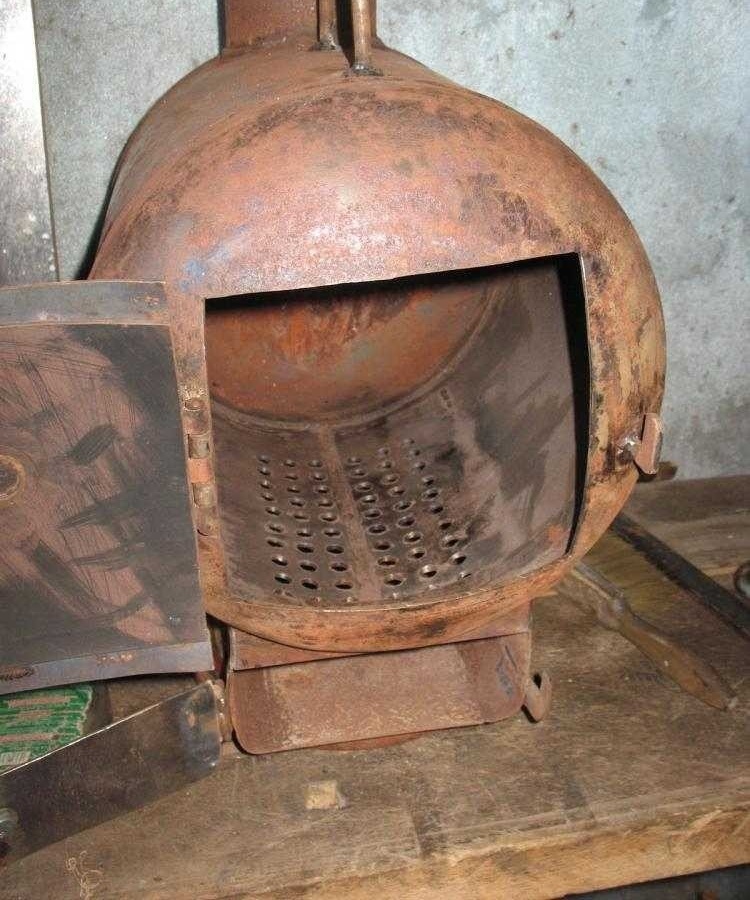
- We make the door of the stove. Solder the handle to the lid. We fix the canopy. Attach the cover to the firebox. An additional duct is not necessary, an air flow through the openings of the grate is sufficient.

There is enough air to burn the fuel that will flow through the grate openings
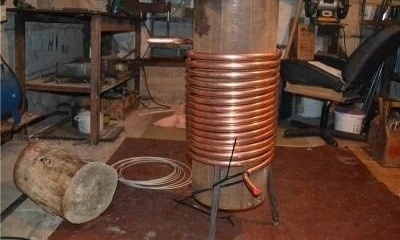
- We carefully wind the heat exchanger tube (copper or aluminum) onto the chimney pipe. So that he does not spring, he should be soldered through one turn to the chimney. For this we use welding.
- Having finished the assembly of the heat exchanger, we fasten the adapters with taps at the ends of the tubes using fittings. On the lower pipe we install a tee with a hinged valve for draining and filling water into the heat exchanger.
- We carry out hydraulic tests. It is necessary to draw water into the resulting system and conduct tests under pressure of 4-6 atmospheres. Overpressure allows you to test the strength of all nodes, connections and check for leaks.


Video: potbelly stove with a water circuit
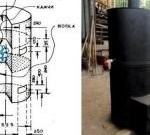
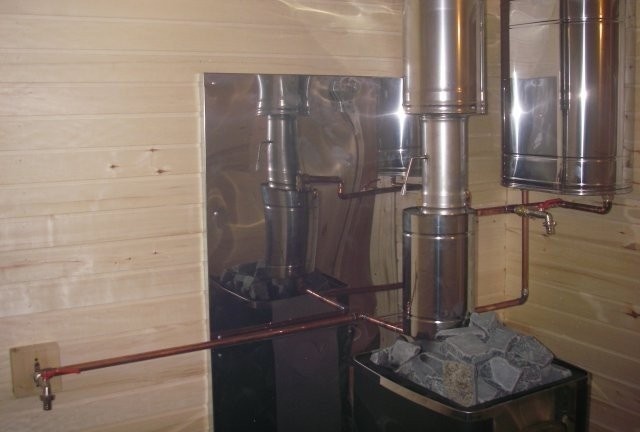
The device of a capacitive heat exchanger in the chimney of a potbelly stove
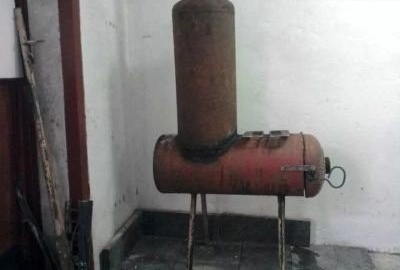
We assemble a capacitive recuperator using the scheme.
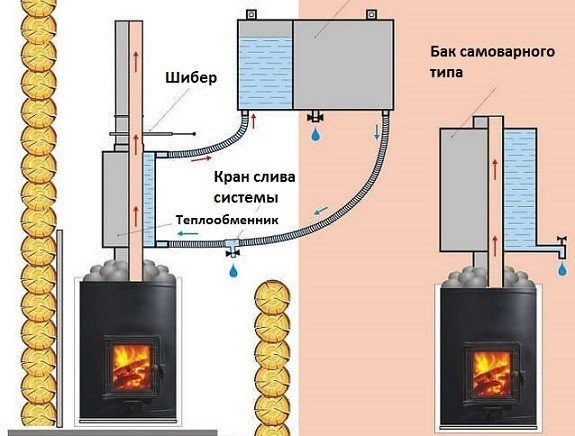
With the help of a stove, it is very convenient to fill the storage tank with hot water
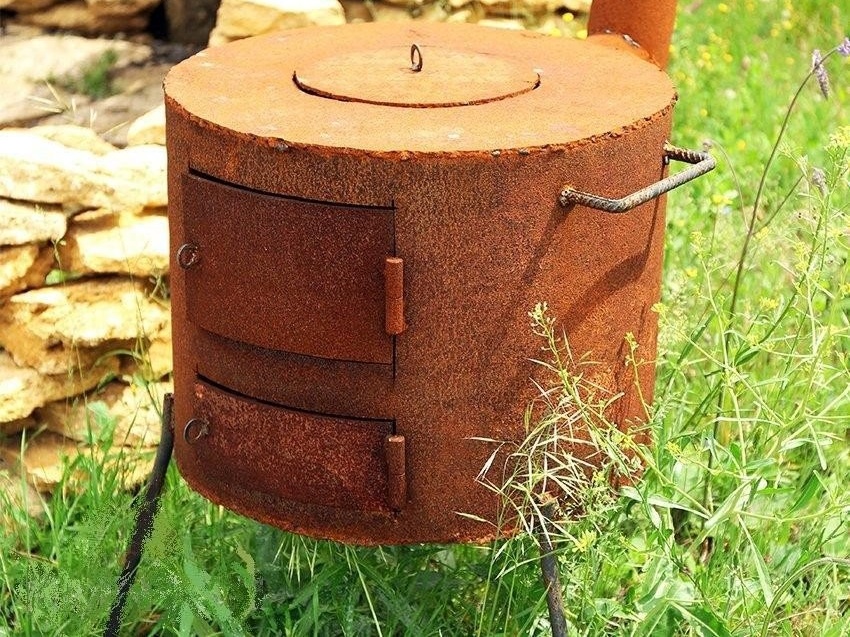
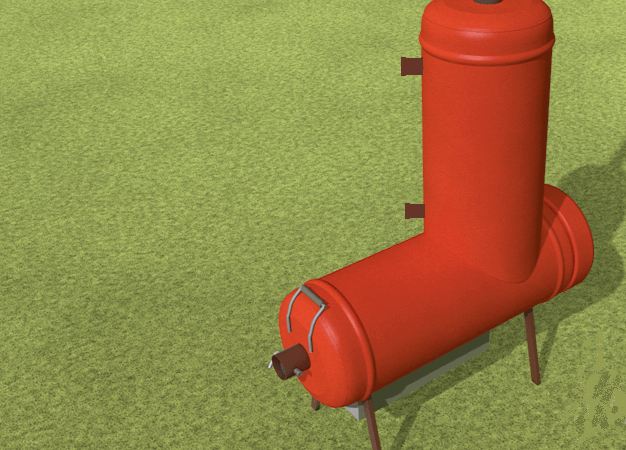
Step-by-step assembly of a stove with a water jacket:
- We take a pipe with a diameter of 250-300 mm or use a carbon dioxide cylinder.
- Taking a thick sheet of metal, we cut out two metal square plates with a grinder. The size of the plates is slightly larger than the diameter of the cylinder (350x350 mm).
The holes for the furnace and the blower are cut one below the other using a grinder
- We make holes for the chimney inside the plates (118 mm). In the cylinder with a grinder, we cut out the holes of the same diameter at the top and bottom. We make a pipe from the cylinder.
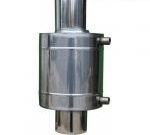
- Solder two nuts with a diameter of 35-50 mm to a carbon dioxide cylinder. The top is 3-5 centimeters from one end. The second at the same distance from the bottom edge.
- Thoroughly scald the outer sides of both nuts.

In the lower and upper part of the carbon dioxide cylinder, nuts are welded to which pipes with coolant will be supplied
- We weld metal plates to the pipe of the expansion tank.
- Inside the plates we burn through holes. We process the hole with a file.
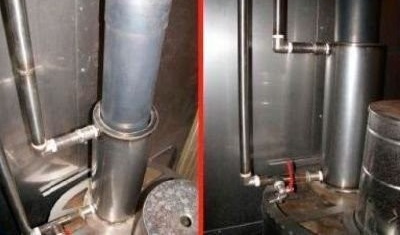
- We insert the chimney into the resulting structure.
- We weld it to the plates or to the edges of the container. We cut off the excess. We process the seams with a file.
At the final stage, a chimney is attached, and the welds are processed with a file
- Fill the system with water, check for leaks. We carry out hydraulic tests, as in the previous case. Recommended pressure is 2–4 atmospheres.
It is necessary to check all joints at a working pressure of 2–4 atmospheres.
- We connect the heat exchanger to the water system, fill the water, kindle the furnace.


The water heater in the bath can be supplied with hot water through the furnace heat exchanger
Features of the operation of the stove with a water jacket
- It is advisable to install a temperature and pressure sensor in the hydraulic system.
- It is necessary to regulate the draft in the grate and in the chimney.
- The water circuit in both types of heat exchangers must be equipped with an expansion tank.
- The water system of the main type needs a circulation pump mounted on the return, i.e. on the lower tube.
- A device with a capacitive tank needs a circulation pump if the diameter of the branches is less than 75 mm.
- It is necessary to provide a place for draining water.
- Do not heat the stove without water - the heat exchanger may burn out.
- After operation, drain the water.
The temperature change in the heat exchanger is due to the burning rate of the furnace. Heat passes into radiation, water heats up in a chimney, and after another half an hour in pipes. The system is inertial due to the high heat capacity of the water, so a large supply of fuel is needed.
Potbelly stove is a flammable design, it is necessary to start and place a fire extinguisher and a hook near.
Furnace cleaning and repair
With regular use, you need to clean the chimney. The appearance of a soot layer of 2-3 mm reduces traction and reduces heat transfer.
You can disassemble the chimney and clean it with a ruff, but this is time consuming and not always possible. If the potbelly stove is operated daily, then the chimney should be cleaned with fire:
- once a week to heat the stove with aspen wood. Aspen has a high combustion temperature, which burns soot in the chimney. Attach little by little, after the main ignition;
- after lighting a fire, add well-dried potato peelings with firewood. Approximately half a bucket is required per filling. It is enough to do this once or twice a week and the chimney will be clean of soot. This method will not work if the chimney is already overgrown with a soot layer of 1–2 cm, in this case only the soot will be softened, and it will be necessary to clean it from the pipe walls with a ruff or a metal scraper;

The burning of potato peelings together with firewood protects the chimney from the formation of soot deposits
- use special firewood or pellets that are added to the furnace while burning. The most famous remedy is “Chimney Sweep Log”. It is burned with firewood about once every six months. It is best to put it on the hot coals left after the furnace. A distinctive feature of this product is that it continues to operate for two weeks after application, gradually softening the soot on the pipe walls.

The log burns in the stove in about 1.5 hours and then acts for two weeks, softening and removing soot from the walls of the chimney


The main oven repair activities are:
- Pipe repair. The chimney pipe is the weakest point in the potbelly stove. If it burns out - it needs to be changed.
- Heat exchanger repair. The main heat exchanger can be removed by soldering it from the furnace body. But the capacitive circuit will have to be welded again in a few years.
- Elimination of defects in the furnace body. If a wall or back surface burns out, usually a metal patch is welded onto this area. Slots can be brewed with scraps of metal rods.
All operations are quite simple and understandable, so the maintenance of the stove-potbelly stove will not cause any big problems.
Video: a stove for a garage and cleaning a chimney
For the third hundred years, the furnace, invented by Benjamin Franklin, has been serving us. It is still easy to manufacture and unpretentious in operation. A potbelly stove with a water jacket is not only heating and cooking. This is hot water in a house, on a garden plot, in a garage, in a warehouse or at a construction site. New technologists have given this stove relevance in our days.