How to make a metal stove with your own hands
Metal stoves are very popular due to their low cost, and are widely used for heating cottages, bathhouses, utility rooms, garages.
But you can do it yourself, it’s not so difficult. Of course, they have, as advantages, in comparison with brick stoves, but also there are disadvantages.
Content
Design features
The simplest design of a metal furnace is the so-called potbelly stove. Its design is quite simple: a metal box with legs and a door, a pipe for the removal of combustion products. The main disadvantage of this furnace is its high fuel consumption and low heat transfer. And also a big minus is the danger of fire.
The Russian name for this type of stove is based on the association with the caricature of a bourgeois portrayed as a person with a thick belly.
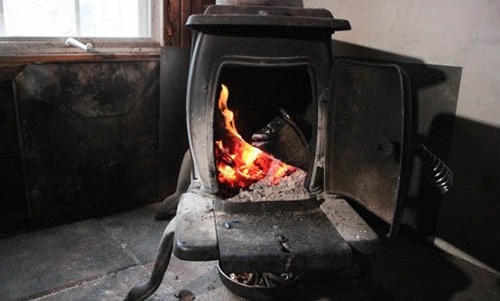
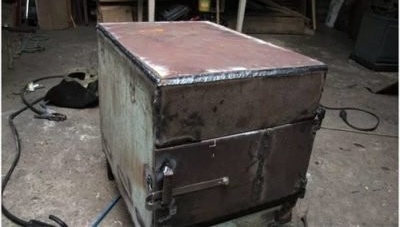
Simple stove "potbelly stove"
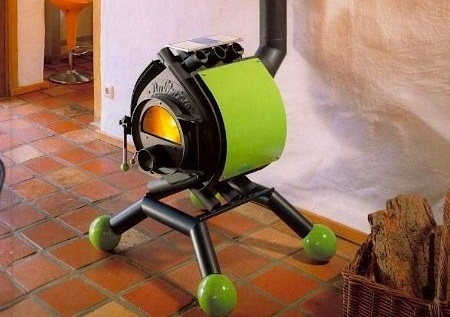
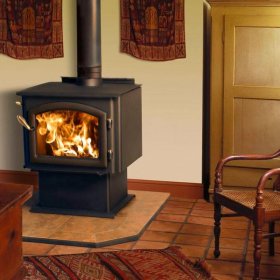
Modern metal furnaces are much safer than a "potbelly stove." Their production is carried out from sheet steel, up to 4-5 mm thick. The design provides a special chamber for laying stones. It is planned to equip a water tank as a heat storage unit with a volume of up to 70 liters. For uniform heating of the furnace, as well as to reduce its fire hazard, it is recommended to enclose the furnace with heat-resistant brick.
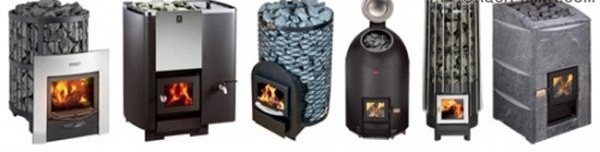
Some samples of modern stoves
Advantages
- The metal is quite durable, but also more pliable material, allowing you to give it any shape. It is able to withstand large temperature extremes and severe loads during operation of the product.
- It is worth noting the high efficiency of the metal stove, reaching 95%.
- The thermal conductivity of the metal is high; accordingly, the furnace heats up and the room heats up quite quickly.
- The strength of metal with a decrease in thickness only grows, unlike ceramics.
- The weight of the furnace is an order of magnitude, and sometimes more, lower than stone or brick, which, in turn, allows you to abandon the device bulky monolithic foundation.
- The low cost of heat produced (10–20 times lower in metal furnaces than in brick ovens) is another plus to the piggy bank of the advantages of this type of furnace.
- An important factor is the transportability of such a stove and ease of installation in place, you just need to bring the chimney.
- As unnecessary, it is easy to store it until the next heating season.
disadvantages
- Probably the most basic drawback is that the stove does not “breathe.” While the brick stove absorbs moisture during cooling, it maintains optimal humidity. A small “breath” of the furnace will appear after facing with brick, but mobility will disappear, and the dimensions will increase.
- Due to the low heat capacity of the metal, heat transfer after fuel combustion usually does not exceed 2-3 hours.
- A big drawback of a metal furnace is its lifespan. At operating temperatures, the metal actively reacts with the moisture contained in the air, and as a result corrodes rapidly. The service life of a metal furnace usually does not exceed twenty years. But this is fully compensated by an easy and inexpensive replacement of the furnace and cheap fuel.
Kinds
At the moment, the market offers two types of metal stoves for the house made of cast iron and steel. The cast-iron stove for heat transfer is located between the brick and steel. The option of making a cast-iron stove for making it yourself disappears immediately, since it is necessary to organize the casting process of cast iron, which is impossible in principle on a suburban area. For this you need special equipment. But the sheet metal furnace, to build on their own with their own hands, and in some cases almost without spending money.
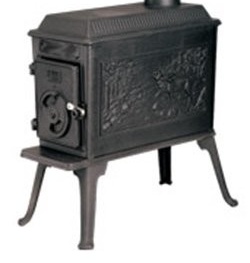
Iron Casting Furnace
A sample of a prefabricated steel furnace.
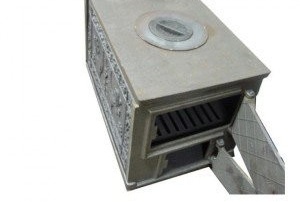
Sheet Metal Furnace
Principle of action and design
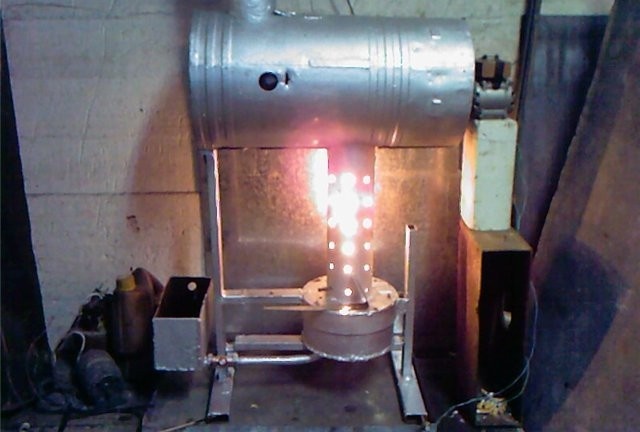
Consider the general scheme of operation of furnaces. The main applied schemes in the figures:
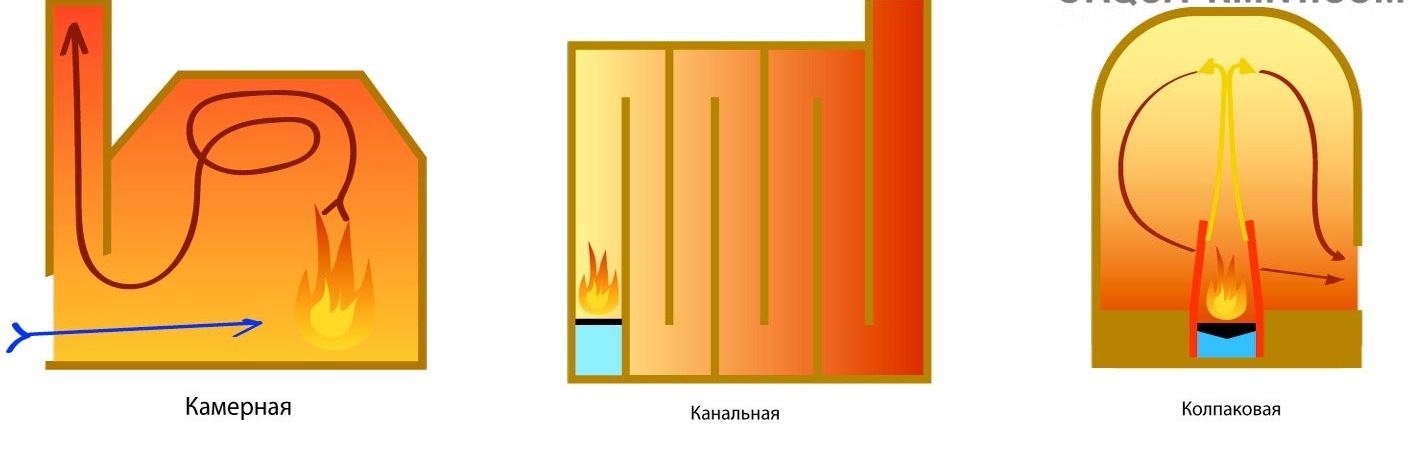
Schemes of the principle of operation of furnaces
Camera system
In the furnace of the chamber system, the combustion products are bypassed into the gas chamber and there they burn out. The flow of air is formed naturally. In chamber furnaces intended for domestic use, the furnace and the afterburner are located in one module - the furnace. For complete afterburning of gases, the chamber should be with vaulted walls. A good example of a chamber system is the Russian stove. With some improvement, chamber furnaces are quite effective.
Channel system
In the channel system organized the forced movement of gases from the source of fire, through the channels inside the stove, to the chimney. Combustion products, dying and passing through the channels cool, giving off heat to the stove. The efficiency of such a furnace is about 60%, and so that the gases begin to burn out, you must first bring the furnace to an operating temperature of 400 degrees.
Bell system
In this system, the gases are located under the dome of the hood and burn, descend along the walls of the furnace giving up the remaining heat. In this system, to start the combustion of gases, it is necessary to warm up a small area of the dome dome. Efficiency in furnaces of this type can reach 70% and higher.
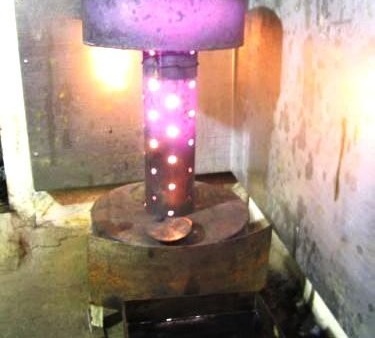
Schemes of metal furnaces and improvements
It is well known that metal heats up quickly, but also cools quickly, low heat capacity makes it an unimportant heat storage, but if you take into account some properties of the material, classical schemes can be applied to metal furnaces and get the most out of them, since heat losses due to heating minimized. Let's consider two schemes.
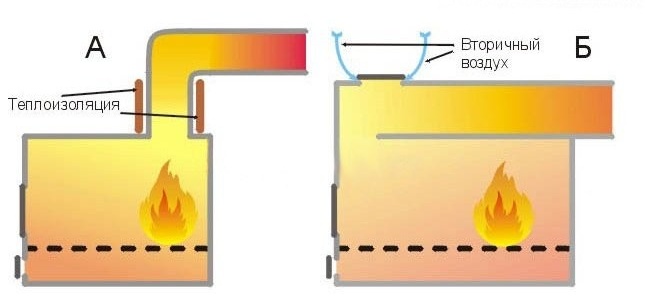
Schemes of metal furnaces
Chamber (A)
A typical representative is a “potbelly stove”. Its prototypes, indoor stoves, were used in the 19th century and were extremely voracious in terms of fuel. In times of devastation and turmoil after the revolution, the "potbelly stove" improved and was dubbed its current name.
The following improvements have been made:
- To adjust the heat transfer power, a grate was inserted into the crucible and blown with a door.
- The diameter of the chimney is 9-10 millimeters per 0.23 kilocalories of thermal energy.
- Small chimney height, up to 3 meters from the plane of the grate.
- The beginning of the chimney up to 1–1.5 m is made vertically and covered with a heat-insulating non-combustible material.
- Further, the chimney continued with a horizontal section - a hog - at least 2.5 m long, it was inserted into the window and another vertical segment of 1-1.5 meters was added to provide traction.
Channel (B)
The potbelly stove is easy to adapt to the channel scheme. Of course, only the appearance will be common with the brick stove. The channels will be of little use due to the large thermal conductivity of the metal, only the horizontal section remains from the original system, separating the afterburner and the furnace. Additional air for burning gas comes from openings on the hob or through a separate adjustable duct. The chimney outlet is horizontal.
Improvement results:
- Thanks to the afterburning of gases in a localized place, the efficiency has grown to 70–80%
- The released heat energy increased by 2-3 times.
- The stove is undemanding to traction and chimney characteristics, it behaves like a simple potbelly stove: increased draft, increased combustion and rarefaction of the medium in the gas afterburner. More secondary air comes in and the gases burn out completely.
- Since the main power is produced in the afterburner, the furnace can operate in two modes: flame and long burning.
- Good heat transfer from the furnace through a rather thin partition gives the necessary temperature in the afterburner for igniting unburned gases, therefore the furnace enters the operating mode almost instantly.
- A separate air supply to the furnace and afterburner allows you to configure the furnace for almost any solid fuel.
- The heat transfer capacity of the furnace is easily controlled by the air supply level on the blower. In a classic potbelly stove, air power control is very limited.
- Thanks to the afterburner, under the hob, the temperature is kept within 250-300 degrees, which is quite comfortable for cooking.
- High release of thermal energy from the stove allows you to evenly and quickly warm the room.
- At the entrance to the chimney, you can also put a heat exchange circuit for hot water supply.
- Using high-quality firewood or coal, you will have to clean the chimney once every 5 years.
Drawing and calculation of parameters
What dimensions the oven will have and how it will look everyone should decide for himself. People with engineering thinking and practical skills can make their own adjustments to the simplest design to improve and simplify the system.
Sketch and drawing of a potbelly stove:
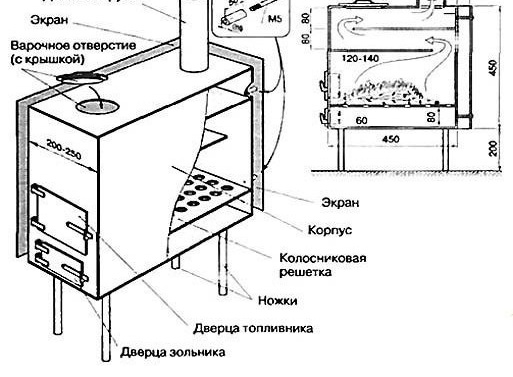
Potbelly stove drawing
Materials and tools
- Drawing and sketch of the future design with dimensions.
- Sheet metal, 4–5 mm thick.
- Steel corners.
- Steel tubes with a diameter of 15–20 mm or fittings with a diameter of 10–12 mm for a grate.
- Metal pipe with a diameter of 180 mm.
- Arc welding, electrodes 3.
- Angle grinder (grinder) with a cutting wheel, hammer, tape measure, pencil or marker.
How to make a metal stove with your own hands: step by step
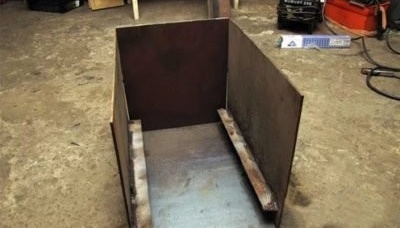
- The furnace body will be assembled from rectangular sheets of steel, butt welding them. We take a grinder and cut five rectangles according to the sizes given in the drawing. We will deal with the front part later, since there will be a door for the furnace and a blower.

Cut to size steel sheets
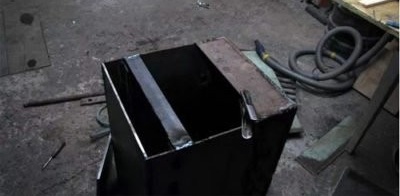
- First you need to weld the sides to the bottom. First we substitute one side panel to the bottom, controlling the right angle between the planes with the square and grab the joint at several points by welding. We make the second sidewall by analogy with the first. We check the right angles, the correspondence of the width of the bottom to the distance between the side walls at the top where the hob will be. After making sure that everything is correct, we weld the joints completely.
- We weld the back wall to the side panels and the bottom. We mark the side walls from the inside for chimney circulation of the furnace and the ash pan according to the drawing for three zones. Between the furnace and the ash pan there will be a grate, on which fuel is directly placed. For its fastening on the inner surface of the sidewalls at a height of 10-15 cm from the bottom, angles for the entire length of the panels are welded.The corners should be welded with the shelf down.
Welding the walls and corners to them
- We proceed to the manufacture of a grate. Of the materials required: cutting water pipes with a diameter of 15–20 mm and a length equal to or greater than (excess cut off) the internal width of the furnace. Instead of pipes, fittings with a diameter of 10-12 mm are perfect. An armature or two steel bars with a diameter of 15–20 mm or strips of thick (4–5 mm) steel along the length of the stove.
- We place the fittings (tubes) on the rods in increments of 3-5 cm and reliably weld.
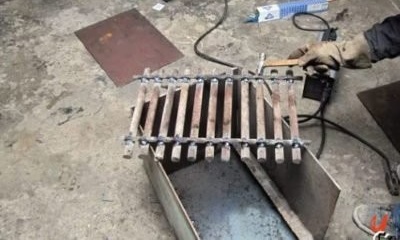
Production of grate
-
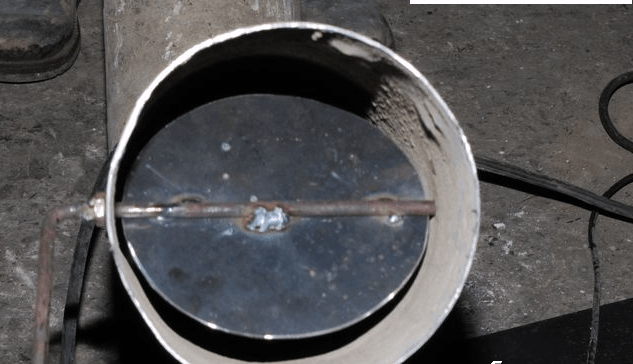
The grill must be removable, so it is not welded to the corners. The need to remove the grill arises when cleaning and repairing a potbelly stove or replacing the grill itself.
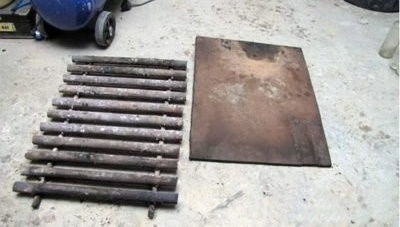
Removable elements - grill and reflector
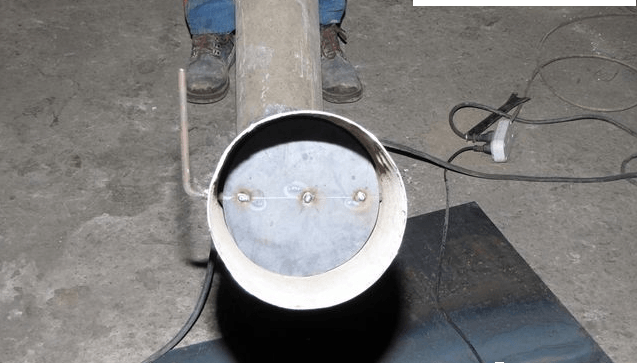
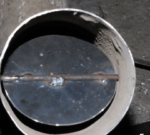
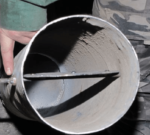
- Next, we weld two rods (pieces of reinforcement) at the top of the furnace to install a reflector. It will share a firebox with an afterburner and a chimney and is removable. More details in the figure:

Location of the main elements in the furnace
- The length of the reflector should be 10/11 of the length of the potbelly stove, in order to get a gap for the exit of smoke. It is advisable to make it thicker from metal, since it will be warmed up much stronger than other structural elements.
- Getting to the finishing work. In the lid, we weld a hole of the required size and section for the chimney, it can also be done already on the assembled structure. We weld the lid to the body of the stove. Then you need to cut two jumpers. One narrow and the other wide (the exact dimensions depend on the specific dimensions of the furnace). The narrow one is welded at the level of the grate to separate the firebox and ash pan doors, and the wide one is at the top to the sidewalls and the lid.
Cooking the dividing jumpers
- A fire door is best done almost the entire width of the stove, both for the convenience of laying firewood and for easily removing the mirror and grill. For an ashpit, you can do it narrower. We make curtains from tubes and rods.
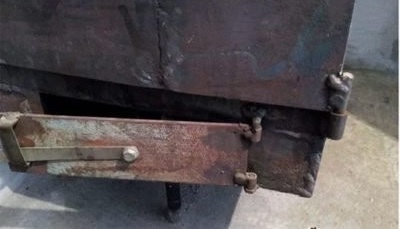
Doors on the finished stove
- Door handles can be made both from metal plates and from pipe scraps. Alternatively, you can use the same universal reinforcement. We fix the finished handles by welding. I think with the manufacture of latches on the door, difficulties should not arise.
The oven is almost ready
- Having completed the assembly, it is worth thinking about the supports of the stove. Legs can be made from pipe segments of the desired height. The supports can also be made height-adjustable, for these purposes, a nut is welded to the end of the tube (the inner diameter of the nut and tube must match each other) and a bolt is screwed in.
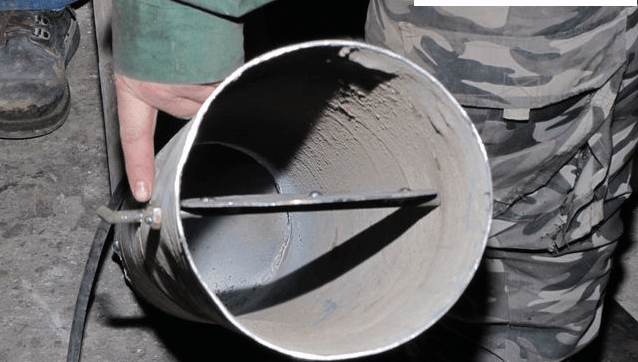
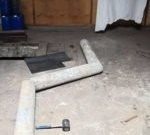
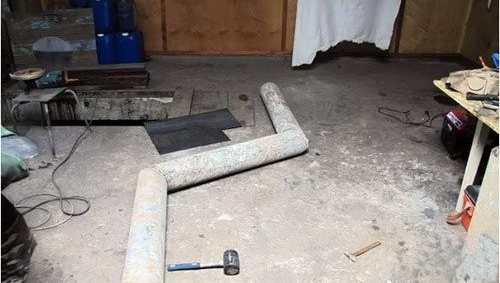
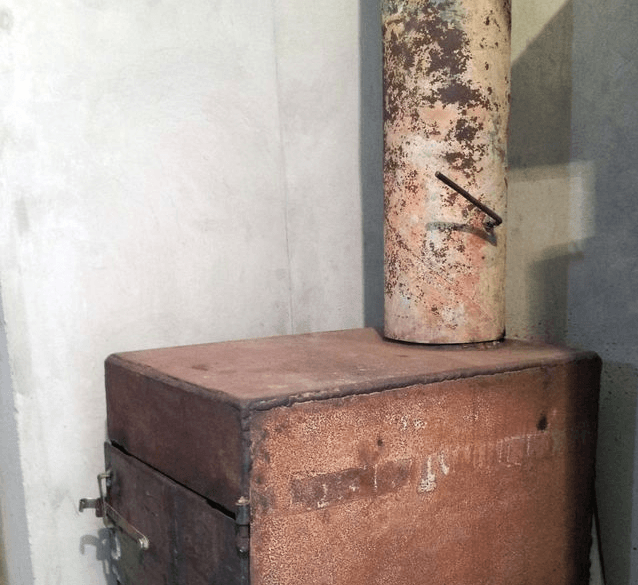
- Getting to the manufacture of the chimney. A pipe with a diameter of 15–20 cm is suitable for its manufacture. We bring the end of the pipe outside the premises through an opening in the wall or roof. The angles in the pipe should be 45 degrees, that is, there should be a complete absence of horizontal segments all the way. At the bottom of the chimney we make a rotary damper. It can be made from a piece of sheet steel, the diameter of the cut-out damper should be slightly smaller than the diameter of the pipe. In the pipe we drill a hole for the damper adjustment knob, a steel bar is suitable for this purpose. We weld a sleeve from a pipe section of 15–20 cm to the hole in the lid, it should be slightly smaller in diameter than the diameter of the chimney, in order to facilitate the installation or dismantling of the chimney as much as possible. It remains only to install a potbelly stove and experience.
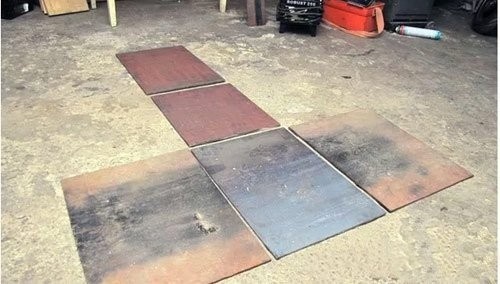

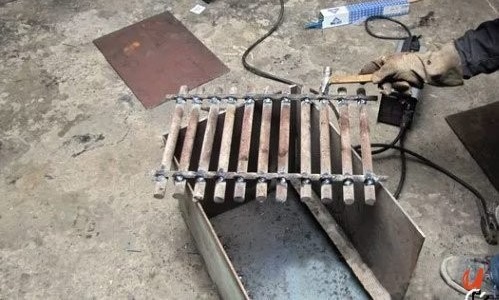
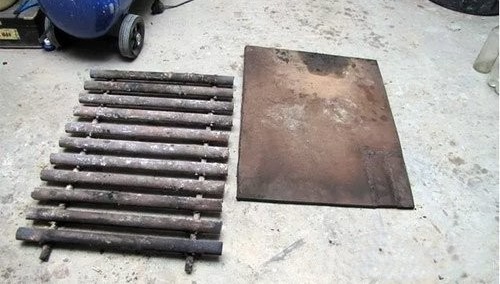
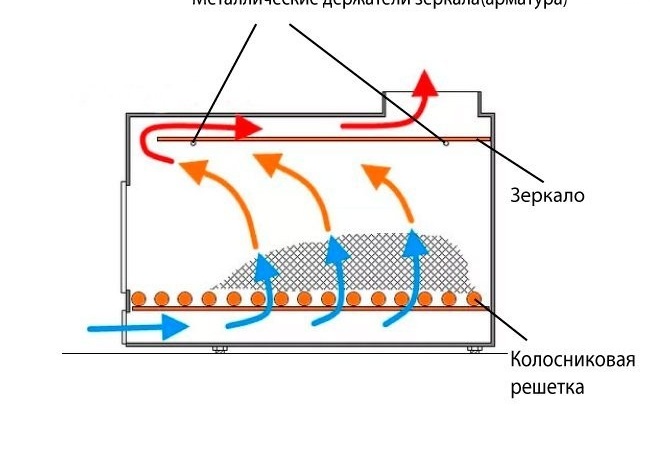
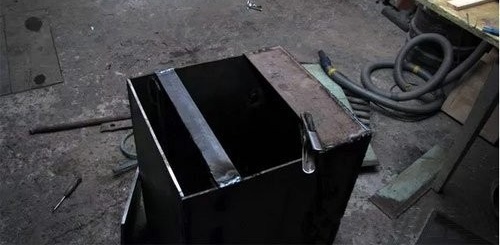

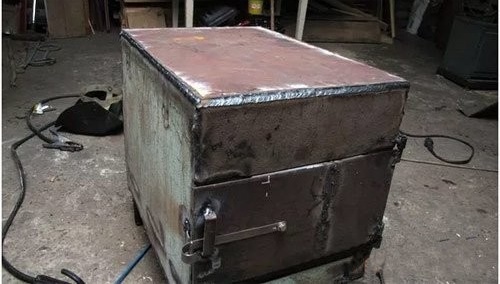
Photo gallery: stove manufacturing process
-
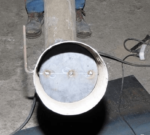
- Damper in closed position
-
- Half open damper
-
- Checking the operation of the shutter
-
- Assembled chimney
-

- Chimney mounted on the stove
Lining
Metal stoves are often bricked outside and inside. But there are two reasons why this should not be done:
- The brick has a fairly low thermal conductivity and high heat capacity. The heat received during the combustion of fuel in the furnace simply flies out into the pipe along with the smoke.not having time to warm the metal walls of the potbelly stove.
- The stove surface is deprived of air access, thereby significantly accelerating burnout of the walls and the risk of carbon monoxide entering the room, which is dangerous to human health and life.
Selection and preparation of the installation site
For this type of stove, a monolithic foundation does not need to be built due to their low weight. To select the installation location, one should be guided by such parameters as distance from doors and windows (for less heat loss) and the convenience of removing the chimney from the room. In garages and utility rooms, as a rule, there is a concrete floor, so there is no need to lay anything. In rooms with a wooden floor, a sheet of asbestos or tin should be laid on the installation site and fixed along the perimeter with self-tapping screws. On the walls near the installation site to avoid heat loss, you can glue foil insulation.
Dressing
To decorate a potbelly stove, you can use chamotte plates or decorative metal plates, or you can simply paint the stove with special heat-resistant paints to your taste, previously cleaning the surfaces with sandpaper.
Exploitation
Some requirements for safe operation, in compliance with which you will protect yourself and your loved ones:
- The stove must always stand on a refractory base.
- All flammable objects and liquids must be at a safe distance of 80–100 cm from the oven.
- You should not completely hammer the firebox at one time with firewood.
- Always ensure that the furnace door is closed when using the oven.
- Regularly inspect the chimney for leaking spots to prevent smoke from entering the room.
- Do not leave a working oven unattended for a long time.
- Do not attempt to touch the oven body while it is in operation to prevent burns.
Cleaning and maintenance
With intensive use of the stove in the chimney channel, soot and dirt are deposited, and gradually accumulating, narrows the lumen of the channel, which entails a decrease in draft and overall design efficiency. It is enough to check the chimney once a year for contamination and, if necessary, clean it from soot. There are several ways to clean the chimney pipe:
- Mechanical, brush or brush.
- Chemical, by burning potato peelings in the furnace, while the starch secreted softens the soot and it leaves.
For best performance, you can combine these two methods. From the walls of the furnace, carbon deposits are best removed with a brush for metal. The mirror and grate are easy to remove for replacement or minor repairs.
Video: how to make a potbelly stove yourself
Making a metal furnace yourself is not as difficult as it might initially seem. Of course, this design is not the only option of its kind, but already proven and reliable.