Furnace lining

How and how to finish a home stove is an issue for many people. Despite the fact that modern heating is often carried out in cottages, the stove still takes its place of honor as a leader. Often she may not look very attractive. Especially if recyclables were used for its construction. That is why the stove needs additional decoration. Indeed, in addition to its main function - heating the room, the stove should also decorate the room with everything else.
Content
Facing Material Requirements
A furnace is a structure whose materials work in emergency conditions. Facing is no exception. There are certain requirements for the finishing material of the furnace. He must:
- Withstand high temperatures.
- Possess the property of high heat transfer.
- Resistant to mechanical damage.
- Have a good bond with the bonding solution.
- Be attractive and have an aesthetic appearance.
Experts recommend facing the stove with brick, ceramic tile (terracotta or majolica), tiles or natural stone (marble, basalt, sandstone, slate and granite). More recently, the use of talc chloride and artificial stone has become popular. Some resort to the simplest methods, such as plastering or painting.
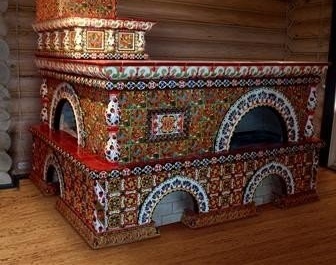
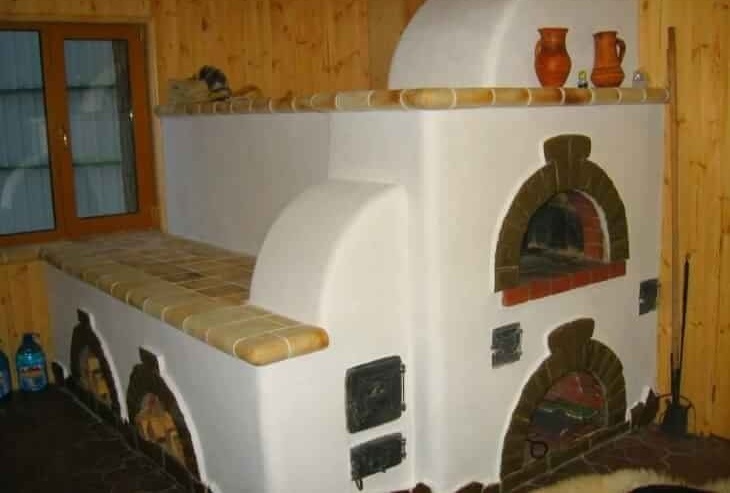
Photo gallery: beautiful stoves
-

- You can combine different types of cladding
-
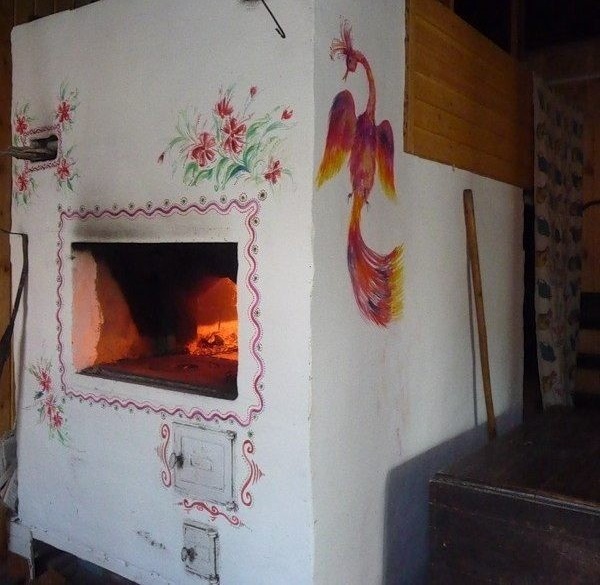
- Oven painting and patterning can be an economical decoration option
-
- Brick finish looks very aesthetically pleasing

-

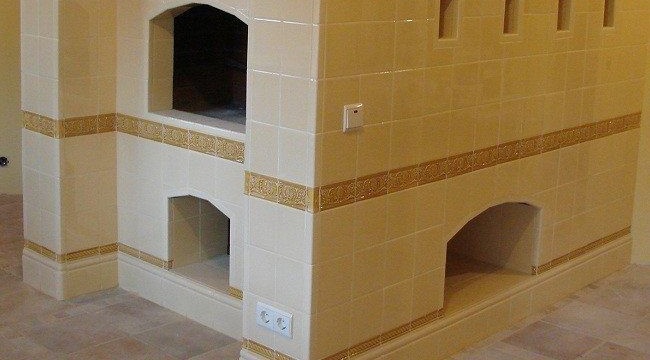
- Ceramic tiles are done most often.
-
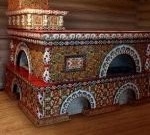
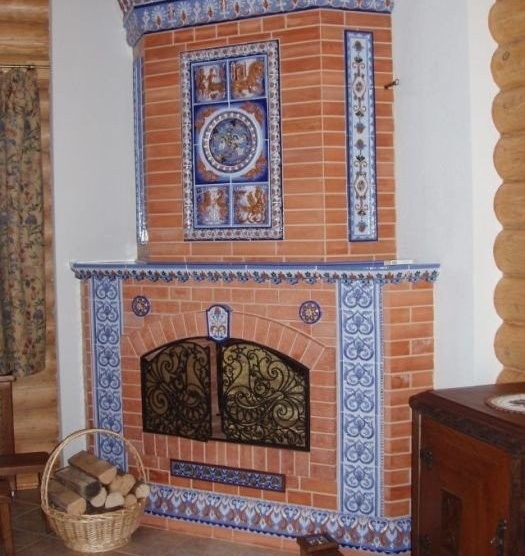
- Facing the stove with tiles will make it unique
-
- Natural stone in the decoration of the furnace looks very status
Types of cladding
There are a fairly large number of liner options for home stoves. When choosing, you need to consider several factors:
- your financial capabilities;
- general view of the lined stove, it must comply with the interior design of the house;
- personal preferences.
A stove made of good refractory brick may not need additional decoration at all, but it often happens that its appearance does not fit into the overall design of the house, and then you have to resort to the cladding.
Plastering
This is the easiest way to finish the surface of the stove.Previously, this was done with clay mixtures. But today it is no longer relevant. Special dry heat-resistant mixtures appeared on the market.
How to apply plaster so that cracks do not appear during daily use of the stove? This is a hot issue for many stove owners. Note that cracks appear only when the requirements and rules were not observed during the plastering of the furnace, when preparing the surface for finishing, or when mixing the mortar.
The brick wall is lined with plaster using traditional sand and clay mortars and professionally made building mixtures, which can be purchased at almost any specialized store. There are several requirements that this material must meet in order to be able to use it on oven walls. He must:
- Be heat resistant.
- Possess high hitch ability. In physics, this phenomenon is called adhesion (from lat. "Adhaesio" - sticking).
- Adequately respond to the fact that the material of the walls of the furnace can expand from high temperatures.
You can use plaster as a facing material for:
- processing an old stove with a similar coating;
- buildings that can crack at any moment, and carbon monoxide will leak into the room;
- giving a neat appearance to the structure;
- preventing the appearance of insects between the rows of masonry;
- furnaces in case you just wanted to make a repair of the room, and the appearance of such a hearth does not fit the new design.
Plaster may not be the only facing material used.
Advantages of plaster:
- Availability of material. Its use is the simplest of all.
- Low cost.
- Possibility to use for decoration of a new furnace and restoration of an old one. It is perfect for any surface.
- The increase in wall thickness and heat capacity. This leads to the economical use of fuel. After all, the furnace takes more time to cool.
- Prevention of possible CO penetration2 into the room and increasing fire safety.
- The possibility of painting, whitewashing or coating the surface with decorative plaster.
Tools required:
- Spatulas of different sizes.
- Plaster hammer with which nails are hammered.
- Trowel to apply and distribute the solution along the walls of the oven.
- Hammer Cam.
- Scissors are ordinary or metal, depending on what the walls will fit, fiberglass mesh or netting.
- Grater and grater to smooth and smooth the treated surface.
- Smooth to make the surface perfectly smooth.
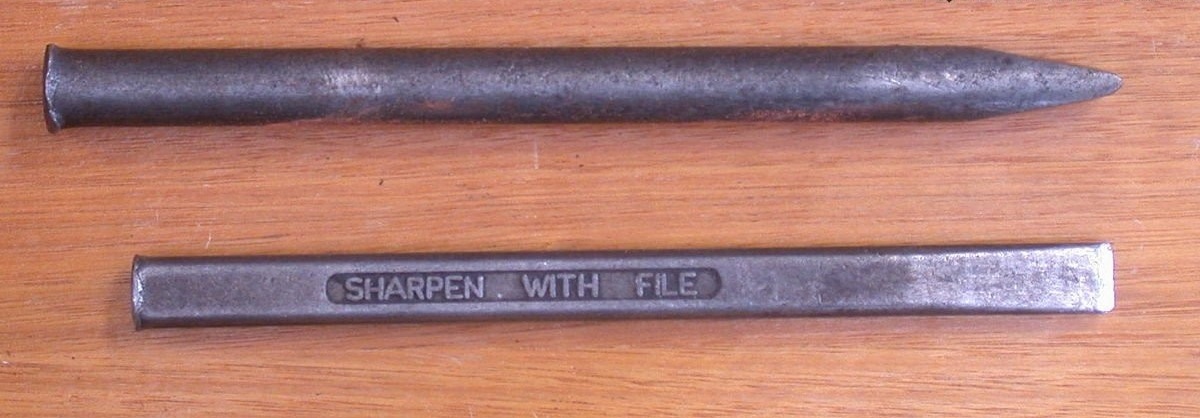
- Chisel, it makes it possible to make notches that contribute to better adhesion of materials.

Chisel can make notches
- Brushes of different sizes for applying a primer. They can also be used to create a textured wall.
- A brush with metal bristles is needed to clean the surface of the old layer of plaster and to clean the joints.
- The construction level, which verifies the verticality and horizontalness of the surface.
- Plumb line. Its use will help to check whether the walls are even.

A plumb line helps determine the evenness of the masonry
- Rules for the alignment of the material applied to the wall.

Types of mortar
The furnace has an atmosphere of constant temperature changes. That is why the main requirement for plaster is resistance to constant temperature changes. If you make the solution yourself, then follow the rules without fail so that no cracks appear. Their composition can be simple and complex. In the first case, only clay and sand are used.
When preparing the solution for plastering the furnace, you must:
- Sift the sand well through a fine sieve.
- Clay also rub through it. It must be cleaned of small plant roots, and acquire a powdery state.
Choose fatter clay so that a better adhesion of materials is achieved. But the fat content should not be excessive. If this happens, then dilute it with sand.
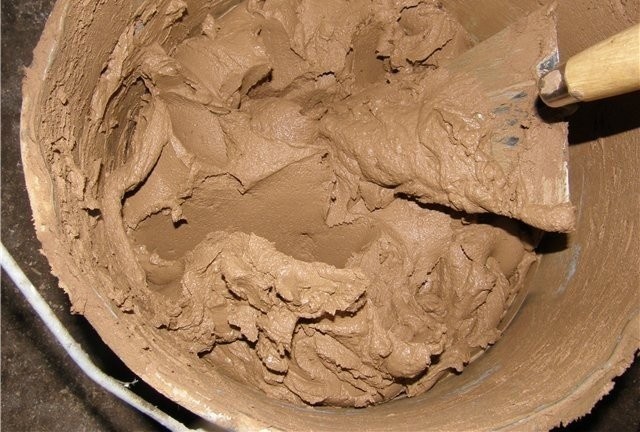
Soaking clay is a mandatory step in the preparation of mortar
Soak the clay in water before kneading the solution. Leave her there for a few hours. She must absorb all the water. After that, you need to add more fluids. It must be added until the clay "gets drunk." Water above the clay should stand 10-15 cm. As soon as the liquid begins to remain above the mixture, it can be mixed, achieving a consistency of thick sour cream.
Asbestos must be added to the solution. It will be a reinforcing component.
An important rule remains the use of those materials which, when interacting with high temperatures, do not emit substances harmful to human health.
Some craftsmen add a little salt to the solution, mistakenly thinking that they increase the strength of the solution. This is actually not the case. But salt can play a positive role. Its addition makes the solution more plastic, which prevents it from cracking. And also in such plaster different insects cannot get.
Table: ratio of materials in the solution for plastering the furnace
| Stucco recipes (unit - part) | ||||||
| Composition number | Clay | Sand | Asbestos | Lime | Cement | Gypsum |
| 1 | 1 | 2 | 0,1 | — | — | — |
| 2 | 1 | 2 | 0,1 | 1 | — | — |
| 3 | 1 | 2 | 0,1 | — | 1 | — |
| 4 | 1 | 1 | 0,2 | 2 | — | 1 |
| 5 | 1 | 1 | 0,2 | 2 | — | — |
| 6 | — | 1 | 0,1 | 2 | — | 1 |
Preparing for plastering
In order to perform quality work, it is necessary to carefully prepare the surface of the furnace:
- It is good to clean the surface with a chisel and hammer from the old plaster, with a brush with a metal pile from dust.
- Deepen masonry joints by 5–10 mm. Once again clean everything from dust.
- Prime the walls well. To process thin seams with a thin brush.
- Sometimes plaster needs to be applied in several layers. Especially if the walls are very uneven. Some surfaces require the installation of reinforcing or fiberglass mesh.
- Steel or perforated corners to make even the corners of the stove.
How to plaster the oven with your own hands
There are several ways to apply this material. The first is suitable for walls with large skews, when you need global alignment of the surface with a layer of plaster of 5-8 cm. All work takes place in several stages:
- It is necessary to install and fix leveling beacons.
- To heat the stove a little, so that it becomes warm.
- Wet the walls with water.
- Apply a primer. Wait for it to dry.
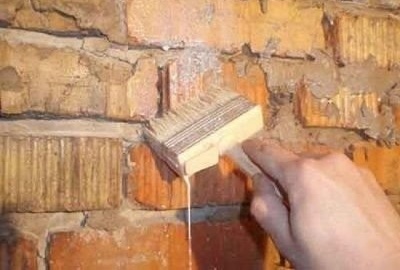
Applying a primer to the oven is a must.
- The first layer should be medium - liquid. It is applied by spraying movements. The main thing is that it falls into the seams, and its thickness was no more than 4-5 mm. Need to give it a good dry.
- Apply the next layer, which should protrude 8–10 mm behind the beacons. You need to start work from the bottom, moving further up. Apply a solution of 40-50 cm and align with the rule, then rise higher. Repeat work until plastering is completed.
- Gently grind the still-dry surface with a grout.
- Apply the last coat - finish. It is the most liquid, and its thickness is not more than 1.5–2 mm.
- Form the corners using an angular spatula.

To make the surface dry at the same time, cover the walls with damp burlap for the first time. Wet it several times.
The second option involves the use of mesh-netting. It levels the surface and sets the desired thickness for the walls. This is a more durable plastering compared to the previous method.

The plaster of the furnace can be applied to the reinforcing net.
The work plan is as follows:
- The first layer is laid by spraying. He fixes the netting in place. This makes it possible to more conveniently apply the next layer. Let the layer dry.
- The next leveling layer is applied. If necessary, then not one.
- All cracks are smeared and overwritten with the last layer.
The third method is suitable for walls requiring minimal refreshment of appearance.You can make one or two layers, the thickness of which is not more than 2-3 mm. Work in the following sequence:
- Prepare and prime the wall.
- If necessary, fasten the guide rails to know the thickness of the layer.
- From bottom to top with a wide spatula, apply the mixture and immediately level it with the rule.
- Make corners with a trowel.
- Prior to complete drying, gently smooth the surface with a grout. If you are going to clad a newly built furnace, then be sure to wait for it to fully shrink. It takes about a month.
The plastered stove can additionally be decorated with decorative tiles.
Video: how to plaster the stove
Dyeing
Paint can be applied directly to masonry or to a plastered stove. Of course, in both cases the surface must be beautiful. If it is a brick, then new, so that the paint lies on it beautifully and evenly. If it is a plastered surface, then it must first be updated, and only then painted.
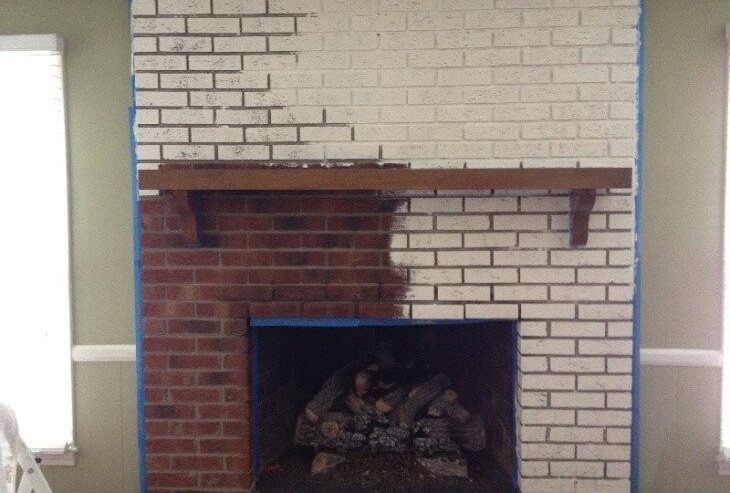
The stove can be coated with lime.
There is a huge variety of paints of different textures, levels of difficulty, colors and prices. The simplest solution is to use lime or chalk whitewash. In order to strengthen this solution, it is necessary to add a little salt to it. This will prevent the composition from shedding while using the stove. The surface is covered with whitewash in several layers, each of which gives a more aesthetic and attractive appearance to the structure.
When facing the furnace, heat-resistant paints can also be used, which are quite simply applied to the surface and have a wide color gamut. The hearth with their help can be made not only monotonous, but also draw various patterns and murals. Most often, the furnace surface is covered with alkyd, organosilicate and silicon-organic paints. This requires preliminary preparation:
- It is necessary to clean the surface: there should be no dust and residues of the previous finish. Additionally, it can be washed.
- Remove greasy stains with a soda solution.
- The primer is optional.
- Burn the stove. On warm walls, the paint will go better.
- Paint the walls with a medium-length pile roller.
- To paint seams and hard to reach places, use a brush.
- Make several layers of paint, giving each of them time to dry well before putting the next layer.
- After the oven is completely painted, you need to let it stand for 2-3 days before you start using it.
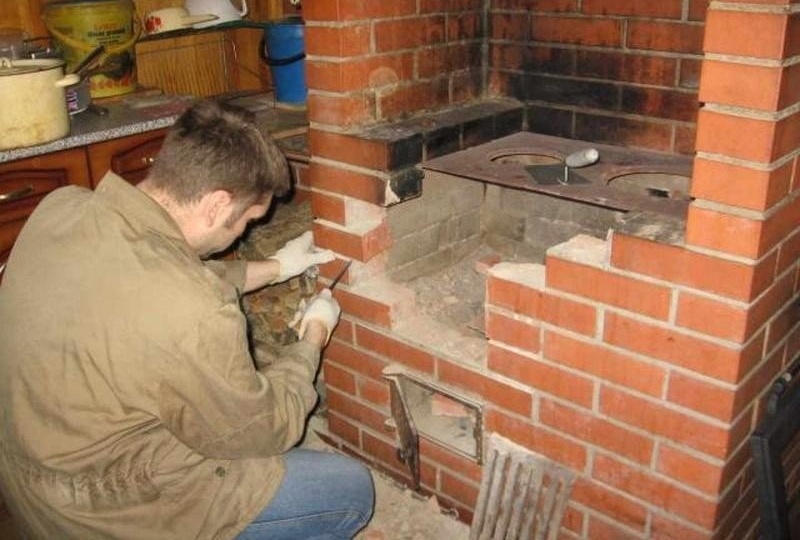
Brick Furnish
If you like the look of ceramic bricks, then know that this is a very good option for decorating the stove. Its biggest advantage is that it does not cause cracks when heated. Brick finish does not need to use a reinforcing network.
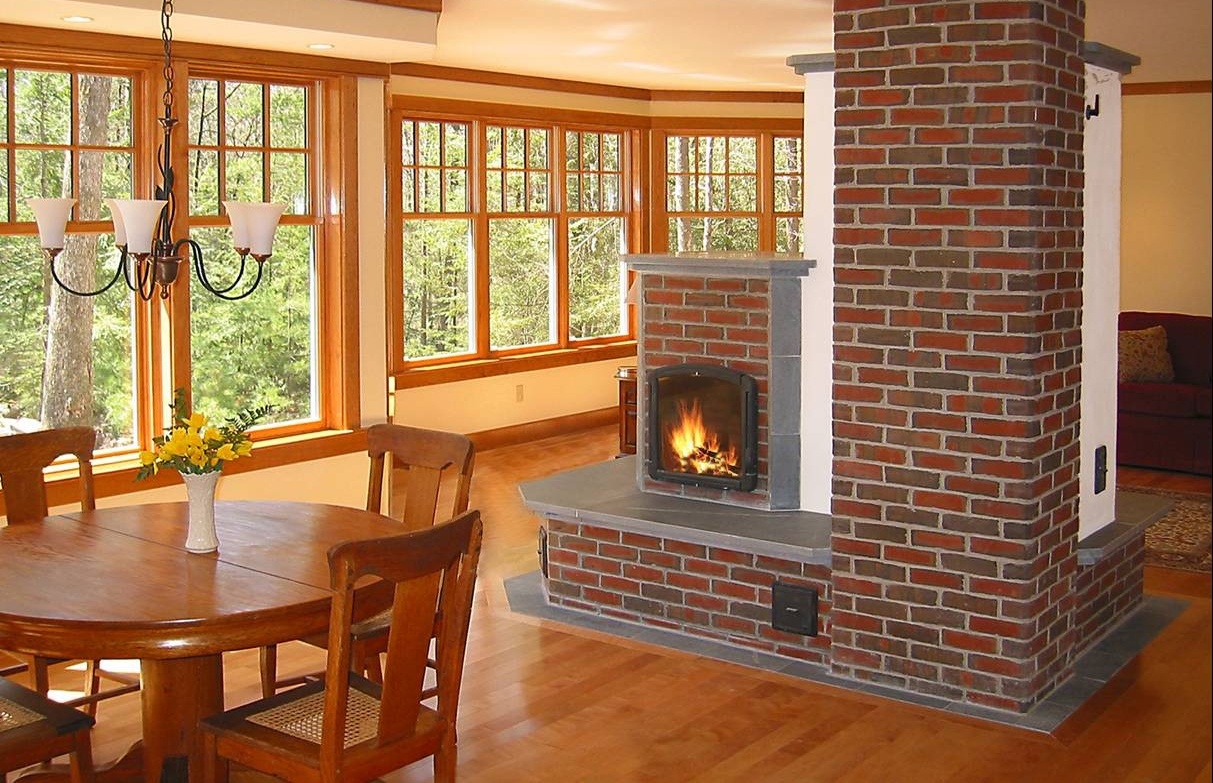
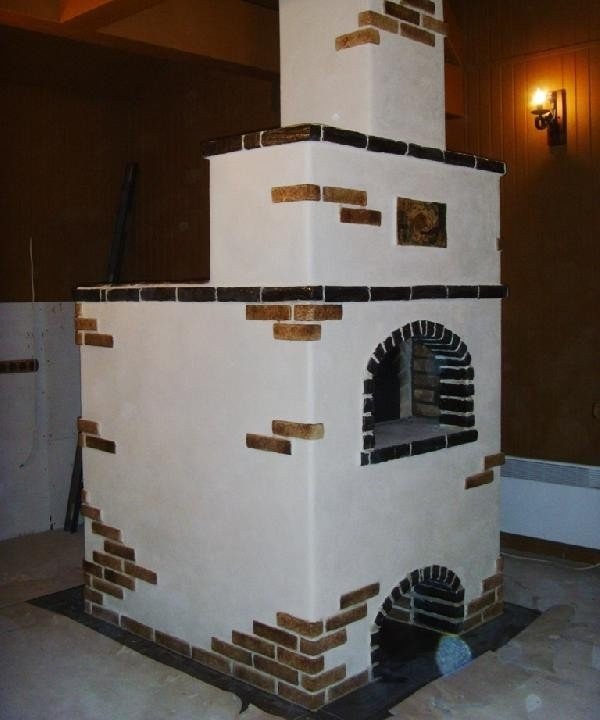
Decorative brick can be laid at the same time as the walls of the stove. This type of cladding perfectly improves the overall appearance of the structure. And if you make masonry using contrasting colors and curly details, then the transformation of the furnace will exceed all expectations.
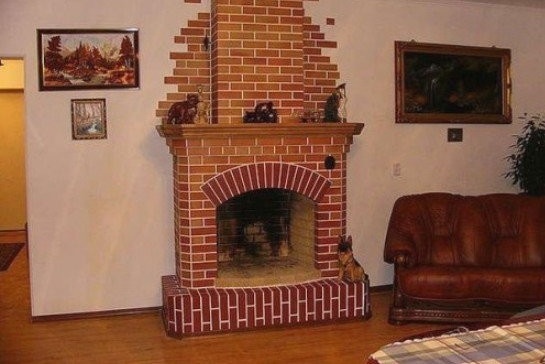
The brick finish of the stove fits perfectly into the interior of the house
Not only conventional stoves are trimmed with brick, but also metal ones. True, between the iron surface and the masonry, you need to fill in a layer of dried fine sand. Thus, a metal that has the ability to expand when heated does not deform your beautiful brick lining.
Video: how to paint a brick oven
Ceramic tiles
The following types are most often used in decoration:
- terracotta - it is made from clay of a special grade by pressing, it is unglazed ceramic;
- majolica - glazed on the front side of the tile, obtained by pressing, similar to tiles;
- clinker tile - it is obtained by mixing clay of high plasticity of different grades, after which it is burned and pressed.
Ceramic tile is an inexpensive and popular option for furnishing stoves. True, she has a significant minus. It is not too firmly connected with the solution to the surface of the furnace and often can not withstand high temperatures, it can fall off. It can be used in places where the surface is not very hot. You can make a combined version of the cladding and brick the places where the temperature is maximum, and the remaining places are tiled.
If desired, you can combine different types of cladding
Tips for tiling:
- it is better to use a small tile;
- on metal washers it is recommended to fix the reinforcing mesh with cells of 10 mm;
- fix the tile is recommended with special adhesives that withstand high temperatures /
Video: how to tile a Russian stove with ceramic tiles
Tiling
For a very long time, stove-builders could not find an opportunity to protect the finishing material from exposure to high temperature. And finally, they came up with tiles. She looks like a usual glossy tile, but with a special volumetric configuration. On the back there are special protrusions called rumps. They create a more dense connection of the tile with an array of masonry.
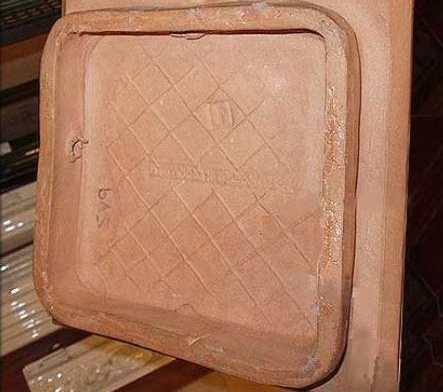
Tiles have a volumetric configuration
Laying of this type of cladding is carried out together with the alignment of the furnace. The main masonry and tiles are interconnected by special wire "antennae", which are laid in the seams of the brickwork.
Tiles are connected to each other by steel hooks. Mounting with brickwork is carried out not only by the "antennae", but also by concrete mortar, which is laid in the rumps and between the tiles.
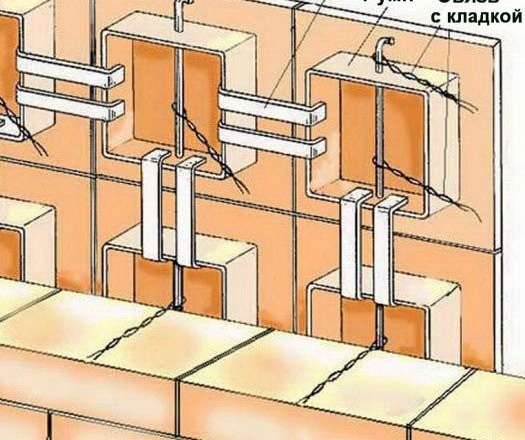
You need to fix the tiles in a special way
It is better to decorate the wall with tiles at the stage of ordering the furnace. Moreover, at first a row of tiles is placed, they are fixed with each other, then clay mortar is poured, and only after that the brick wall is laid close to the tiles. But it is possible to veneer a ready-made oven with this material.
Video: decorating the stove with tiles
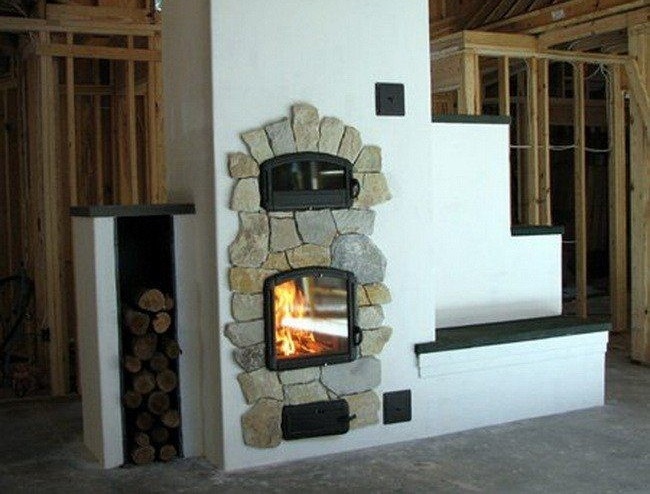
Natural and artificial stone finish
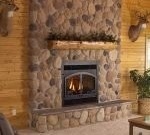
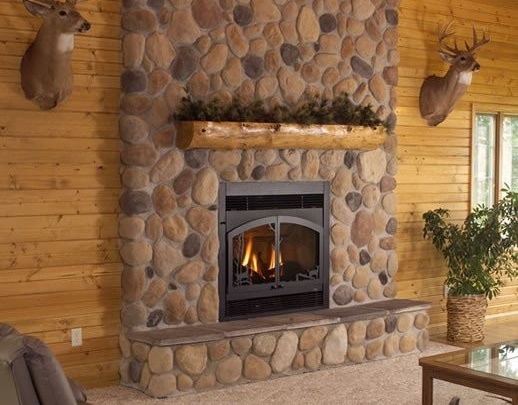
Natural stones are environmentally friendly, durable, durable, well-retaining heat and perfectly tolerate high temperature materials. They have a beautiful texture and natural color scheme. All these are indisputable advantages of this facing material. Its only drawback is the high cost.
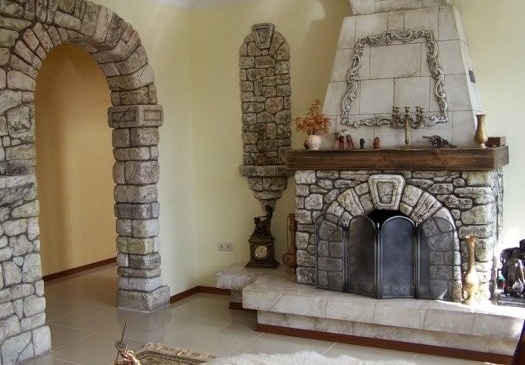
Natural stone is often used as a finishing material.
That's why artificial stones were invented. This version of the facing material is almost inferior to natural. It is just as beautiful, durable, heat-resistant and environmentally friendly.
The manufacturing process of artificial stone is complex. It is made of clay, which is cut, ground and polished. It is preliminarily pressed and fired under special conditions. Thus, complex figured elements are obtained. And heat-resistant mastics further improve the quality of natural stone.
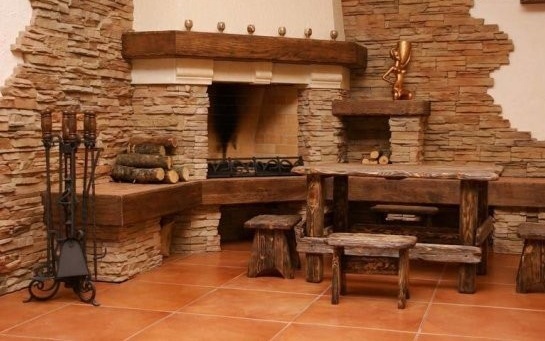
Artificial stone in the decoration of the furnace can reduce its cost
With a little imagination, you can make an entire work of art out of an old plain stove. Yes, and not necessarily from the old one. Facing is also a necessary thing for new furnaces.