How to adjust the temperature of the radiator: an overview of modern thermostatic devices
The range of methods for controlling the temperature of the coolant in radiators is quite wide. Of course, you can open-close the window or manually adjust the operation of the boiler, but why bring yourself so much trouble? Isn't it better to use more modern and convenient methods and systems for these purposes? Among the available options are thermostatic heads, as well as servos that are controlled by temperature sensors and are widely used in smart home systems.
To change the heating temperature of the radiator, you can use:
- Conventional valve mounted on a radiator;
- Thermal head;
- Two-way valves with servo.
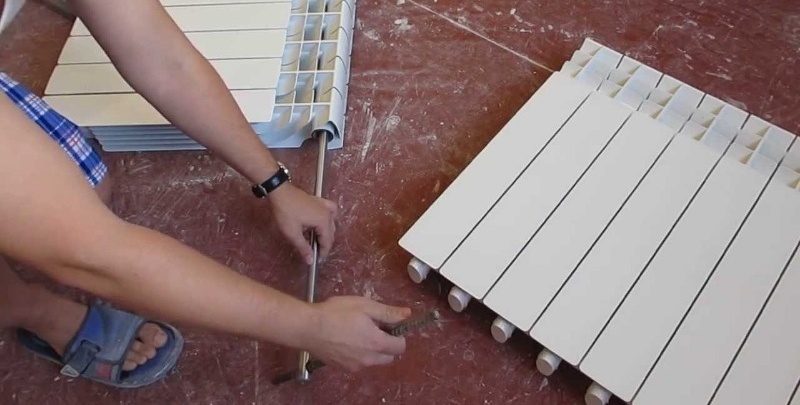
All these methods are based on a change in the flow of coolant entering the radiator. To lower the temperature, the amount of coolant decreases, and to increase it increases. The most budgetary way to regulate the temperature of the radiator can be considered a valve. A faucet or valve is installed near the radiator, the coolant flow is manually controlled, that is, simply turn off the tap, and then open it again.
Content
Using special thermal heads
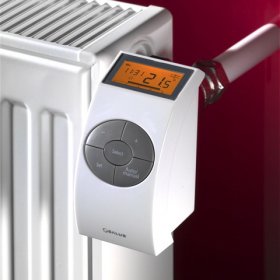
The thermostatic head is a device filled with a special composition. Thermal heads should be installed simultaneously with a three-way valve, without which it will be simply impossible to regulate the temperature of the radiator.

The thermostatic head is a modern and not too complicated way to automatically control the temperature of heating radiators. These devices should be installed on a three-way valve.
When heated, the filler expands rapidly and shrinks as quickly as it cools. The expansion or contraction of this composition affects the stem of a three-way valve installed under the thermal head.
There is a regulator on the device, with the help of which the temperature of the coolant required at the moment is manually set. Subsequently, the heating is adjusted automatically. However, if the room temperature changes, the new data on the thermal head will have to be manually set again.
All thermostatic heads can be divided into two types: stationary and remote. The first is installed using a valve directly on the radiator pipe. The second ones are equipped with a special remote bulb, which contains a composition that responds to changes in temperature. Actually, the thermal head is mounted near the radiator, and the flask can be placed at a certain distance. The flask is connected to the thermal head with a special capillary tube.

The remote bulb is connected to the thermal head by a relatively short capillary tube.The flask should be installed in such a place that the temperature measurement is as correct as possible.
Usually thermoheads with an external bulb have a rather short capillary tube, so the options for placing the bulb will be quite limited.
Servo + two way valve
The use of servos and two-way valves allows you to adjust the temperature in the room more efficiently. Most often, such a combination is used in “smart home” systems, but the general principle can be used in quite ordinary dwellings.
To implement the scheme, the following actions are implemented:
- a number of temperature sensors are installed in the house;
- thermal sensor data is transmitted to the processor;
- a special program processes the data;
- in accordance with the specified parameters, the coolant is switched on / off to the radiator.
Such a system allows you to control not only a separate radiator, but also a whole group of radiators, for example, part of a heating circuit designed for a specific room.
If, when using a thermal head, the action on the valve stem occurs with the help of a compound cast inside, then in this case a servo drive is used, i.e. an electric motor operating at very low revolutions. It allows opening / closing of the valve very smoothly. With a sharp opening of the valve, there is a high probability of occurrence of a hazard to the system water hammer. As a result, both individual units and the entire heating system can be damaged.
If it is not practical to install a “smart home” system with a large number of temperature sensors, you can use a conventional room temperature sensor, a servo actuator, and a two-way valve. This solution is especially convenient if the room is heated by a radiator, which is installed in a niche and is closed special decorative screen. In this case, it will be inconvenient to regulate the temperature using a valve or a thermal head, since you will have to dismantle the screen every time.

If a heating radiator installed in a niche is hidden by a screen, it can be inconvenient to regulate the temperature using a thermal head. Servo-driven system will become more efficient
It is also worth noting that the temperature sensor or thermostatic head should not be installed in a niche closed by the screen, since an excess temperature is created in such a space. As a result, it will not be possible to obtain the correct readings of measuring instruments.
What are servo drives?
Servo drives are widely used in the automation of heating, plumbing and sewer systems. There are two types of such devices:
- open;
- closed.
The first in an inactive state remain open and close when the voltage is applied to the device. The second, on the contrary, are closed and open when power is received. For heating systems, only closed servo drives are used.

Servo for radiators is an electric motor operating at low speeds. The diagram shows the device: 1 - Nut M301.5; 2 - Spring; 3 - Bellows; 4 - LEDs; 5 - Auxiliary contact; 6 - Cable connector.
Both servo drives and thermostatic heads have a union nut with the same thread. Therefore, they can be mounted with conventional radiator valves, and with valves for two or three strokes. However, valves of some foreign manufacturers, for example, Giacomini, have different thread parameters.
How to install a thermostat with a servo drive?
If the room has only one radiator located in a closed niche, the installation of control devices is carried out as follows:
- Choose a place and install a room thermostat.
- Install a two-way valve on the radiator feed pipe.
- Screw the actuator to the valve.
- Lead the power cable to the servo drive.
- Route the cable from the servo to the thermostat.
After that, you should supply power to the thermostat, turn on the heating and set the required temperature on the thermostat.
If there are several radiators in the room, then the two-way valve must be installed on the return heating pipe. At the same time, a part of the supply pipe equipped with valves is mounted. It will be convenient if these areas: feed with valves and "return" and two-way valve and servo-drive - will be placed in a separate niche. The servo is connected to the room thermostat in the same way as described above.
With a large number of separate temperature control zones, it is recommended to mount part of the heating pipeline vertically, so that it is more convenient to install valves for servos. At the same time, a simplified analogue of the distribution manifold should be made from a pipe segment of a larger diameter than a conventional pipe. At the highest point of this device, it is necessary to install a device for automatically removing accumulated air by connecting it through a ball valve. The rest will use the standard horizontal double pipe system heating circuit connection forced circulation. Detailed information on this is presented in the video:
Step by step the installation process of an adjustable heating system of this type may look like this:
- Draw up a project, indicating the individual regulation zones.
- Install radiators.
- Bring the supply pipes and return pipe to the distribution manifold.
- Connect the supply piping to the system using ball valves.
- Connect the return pipes to the system via two-way valves.
- Choose and prepare a place to install a room thermostat.
- Connect the required power cables to the servos and thermostats.
- Finish the room.
- Install servos and thermostat.
- Connect devices to power supply.
A few words about room thermostats
Most often, modern electronic thermostats are used to automatically control heating systems. There are models that receive power from a 220 V network. To connect such a model, you need two cables: one to the power source, and the second to the servo drive.
Another type of thermostat is battery powered. To connect such a model to a servo drive, you need to break the phase. Zero does not need to be torn, it is simply transmitted to the servo drive.