How to connect a thermostat for heating batteries and configure it correctly
Thermostatic equipment allows a person to influence the microclimate in the house, setting an acceptable range of day and night air temperatures. In addition to maintaining the temperature balance in the living room, thermostats for heating can optimize the cost of paying for utilities. In winter, many residents of apartment buildings are forced to constantly keep the air vents open, trying to escape from the batteries that “breathe” heat. You can put up with this situation if the calculations for heating are carried out according to the standards. If heat meters are installed in the apartment or house, then it becomes completely unprofitable for the owners to inconvenience, “heating” the street.
After watching the video, you will learn how to set the temperature controller and adjust it.
Most of all, the installation of temperature controllers requires rooms in which the temperature values fluctuate significantly during the day (kitchens and rooms oriented to the sunny side). It is important to regulate the temperature level in the bedrooms, since a full sleep is possible only at 18-19 ° C.
Where are thermostats usually installed?
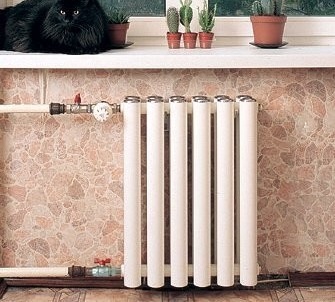
The best place to place the thermostat is the heater itself (radiator), provided that it is not closed by curtains, decorative grilles or other interior items. Violation of this rule leads to an inadequate assessment of the temperature level in the room.
This rule can be circumvented by using a thermostatic element with a remote sensor located at a distance of 2 to 8 meters from the valve. In this case, the temperature level will be monitored at the location of the sensor. Also, temperature controllers for radiators can be installed on a horizontal section of the pipeline near the point of entry into the heater.

When the thermo regulator completely blocks the flow of coolant into the radiator, its circulation in the system will continue through the jumper pipe
If the installation of the equipment is carried out in accordance with the instructions and compliance with all building codes, then temperature control can be performed in the range from 5 ° C to 30 ° C in increments of one degree. In some models, this range may be different, so you should clarify this information before buying.
Thermostat mounting procedure
To install a thermostat for heating radiators, first turn off the feed riser. Then, water is drained from the heating system and installation works are carried out, which are performed in the following order:
- cut off horizontal pipe connections at a certain distance from the radiator;
- disconnect the cut-off pipeline, as well as the valve, if it was installed earlier, from the radiator;
- disconnecting the shanks together with the nuts from the stopcock and thermostat valve; they are wrapped in plugs in a heating battery;
- then collect the piping and install in the selected place;
- then they connect the installed piping with horizontally located eyeliner pipes coming from the riser.
Heating systems are divided into two types: one-pipe and two-pipe. In a one-pipe heating system, when connecting a thermostat, you have to change the radiator connection scheme by installing a jumper connecting the direct and reverse supply of the device.
This jumper pipe, otherwise called bypass, allows you to ply the coolant when the heating battery is shut off by a temperature control device. When implementing such a connection scheme, it is convenient to dismantle the device, having previously closed the valves shown in the figure under numbers 3 and 4.

Connection diagram for a thermostat for a heating radiator in a single pipe system

Connection diagram for the radiator temperature controller in a two-pipe heating system
Legend to the schemes:
- heating system riser;
- Radiator;
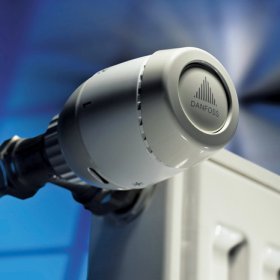
- temperature regulator (automatic or manual);
- bottom valve;
- manual or automatic air vent;
- jumper;
- riser reverse;
- stub.
In a two-pipe heating system, the control of the flow of coolant into the radiator can be carried out using the temperature regulator of the radiator of the heating batteries, installed on the top connection.
How to adjust the temperature controller?
For the correct setting of the thermostat, it is necessary to minimize heat leakage from the room by closing windows and doors. Indoor thermometer is placed where there should be a constant temperature. Then fully open the valve, turning the thermostat head to the left to the stop. In this position, the radiator provides the maximum level of heat transfer, so the air in the room will begin to heat up.
After the thermometer readings increase by 5–6 ° С in comparison with the initial value, the valve is closed. Why turn the head to the right also to the stop. In this case, the air temperature in the room will gradually decrease. When the temperature reaches the desired value, proceed to the slow opening of the valve.
As soon as the noise of water in the thermostat is heard and a sharp heating of the valve body is felt, the rotation of the head is stopped, remembering its position. On this, the temperature control setting is considered complete.

For the installation of thermostats for heating radiators, it is best to invite professional plumbers
The choice and installation of temperature controllers is best entrusted to specialists who will connect the equipment in accordance with the manufacturer's recommendations. A properly installed temperature regulator will provide a comfortable temperature level in the room and help save heat consumption, which will positively affect the family budget.