How to install the mixer on the sink: flexible and rigid connection options
The use of water for domestic purposes places increased demands on it: softness of the jet, comfortable temperature indicators for the body, good pressure, etc. A high-quality mixer can provide them. Today, plumbing equipment for bathtubs, kitchen sinks, washbasins and bidets is available for sale at various prices and various modifications. Products are designed for a wide consumer, therefore, manufacturers unified their models with the goal that they could be installed by any novice plumber familiar with plumbing. And many homeowners are trying to do this, so the topic of how to install a faucet on the sink does not lose its relevance.
Before starting the installation work, you need to decide which connection will be used: using flexible hoses or rigid. This primarily depends on the type of water distribution device. When buying it, you should take into account the dimensions of the sink so that the water jet does not spray out with a short "nose" or a small bowl.
You should also prepare the necessary tool:
- gas key;
- large pliers;
- Phillips and flat head screwdrivers;
- hexagons;
- open end wrench 12x14;
- vinyl tape;
- adjustable wrench.
Please note that expensive and exclusive models of faucets, as a rule, have installation features, therefore, you must first study the installation instructions from the manufacturer.

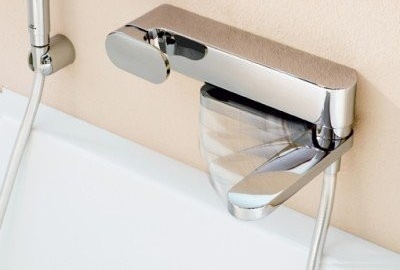
An example of a correctly installed mixer using flexible hoses
Method # 1 - flexible connection
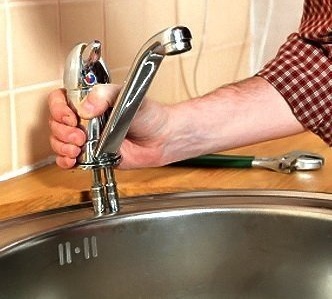
You can protect the delicate external coating of the mixer from mechanical damage during installation work by wrapping it with ordinary electrical tape.
In the process, you need to think through the frequency of work, first "try on" the installed equipment. And then proceed according to the sequence of installation steps:
- Shutoff valves block water in cold and hot supply.
- When replacing the old mixer, it is first dismantled: the clamping nut is unscrewed with a key, and the fixing screw is screwdriver. The mixer is removed. The installation site is cleaned. If the water-folding fittings are installed for the first time, then the place of its fastening should be marked. In case of difficulties during dismantling, it is necessary to apply a special chemical composition to the place of contact between the sink and the mixer, and then, after waiting half an hour, start work.
- An audit of the installed equipment is carried out. Manually assemble all the elements in a single unit using seals and tabs. Previously, the o-ring is put on the gander, but the nuts are removed from the studs. An eyeliner is inserted. The studs are attached below, the tight ring is tightly installed.
- Fastening to the pipeline is made with union nuts and adapters.Connecting hoses are pushed into a special opening of the sink, after which the mixer falls into place.
- Additional fixation from below under the sink is provided by the pressure washer and gasket. Having adopted a stable form, the mixer is tightened without much effort, which ensures its static state (in the case when a different position is not provided for by the design). If the input axes of the device and the pipe couplings do not meet, the connection is made using eccentric adapters having different threaded diameters at both ends. It is necessary to use the tool after fixing the mixer manually; the key brings the final "stroke" equal to half a turn.
- Flexible hoses are connected to the supply of cold and hot water: to the left - hot water, to the right - cold. The nuts are screwed on by hand and then tightened with an adjustable wrench. It is important that the hoses do not twist, do not stretch or bend. The strength of the threaded connection is achieved by tape fum or linen sealant (tow). The winding should be wound along the nut thread, having performed at least 14 turns.
A leak test is carried out with the mixer turned off and the water supply turned on: first cold and then hot. Being filled, the system will “show” itself by the presence or absence of leaks near the water distribution device or on flexible connections. If water appears on the threads, then tighten the nuts slightly with a wrench.

The tightness of the connection and the life of the product depend on the correctness of the winding
Method # 2 - hard connect
In practice, it often happens that flexible hoses of standard design (30 cm) do not always “reach” the hot or cold inlet. In this case, the fitting nut of the required length is the best alternative to flexible coupling.

A hard installation option is considered more durable, but a flexible connection is easier to repair in the event of a breakdown
The installation of the mixer on the sink with a rigid connection has a longer maintenance-free period and its own characteristics. In this case, the preparatory stage is the same as when performing flexible installation.
Then the work is done according to this algorithm:
- For more complete access to the collet, a corner needle is screwed into one of the entrances to the mixer so that its direction is oriented to the freest part of the space under the sink. This will facilitate the further connection of the pipe.
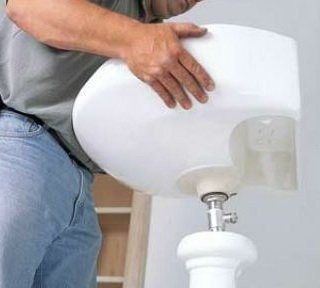
- A hydraulic seal is performed between the sink and the mixer using a gasket.
- The crane is installed in the mounting hole.
- From below, the tap is sealed and reinforced with another gasket.
- The straight needle is screwed fully into the mixer.
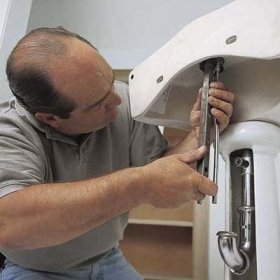
- After determining the length of the supply pipes, the desired size is left, and the excess section is cut off by a pipe cutter. Metalloplastik well accepts the necessary configuration when bending.
- Finally, the pipes are fixed with clamping sleeves using the necessary keys.
Before starting plumbing, you should decide on the interior design of the room. First, it is better to pick up the sink, and then the mixer to it. Correct installation ensures ease of use, long uninterrupted operation, reliability and comfort.