Installation of a hanging sink: analysis of 3 possible mounting options
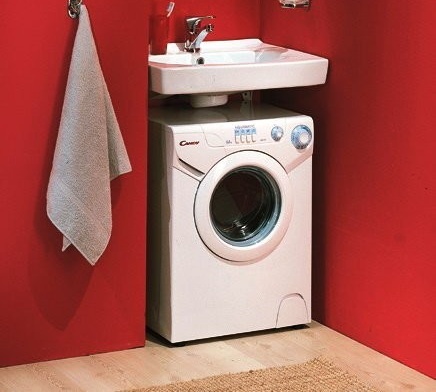
Most of the bathrooms in the old apartments have a small area. As soon as the owners do not have to be sophisticated in order to install at least the minimum necessary equipment in such premises. One way out of the situation may be a hanging sink. For those who are fortunate enough to have a larger bathroom, such plumbing can be an interesting and convenient solution in the design of the room. And the use of the product, coupled with the curbstone, will enable more rational use of space.
What designs are there at all?
Separation of shells by material:
- ceramic;
- glass;
- stone;
- metal.
Depending on the method of attachment, suspension structures are:
- with conventional wall mount;
- on brackets;
- with a pedestal.
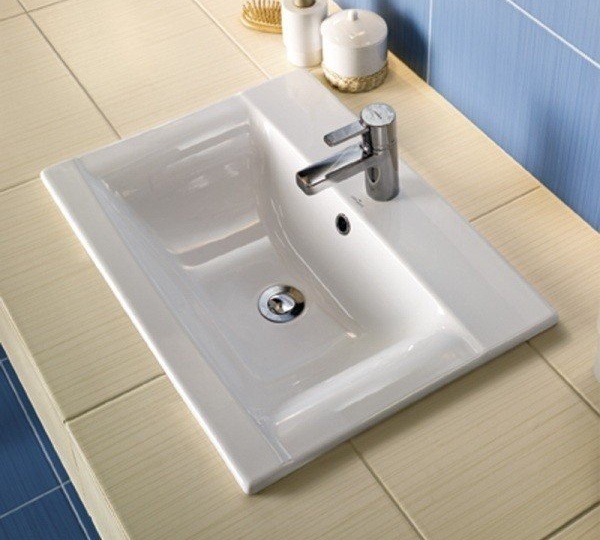
Usually hanging shells are attached to the wall with dowels and screws. This installation method is not suitable for heavy products made of granite or marble. In this case, special brackets are used, which create a more solid support for the washbasin. A very convenient option is a hanging stand with a sink located above it. A place for storing the necessary things is added, not cluttering up free space.
Preparatory phase - determining the installation location
Before buying a sink, you need to calculate its optimal size. To do this, measure the bathroom and determine the position of the product relative to other elements of the room.
Note! Mounting the sink to the wall is carried out only on a solid base. Drywall walls are not suitable for this at all!
If water and sewer pipelines have already been completed, the location of their exit and entrance must be taken into account. The installation height of the product depends on the height of the people who will use it. Most often it is impossible to please both adults and children at the same time. Therefore, choose the distance from the floor to the upper plane of the shell centimeters 85.
Option # 1 - fixing the sink to the studs
To install the sink you must have:
- drill;
- adjustable wrench;
- level;
- teflon tape;
- measuring tools.
Marking of product attachment points
Having determined the location of the sink, draw a horizontal line at the junction of the surface of the product to the wall. Here you will need a building level.
There are holes on the back of the washbasin that make marks on the surface. To do this, attach the product to the wall and draw out with a pencil the attachment points. Using a drill, drill holes and insert dowels into them.
Advice! So that the drill does not slip on the tile, an adhesive mounting tape is fixed to it.
Then the studs are screwed in, controlling the depth. After screwing, its protruding part should be at least one and a half centimeters longer than the width of the shell.This is necessary so that after mounting the product, you can freely tighten the mounting nuts.

After the studs are screwed in, they should protrude from the wall. The length of the protruding hairpin should be at least 1.5 cm greater than the width of the sink
Installation of the integrated mixer
It is advisable to install the mixer on the sink before fixing it to the wall. To do this, first, flexible eyeliners and fixing studs are screwed into it. Water hoses are inserted into the hole.

The mixer is mounted on a hanging sink before it is mounted on the wall. Fixing it after that will be much more difficult and inconvenient
Attention! Before installing the mixer, a gasket is put on it - to prevent water from leaking.
From the bottom, put on a moon-shaped gasket, washer and tighten the nut on each hose. It is necessary to monitor the correct location of the spout of the mixer. Then the angle valves are screwed up, applying a sealant to the thread and wrapping it with Teflon tape or hemp.

Before mounting the angle valves in the wall, it is necessary to apply sealant to their threads and wind Teflon tape or hemp
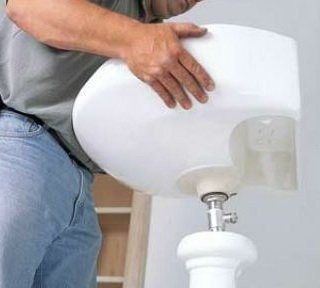
Mounting and connecting the sink
A sealing putty is applied to the back wall of the sink. Install the washbasin on top of the mounting studs. Put on them plastic sealing inserts, and then nuts and tighten. During the installation of the sink, it is necessary to control that the top of the product is located strictly horizontally, using the level.
The ends of the flexible hoses are inserted into the corner valves and screwed. Before this, a rubber seal must be laid under the nut.
Do not tighten the nuts while screwing on the flexible hoses. You can adjust the pressing force during the test.
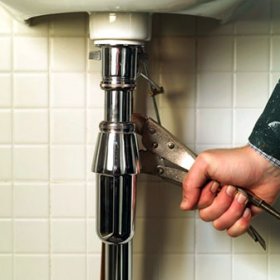
Then collect and screw the siphon according to the instructions. Connect it to the sewer outlet using a pipe or flexible hose. During the assembly process, it is necessary to monitor the state of the gaskets. They should not be dry and have barbs.

During the installation of the siphon, the condition of the seals should be monitored so that there are no burrs on them, and they themselves are not dry. This reduces the strength of the joints.
Features In case of divergence of the diameters of the outlet and the pipe, a sealing sleeve is used.
At the end of the installation of all parts of the hanging shell, a system check is performed. If the connection of the pipe and cuff has leaked, it must be disassembled and allowed to dry. And before installing the cuff in place, grease it with sealant.

Upon completion of the installation of the hanging shell, the system is checked. In the process of which the flexible hoses are adjusted and the remaining connections are checked
Option # 2 - installing the sink on the brackets
To begin with, determine the necessary distance between the brackets, applying them to the sink. Then mark the places of their attachment to the wall. Make holes with a drill. Insert dowels into them and firmly fix the brackets. Then they hang a sink with an installed mixer. Then make the connection of parts of the product to the sewer and water supply. If the sink has been installed correctly, then it will hold firmly and not move.
Option # 3 - a cabinet with a sink mounted on the wall
Before the hanging sink will be attached to the wall, you must make sure that the elements of the cabinet do not interfere with the connection of the mixer and siphon. Otherwise, you may need to make holes in the back of it. Then, with the help of brackets, a stand is mounted. Then a sink is placed on top of it. Then connect it to the sewer and water supply. In this case, the sink is fixed to the wall either with anchor screws, or by gluing with silicone.
Before choosing and installing plumbing, be sure to consider the size of the bathroom.The use of hanging sinks that can be installed above the bathtub or washing machine significantly save space. A self-assembly of the product reduces the cost of repairs.