DIY shower installation: a step-by-step example of assembly and connection
Showers are becoming available to most consumers, and therefore out of the category of exotic equipment, which can only be seen in the exhibition hall of specialized stores. Modern models are equipped with all necessary consumables, which facilitates the process of self-assembly of the purchased product. To be installed shower stall DIY is as simple as other types of plumbing. For someone who knows how to hold a screwdriver and adjustable wrench in their hands, this task will not seem too difficult. Although specialists who daily install various models of shower cabins according to customer orders will need much less time to install the equipment. After all, they have all the operations worked out to automatism. The cost of the service is affected by the type of booth, as well as the prices prevailing in this market segment in each particular region. Watch the video to better understand the installation features of this type of plumbing equipment. After viewing, assembling a shower cabin with your own hands is much faster.
Content
How is the shower stall arranged?
The main elements of the shower include:
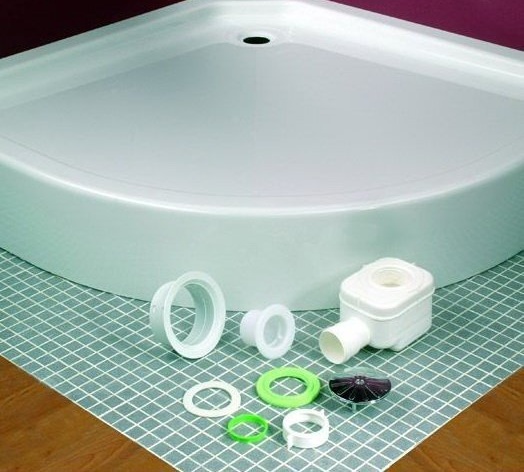
- a pallet equipped with a special metal frame for installation and height-adjustable legs necessary to level the horizontal position of the installed product;
- the roof of the cab, otherwise called the ceiling panel;
- glass doors equipped with special fasteners and a roller mechanism to facilitate the process of opening and closing them;
- the rear wall of the cab with side panels (subject to the availability of them in the configuration of the model).
Important! The more complex the device is, the more difficult and longer it takes to install it. Budget models, as a rule, are assembled and connected to the water supply, sewage and electricity networks without any problems. More modern models, combined with a sauna and hydromassage, are assembled by specialists with the necessary qualifications for the installation of high-tech equipment.

The design of the shower cabin depends on the type of model and the number of additional functions
Unpacking items before assembly
The manufacturer packs the main elements of a shower cabin separately. Depending on the specific model, the number of packaging places varies. Usually two doors and a front wall of a product are packed together. Side and rear windows are placed in separate packages. Separately, there is a central panel, as well as a pallet with a ceiling panel and all accessories.
Important! After unpacking, it is recommended to store the glass panels in an upright position, leaning them against the wall.With horizontal storage of panels, their damage is not excluded.
In the kit must be mandatory instructions for assembling the shower. Check that it contains text in Russian. Plumbing, supplied by well-known manufacturers, is easily assembled in steps detailed in the instructions. Cheap models assembled in China may be accompanied by confusing instructions written in error. In this case, it is recommended to pre-assemble the product without tightening the fasteners all the way to check that the cab is complete and that all the necessary fittings are present. In expensive models, there are no problems with components.
In some cases, it is recommended to choose a bathtub for a small bathroom. If you still hesitate, then this material will break your doubts about stones:https://aquatech.tomathouse.com/en/voprosy/vanna-ili-dushevaya-kabina.html
The main stages of installation of a shower cabin
In a simplified version, the assembly scheme of the shower cabin is as follows:
- installation of the pallet and regulation of its horizontal position with subsequent summing up the sewage system;
- installation of the walls of the cabin around the entire perimeter of the pallet and installation of the roof, as well as sliding doors;
- connection of a shower cabin to a water supply system;
- connecting the equipment to the mains in accordance with the requirements of electrical safety during the operation of this type of plumbing;
- checking the tightness of all connections with a full commissioning.
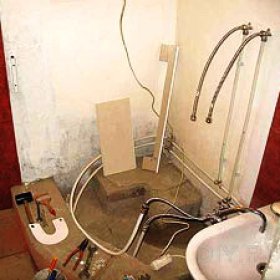
Pallet installation
When installing the pallet using a building level, check the horizontal position. If necessary, adjust the legs, after removing the screen from the pallet for ease of operation. The height of the legs is securely fixed with a lock nut. Next, they remove the protective film from all the holes in the pallet and proceed to connect the drain, using sewer pipes of a suitable diameter and various plumbing connectors, rubber seals and cuffs.

Adjusting the horizontal position of the shower tray by unscrewing the legs to the required height
Important! All joints are carefully lubricated with silicone sealant.
After they insert the plug into the drain hole, and also carry out the installation of the devices provided for in the package (for example, a headrest, a seat), inserting the fasteners into the holes provided for this in the pallet.
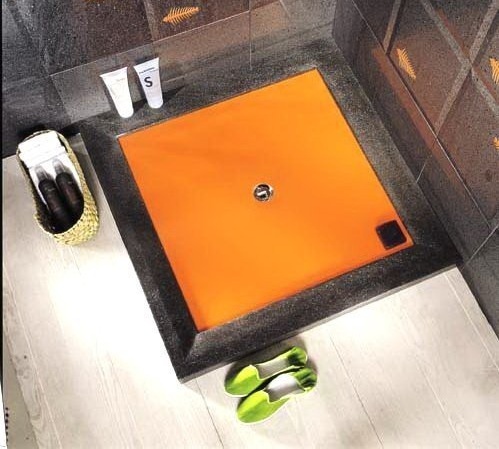
With the selection and installation of a flat shower tray, this material will help:https://aquatech.tomathouse.com/en/voprosy/ploskij-poddon-dushevoj-kabiny.html
Mounting the rear and side walls of the cab
Before mounting the back wall and side glass panels, it is necessary to attach all additional devices to their surface, being guided by the layout and location of the process holes.
When installing the mirror, it is not recommended to use an adjustable wrench, just tighten the nut by hand. The panel for attaching the liquid dispensers is attached to the side wall with the help of nuts and bolts screwed with a screwdriver. The liquid dispensers themselves are installed on the panel, directing them from top to bottom, until a characteristic click appears. Also fastened in the places provided by the manufacturer:
- shelves for bath accessories;
- bracket for hand shower;
- clamps on which the massager for legs is suspended;
- decorative corner necessary for connecting a flexible hose for a hand shower;
- backrest with hydromassage nozzles, with the help of which lumbar massage is provided.
Important! All fasteners use silicone gaskets that protect the glass panels from damage by metal fasteners.

Installation of the rear and side walls of the shower
Then proceed to the alternate fastening of the rear, side and front walls of the shower cubicle to the pallet. At the same time, the joints of the surfaces are lubricated with silicone sealant.The fastening of glass panels inserted into the aluminum profile frame is carried out using self-tapping screws twisted from the back of the cab.
Important! Water supply is organized immediately after the installation of the rear wall of the product. At the same time, the connection of the shower cabin to the water supply is carried out using flexible hoses, which are attached with special clamps. After completing the installation of all the hoses, clamps are additionally drawn to prevent leaks of the system.
Roof and door installation
Before starting work, a protective film is removed from the roof, which protects the surface of the part from damage during transportation and storage. A decorative panel is mounted on the front side of the ceiling panel to accommodate the speaker and fan. On the opposite side, respectively connect the speaker itself and the fan using four screws. Next, the upper rain shower is assembled. LEDs providing backlight are inserted into the ceiling. The electric wire is led out through a special hole provided in the roof. The ceiling with the upper watering can is attached to the roof with a nut. On the rear side of the ceiling panel, a power supply is attached with self-tapping screws, after which it is installed on the glass enclosure of the shower. The roof of the cabin is fixed with self-tapping screws. Using the longest hose mounted on the central panel, a rain shower is connected to the water. Eight rollers are installed on the arched doors (four for each). Before installation, the rollers are disassembled, and then assembled in the reverse order. Then they proceed to mount the handles, starting mounting accessories on the inside of the cab.
After connecting the handles from the outside, putting them on the already installed fasteners and clamping the side screws. Then proceed to the installation of doors, while adjusting the door rollers using the adjusting screws.
Read more about the device and the drain connection here:https://aquatech.tomathouse.com/en/santehnika/vanna/sifon-sliv-dlya-dushevoj-kabiny.html

Adjustment of the roller mechanism of the shower door
Connect the equipment to power
Many amateur enthusiasts can figure out how to assemble a shower cabin without the help of specialists. It is more difficult to understand how to properly connect the equipment to the mains. In accordance with the rules of electrical safety, the shower cabin must be connected using a copper three-core cable separately conducted from the switchboard, the cross-section of which is at least 2 square millimeters.
Important! When connecting powerful showers that consume 5 kW per hour of electricity, they install a separate machine for 25 A. In order to ensure the safe operation of this equipment, it is better to invite a professional electrician.
Commissioning
Do-it-yourself installation of a shower cabin is being completed by commissioning. Once again check the tightness of the connection of the cab elements and the operability of the drainage system. Identified deficiencies are immediately eliminated. The equipment is then tested under full load.
Important! Due to insufficient water pressure in the water supply system of apartment buildings, not all shower functions work correctly. Especially, this concerns the operation of hydromassage nozzles. To regulate the operation of these devices, it is necessary to put a pump and a tank of water, the volume of which must exceed two hundred liters.
You have learned how to install a shower and what difficulties await you. Now, with knowledge of the matter, you can decide whether to perform the work yourself or invite specialists.

5 comments