How to disassemble and repair different types of single lever mixers
Today, in every apartment there are stylish single-lever mixers, both in the kitchen and in the bathroom. Unfortunately, sometimes this technique fails, although there is not a single “old-fashioned” axle box in it. In fact, it is quite easy to repair such a mechanism, so below we describe the procedure for the complete disassembly of such a “device”.
Content
The device and principle of operation with a cartridge
At first, it may seem to an ignorant person that there should be a complex mechanism inside such a mixer. However, you just need to decide and start disassembling. As the famous saying goes: the eyes are afraid, and the hands are doing. But first, to understand the essence, consider the device and principle of operation of the "one-armed" mixer. The internal "filling" of this important plumbing equipment is of two types: with a cartridge or ball. The most common in the modern line of plumbing can be called the first type. We’ll start with him.
The main element of such a working mechanism is a cartridge. It usually breaks. It’s just that, in fact, it mixes hot and cold water. The cartridge itself is a cylindrical plastic case.
Inside are three ceramic discs with holes. They are so precisely processed by ultrasound that they act tightly against each other without passing water.
In fact, only one disk works - it moves relative to two fixed disks, which are one level lower. At the same time, its opening is shifted to the disk with an opening for supplying either cold or hot water, since the moving plate is directly tied to the shift lever. This is the mixing of fluid in the housing.
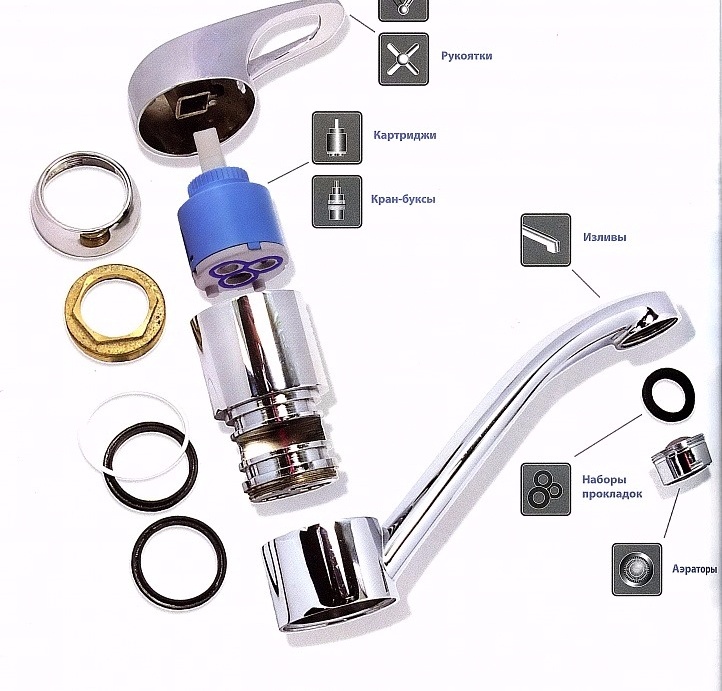
In addition to the cartridge, the mixer has other important spare parts:
- Lever arm.
- The metal housing in which the cartridge is based.
- The housing cover, which is wound on top and presses the main mixing organ.
- Spout with aerator at the end.
- Necessary gaskets.
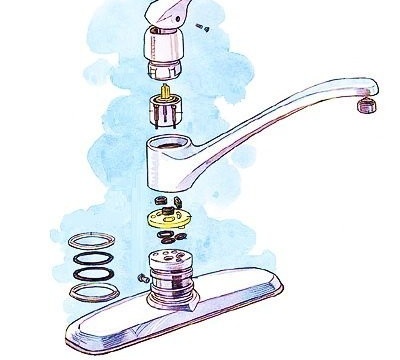
The device of the mixer with a cartridge: a simple and intuitive diagram
The cartridge is inserted into the housing and pressed against the lid, which is screwed onto the thread. But the mixing mechanism in the center has a white plastic pin protruding upward from the lid. It is on this “column” that the inner part of the rotary lever is mounted. However, in the disassembly instructions, we will discuss this moment in order of priority. So, let's get started.
There are several types of faucets, each of which has advantages and disadvantages. More on this in our next article:https://aquatech.tomathouse.com/en/santehnika/kran/ustrojstvo-vodoprovodnogo-krana.html.
Instruction: how to disassemble this type
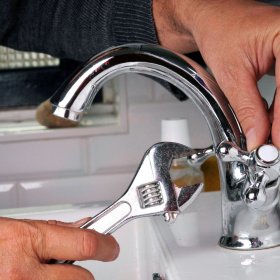
Faucets with a cartridge for the bathroom and for the washstand, as well as for the kitchen sink do not differ much in their internal contents. Therefore, we consider a certain general case.However, to dismantle the “apparatus” above the bathtub, you need to take a plumbing gas wrench and unscrew the two large nuts securing to the cam.
But to remove the unit from the kitchen sink, it is enough to unscrew the large brass nut from the back of the sink or simply unscrew the two small nuts from the mounting studs. Only the nuts of the flexible hoses must first be unscrewed from the water pipe with the same gas wrench.
Do not forget: before such work, be sure to turn off the water in the apartment. Usually an intelligent host knows where the opening taps are.
So, imagine that the mixer is removed and lies in front of us on a table suitable for repair. First, we list the tools that need to be prepared to parse the mechanism:
- Spanners.
- Plumbing gas wrench or adjustable wrench.
- Thin nose pliers.
- Hexagons in the set.
- Flat blade screwdriver.
We begin the process of dismantling.
- First of all, turn off the flexible hoses with the key to “10” if we work with a kitchen “unit”. In this case, difficulties associated with sticking the thread may occur. To make the operation easier, you need to try as best as possible to capture with a key all the faces of each nut.
- Next, gently pry a screwdriver with a plastic plug with a blue-red color. Underneath is a hexagon fixing the lever of the mixer.
- We unscrew this hexagon. Thus, the same plastic pin in the center of the cartridge that we mentioned is completely released, and now the mixer control lever no longer holds anything.
- Pulling up, we take out this handle. There are also possible problems associated with sticking elements. Then you need to carefully help with a screwdriver. After we get the protective cover over the lid, if any.
- We almost got to the main organ of the mixing mechanism. But that's not all - the cartridge “holds” the housing cover. We twist it gently with your fingers, if it gives in. If not, turnkey faces or pliers are usually provided on this large nut. Just unscrew the cover with a suitable tool very carefully, this part may burst, because it is made of very thin metal!
- After the described action, you can finally easily remove the cartridge. If the cause of the failure of the entire assembly is precisely in it, it is useless to disassemble it. This part is completely replaced. Moreover, its cost in the store is low, about 100 - 200 p.
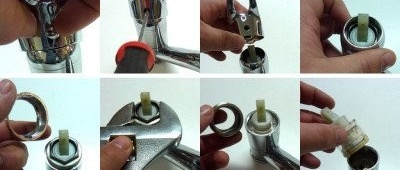
Single lever mixer disassembly
By the way, it’s better to go to the store, taking this item with you. Indeed, different mixers have completely different cartridge models. And the apartment can be left for an hour without water, while you run away to the nearest plumbing store. In extreme cases, take detailed photographs of the extracted node. Also fix the location in the camera memory cartridge in the mixerin order to collect everything correctly later.
- At the spout, we unscrew the aerator with a suitable wrench, then we take out its filter mesh and carefully clean it. Usually, many small particles, similar to a metal precipitate, accumulate on the cells.
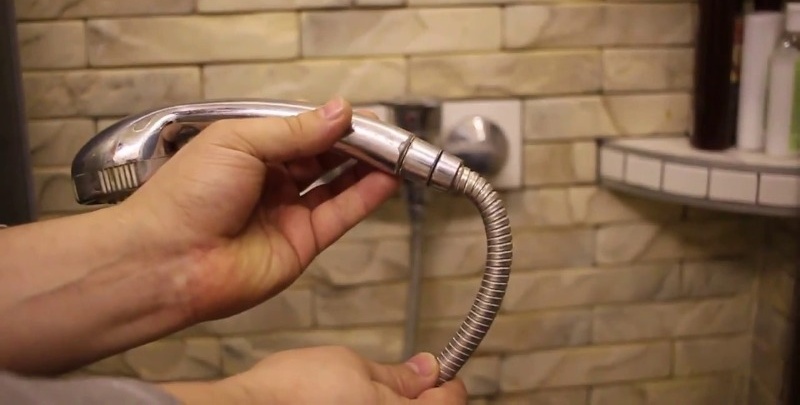
- This ends the process. Although, in addition to the cartridge, the mixer over the bathtub may still break the shower head. Then you do not need to disassemble the “unit” according to the instructions described. Simply unscrew the nut of the watering can and remove the element from the metal hose. Well, then install the new one in the reverse order.
As for kitchen faucets, cheap models also have such a breakdown: the main body, in which the cartridge is installed, is cracking. In such a case, a complete disassembly is also meaningless. It is necessary to completely replace such a "one-armed" crane.
Single lever ball mixers
Equipment that uses a special ball instead of a cartridge is less common. However, its disassembly is not much different from the procedure already described by us. Nevertheless, there are nuances that need to be addressed.
So, we describe the instructions for the ball mixer. The tools used are the same.
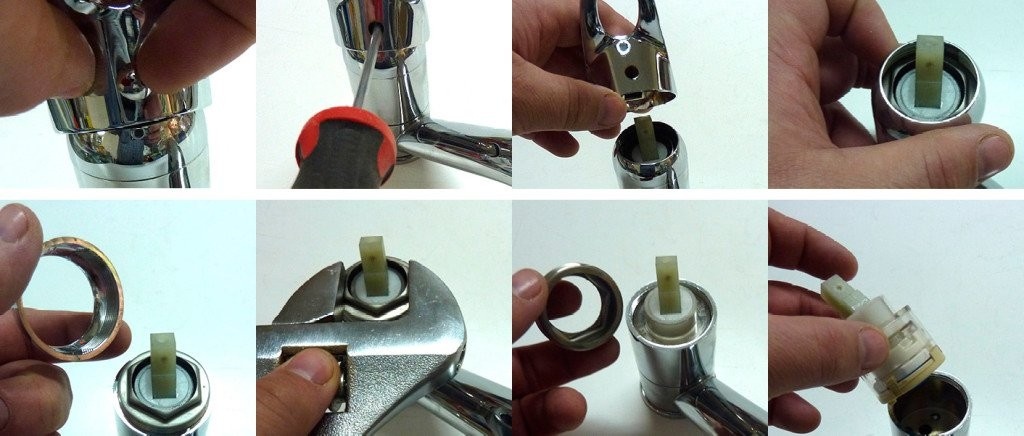
Dismantling the ball mixer
- First, they also pry off with a screwdriver and remove the multi-colored plug.
- Then loosen the opened bolt.
- Now you can get the lever under which the cap is located.
- This sealing link is unscrewed, then the cam and washer are pulled out.
- Finally, they take out the ball.
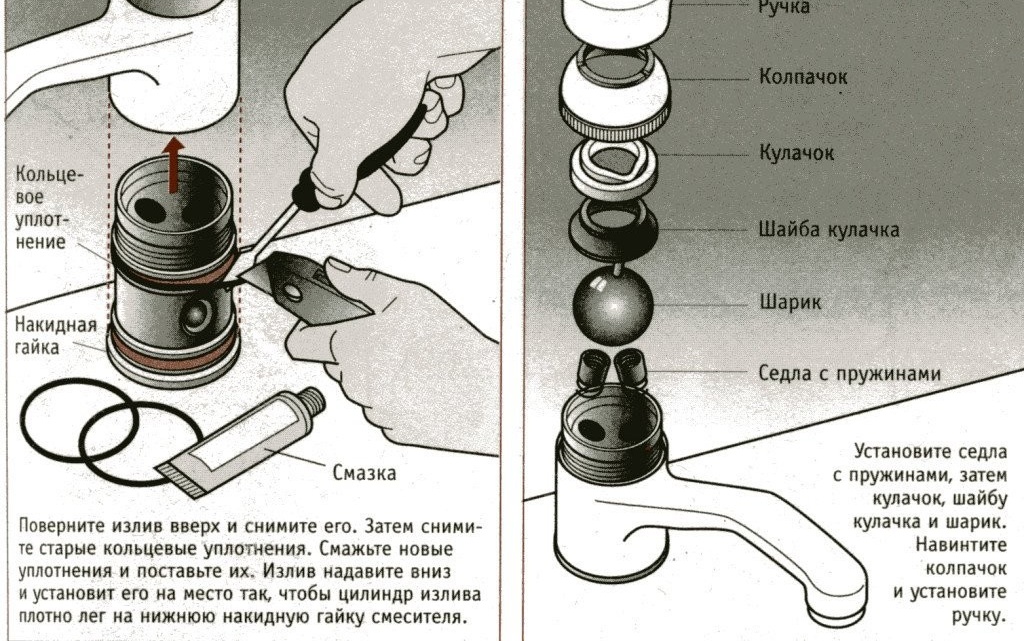
- But that is not all. Like a cartridge, this “organ” is central to the process of mixing hot and cold water. Under it are two valves with springs.
- Carefully remove these elements, which are used to enter the contents of the pipes into the mixer. If necessary, clean them. It is their pollution that is the most common type of breakdown of the described node.
- Then you can remove the case and replace the rubber bands-rings. They are strung on a plastic base.
- We assemble in the reverse order. All operations can be done without removing the mixer from the sink.
Despite the rather simple device, there are still malfunctions in the mixers; they can be easily fixed on their own. How to do this, read our article:https://aquatech.tomathouse.com/en/santehnika/kran/remont-smesitelya-svoimi-rukami.html.
The process described in more detail is shown in the following video.
Video: disassembly of the structure
So, we detailed the technological processes of dismantling the parts of various household mixers. Whether it’s a bathroom or a kitchen, these instructions are intended to serve as a guide to action for the technically savvy owners.