How to build a grease trap

Kitchen sewers often suffer from blockages. The most unpleasant of them are associated with the accumulation of fat in the pipes. Traditional chemistry like "Mole" in advanced cases may be powerless. But such an ingenious device as a grease trap will help to avoid blockages. How to build it, let's talk in this article.
Content
Prevention unit
A grease trap is an installation, figuratively speaking, separating grains from the chaff. It is integrated into the sewage system to prevent fat deposits in pipes. And this technique is based on one simple principle - fat always rises to the surface of a certain volume of cool water. Most often, such devices are used in canteens and culinary, there it is justified by sanitary standards. But at home, you can make a homemade grease trap. After all, its advantages are obvious:
- he prevents very unpleasant blockages in the sewer;
- the device of such a household installation is simple;
- maintenance of such equipment is minimal.
For starters, let's consider what the simplest “filling” of a household grease trap is. The main elements that a simple separator includes are listed below.
- Inlet pipe.
- Partition.
- Outlet pipe to the sewer, usually in the form of a tee.
- All this is located in a box-shaped plastic case, the inlet and drain pipes look out.
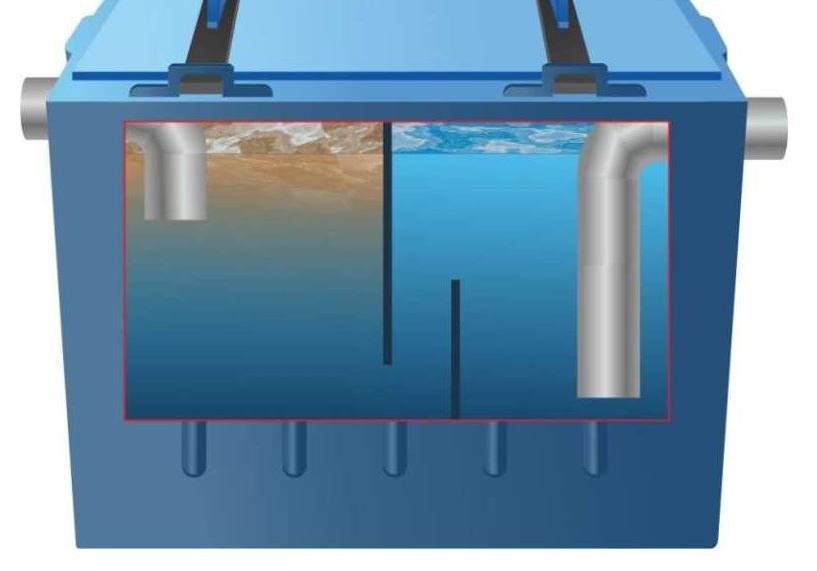
Household grease trap circuit
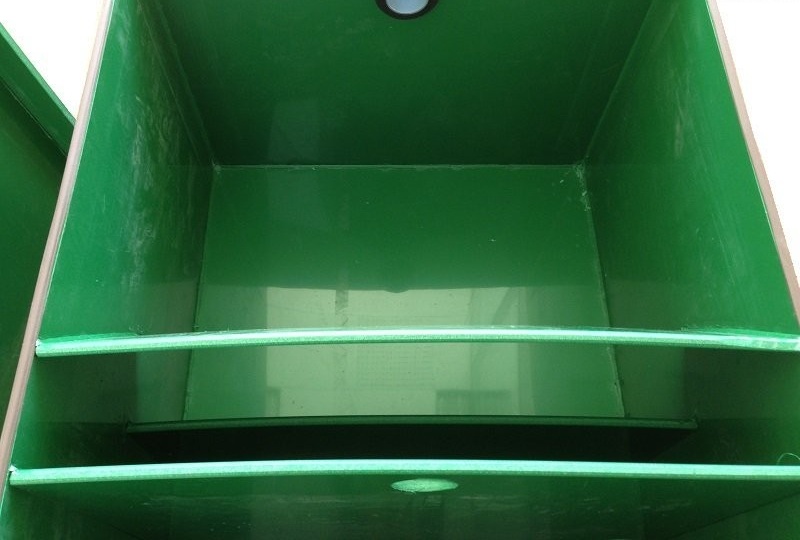
In the presence of all these elements, the principle of operation is as follows: water with fat enters through the inlet pipe from the kitchen sink. Inside our unit, the liquid fills the primary chamber, where it settles a little, while the fat rises upward. This chamber is separated from the rest of the device by a partition.
However, this wall does not stretch to the very top. Its height is about two-thirds of the height of the box. Thus, a gap remains. It is through this upper “outlet” that water without fat flows into the neighboring chamber and at the very bottom falls into the outlet pipe, which is most often made in the form of a tee. After which, in fact, the liquid flows into the sewer.
At the same time, all the collected fat remains on the surface of the constantly maintained volume of the working medium. Therefore, the described separator is serviced. As the accumulation of unpleasant suspensions, the device must be completely disconnected from the line, and then released from the contents. Such an operation must be done at least once every two weeks. It all depends on the amount of pollution, on the intensity of use of the sink. Next, we consider the process of creating such a home appliance that needs to be periodically cleaned.
How to make a grease trap yourself
Material selection and calculation
Typically, materials such as
- food grade plastic;
- fiberglass;
- polypropylene;
- stainless steel.
But in our case, it will be enough to use the harmless materials available on the farm. The homemade separator case can be made of a plastic toy box with a tight-fitting lid. Pipes for wiring fit standard. For input, as well as for output, a new sewer elbow will fit, if necessary supplemented with a purchased pipe section. The diameter of these links, as a rule, corresponds to the common size of sewer communications for an apartment, that is, 50 mm.
To determine the approximate dimensions of the housing, in other words, the volume of the grease trap, it is necessary to calculate the performance of the unit. For industrial enterprises, the calculation method is rather complicated and takes into account several factors that in our case do not matter. Therefore, it is enough to make a simplified calculation by the formula:
P = nxPs, where
- P is the performance of our separator, l / s,
- n is the number of sinks in the rooms,
- Ps is the water flow rate in the water supply, which is usually about 0.1 l / s
Suppose we have one kitchen sink. Then we get P = 1x0.1 = 0.1 l / s. Now you can directly calculate the volume of our installation using the following formula:
V = 60хPхt, where t is the average duration of fat sedimentation, approximately 6 minutes.
Then for our example we get the desired volume V = 60x0.1x6 = 36 liters. Now you can choose the dimensions of the used box. It is easy to understand that, say, such dimensions are ideally suited: 0.3 m. X 0.3 m. X 0.4 m. If you multiply them, it will turn out 0.036 m3 or 36 liters. Moreover, the height of the hull can be taken as equal to 0.3 m., And equal to 0.4 m.
Next, you need to draw a sketch or drawing.
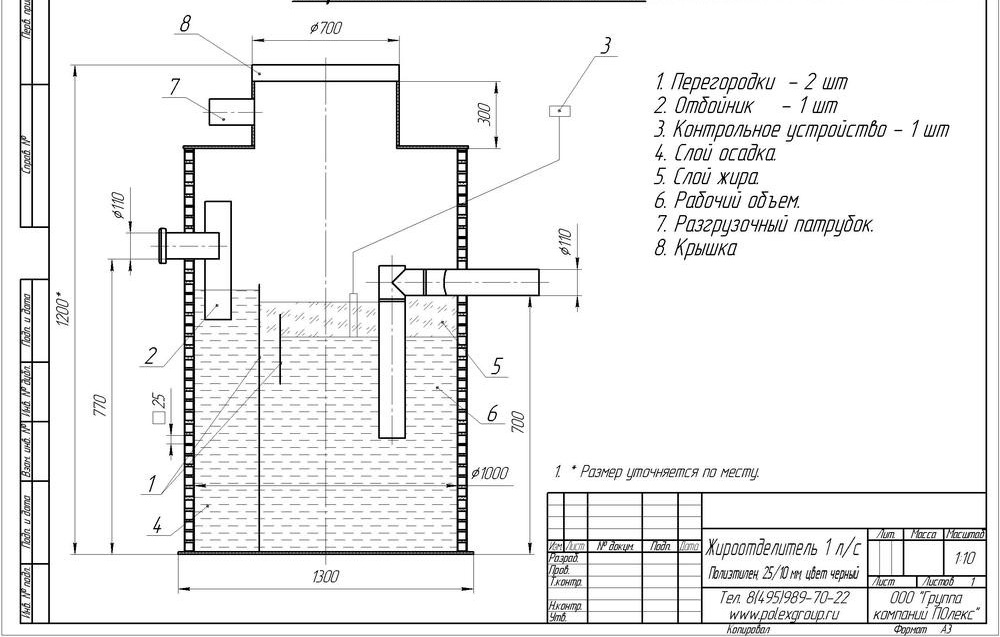
Household grease trap drawing
The height of the inlet and outlet openings must be taken constructively, based on the following principle. The center of the outlet should be 3 to 5 centimeters lower than the center of the inlet. In this case, the input should be located as close as possible to the lid of the box.
Finally, it's time to start the main stage: assembling a makeshift separator.
DIY making
For work, we need the following tools and materials (instead of a partition in the structure, you can use a low branch pipe with a large diameter of 100 mm):
- a box of suitable design dimensions (or slightly larger);
- PET type elbow with a diameter of 50 mm;
- PET type tee with a diameter of 50 mm;
- a pipe with a diameter of 100 mm and a length of about two-thirds of the height of the box;
- the same length of a piece of PET pipe with a diameter of 50 mm with mounting extension and a rubber sleeve at the end;
- jigsaw or file;
- sanitary sealant;
- sandpaper;
- rubber sealing tape with an adhesive layer.
We begin to create a homemade homemade grease trap.
- In the end sides of the box, we cut holes for the inlet and outlet pipes with an existing tool. This must be done very carefully, clearly in the diameter of the used pipe elements. Do not forget to carefully clean the edges of the cut.

Grease trap manufacturing process
- We install and conscientiously glue a pipe with a diameter of 100 mm on the bottom of the box using sanitary sealant.
- After drying, we install a piece of pipe with a diameter of 50 mm inside the pipe 100 mm coaxially, but so that the fifty-millimeter end does not reach the bottom of the box for three to four centimeters. We insert a discharge outlet tee from above into this pipe. The other end of this last link should go into the outlet. And the top branch of the tee will be “looking” with its hole on the box lid. It will be a kind of ventilation.
- Next, mount the opening elbow.
- Carefully coat with sealant the entry points of both nozzles into the box.
- At the end of the process, glue the edges of the box lid, which are joined with the body, with sealing tape.
- We are waiting for the sealant to dry. After this, the grease trap is ready for use.
Connecting our separator to the sewage system is simple. It is enough to install it under the sink. Then you need to pull the drain corrugation from the main sewer pipe and insert the end of this drain into the inlet elbow of the grease trap. In this case, the output tee of the device must be connected to the sewer with another corrugation.
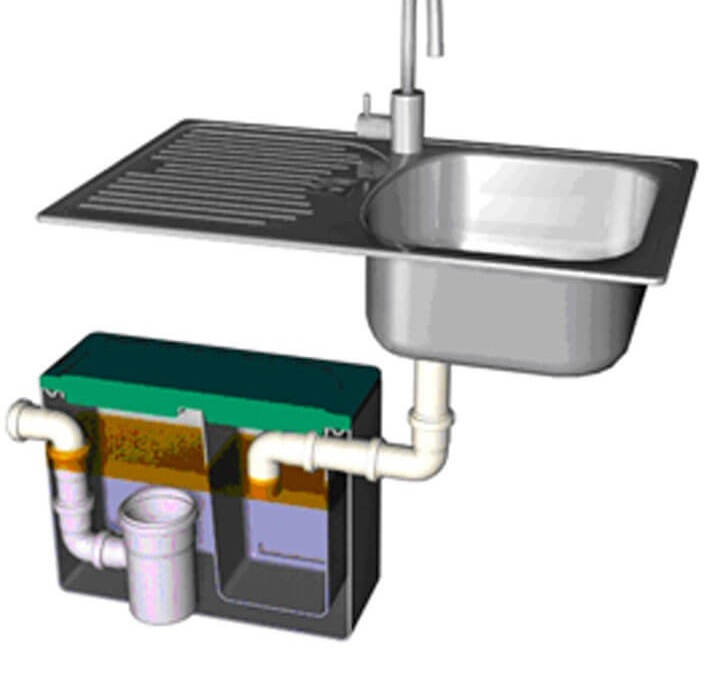
Installation under the sink
Important to remember! Effective separation of fat from wastewater occurs only at low temperatures, up to 40 degrees Celsius. Therefore, try to place your unit as far as possible from the sink siphon. This is necessary in order for the hot water to cool during the flow.
During operation of the described unit, you can enjoy clean sewer pipes. The main thing is that every two to three weeks, or better still more often, turn off and completely empty our device, clean it, and then reinstall it on the network.
The fat separator device that we have described here will ensure uninterrupted operation of the unit for a long time, namely for several years. After all, it is not much different from the factory. So feel free to start manufacturing it!