DIY instantaneous water heater - what and how to do
Flowing water heaters differ from storage (boilers) in that they heat the flow of water passing through them. Therefore, their power is higher than that of boilers. Self-manufacture of these devices will help you make hot water in the country or at home. You will learn how to make electric, solar and other models of instantaneous water heaters with your own hands, and you can also make a device that meets your conditions.
Content
Types of instantaneous water heaters
Instantaneous water heaters divided by the type of energy that is used for heating. Therefore, they can be divided into the following types:
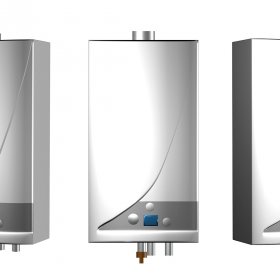
- Electric, in which the passing water is heated by a heating element (tubular electric heater) or a metal tube, which is affected by an alternating magnetic field (inductor). Therefore, they are divided into two types: induction and heating elements. This type of water heater consumes electrical energy, therefore it is not suitable for those places where it is impossible to connect to the mains;
- Water, working from the heating system. These devices do not require an electrical connection, so they can be used even in non-electrified houses. However, dependence on the heating system does not allow their use in the summer;
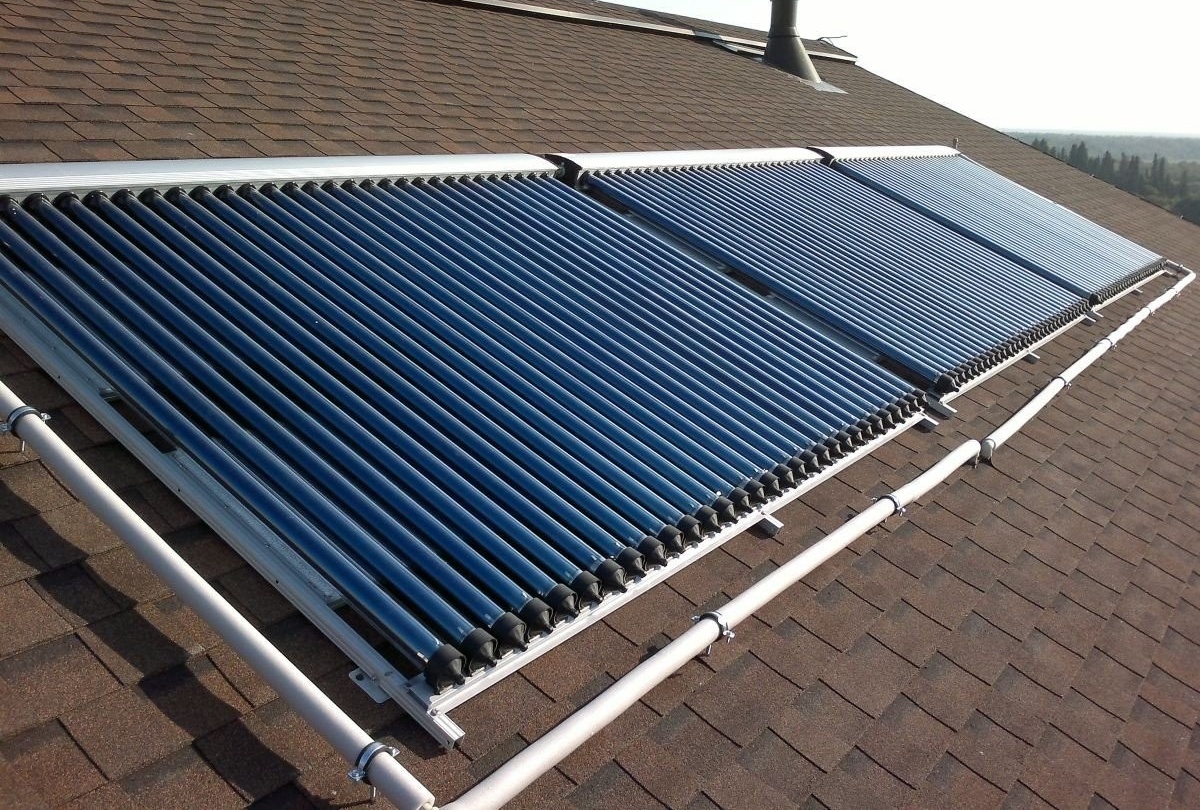
- Solar, receiving heat from the sun. They do not depend on the heating system or electricity, so they can be used in summer cottages. However, these devices heat water only on warm sunny days;
- Gas powered by liquefied or main gas. Such devices are used only in houses and apartments connected to the central gas pipeline.
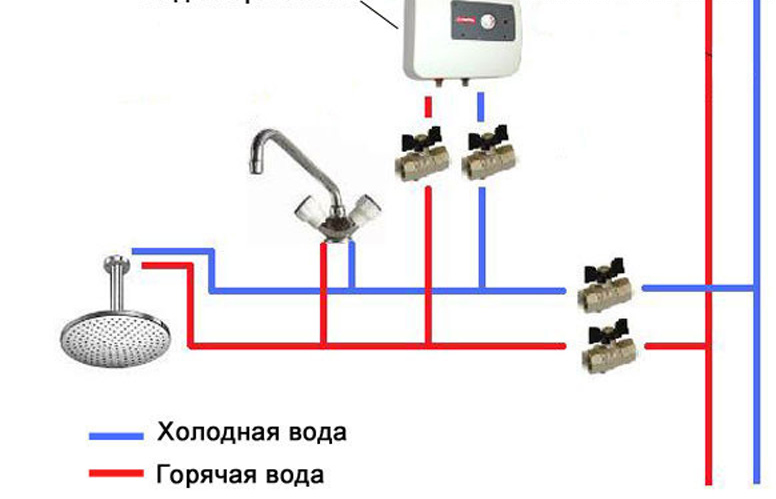
This device heats the flow of water through it.
The basis of an electric water heater is a nichrome wire, which has a high resistance, wound on a ceramic frame. Induction heater works on a different principle. A thick copper bus is wound on a metal pipe, then high-frequency (up to 100 kilohertz) voltage is applied. An alternating magnetic field heats the metal pipe, and the pipe, in turn, heats the water. There are instantaneous heaters that integrate into boilers or heat storage tanks filled with water. Therefore, they are called water. The best option for a summer cottage is a solar instantaneous water heater.It works from solar energy and heats water to 38–45 degrees, which is quite enough to take a shower. Gas flowing water heaters appeared in the student environment from hopelessness caused by a broken column or other similar factors. They are a spiral tube of copper, located above the fire of a kitchen gas stove.
What can you do yourself
Before choosing a specific type of water heater, you need to determine what tools, materials and skills are available to you. If you know how to work well with a welding machine, then you can make an electric water heater. If you already have a working heating system with a heat accumulator and you know how to use a welding inverter, then you can make a water heater. If you do not have such talents or you do not have either electricity or water heating, then you can afford a solar water heater.
Tip: if you are not an experienced radio amateur who knows how to configure complex contours, then do not try to make induction water heaters yourself. Even a small mistake in adjusting the circuit formed by the capacitor, inductor and metal core will lead to the appearance of phenomena such as a standing wave and spurious harmonics. Such physical processes adversely affect equipment and people, cause headaches and other health problems.
Gas instantaneous water heaters - a means of increased danger. To work with any gas devices you need to undergo special training, otherwise it is likely that instead of a instantaneous water heater you will get a time bomb that will explode once. If the gas concentration in the room is 2-15%, then the explosion will occur from any spark. Therefore, in this article there are no instructions with which you can create a gas instantaneous water heater.
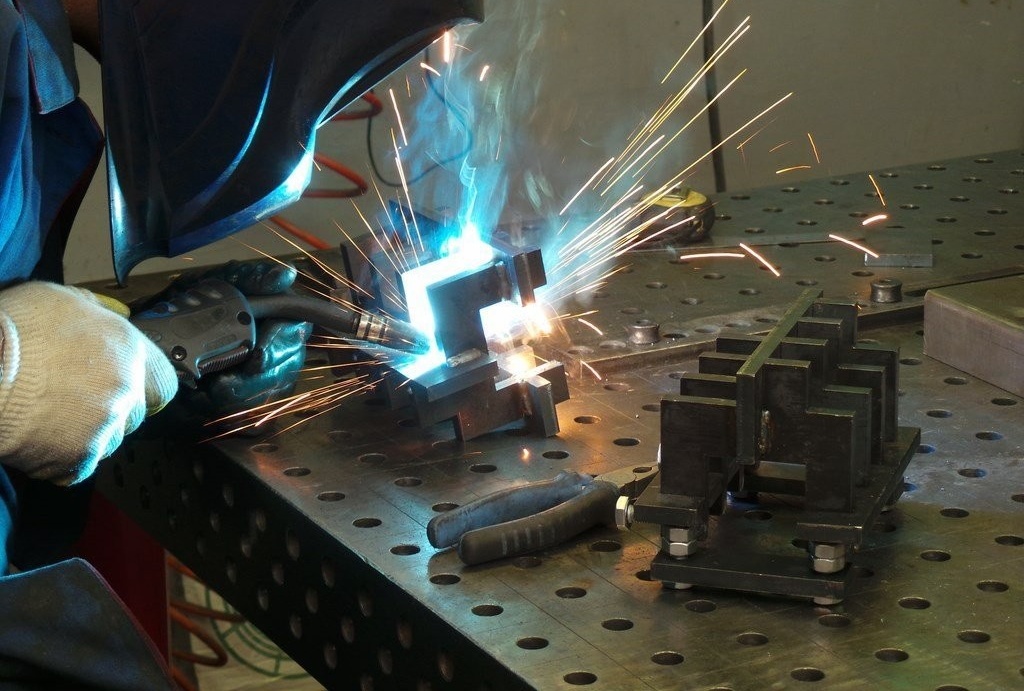
To create most water heaters you will have to learn how to use welding.
Remember: a homemade product can compete with a factory water heater only if two conditions are met - if you have vast experience in working with heating and electricity systems, and also have access to quality materials. If at least one of the conditions is not met, do not take any chances and buy a instantaneous water heater in the store.
Advantages and disadvantages of various types
The main advantage of an electric heater is that parts for it can be purchased at the nearest hardware store and at a collection point for ferrous and non-ferrous scrap metal (ferrous metal). In addition, during the assembly of the device will require a minimum of welding work. If you can find a casing with a suitable size on the chermet with two nozzles, then you can probably do without welding. The disadvantages of this unit are also obvious - it cannot work without power supply and quickly deteriorates due to poor water or improper operation.
The advantage of a heater operating from a heating system is that it can be used regardless of the availability of electricity. The coolant has a much lower temperature than the heater, so even bad water has almost no effect on it. The disadvantages of the device are obvious: the high complexity of manufacturing (you will need to solder thin copper tubes to a steel pipe) and the dependence on the heating system. In this case, hot water at the outlet of the heater will be about a third colder than the coolant. That is, when the heating system is heated to 40 degrees, the water in the tap will heat up to 25-30 degrees. If you heat up the heating to 90 degrees, then you will warm the hot water to 55-60 °. To slightly improve this ratio, as well as reduce heating costs, the unit will be insulated. After all, it is constantly connected to the supply pipe, therefore it actively emits infrared rays and cools the coolant.It can also be used as another radiator of low power. In this case, it is not necessary to insulate the water heater.
The main advantage of a solar water heater is ease of manufacture and independence from energy resources. On a hot sunny day, such a device will easily warm water to a temperature of 40-50 degrees, which is quite enough for bathing, washing or washing dishes. This unit has only one drawback - it depends on the sun, so on cloudy or rainy days, as well as in winter, the water heater is useless.
Therefore, the type of water heater is selected based on:
- the availability of electricity;
- Ability to work with a grinder, a welding inverter and a gas torch;
- connectivity to heating;
- time of year;
- water quality.
Not everywhere you can install a water heater that will run on solar energy. But you can always find an alternative. In our next article, you will learn how to choose the right electrical unit and provide the whole family with hot water:https://aquatech.tomathouse.com/en/otoplenie/boilery/kak-vyibrat-vodonagrevatel.html.
Self-made heater
After weighing all the advantages and disadvantages and determining the type of device, proceed to the preparation of materials and the workplace. Most of the work is conveniently performed in the barn or in the yard in dry, calm weather. If you are going to do welding or soldering, make sure that there are people nearby who will be able to help you in the event of an emergency. Also, keep a first-aid kit near the workplace so that people who come to your aid do not have to run around the yard and at home in search of bandages or other medical supplies. Tools such as grinders and gas burners require a responsible attitude. Neglect of security measures may result in tragedy.
How to make an electric flow heater
Materials:
- tubular electric heater (TEN) with a power of 4-6 kW;
- a piece of steel pipe into which a heater is placed with a small margin;
- two pieces of a half-inch steel pipe, in which a standard thread is cut from one edge;
- several pieces of sheet steel 3 mm thick;
- nut and bolt for grounding;
- anticorrosive paint.
You will also need tools:
- Bulgarian;
- drill;
- nozzle for removing dirt and rust;
- welding inverter;
- electrodes
- metal brush;
- roulette;
- a hammer;
- sharp core.
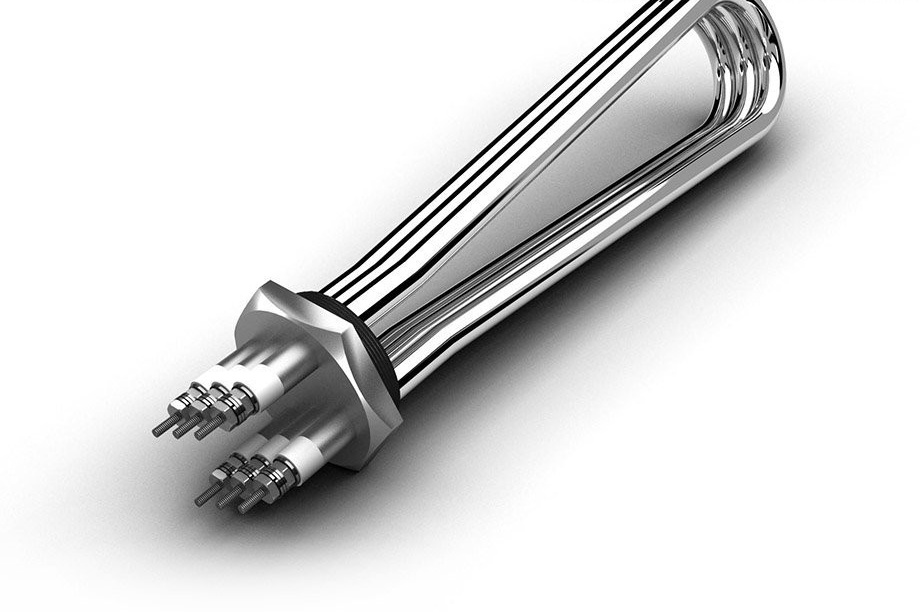
TEN - the basis of the electric flow heater
Step-by-step instruction
- Before starting work, all metal parts must be cleaned of dirt and rust using a special nozzle on a drill or grinder.
- Take a piece of metal larger than the diameter of the pipe, and in the center outline the holes for installing the heater. Depending on the model of heating elements, there can be from 1 to 6.
- Remove the fasteners from the heater and pick up a drill 1 mm more than the legs of the electric heater. Make the necessary holes with this drill. Some models of heating elements are equipped with a threaded or smooth body designed for insertion into some device. In this case, you will have to cut such a hole with a drill or inverter. You can also turn to the turner to drill a suitable hole. If necessary, drill a hole for the mounting bolts and cut the threads.
- Attach this piece of metal to the end of the pipe so that the holes are approximately in the middle and the core outline the shape of the pipe.
- Using a grinder, cut the metal according to the marking, then make another same circle, only without holes.
- Insert and fix the heater in the circle intended for it. Make sure everything is tightly pressed. If something sticks out somewhere, find and eliminate the cause.
- Remove the heater and weld a circle to the end of the pipe.
- Cut the pipe so that from the end of the heater to the second circle is 1-2 cm.
- Depart from each end of the pipe 1 cm and cut two holes in it in one line, corresponding to the inner diameter of the threaded segments.
- Weld the threaded segments to the holes, you will connect water to them.
- Weld a circle with holes under the heater and install the heater, then weld the second circle on the other side.
- In any convenient place, focusing on the subsequent installation of the heater, weld the ground nut.
- Connect the assembled structure to the water supply and faucet to make sure that it passes water well through itself and does not leak anywhere. If a leak is found, brew it.
- Remove the water heater, degrease and paint with anti-corrosion paint. When the paint is dry, you can install and connect it.
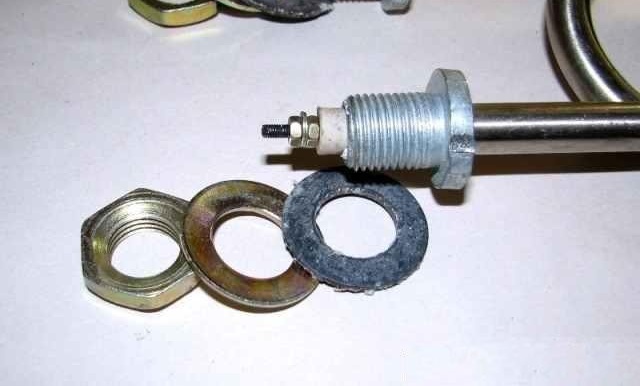
Most of these heaters are mounted using various gaskets and nuts.
Warning: This type of water heater must be earthed. Otherwise, there is a high probability of electric shock. Therefore, before turning on the heater, make sure that it is firmly connected to ground.
How to make a flow structure working from a heating system
The principle of operation of this device is to heat a heat exchanger (coil) placed in a hot coolant of a heating system, for example, a heat accumulator. However, inserting such a coil into a new heat accumulator will not lead to anything good. Because of this, you will lose the warranty on the device, and you can also damage the insulation, which will drastically reduce efficiency and increase heating costs. Therefore, it is necessary to independently make a small-sized heat accumulator, embed a heat exchanger into it and insulate the entire structure. You can include such a water heater in the gap of the heating supply pipe and provide yourself with clean hot water. In an uninsulated water heater, some of the heating energy will be wasted, which will increase spending in the winter. If this does not bother you, then you can not insulate the device, this will make it more compact.
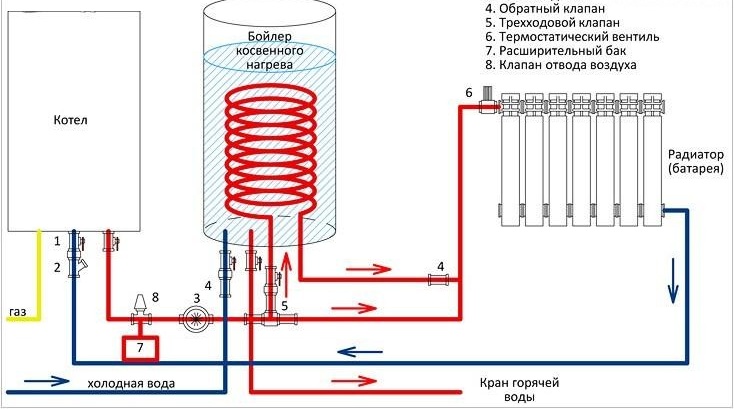
This device heats water due to the high temperature of the coolant in the heating system.
For work you will need the following tools:
- Bulgarian;
- drill;
- welding inverter;
- gas cutter;
- a soldering iron with a power of at least 300 watts;
- roulette;
- compass;
- sharp core;
- scissors for metal or secateurs.
- riveter.
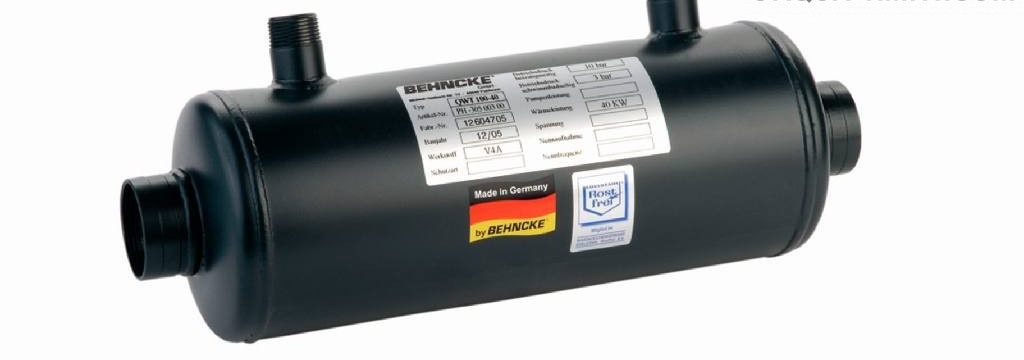
This arrangement of instantaneous water heater is well suited for self-production
You will also need the following materials:
- a copper tube with a diameter of 4-8 mm;
- copper sheet 2-3 mm thick;
- an iron or wooden round mandrel with a diameter of 10-12 cm (you can use a piece of pipe);
- sheet iron with a thickness of 3-5 mm;
- anticorrosive paint;
- 2 angles of 90 degrees from a pipe half an inch;
- 4 pieces of half-inch pipe 10-15 cm long with standard thread;
- 2 brass couplings (half inch) with thread;
- half inch steel pipe;
- thick-walled steel pipe, the inner diameter of which is more than 20 cm (you can use part of an empty gas cylinder);
- medium temperature solder for copper and brass, as well as the corresponding flux;
- fluoroplastic sealing material (FUM tape).
For insulation, prepare:
- mineral wool;
- steel corner with a shelf size of 50 mm;
- sheet iron 0.7–1 mm thick;
- rivets.
Instruction manual
- Wind a copper tube onto the mandrel. If the tube is less than 8 mm in diameter, then two must be wound at the same time. The length of the spiral is 15–20 cm. During winding, pull the tube slightly towards you, this will help to avoid its deformation. Do not use a mandrel with a diameter of less than 5 cm, otherwise the tube will fold or flatten due to bending too much.
- From a sheet of copper, cut two round plates, the diameter of which is equal to the size of the brass couplings. In the center of the plates, drill holes in diameter and number of tubes. Strip both surfaces of the plates and one of the ends of each brass coupling using sandpaper and using a gas burner, medium temperature solder and flux, solder the plates to the couplings.
- When the parts have completely cooled, insert tubes into them to a depth of 1 mm and solder with a gas torch and the same solder and flux.
- Connect the coil to the water supply and supply water to check for leaks. If they are, then eliminate them.
- Mark in the thick pipe (body) two holes corresponding to the coil couplings.
- Drill them so that they are 1 mm larger than the diameter of the half-inch threaded pipe sections.
- Strip the pipe inside and out with a drill head or grinder.
- Strip and half inch pipes.
- Dip the coil into the thick pipe, insert the threaded pipes into the holes and screw them into the couplings using the FUM tape.
- Using solder, flux and gas burner, solder thin pipes to thick ones. Do not overheat the thin pipe so that the FUM does not melt.
- Drill two holes from the opposite edge of the body and weld two threaded pipes to them. If you have thicker pipes in the heating system, then use threaded sections of the same diameter and drill a hole for them.
- Cut two circles from sheet steel 3-5 mm thick, whose diameter is 11 cm larger than the body. If you decide not to heat the water heater, then the size of the disks should be equal to the diameter of the case.
- Weld these circles to the two ends of the body.
- Connect both heating leads to the water supply to check the resulting unit for leakage. If a leak is found, brew it.
- Coat the unit with anticorrosion protection.
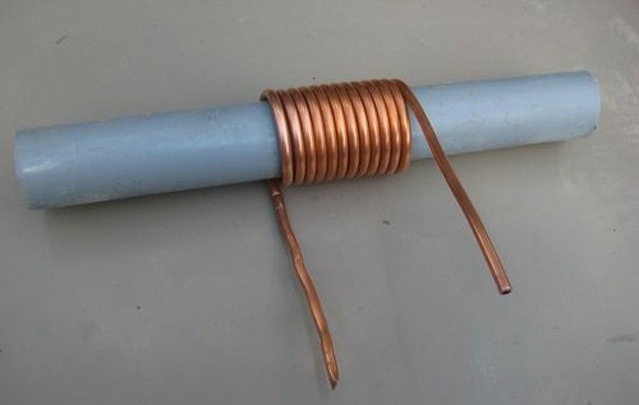
The correct winding of the copper tube on the mandrel will allow you to create a coil - heat exchanger
If you doubt your abilities and ability to solder, then put a thick pipe so that thin pipes stick out vertically upwards. Support the coil so that it is in the middle of the pipe, fill it with water to the upper edge of both couplings and proceed to solder. This will protect the coil from overheating.
How to insulate a water heater with your own hands
- Weld 7-10 corners to the body surface so that the second shelf is parallel to the pipe surface. Weld not with a solid seam, but with 3-4 tacks of 1 cm length. This will reduce heat loss through the corners that come in contact with the outer metal sheath.
- From a thin sheet metal, make a strip whose width is 2 cm greater than the distance between the end circles of the housing. The length of the strip should be sufficient to completely wrap the resulting unit.
- On both sides of this strip, make sides 1 cm wide.
- Using a secateurs or scissors for metal, give these sides a sawtooth look, for this, mark them with a zigzag tooth in the shape of an equilateral triangle.
- Cut the teeth opposite the corner from the edge of the strip.
- Attach the strip to the corner, ensuring the correct orientation of the strip so that it can be wrapped around the unit, because after installing the rivets you can not fix anything.
- Drill a strip and a corner (5–7 holes) and fasten the parts with a rivet.
- Cut a suitable piece of mineral wool and insert it between the corner to which the thin metal is attached and the adjacent corner.
- Cover the insulation with metal and fasten with rivets.
- Perform the same operation on the remaining corners.
- Weld the legs from the corner either to one of the round plates, or between the plates, if you install it horizontally.
Video: how to use a rivet
How to make a solar model
Here is a list of tools that you will need to work:
- drill or screwdriver;
- stapler;
- jigsaw;
- glass cutter;
- pencil;
- roulette.
You will also need the following materials:
- plywood 20 mm thick;
- wooden planed whetstone with a section of 5x5 cm;
- planed board with a width of 10 and a thickness of 5 cm;
- black rubber garden hose;
- foamed foil insulation;
- screws of various sizes;
- glass 3-5 mm thick; plywood, the thickness of which is equal to the thickness of the glass;
- wooden slats with a width of 5 and a thickness of 1 cm;
- knitting wire.
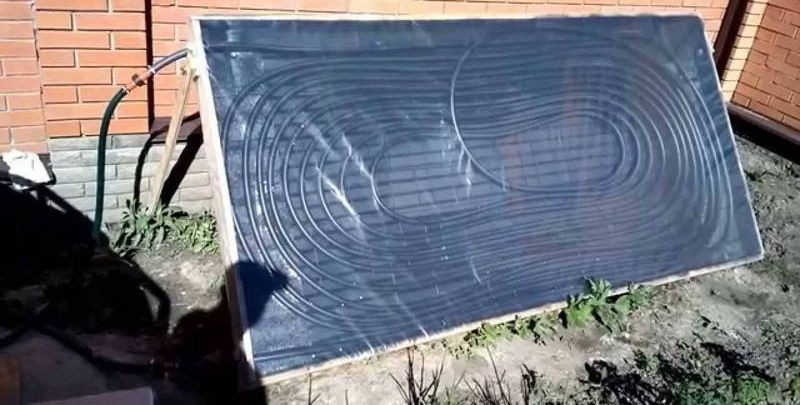
Such a water heater is made from a garden hose
Walkthrough Assembly
- Determine what size you will make the water heater and where to mount it. It works best on the south side of the roof, in which case it is warmed by the morning, afternoon and evening rays of the sun.
- Cut a rectangular base of suitable size from plywood.
- Screw the planed bars around it to make it look like a fire shield.
- Connect the bars with each other, this will increase the rigidity of the structure.
- Sheathe the inside of the resulting box with foamed foil insulation using a stapler. Lay the insulation with foil out.
- Cut pieces of 15 cm long from a planed board and cut one edge in a semicircle so that the diameter of the circle is equal to the width of the board. These will be the hose guides.
- Screw the guides to the plywood from the side of the insulation so that the hose laid on them forms a snake. At the point of rotation of the hose, the distance between the turns should not be larger than the diameter of the hose. Using a jigsaw, cut two grooves in the lower bar for the inlet and outlet of the hose.
- From thin plywood, cut strips 4 cm wide.
- Using a stapler, attach the plywood strips to the face of the bars so that they form a step that prevents the glass from moving.
- Lift the water heater to the roof and attach to the south side. If possible, install it horizontally, because the smaller the angle relative to the ground, the greater the efficiency.
- Lay the hose along the guides and secure it with eyelets from the knitting wire. Fasten the loops to the plywood so that they are not higher than the guides, otherwise the glass will burst.
- Instead of a rubber hose, use a copper or steel pipe 5–10 mm thick or a coil removed from an old refrigerator. In this case, the guides are not needed, however, it is necessary to bend the pipes so that the turning radius is at least 5 diameters. After giving the tube the necessary shape, cover it with a sheet of thin sheet painted in black, and fix it in the body of the water heater.
- Cut the glass to size, install it on the water heater and fix it with rails, which must be laid exactly on the beam.
- Connect the pipes to the water heater and supply water.
A solar water heater can be made not only from a hose. For installation, the condenser of the old refrigerator or flat heating radiators are suitable. Detailed instructions can be found here:https://aquatech.tomathouse.com/en/otoplenie/boilery/solnechnyiy-vodonagrevatel-svoimi-rukami.html.
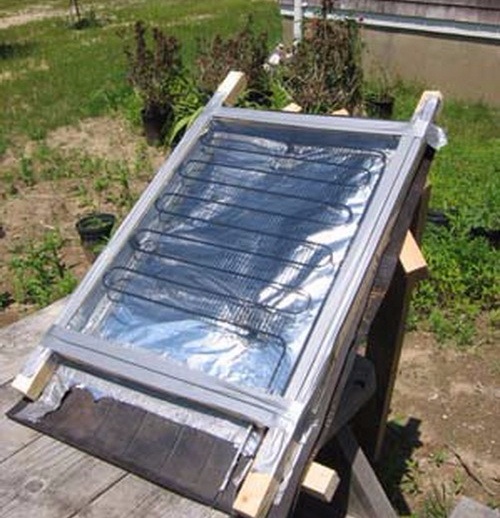
This instantaneous water heater was made from the radiator of an old refrigerator
Features of using homemade products
Industrial instantaneous water heaters undergo a serious test, which prevents the appearance on the market of defective units that pose a danger to users. When making such a device yourself, you must clearly understand that no one except you will diagnose and detect a malfunction. If you do something wrong and do not notice it in time, then the whole severity of the consequences will fall on the one who is closest to the damaged unit. Therefore, before the first start-up and every 2-3 months, be sure to check the condition of the wires, contacts and welds.
Do not forget to open the water first, then turn on the heater. Otherwise, the water in the unit will boil, and the tubular heater will burn out. In those devices that are sold in the store, a complex sensor is installed that responds to the movement of water and supplies electricity to the heater spiral.
Install home-made devices in places where people’s activity is minimal. This will protect you and your loved ones, if for some reason the unit will leak. The coolant in the heating system is under pressure up to 1 atmosphere, so the length of the jet through the leak can reach 1 meter.Water with a temperature of 70–80 degrees can boil strongly (second-degree burns), so take these recommendations seriously.
A flowing water heater can be made independently, however, the cost of such a device will be much more expensive than the purchased unit and will be less efficient and safe. Therefore, making it yourself is justified only if the models that the stores offer are not suitable for you.
Read more about the range and the best units for heating water in our material:https://aquatech.tomathouse.com/en/otoplenie/boilery/kakoy-vodonagrevatel-vyibrat.html.