Greenhouse conditions: how to install an automatic irrigation system in a greenhouse with your own hands
An automatic irrigation system for the greenhouse provides plants with moisture in a constant mode. At the same time, the daily laborious process of planting care is simplified. The owner of the greenhouse can purchase a machine for automatic watering in a store for gardeners, but it is more practical to do it yourself.
Content
Types of automatic irrigation systems and their device
There are three types of auto-watering systems that you can create yourself: subsoil, drip and rain. Any of the options is suitable both for providing moisture to the greenhouse, and for irrigation of beds in open ground. Each type has its own design and operational features, advantages and disadvantages.
Drip
This variety is considered the most economical and progressive for growing greenhouse crops. It was invented by agronomists from Israel to achieve a high yield with a shortage of water resources. A similar system can work both from power supply and in stand-alone mode.
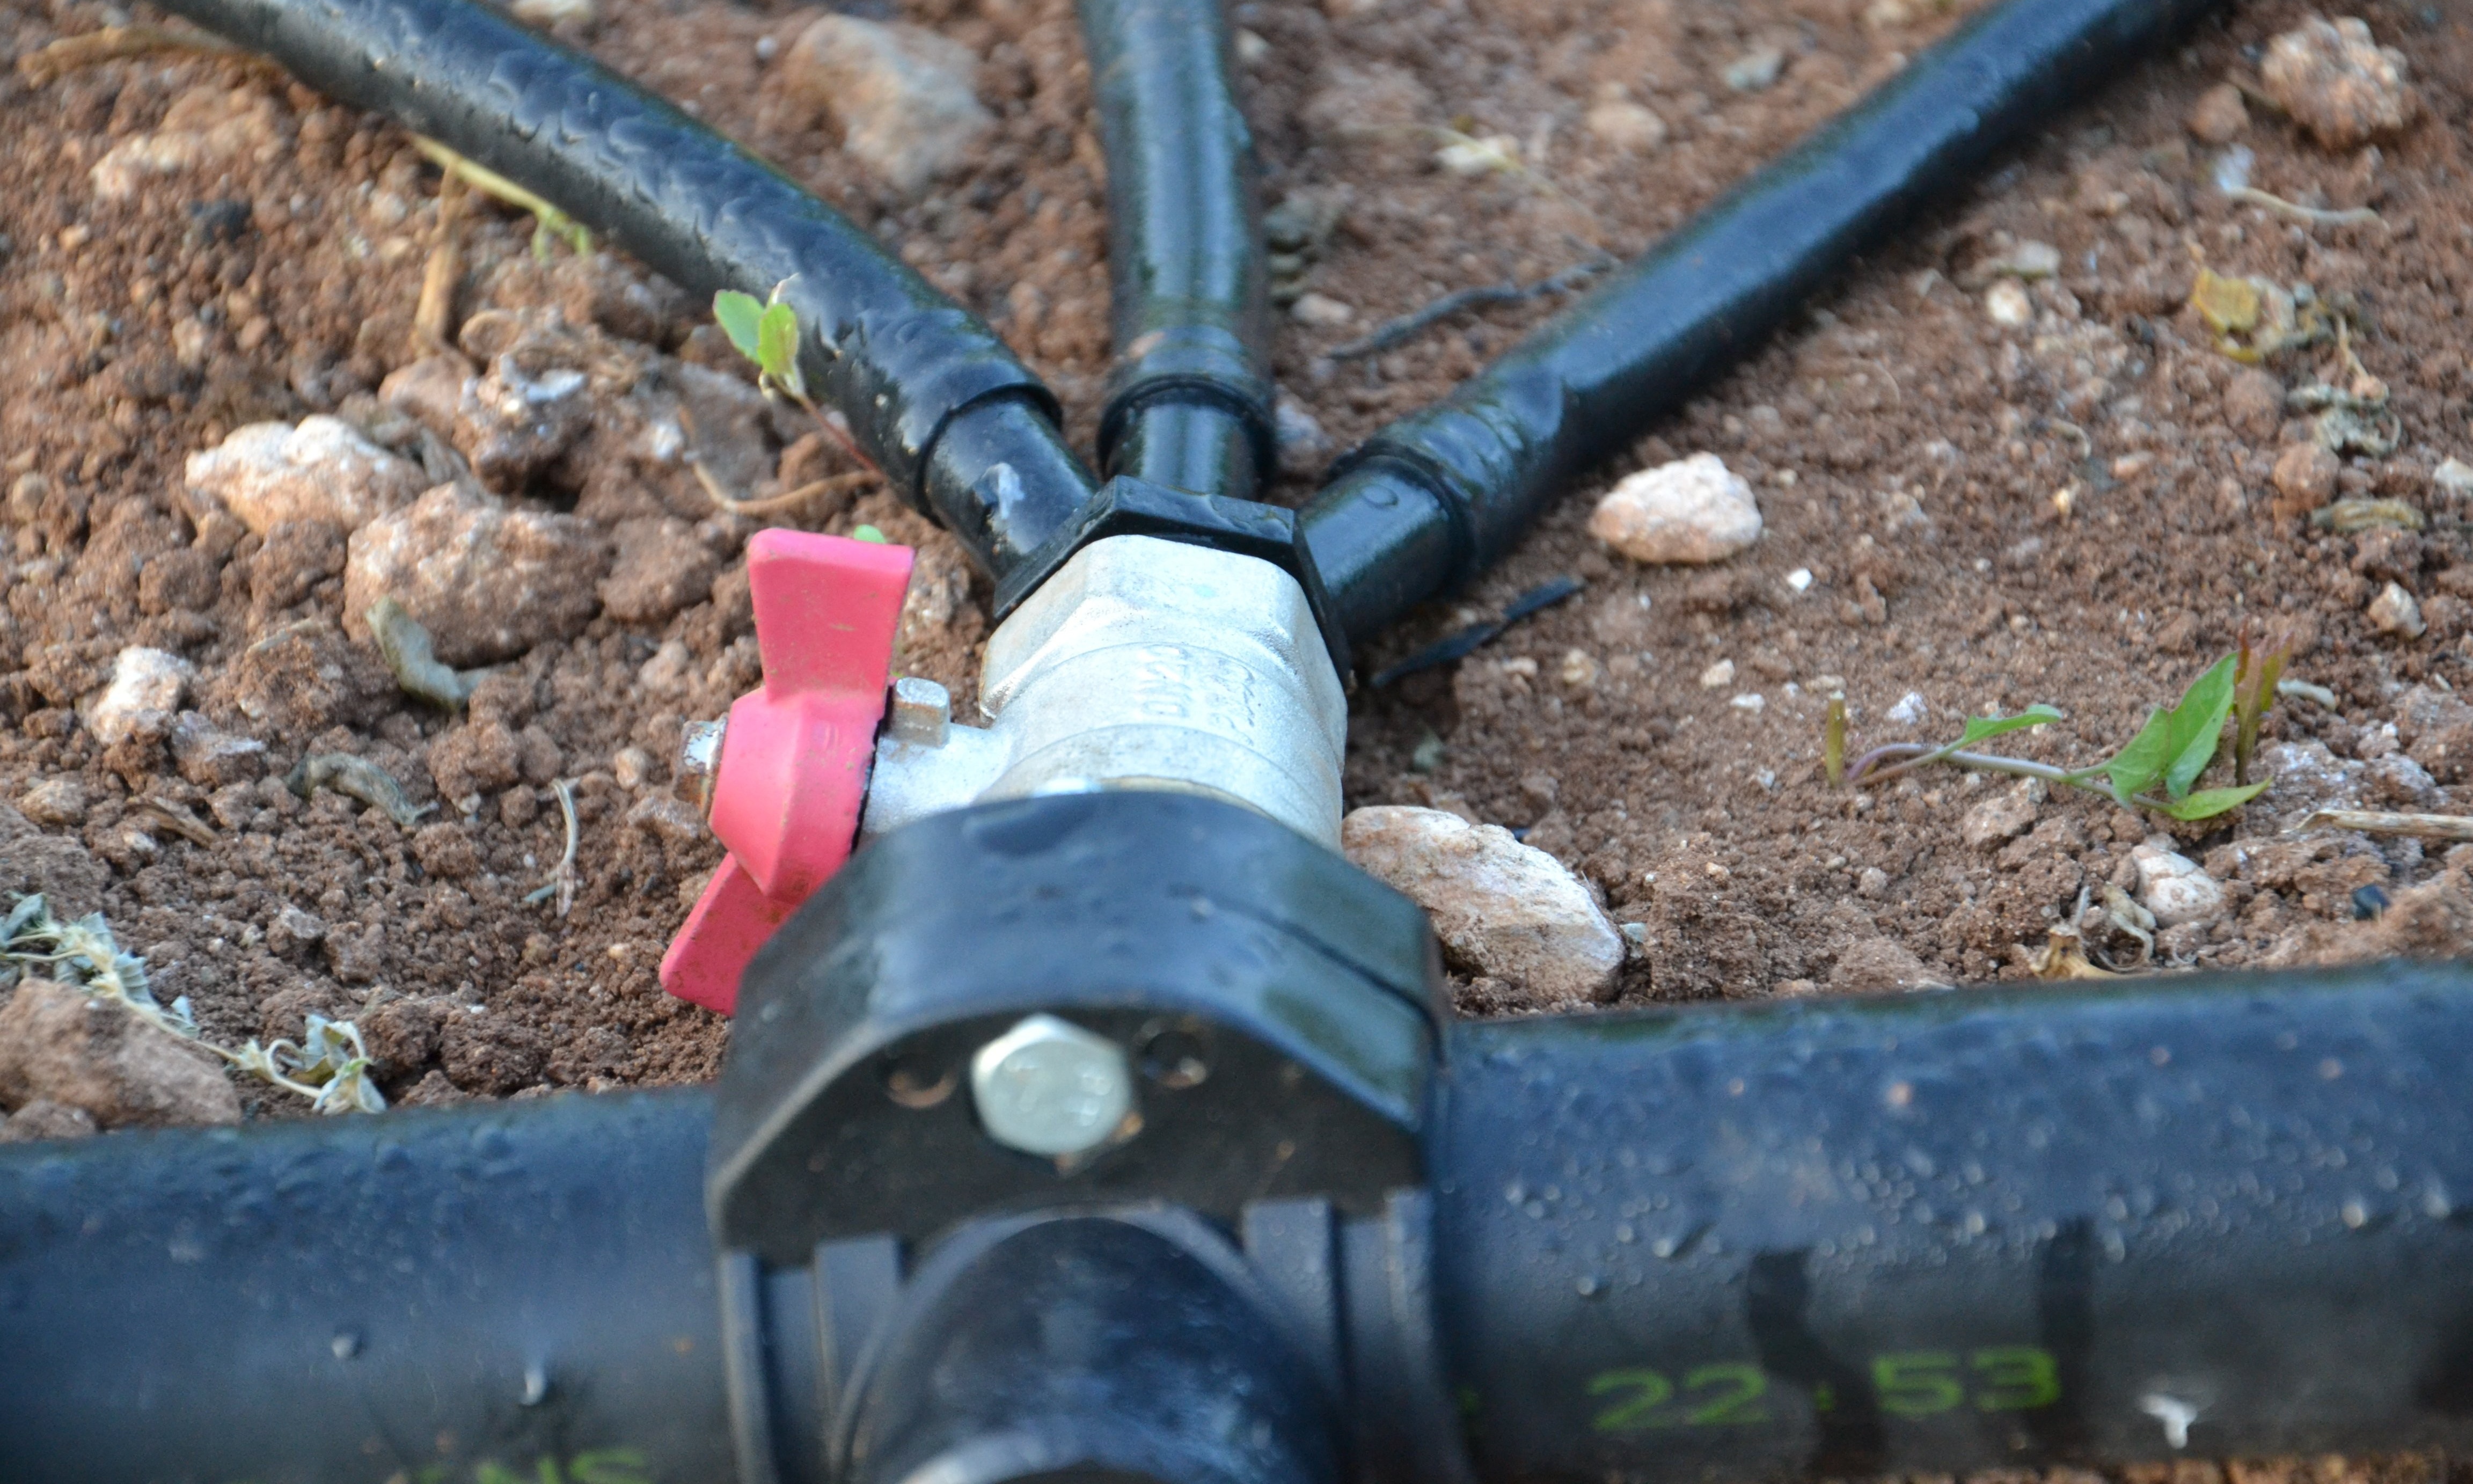
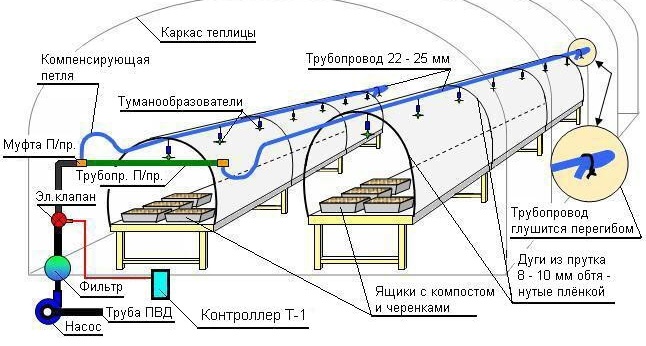
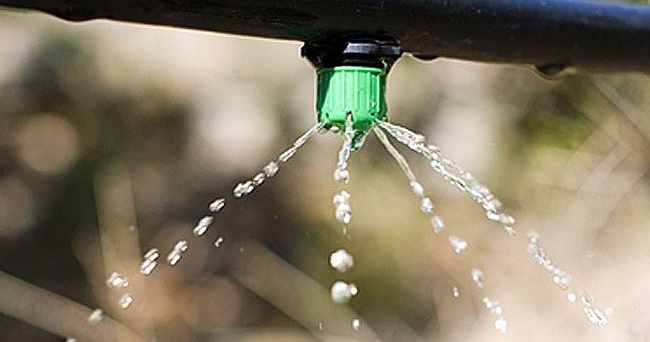
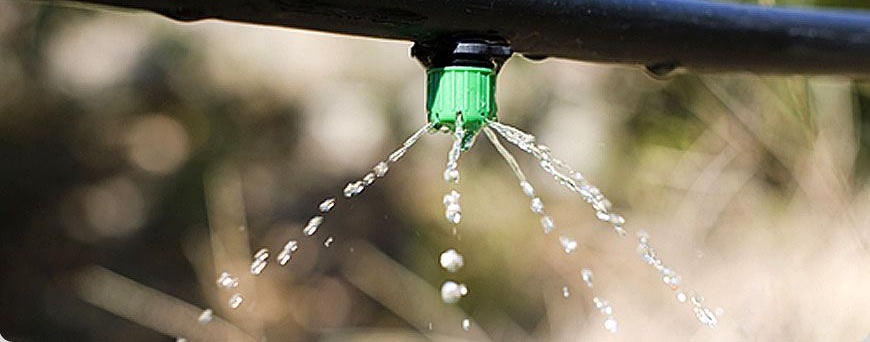
The automatic irrigation operation scheme is simple: from the source through the pipelines, moisture is directed to tapes with droppers. Small drops of water moisturize the root system of each plant. In addition, delivery of liquid top dressing is carried out along the highways to the stands.
Piping from the source delivers water to moisten the root system
Advantages of the drip system:
- low water pressure (saving up to 30% compared to conventional irrigation);
- “Targeted” delivery of moisture and fertilizers to each bush, which prevents weeds from spreading;
- rare loosening due to lack of sintered crust on the soil.
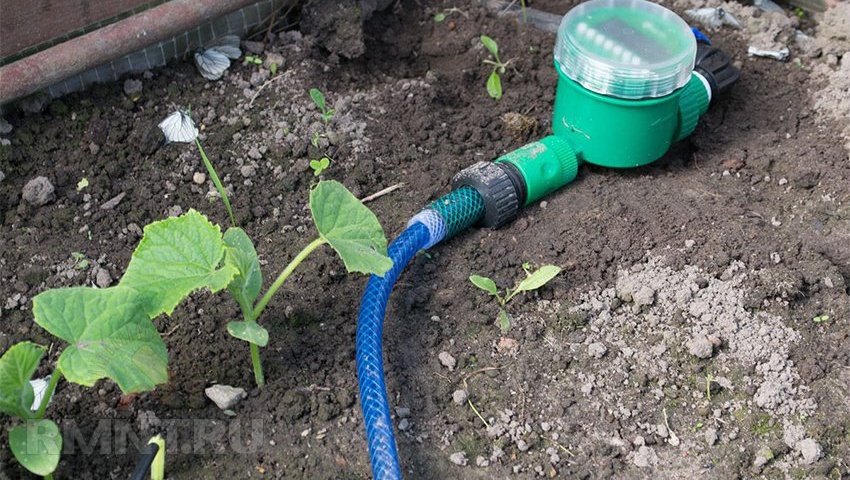
If there is a timer and a controller, the system will work completely on the machine, and water will be supplied at the right time.
Creating such a system is easy with your own hands, and to save money, use medical droppers instead of special dispensers.
The disadvantages of the drip device include the demand for clean water. A filter is required here. Otherwise, particles of sludge will settle on the walls of the pipes, which will quickly render the irrigation system unusable.
Sprinkling
Typically, such systems are used for irrigation of flower beds and lawns, but it is possible to install a similar design in the greenhouse.It is suitable for watering vegetables and not too delicate flowers.
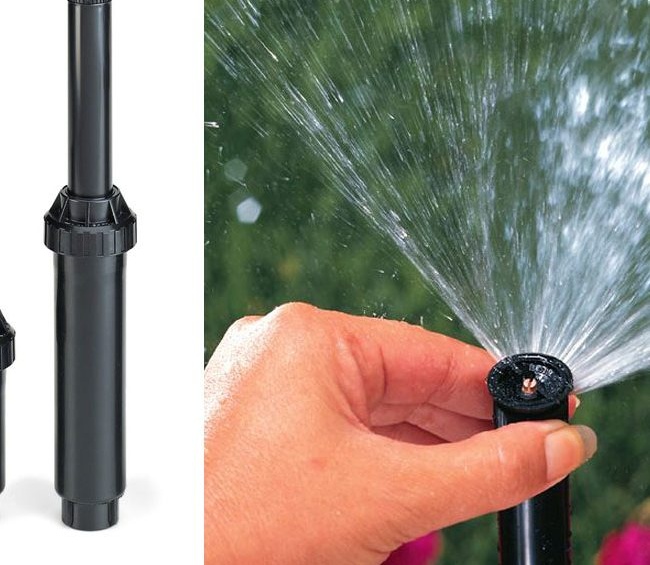
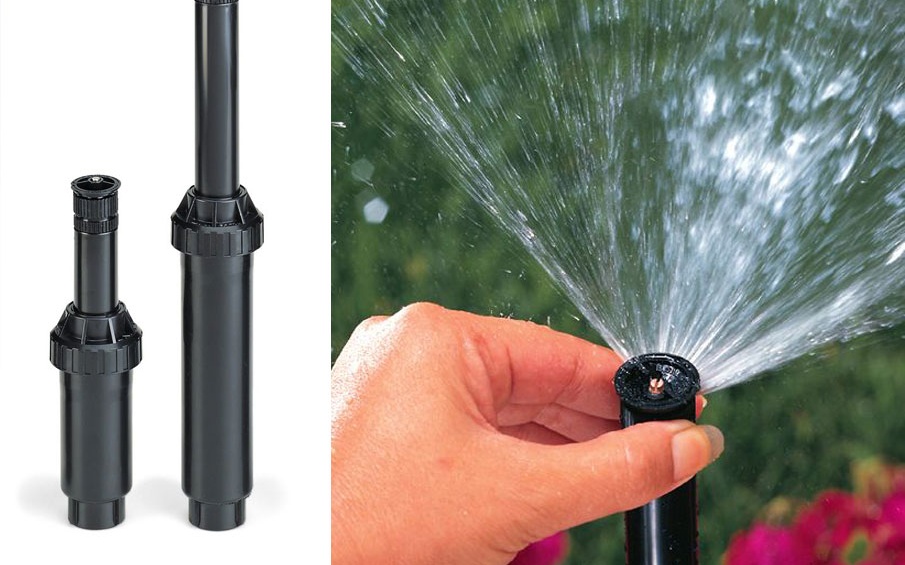
The moisture supply process resembles artificial rain. Water under pressure flows from sprinkler nozzles, splits into drops and falls on the soil and bushes of plants. Sprinklers are at ground level or mounted under the roof of the greenhouse.
Sprinkler nozzles crush water into droplets simulating rain
The advantages of the sprinkler system include:
- uniform distribution of water and moisture to the required depth, which does not allow rotting of the root system of plants;
- increase the vital activity of beneficial microorganisms in the soil;
- creating a microclimate comfortable for greenhouse crops;
- the ability to cover large areas.
Sprinkling reduces the temperature in the greenhouse, which prevents the evaporation of moisture on hot days.
The sprinkler irrigation method has its drawbacks:
- risk of excess moisture in the greenhouse;
- sunburns on plant leaves on clear days (especially on delicate flower petals);
- the need to shake off drops of water from each bush;
- inefficient use of water due to evaporation before entering the soil;
- the inability to use the device for applying dressings.
Such an installation requires a large pressure of water, which creates additional difficulties in installation.
Ideally, for greenhouses, the sprinkler system should be used complete with a drip or subsoil.
Less disadvantages of the aerosol sprinkler system. In this case, the holes in the nebulizers are smaller, which avoids large droplets burning the plants in sunny weather. But here you need a powerful engine and high-quality lines, because the pressure of water for pushing through the tiny holes of the nozzles must be strong. So, the pressure in the pipeline should reach 30-50 bar.
With self-installation of aerosol autowatering, deluge sprayers can be used to automatically extinguish fires.
Underground (subsoil) irrigation
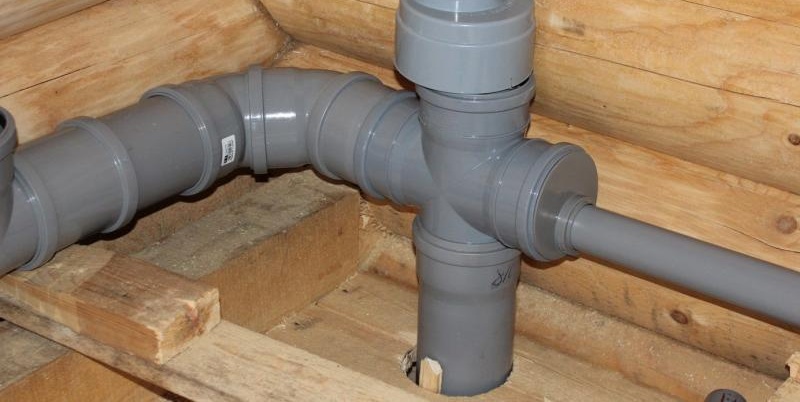
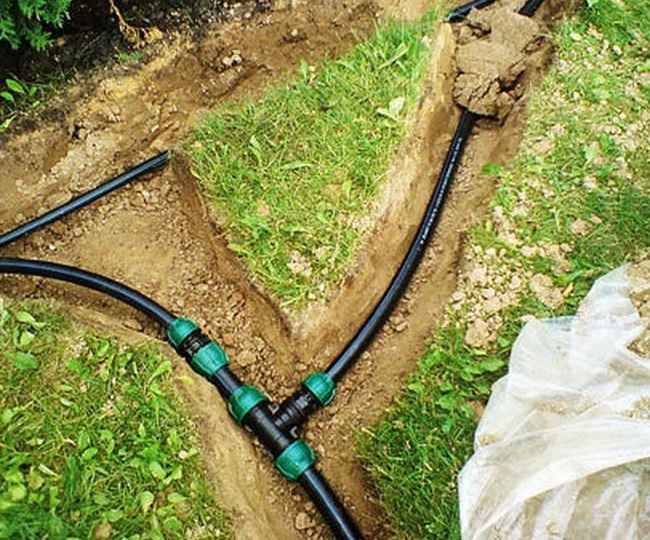
The scheme of such a watering device is similar to a drip system. But the mains are laid underground so that moisture comes to the very roots of the greenhouse “inhabitants”. Water from a storage tank or water pipe enters the humidifiers - perforated pipes. At home, they are replaced with plastic bottles with holes in the bottom.
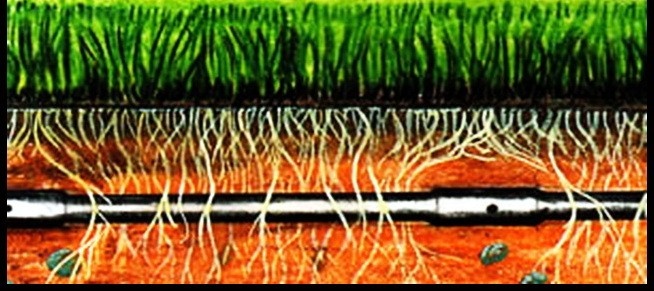
Highways of the subsoil system are laid underground
Such a device allows the development of perennial, as well as capricious and sensitive cultures.
The benefits of subsurface irrigation do not end there. These include:
- additional aeration of the earth;
- simplicity and low cost of installation;
- low water consumption;
- stable humidity of the greenhouse atmosphere.
The system can be fully automated or operate in a semi-automatic mode, when the main tank or even the dampers dug in manually are filled with water.
Of the minuses, it can be noted:
- with improper installation, a saturation of the soil with water is possible, leading to root decay;
- moisture deficit, in which green spaces wither and dry.
Necessary materials and tools for installation
First of all, it is a source of moisture. Therefore, it is necessary to ensure the possibility of connecting to a water supply system, a set of water from an open reservoir or the installation of a large storage tank with regular replenishment.
Most installations use:
- hoses and polymer pipes;
- irrigation devices (dispensers, sprayers);
- various fittings (connecting elements, taps, valves, plugs).
Instead of valves, solenoid valves can be mounted. They are regulated by additional devices - a controller and a timer. In this case, the supply and shutdown of water will go automatically, at the time set by the owner of the greenhouse.
Some systems work autonomously, but most require pumping equipment to be connected to the mains.The control unit will fully automate the system. But it is difficult to make it yourself; you will need to spend money on the acquisition.
How to make a do-it-yourself irrigation system for a greenhouse
Proper watering in the greenhouse is easy to implement. All that is needed is to choose all the required tools and materials correctly and be guided by step-by-step instructions.
Drip irrigation system
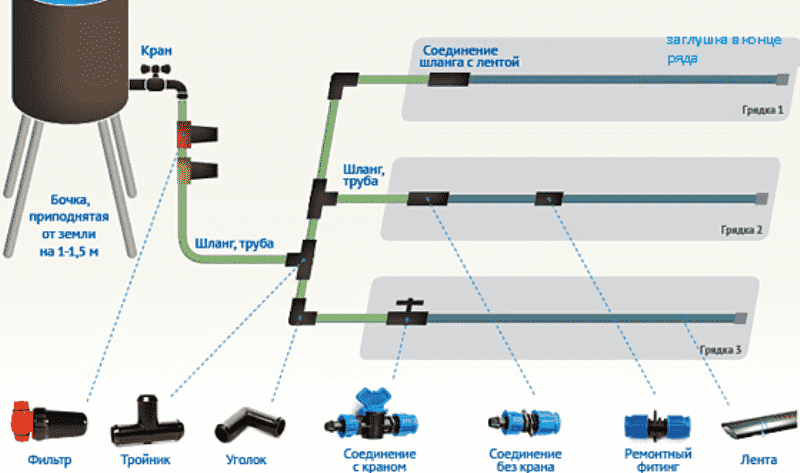
Here, water from a tank or a water pipe enters the irrigation point through a main pipe that has branches. The materials for the system are calculated and cut in the workshop, and installation and connection are done in the greenhouse.
In the greenhouse or near it, you need to find a place for the water store. Its height position should be at least 200 cm above ground level. This is enough for watering about fifty square meters. The capacity for a greenhouse of such an area should be a volume of 1 cubic meter. Or to ensure the flow of water from an open source, central water supply.
The following materials will be required to install the device:
- plastic hoses with a cross section of 8 mm;
- fitting parts (angles, tees, crosses, plugs). Elements with mounted cones at the joints easily fit with hoses without the use of a specialized tool. At the same time, they calmly hold pressure up to three atmospheres;
- site for adding fertilizer compositions;
- apparatus for reducing pressure - anti-drainage valves, gearboxes, mini-cranes. They are necessary for uniform distribution of moisture in the system;
- drip tubes for delivering water from the pipeline to the roots of plants. Labyrinth-type devices evenly distribute water in three to five directions;
- monitoring device with a timer. It will at the right time open and close the tap on the main water conduit.
The drip irrigation system needs a cleaning filter. Otherwise, the main and drip tubes will quickly become clogged. When using a natural body of water or a water supply system as a source of moisture, a two-stage filter is required.
From the tools you will need:
- drill and drill of the required diameter;
- pliers;
- awl;
- measuring tool (tape measure);
- pipe and hose cutter.
The following formula is used to calculate the number of irrigation pipes: Lt = Sк * 10000 / L, where Lt is the need for the irrigation pipe (m), Sк is the ridge area, L is the distance between the irrigation pipes. From the resulting figure you need to build on when calculating the number of necessary locking and connecting elements.
It is important to consider the daily water requirements of different crops. The most popular for growing in greenhouses are cucumbers, tomatoes, various varieties of salad and cabbage. The first crop requires daily 2 liters of water per bush, leafy vegetables - 2.5 liters, tomatoes - 1.5 liters. Droppers must be placed at a distance of 0.3 m from each other to achieve the best watering, while the soil is moistened in one to two hours.
Before purchasing and installing, be sure to make a scaled drawing of the future system. So you will immediately see how the lines and droppers will be located, and calculate how many and what parts will be required for the device.
After that, you can proceed to the manufacture of the pipeline, the collection of the system and installation:
- For the installation of droppers, drill holes in the right places in the tubes, referring to the drawing. The diameter of the holes needs to be made slightly smaller for a more tight fixation of droppers: otherwise they will be squeezed out by the pressure of water. After drilling all the holes, insert droppers into them. The free ends of the hoses must be plugged, the easiest way is to bend and fix with a wire. If you don’t have time and finances allow, you can buy a ready-made watering tape with droppers.
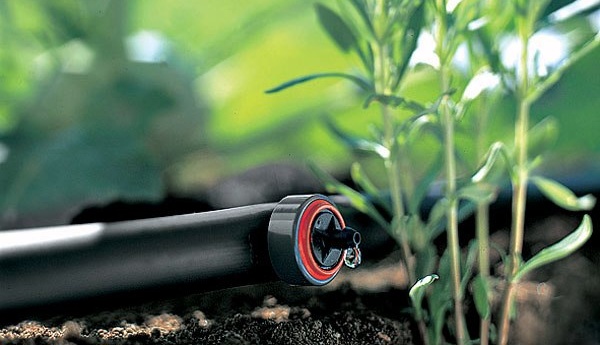
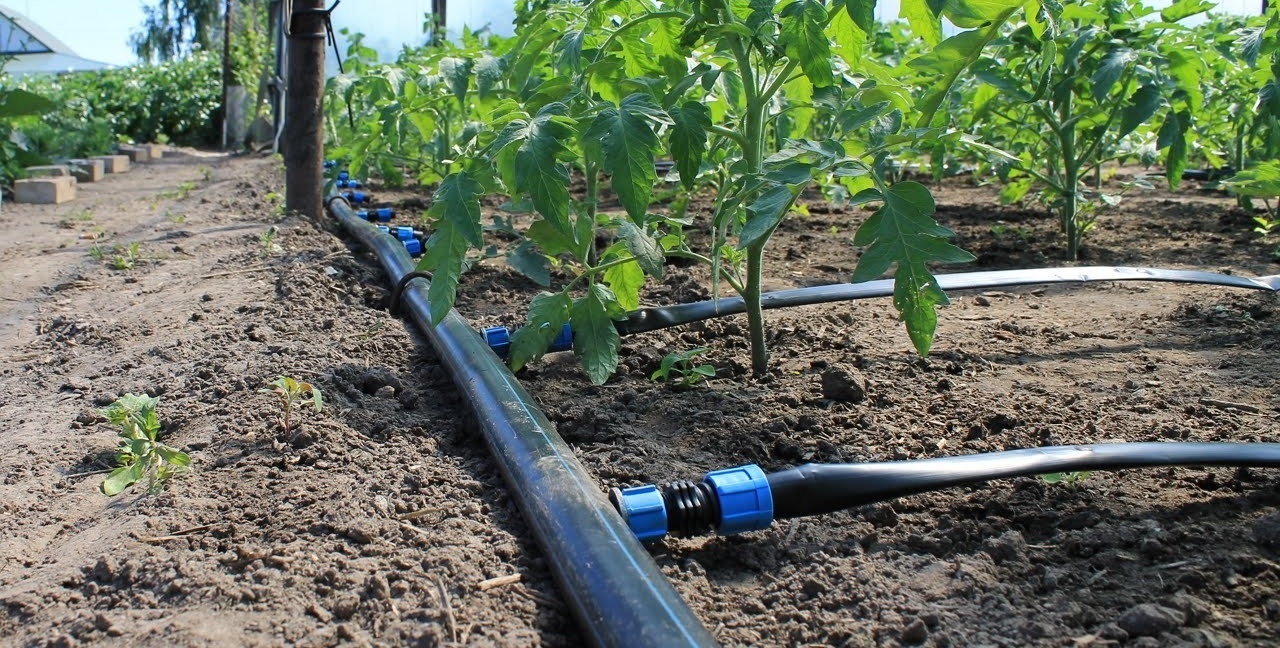
Watering tapes are laid along the beds
- We lay the main pipe across the beds and we attach watering tapes to it through the fitting connections. The interface between the dropper and tube should be left at the top. The ends of the drip lines are closed with plugs or flushing taps.
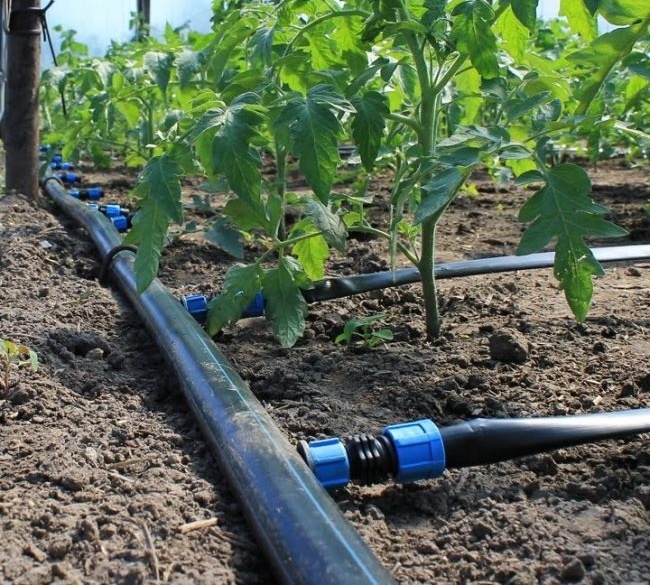
Watering tapes with fittings attached to the main pipe
- We install the filter, and immediately after it, the controller with a timer and pressure-reducing devices and connect the design to the pump.
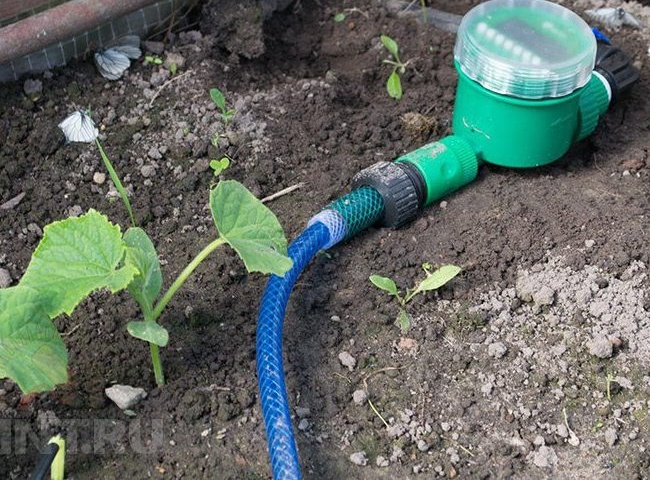
To prevent clogging of the system pipes, an installation of a cleaning filter is necessary
- After installation, we check the system for leaks. We turn on the pump at full power and open all the taps alternately. Leakage will certainly make itself felt. You can fix it by tightening the threaded connections.
Video: Installation of a drip installation in 15 minutes
Sprinkler system
The difference between drip and rain irrigation designs lies in the method of supplying water to greenhouse crops. Drip devices are replaced by nozzles that spray water around themselves in a certain radius. The location of the pipeline for the rain irrigation system can be arranged not on the ground, but above the ridges - under the roof of the greenhouse.
What you need to create a do-it-yourself installation:
- storage tank (if the system is not connected to the water supply);
- pump equipment;
- water distribution and irrigation pipes or hoses;
- sprinkling nozzles;
- fitting;
- filter.
If desired, you can install a monitoring device with a timer for automatically connecting water from water pipelines.
Of the tools required:
- wrenches and adjustable wrenches;
- soldering iron for propylene pipes (if fittings are not used);
- pipe cutter.
When calculating the length of the pipes and the number of sprinklers, it is necessary to take into account the dimensions of the greenhouse and the location of the nozzles themselves. They should be in relation to each other so that during operation the jets overlap non-irrigated zones. To calculate everything exactly, make a large-scale design drawing before purchasing materials.
Further assembly of the system will not be difficult:
- Install the storage tank. Strongly raise it is not required - a pump is used to pump water and create the desired pressure. In series, we install pumping equipment, a tap for manually blocking water at the outlet, a filter and a timer.
Installing a storage tank for the sprinkler system
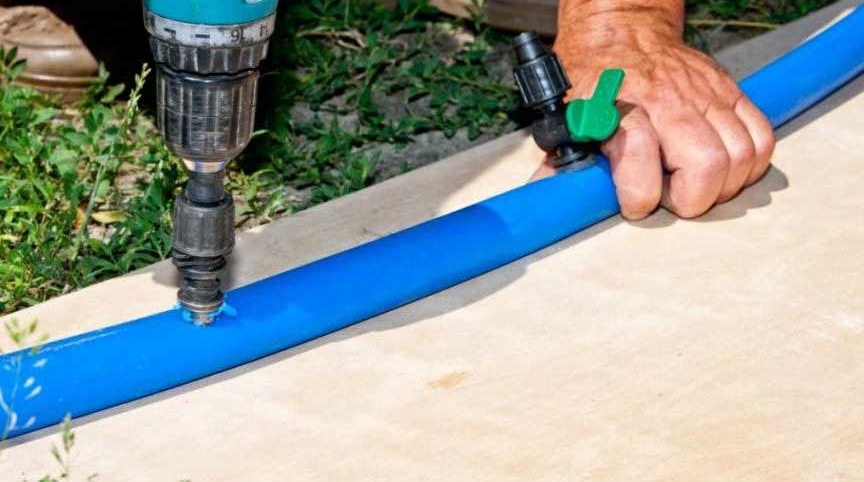
- We lay the main pipe. When installing it above the beds, make sure that all connections are securely fastened. We do not lose sight of the compensation loop - it is necessary so that temperature changes do not affect the operation of the system. We plug the free exits of the pipes with plugs and drill holes for the installation of spray nozzles.
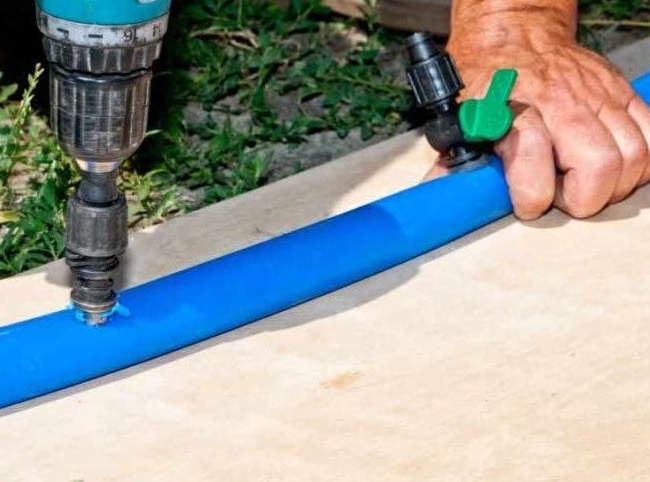
In the main pipe drill holes for nozzles
- We install sprayers. We measure the distance between them, taking into account the minimum radius of the water supply.
When installing nozzles take into account the radius of irrigation
- We make a test run of the system manually. In the absence of leaks or other shortcomings, set the frequency and duration of watering on the controller or timer.
At the first start of the sprinkler system, it is checked for leaks
It is important to remember: small droplets falling with less intensity do not destroy the soil, allow better absorption of moisture, and create conditions for aeration during irrigation.
The best rain intensity is 0.06–0.15 mm / min. The size of the drops should be no more than 0.2 cm.
Excessive force and power of artificial rain harms the stands. In particular, it harms young plants, seedlings. Large drops bend the leaves to the ground, as a result of which they become contaminated and do not participate in photosynthesis. To create normal watering conditions, reduce the water head or reduce the size of the spray outlet by placing a washer with a smaller hole in the nozzle.
Video: How to install a simple sprinkler system yourself
How to arrange subsoil irrigation
To install such an installation, you will need polyethylene pipes with a cross section of 3-4 cm. In them, holes of 0.2 cm diameter are drilled every 30 cm or slits are cut 0.8 cm long and 0.2 cm wide. To avoid clogging of watering elements, a filter is required.
The minimum set of tools will include a shovel, a pipe cutter and a set of keys for mounting connecting elements.
How to mount a simple structure for underground irrigation yourself:
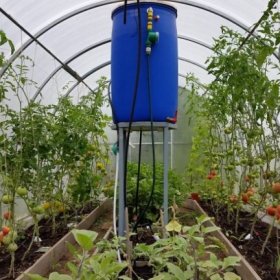
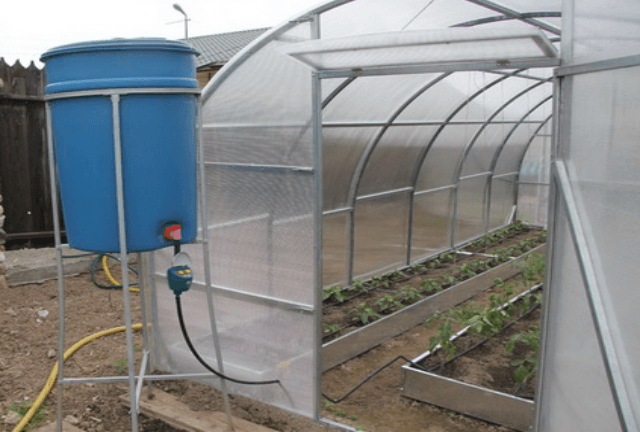
- Place a large water tank on a pedestal above ground level, this helps to create pressure for water supply.
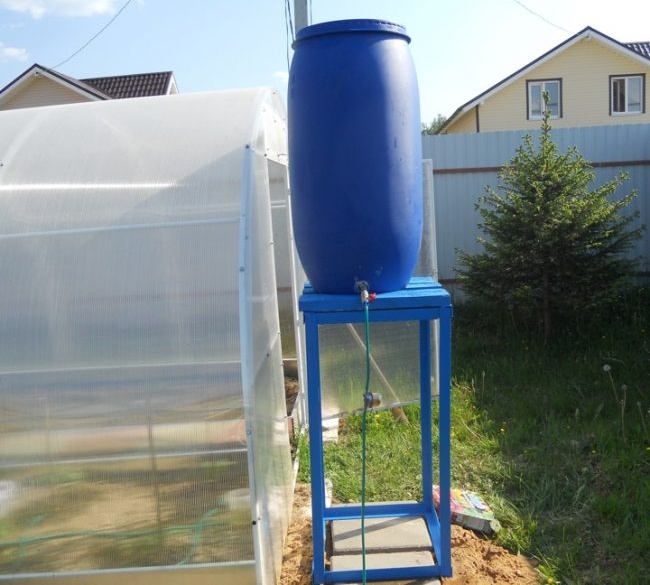
To create pressure for water supply, the tank must be installed at an elevation
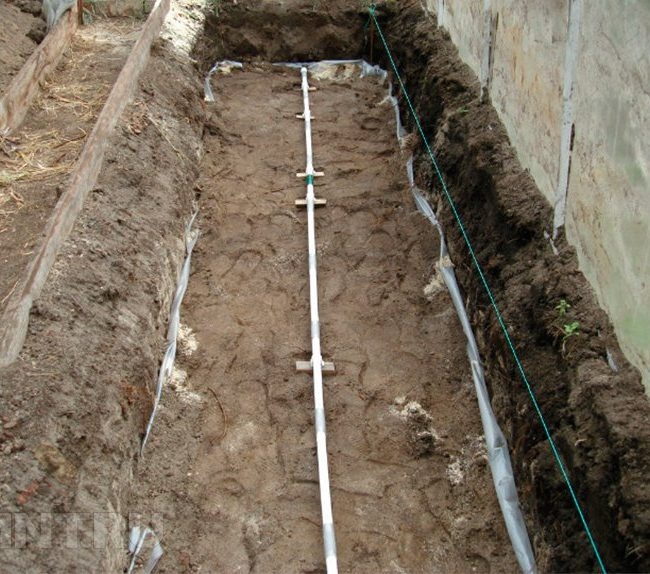
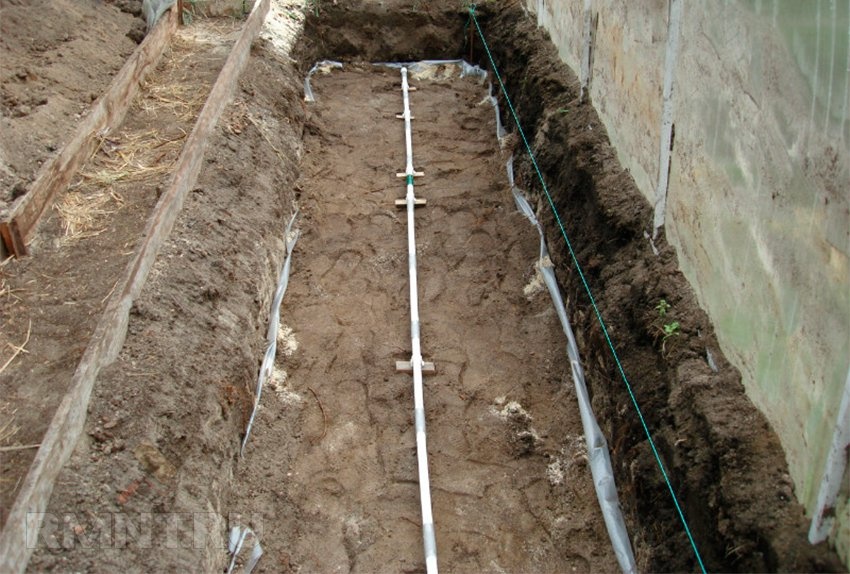
- Dig trenches for the pipeline 0.25 m deep along the shelving and line with polyethylene tapes about 20 cm wide. They are necessary so that the water does not go quickly deep into the ground and diverges better in the horizontal direction. With loose soils in the greenhouse, this is especially important.
Trenches for the intrasoil irrigation pipeline should be 25 cm coarse
- Lay humidifier tubes with a slope so that the water displaces the air. If the width of the ridges does not exceed 80 cm, one humidifier is enough. Otherwise, it will take two with an interval between them of 50–80 cm. If you grow moisture-loving crops, then the required distance between the devices should be no more than half a meter.
To water displaced air, the system pipes are laid down
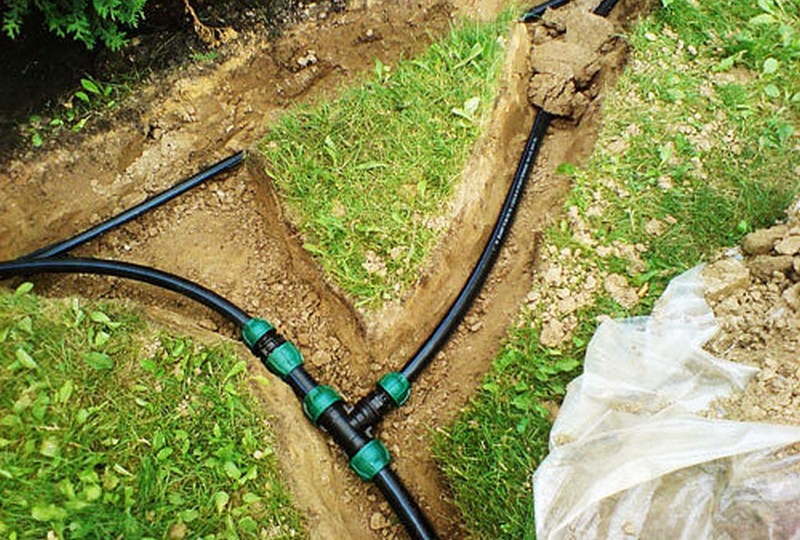
- Connect the humidifiers to the tank using hoses or pipes. After a couple of days, dig the soil between the humidifiers and check if the moisture is well distributed. If not, you need to reduce the space between them.

In greenhouse constructions, underground highways are used not only for irrigation, but also as local heating. Heating is usually carried out by supplying warm water. It contributes to the full regulation of the temperature in the greenhouse, the warming of the above-ground layer of air, and thanks to this, it prevents the plants from freezing.
Video: Workshop on installing an intra-soil irrigation system
Plastic bottles are sometimes used as humidifying devices. To do this, drill a hole in the lid and insert a flexible pipe with a cross section of 10-15 mm tightly into it. Water will be supplied through it. There is an easier option - cut off the neck of the bottle for convenient pouring of water in portions.
After that, two or three small holes are created in the bottom of the bottle for transferring liquid to the soil and they are dug into the ground. Such humidifiers do not require financial costs. But they are suitable for small greenhouses due to the complexity of filling with water.
Video: A simple method of root watering using plastic containers
Do I need to clean for the cold season
Drainage and drip systems in unheated greenhouses need to be prepared for the winter season. If this is not done, the water in the pipe or hoses will freeze and they will become deformed.
How to properly prepare the autowatering system for winter:
- Shut off the water supply from the source and empty the storage tank.
- In order for residual moisture to leak out, open the taps and remove the plugs.
- In the drip installation, remove the dropper pegs from the soil.
- If possible, it is worth blowing the main pipes with a compressor through a temporary fitting. This will rid the system of moisture residues and possible contaminants. Remember to wear safety glasses.
- In areas with harsh climates, disconnect the hoses and put them in a warm room until spring.
In heated greenhouses, these procedures do not need to be done, because they function all year round. With intra-soil watering, dismantling is also not carried out - the earth will protect the pipes from frost. For insulation, you can cover the areas where the pipeline goes with non-woven materials.In addition, in such systems, heating is often combined with moistening the earth - warm water is supplied in cold weather.
Proper installation, maintenance and care guarantee the long life of any automatic irrigation system. On average, it will last 7–8 years.