How and what is the best way to repair a chip on a bath surface?
Finished the repair of the bathroom. A heavy tool was accidentally dropped into a brand new cast-iron bathtub. Formed a small chip. Will you have to change equipment or can you somehow get out of an unpleasant situation?
Chipping removal - detailed instructions
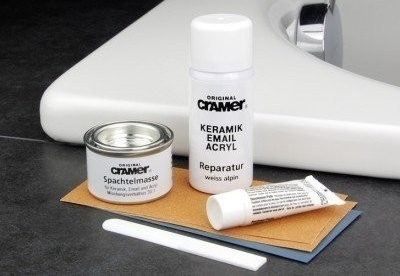
Hello! Chipping enamel is a very common problem. To solve it, you can recommend using the repair kit, which you can buy in most specialized stores. Experts advise to purchase kits from foreign manufacturers, considering them the most high-quality. For example, Keramik-Email-Acryl Reparatur-Set from the German company Cramer. The kit is universal, with its help you can repair cast-iron, acrylic or ceramic equipment.

To repair chips or scratches on the surface of the bathtubs, it is best to use special restoration kits that can be purchased in specialized stores
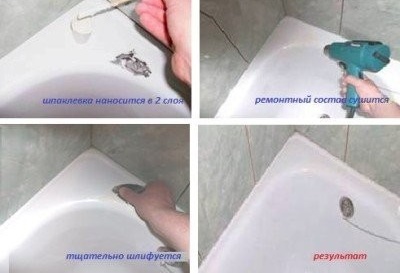
The repair kit includes a two-component putty mixture, which you will need to prepare yourself, enamel in the form of a spray, sandpaper and a spatula. Before proceeding with the repair, it is necessary to carefully prepare the cleavage site. To start it should be thoroughly rinsed. If there is rust or dirt inside, it must be removed. It is best to fill the area with the defect with Sanox-type toilet bowls. The active components present in it “corrode” the surface a little and it will be easier to clean it.
Then the place of cleavage must be degreased. For this, ordinary baking soda is suitable. It is diluted to a pulp state and a fragment is rubbed. After which it is washed abundantly with water and dried well. You can also treat the coating with acetone. Now prepare the putty mixture. It hardens quickly enough, so prepare the composition immediately before application to the chip. Mixing proportions should be indicated in the instructions. However, most often putty requires 30 parts and one part of hardener. To make it easier, a putty the size of about a walnut and a hardener is taken - like a small pea. After thorough mixing, the mixture is ready for application.
Using a spatula, the solution is very carefully applied to the prepared cleavage site and leveled. About half an hour after the composition dries, the putty is cleaned with sandpaper. If the repair kit is universal, it will include several types of sandpaper, each for a specific type of surface. It is very important not to confuse them. The surface is cleaned until the transition between the enamel and putty is felt by touch.

After the putty dries, the repaired area is ground until it feels different from the main surface by touch
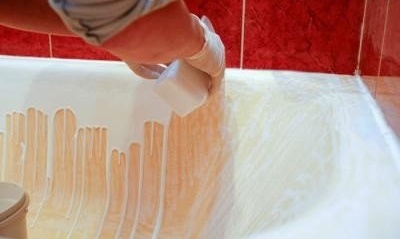
The next step is painting. Enamel is sprayed from a distance of the order of 15-20 cm exactly to the place of cleavage. For greater accuracy, you can use a stencil. Paint is applied in several steps.Each subsequent layer is applied at intervals of 2-3 minutes. As soon as the color of the repaired area and the entire bath becomes the same, the work can be stopped. Now it is important to properly dry the surface. It will be possible to touch the drying area no sooner than after 2 hours. The enamel will completely dry after only two days, however it is not recommended to use the equipment for 4 days.
If it was not possible to find a special kit, home craftsmen recommend assembling it yourself. Instead of a special putty, a car is quite suitable. It is better to choose a coating as light as possible, so that the color does not "shine" through the enamel. You can choose a fiberglass composition, which is slightly better "holds" the temperature. A little material is needed, so the minimum packaging is bought. To clean the surface, sandpaper is selected, the smallest of all that is on the counter.
For painting, you need an aerosol to repair chips. The range of such compounds is very large. From it you need to choose a high-temperature, waterproof enamel that is perfect in color. The last component is an abrasive polishing paste for polishing to the shine of the last layer. All repairs are carried out in the same way as during the restoration with a special kit. With proper application, an excellent result is guaranteed.


