How to connect an outlet for the Internet: standards and schemes
Currently, there is a rapid growth in the development of electronic equipment and almost everyone in the house has a laptop and a personal computer with the Internet. This device is very useful and helps in solving many issues, but in order for it to work correctly and correctly, it is necessary to create the appropriate infrastructure and correctly connect the components. This infrastructure is a network consisting of several elements. Sockets, cables and the device itself.
Content
Types and standards of connection
Each country in the world applies its own standards to sockets (sockets) that are used to connect various types of household electrical appliances: televisions, telephones (subscriber units), computers and other electronic devices to the corresponding distribution networks organized in their territories, but there are international.
The following standards are used to connect landline phones with handsets (TFs), connect them to a wired telephone network, and organize computer networks in the Russian Federation:
- RJ-9 (P4C4);
RJ-9 (P4C4) standard connectors (connectors), called microtelephone, were widely used to connect subscriber devices with handsets until they were pushed out of the market by more convenient and compact radiotelephones, but nevertheless they can still be found.
General picture illustrating the appearance of the 4-pin connector, cable, as well as its connection to the handset and the device
- Rj-14
Used to organize (connect) a telephone line. A distinctive feature of the standard connector is the ability to connect two lines at the same time, using pins 2 and 3 to organize one line - in a living room - and two extreme ones to connect a second additional one (used in offices).
RJ-14 standard connector
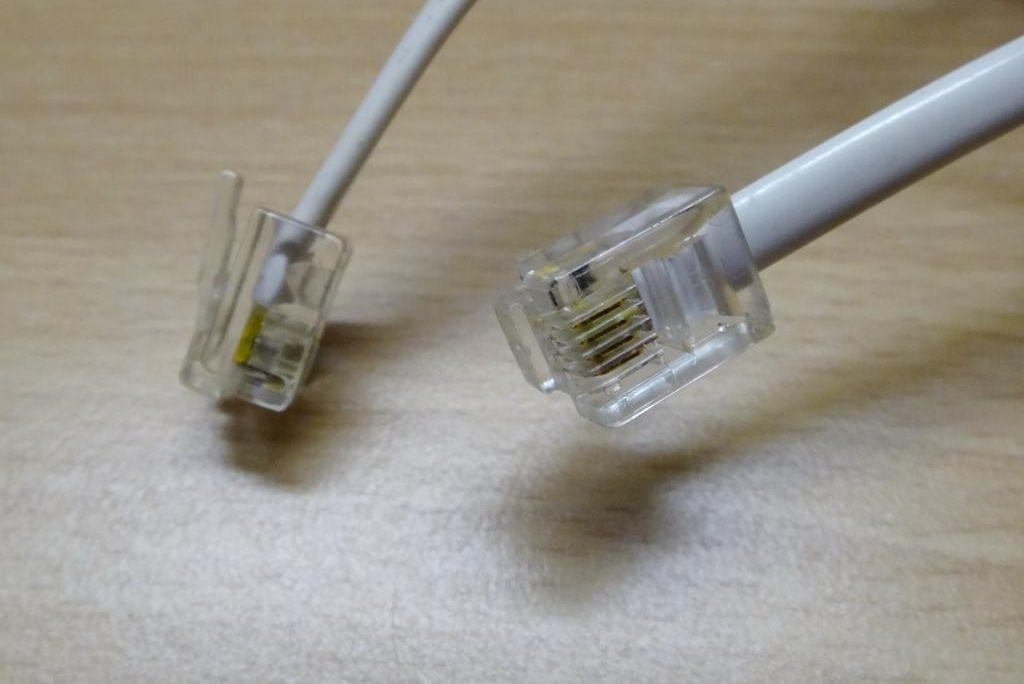
- RJ 45
It is used for connecting network type cables to personal computers, laptops and Internet outlets, as well as organizing local networks using twisted pair as a connecting element.
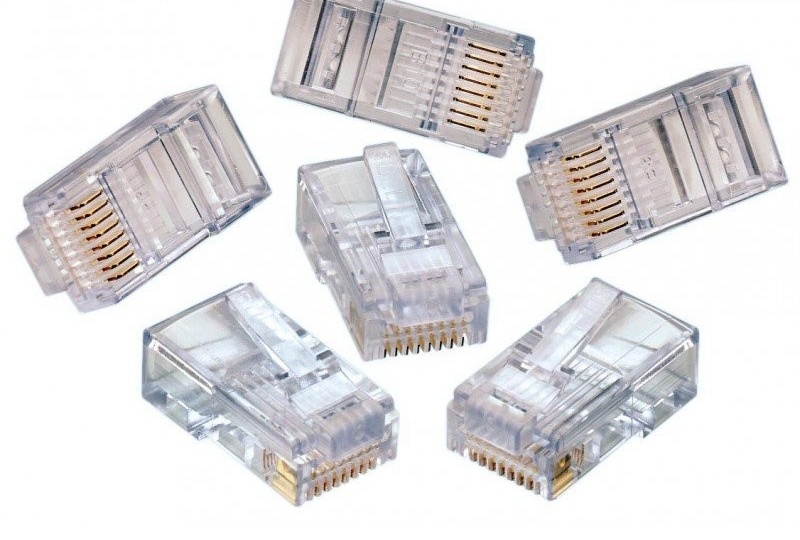
RJ 45 connectors
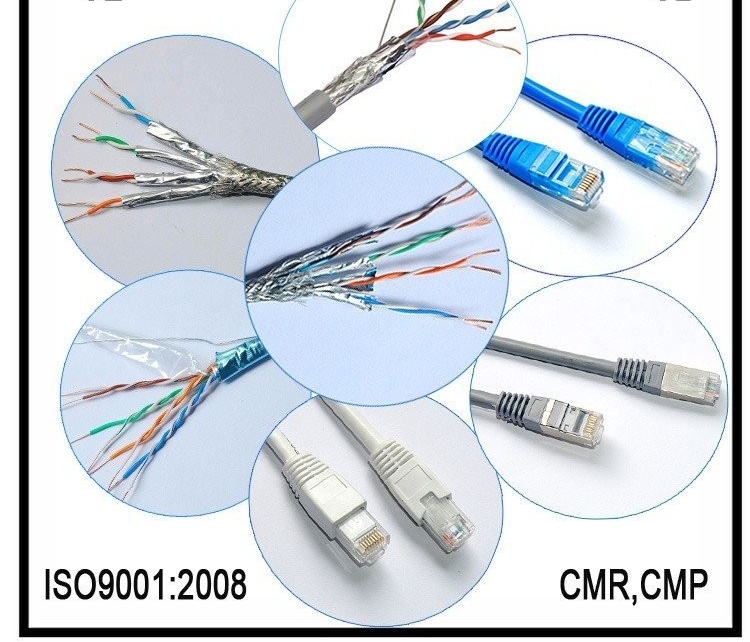
Twisted pair
Twisted pair is one of the varieties of electrical cables, which is a wire that consists of several pairs of insulated conductors twisted between each other and covered with a sheath made of plastic.

Twisted pair cable illustration
The twisting of conductors is carried out to increase the degree of connectivity of the conductors that make up one pair, as well as to reduce the effect of electromagnetic interference arising from third-party signal sources and the level of mutual interference generated during the process of transmitting differential signals.
The classification of twisted pairs into categories is carried out on the basis of the EIA / TIA-568 specification and the international standard ISO 11801.
The design features of the twisted pair are determined by the required speed characteristics of information transfer. Cables are divided into two types: shielded and unshielded and are designated as follows:
|
Designation twisted pair cable |
Shielding methods in different types of cable |
|---|---|
| UTP | Without shielding |
| FTP | The screening of all twisted pairs that are part of the cable is created by a common external screen made of foil |
| STP | Shielding (with foil) of each pair that is part of the cable, in addition to the general external screen made of foil. |
| S / FTP | Shielding (with foil) of each pair that is part of the cable, in addition to the general external screen made of a copper braid. |
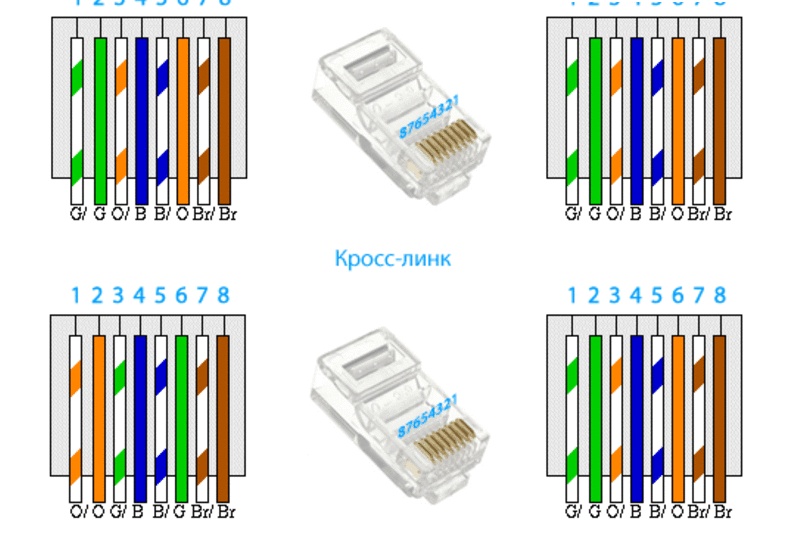
RJ-45 plug crimp color schemes
There are several schematic solutions for crimping twisted pair, which will be discussed below on the example of the Internet cable used to build LAN and DSL networks.
computer circuit - hub
It is used if it is necessary to connect a personal computer (laptop) to one of the nodes of a computer network.
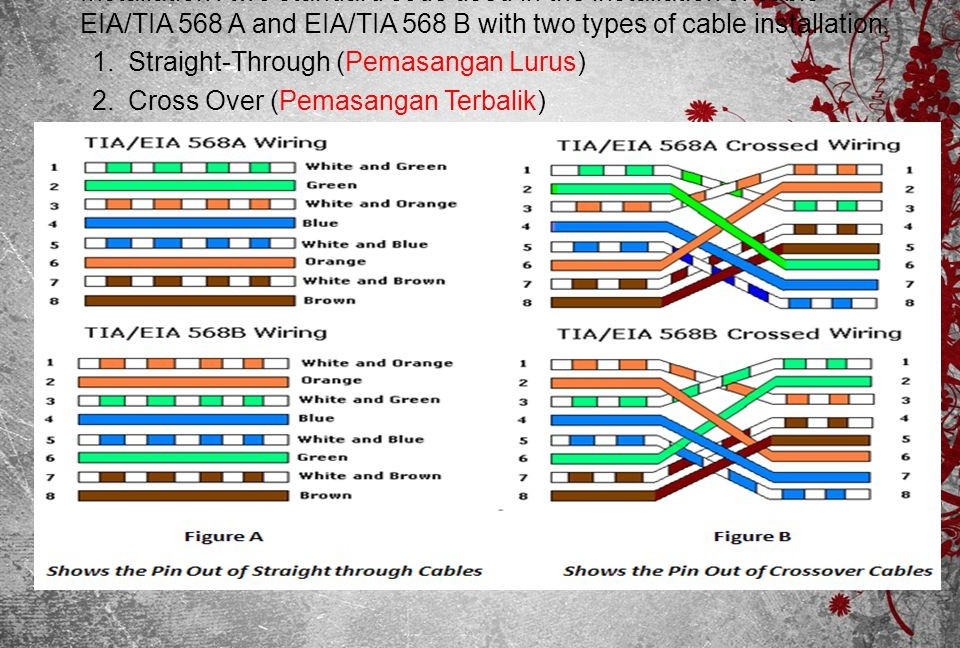
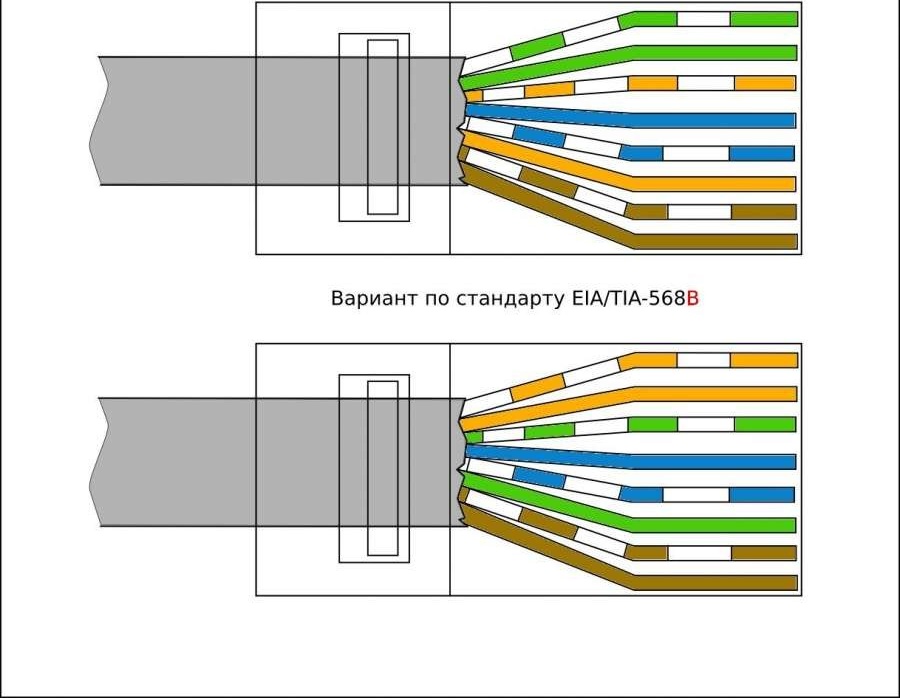
EIA / TIA-568 Wiring Options
As can be seen in the photo, the process of crimping the wires according to both schemes is carried out according to a similar electrical principle. The only thing to consider is that instead of a green pair it is set to orange and vice versa, respectively. Crimping wires according to option “B” is more common. According to the same scheme, the wires are also connected.
computer-to-computer circuit (hub - hub)
To organize a local network consisting of two personal computers that are connected to each other without the use of additional equipment (switch / hub), the following elements are used:
- two RJ-45 standard connectors;
- twisted pair;
To implement this scheme, we unwind the cable of the required length from the box and cut it off. We clean both ends according to the “B” scheme (see above), connect the wires to the connector, and then connect the resulting design to the network ports of the computer.
Four-wire RJ-45 crimp circuit
The four-core RJ-45 cable, the most popular in the cable products market, is mainly used to connect subscribers to traditional Internet networks at speeds up to 100 MB / s. This popularity is due to the fact that its market value compared to the same eight-core is two times lower.
Four core RJ-45 cable
Computer-to-computer connection diagram
With such a scheme, a cross-type connection is organized (one part according to the “A” scheme, the other according to the “B” scheme). The orange and green pairs are connected.
Connection diagram (crimping) of the wire on four cores
The main advantage and distinguishing feature of this circuit is that in the event of a break or short circuit, it is possible not to replace the whole wire, just swap the twisted pairs in the cable. However, it should be remembered that if the repair is carried out according to scheme “B”, then it is necessary to change the orange pair to brown, and green to blue. In the process of correction according to scheme “A”, we replace the orange pair with blue, and the green with brown.
Twisted pair crimp in the connector
It is an important and rather painstaking task. In order to start crimping the twisted pair, you must make sure that you have the necessary tools and material for work:
- RJ-45 cable of the required type (see table above), which must be crimped;
- RJ-45 standard connector;
- crimping pliers or crimper
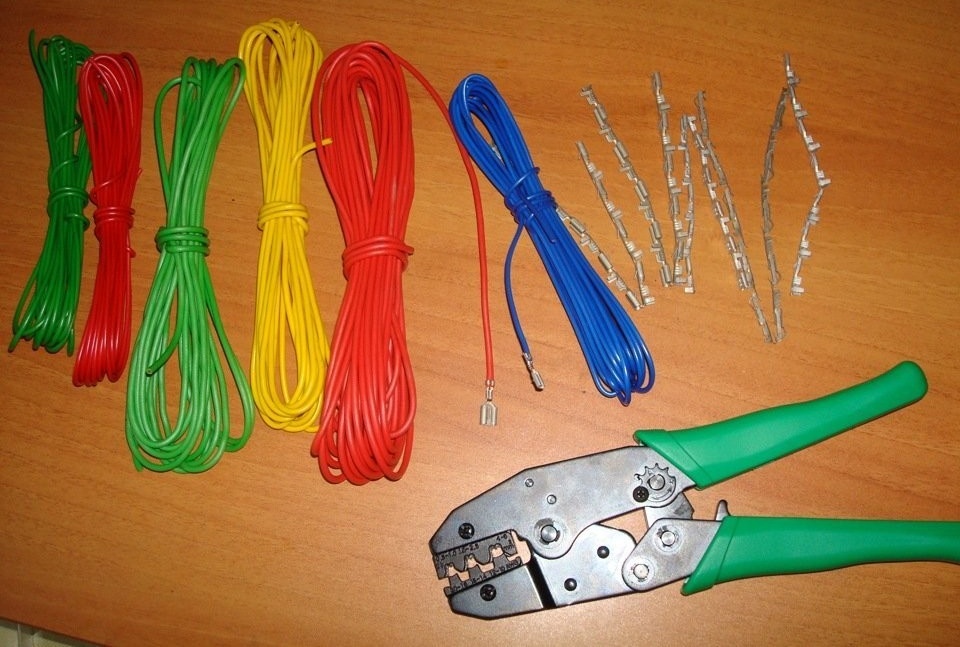
Twisted pair crimping tool
Crimp wire RJ-45 (instruction)
In order to properly crimp the RJ-45 wire, the following steps should be followed:
- Using pincers, bite off a piece of cable necessary to achieve the set goal (always at a right angle), so that the conductors are in a level position.
- Carefully remove the outer insulation layer by approximately 2.5–3.5 cm.
- We select the cores according to the colors in accordance with the crimping scheme selected previously. In order to do this, you first need to unroll the wires and align them, and then arrange them side by side in the correct sequence and press them together as tightly as possible. At the end of this step, we bite off the ends of the wires using pliers (crimper), at a distance of about 10-15 mm from the edge of the insulation.
Cable sorting options for twisted-pair cable
- Slowly and very carefully bait the connector on the cable. We constantly monitor the conductors and in no case do not allow them to enter the connector in the wrong sequence (otherwise the system will not function!). Gently push the cores until they tightly fit into the connector.
Video: crimping twisted pair with special tools
At the same time, it is not always and not at all that the tool necessary for a twisted pair cable can be at hand, therefore there is another type of crimping - using a flat screwdriver.
Cable crimp using a flat screwdriver
Repeat the steps similar to the previous method (cut off the cable, strip the outer insulation layer).
- Select the electrical circuit and sort the wires.
- we shorten the conductors to the desired size.
- Carefully insert the connector.
- Turn the connector so that the latch is at the bottom, and the contacts are on top. We put it on a flat surface so that the connector rests on its base on any base, while the latch must remain free (in order to avoid possible damage).
- Take a screwdriver and gently push the connector. We repeat this action until you see that it does not protrude from the connector housing, when this happens the cable will be securely fixed in the housing.
- Gently press the screwdriver in the contact area and drown them down. We carefully watch that they pass through the insulating layer and become fixed in the conductive core.
Video: crimping a cable using a flat screwdriver
https://youtube.com/watch?v=yLlOEithaVY
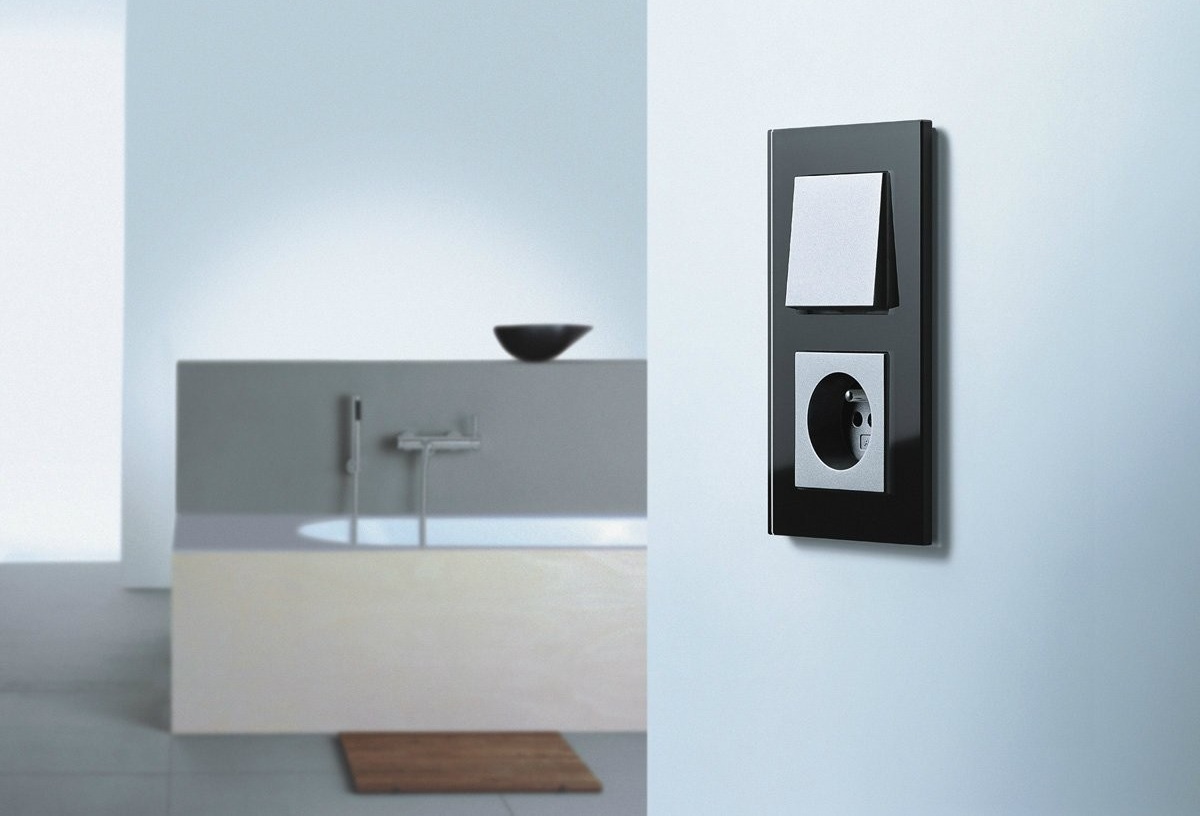
How to connect an outlet for the Internet: installation instructions
Installation and connections is the final step in creating a computer network, but before you begin to carry out preliminary training
Before you start installing the outlet, you must go through the following preparatory steps:
- We make twisted pair laying to the place where it is planned to install the socket (we create internal wiring), which will go through the gates prepared in advance. With this method of laying the cable, it will be completely covered by the surface of the wall (internal installation), which ensures its protection from damage and the effects of interference (interference);
- We carry out installation of the installation box. To do this, in the place chosen to install the outlet, we make a hole with a punch. Then we fasten the box to this place using screws or dowels.
Video: Installing an RJ-45 Outlet for Indoor Installation
In the event that an open method was chosen for the installation of the outlet (external installation), an additional element will be needed for fixing - a cable duct that is mounted on the wall. After the outlet has been installed on the wall, we remove the cover and proceed to its direct connection.
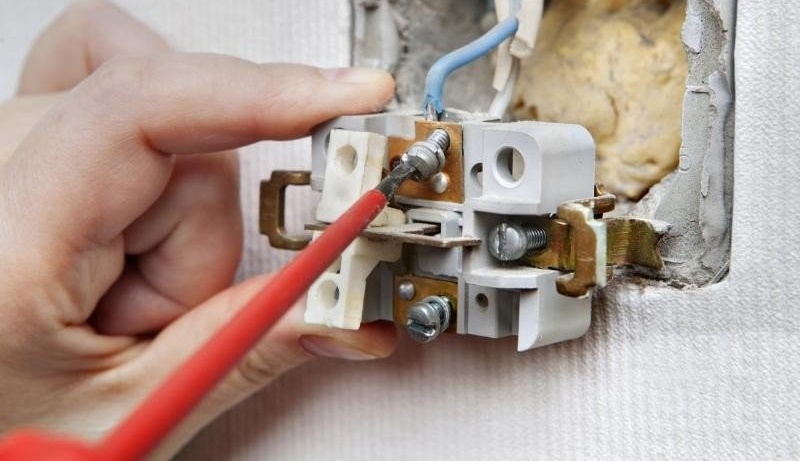
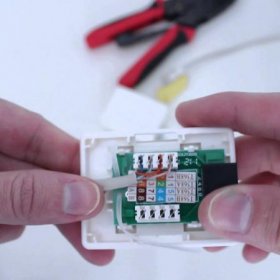
Direct connection of an RJ 45 outlet
Connecting the cable to the outlet is quite simple and will not cause any difficulties. It should only be remembered that there are two schemes according to which the outlet is connected to the connector. T568 "A" or T568 "B". The difference between these schemes is only in the color scheme of the wires.
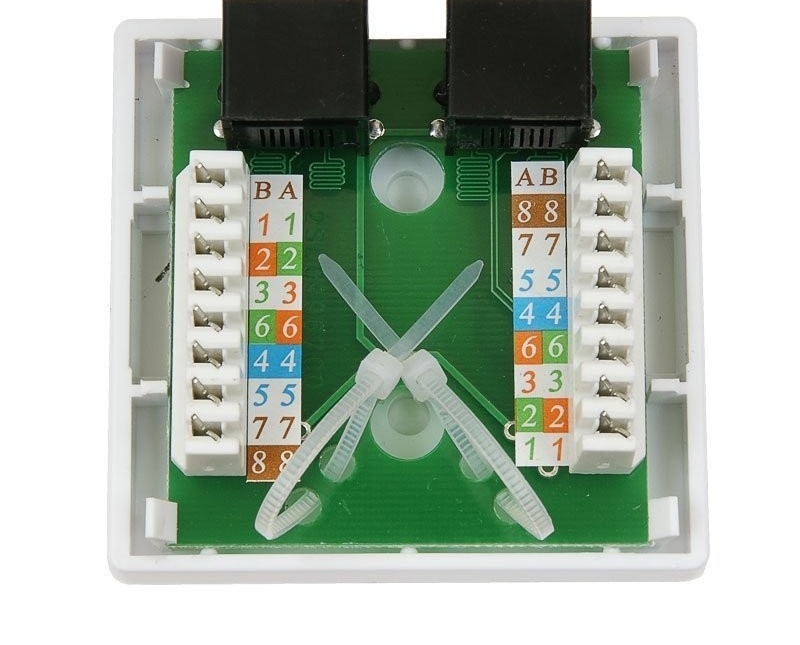
Internal device outlets
Socket terminals are also marked on the basis of the colors of the wires intended for connection to them. For this purpose, mainly manufacturers use special stickers on which markings are applied. In order for the whole system to function properly in the future, you just need to connect the outlet, focusing on this marking.
Work execution order:
1. Remove the front cover from the outlet.
2. Remove the outer insulating layer of the order of 5-6 cm and straighten the veins.
3. We align and distribute the twisted pair wires.
4. In accordance with the selected connection scheme, we put the cores in the ports (without removing the additional insulation layer).
Most Internet outlets are equipped with special latches, working on the principle of clips. This makes it possible to crimp the RJ 45 cable without the use of additional equipment. If they are absent, then to fix the wires we use bolts, which we fasten with a screwdriver.
5. We fix the outlet on the wall or in the installation box.
6. Install the front panel on the outlet.
Outlet manufacturers
In the world there are many companies that manufacture the sockets used to organize computer networks. Let's get to know some of them:
Vico - A company formed in Turkey in 1980. It is the owner of many certificates that it received as a reward for high quality services from representatives of the International Organization for Standardization. Currently, the company has developed a fairly large distribution network of products, consisting of 55 countries, including Russia.
Legrand - Is a leading French company for the manufacture of electrical components used for domestic and industrial purposes. Despite the relatively young age, it produces a fairly extensive product line: sockets designed for use in telephone and computer networks, walk-through switches, circuit breakers, residual current devices (protective devices), contactors, etc.
Hager Systems (Hager) - company founded in Germany in 1955, which in 2004 opened a representative office. Since 2011, it has been called Electrosystems and Technologies LLC, as it was bought by Russian investors in 2009. It is engaged in the production of electrical equipment, such as sockets, switches, modular type protective and switching equipment, cable channels, etc.
In this article, we familiarized ourselves with the basic standards for connectors and sockets that are used to create telephone and computer sockets. We examined the installation procedure for Internet outlets and twisted pair connections, and also met several companies involved in the production of electrical and electronic equipment.