How to connect a three-key lighting switch

The advantage of the three-key switch is that it can be used to adjust the intensity of lighting in the room. Such a switch is used in long corridors, in rooms with several levels of lamps, as well as in cases where lighting is controlled from one point in several separate places. For example, in the bathroom, toilet and kitchen. For the switch to work properly, you need to know how to properly connect it to the mains. This will be discussed.
Content
Preparatory work
To connect a three-key switch need to prepare for him place on the wall. If the wiring in the house or apartment is external, it is enough to bring to the place of the intended placement of the wire from the junction box, having laid them first in the cable channel.
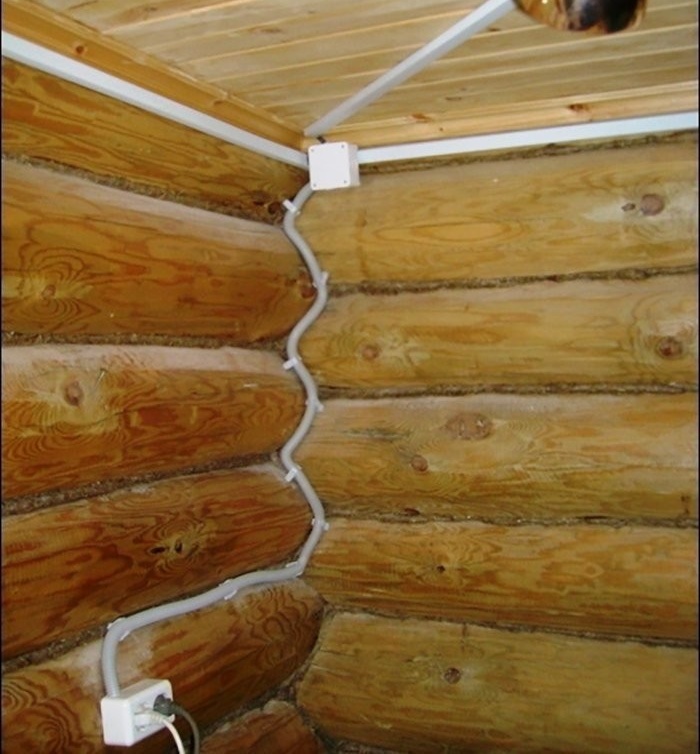
Supply of cable channel to lighting lamps
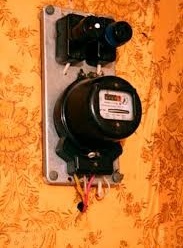
If the wiring is hidden, then before installation circuit breaker The wall socket is first mounted on the wall, and a 4-core cable from the distribution cable is connected to it (using the strobes in the wall) boxes. All this is fixed with the help of electrical alabaster.
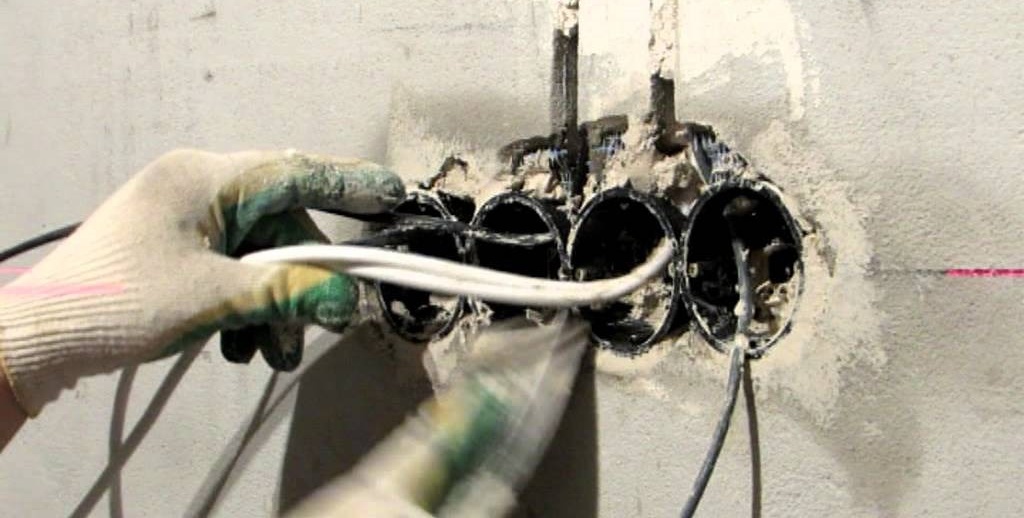
Installation example of socket outlets for switches or sockets
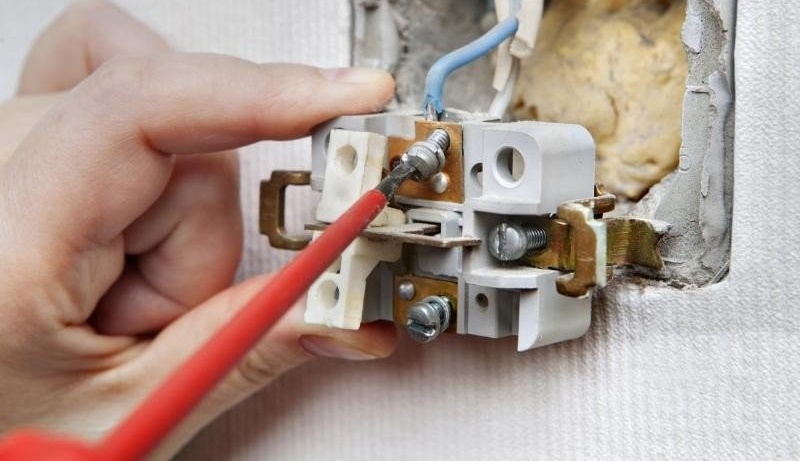
The cross-sectional area of each cable core must be at least 0.75 mm2. Installation is done already on a fully finished wall - after finishing (painting, wallpapering, etc.). If you just need to replace switchthen the task is simplified. You just need to dismantle the old switch. To do this, the keys are removed by prying them with a fingernail or a flat-head screwdriver, and the fixing screws are loosened. Having removed the protective case, it is necessary to remove the base from the socket and disconnect all the wires.
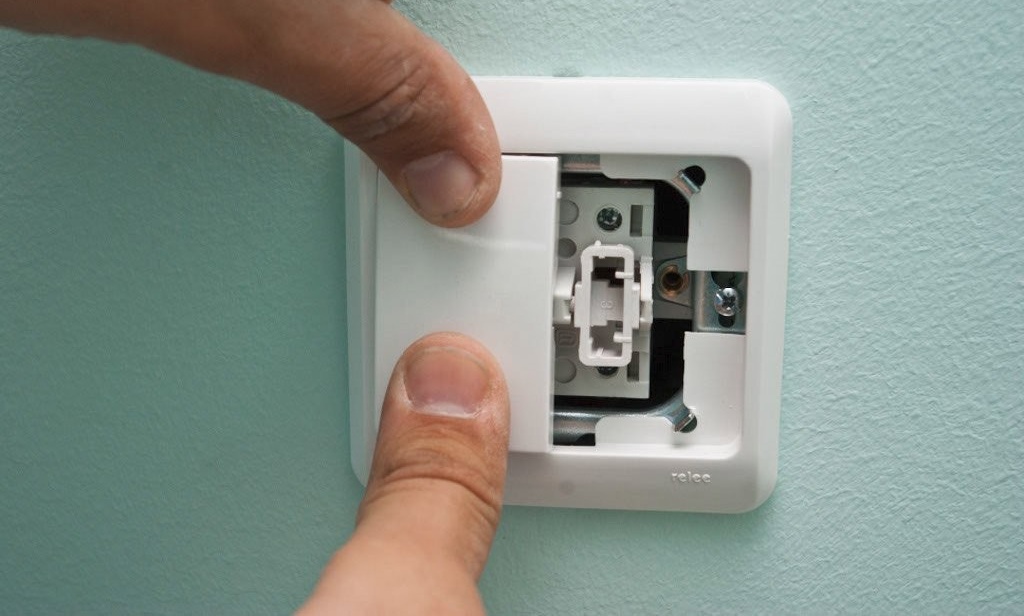
Example of removing a switch key
Dismantling of the circuit breaker can only be carried out in a de-energized mains. Neglect of safety rules threatens to receive an electric shock, with all the ensuing consequences.
Power off is made on the switchboard of the house (apartment). Auto checkbox circuit breaker voltage must be in the off position (down).
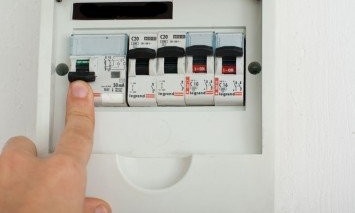
Circuit breaker flag down
In order to finally verify the safety of operation, it is recommended to additionally check the voltage at the terminals circuit breaker household indicator or tester.

The built-in LED lights up when energized.
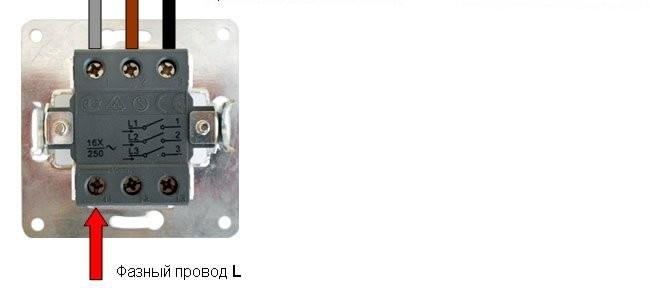
For convenience of further installation, especially if this is done for the first time, it is advisable to mark the phase wire with a marker.It is located separately from the others, in the same way it needs to be installed in the future. If the color coding is correctly observed, the wire with the phase is painted in red (or brown) color.
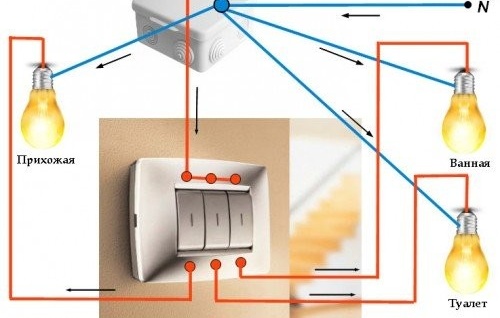
Utility and triple connection diagram circuit breaker
Principle of operation circuit breaker simple enough. By pressing a key, the lamp power circuit is connected or disconnected. Inside the cap are movable copper contacts. Moving the keys up, the contacts are connected, moving down - open. On the switch phase wire is supplied. Zero is fed to the lamp from the junction box.
An example of the distribution of lighting functions on keys
Using the Three-Key circuit breaker allows you to save space on the wall, simplifies installation work. In addition, when using such circuit breaker Electricity is significantly saved (up to 20%), since it becomes possible to turn off unnecessary lamps. Different combinations of keys can only illuminate the space that is needed at the current time, to divide the lighting into levels.
What tools and materials are needed
To connect a three-key circuit breaker The following tools will be needed:
- electric screwdriver with a flat slot, size 3.5–5 mm .;
- pliers.
- knife or stripper for stripping insulation on wires;
Photo gallery: tools necessary for work
-

- Screwdriver leg isolated

-

- Facilitates bare wires from insulation

-

- Electric pliers

If a switch installed for the first time, consumables will be needed cables of the desired cross-section, junction box, installation socket, terminal blocks or insulation tape. With external wiring, a cable channel, and with hidden wiring, a corrugated sleeve and alabaster.
Photo Gallery: Materials Needed
-
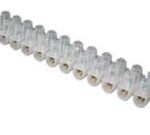
- Terminal blocks are used to connect conductors.

-

- The joints to the twists are insulated with electrical tape

-
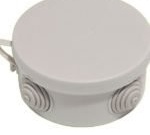
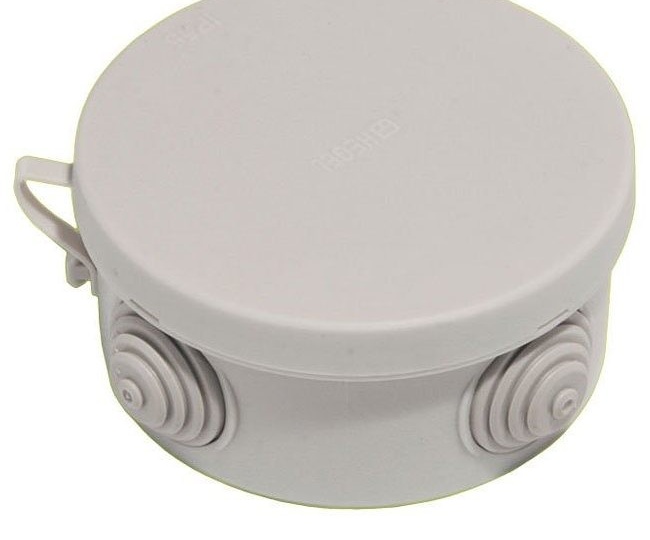
- Installation junction box
-
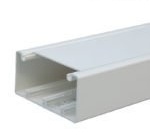
- For external wiring, a cable channel is used

-

- The switch is mounted in the socket

-

- Podrozetnik is fixed with alabaster

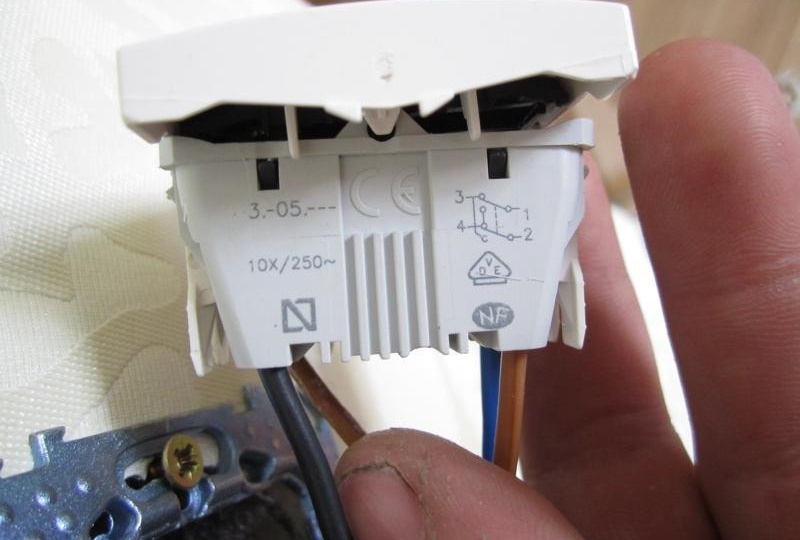
At the time of buying circuit breaker it is worth paying attention to the IP code, whichIt is usually applied on the packaging. The code consists of two numbers indicating the level of protection of the base from moisture and dust. This is especially important when installing the device in the bathroom or outside the house. The first digit indicates the degree of protection against dust, the second - from moisture, on a 6-digit scale. For indoor use, IP 20 is enough, it is better to install on the street or in the bathroom switch with IP 66. In addition, on a quality manufactured the circuit breaker is always marked and the phase terminal is highlighted separately (arrow or Latin letter L).
Connection diagram on the back of the switch
How to connect a three-key switch: step by step actions
The sequence of actions when connecting a three-key circuit breaker following:
- Disconnect the general power supply (or lighting group) on the distribution panel. This is necessary to ensure the safety of the work.
Safety plugs
- Dismantling circuit breaker. If a switch new, disassembling it consists in disconnecting the housing from the base and loosening the terminal mounts. In some modern devices, the terminal is designed on the principle of a latch, you do not need to release it. The wire simply leads into the hole and is automatically fixed there. Other than that, to secure switch in the undergrowth, need on one, two turns of the screw, loosen the tension of the spacer legs.
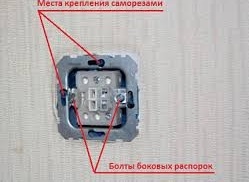
Spacer foot screws
- Connecting wires to circuit breaker. The most crucial moment. It is necessary to understand 4 wires. One is fixed in the common terminal, from it the "phase" will be supplied to all three lamps.The remaining 3 are connected in the desired order. For example, one feeds the central chandelier, the second includes a wall sconce and the third - island lighting above the sofa in the living room. Or, if the chandelier has 6 lights, turn on 3 pairs in turn. It is convenient to clean the insulation with a stripper, but it is also possible with an ordinary knife. The length of the exposed wire should not exceed 10 mm., So that after immersing it in the terminal socket, no more than 1 mm remained outside. If the terminal clamp is a screw terminal, it must be tightened firmly enough.
Terminal Fasteners
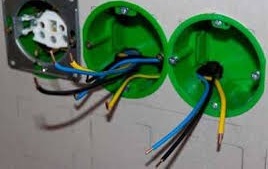
- Connection of wires in the junction box. The most reliable connection of wires is considered to be soldering. Not for nothing that even today, electricians are often called "soldering". However, this work requires skills and a soldering iron with all accessories. Therefore, in most cases, the wires are connected by terminal blocks, of which there is a wide variety on sale. In terms of technical characteristics, such a connection is practically in no way inferior to soldering, and in some cases even more progressive (for example, when a transition is made from an aluminum core to a copper core). In extreme cases, ordinary twisting of metal cores, which is done with pliers, is also acceptable. The insulation in the junction box should also be bare enough to ensure that the fastening is reliable, no more. All cable joints must be carefully insulated so that they cannot contact each other.
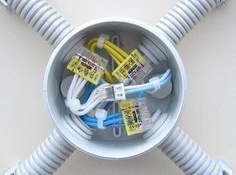
Junction box wires
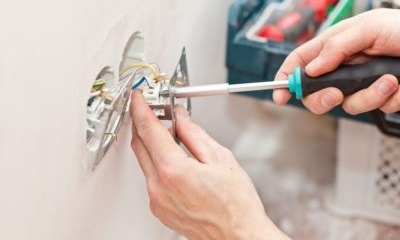
- Checking the connection. Having finally connected all the wires, before the final assembly, you can check the operation of the entire circuit. To do this, turn on the power on the switchboard, test the switch and again turn off the current in the network.
- Junction box assembly and circuit breaker. If everything works as usual, the wires in the junction box are neatly laid inside and closed by a lid. Switch installed in the socket. To do this, the screws of the spacer legs are twisted clockwise. They must be pressed evenly on each side, so that the base is ultimately firmly fixed in the center of the hole. But you should not overtighten too, if you tighten too much, the legs can pierce the plastic body of the socket and switch will "hang out" in it. After that, the protective case is screwed on and the keys are inserted into the grooves. Assembly completed.

Switch assembly
- Turn on general power.

In addition to the first and last points, the order of work may change, this does not matter. You can, for example, first connect the wires in the installation box, and then mount directly switch.
Another thing is important. According to the rules for installing electrical appliances (PUE), it is necessary to connect the device so that it is the phase current conductor that opens. If you swap the "phase" and "zero" everything will work, but the lamp will always be on. And this is fraught with electric shocks in case of careless contact with the exposed contacts when replacing the bulb. In addition, the rules govern the position of the keys. The light should turn on by pressing the button up, and turn off - by pressing down.
Three-key wiring diagram circuit breaker fundamentally not differs from the connection scheme of one or two keyboards. The only difference is the number of controllable lighting points.
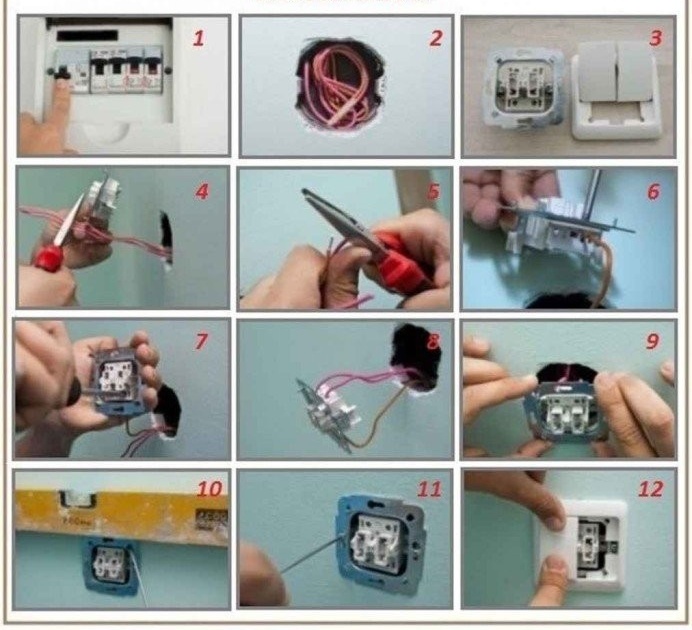
Example of step-by-step installation of a switch
Video: three-key editing circuit breaker
https: // www.
Video: connecting the three-key switch with socket
https: // www.
Possible errors and solutions
The most common connection error circuit breaker is a mess with wires. To avoid it and the device worked in normal mode, it is recommended to connect the lamps in series, observing the alternate connection of conductors. Color marking can facilitate the task. In this case, the introductory, common contact coming from the junction box is fixed first.
Conductor color coding example
The contacts must be clamped tightly so that during installation work they do not fall out of the terminals. It sometimes happens that switch connected and checked, but after installing in the socket, it stopped working. Then you need to remove it again and additionally tighten the terminals. Here, by the way, you can see that to use all the lighting, you need to use only the installation type of wires, indicated by the letter "U" on the marking. It differs in that the inner metal part is a solid copper rod. The connecting cable, consisting of woven thread-like conductors in one core, is prohibited to use.
Generally, breakers Designed for a long service life - up to 10 years or more. But at the same time, it is necessary to observe the correct connection and use lamps whose power does not exceed 100 watts. In case of overloads with large currents, copper contacts begin to burn and carbonize, which ultimately leads to interruption of power supply. Preventive measures to eliminate this problem can be stripping of contacts and additional tightening of terminal clamps.
The use of energy-saving and LED lamps significantly extends the life of the circuit breaker.

LED lamp consumes low current
A little nuance. If LED lamps that consume low currents are installed in lighting fixtures, it is not recommended to use switch with backlight - the built-in LED on the case will not work.
When conducting electrical work, it is necessary to observe fire and personal safety measures. The installation of the switch is connected with the connection of a high voltage current. In order not to become a victim of an accident, you must adhere to the recommendations and rules for safe installation.