Creating a 220-volt LED lamp with your own hands: instructions, diagrams, video
Is it possible to make an LED lamp (LED), working from a voltage of 220 volts, from start to finish? It turns out you can. Our tips and instructions will help you in this exciting lesson.
Content
LED lamp benefits
LED lighting in the house is not only modern, but also stylish and bright. Conservative amateurs of incandescent lamps remain weak “Ilyich’s bulbs” - the Federal Law “On Energy Saving”, adopted in 2009, from January 1, 2011 prohibits the production, import and sale of incandescent lamps with a capacity of more than 100 watts. Advanced users have long switched to compact fluorescent lamps (CFLs). But LEDs bypass all of their predecessors:
- the power consumption of the LED lamp is 10 times less than that of the corresponding incandescent lamp, and almost 35% less than that of CFL;
- the luminous intensity of LED lamps is 8 and 36% higher, respectively;
- achieving the full power of the light flux occurs instantly, unlike CFL, which requires about 2 minutes;
- prime cost - on condition that the lamp is manufactured independently - tends to zero;
- LED lamps are environmentally friendly because they do not contain mercury;
- LED life is measured in tens of thousands of hours. Therefore, LED lamps are almost eternal.
Dry numbers confirm: LED is the future.
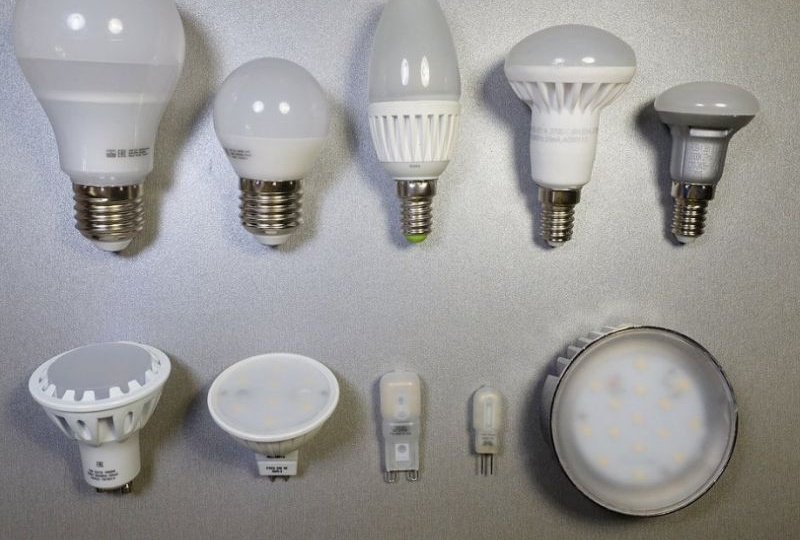
The design of a modern factory LED lamp
The LED here is originally assembled from many crystals. Therefore, in order to assemble such a lamp, you do not need to solder numerous contacts, you only need to attach one pair.

LED lamp consists of a base, driver, radiator, the LED itself and the diffuser
LED types
LED - a semiconductor multilayer crystal with an electron-hole transition. By passing a direct current through it, we get light radiation. An LED differs from a conventional diode in that in case of improper connection, it immediately burns out, since it has a low breakdown voltage (several volts). If the LED burns out, it must be completely replaced; repair is not possible.
There are four main types of LEDs:
- the most common in light jewelry and DIP displays (The Direct In-line Package - a crystal with a lens and two conductors);
- bright car “Piranha” (similar design, but four conclusions, which is more reliable in installation and better for heat dissipation);
- SMD surface mounted diode (Surface Mount Devices - smaller dimensions, better heat sink and more applications);
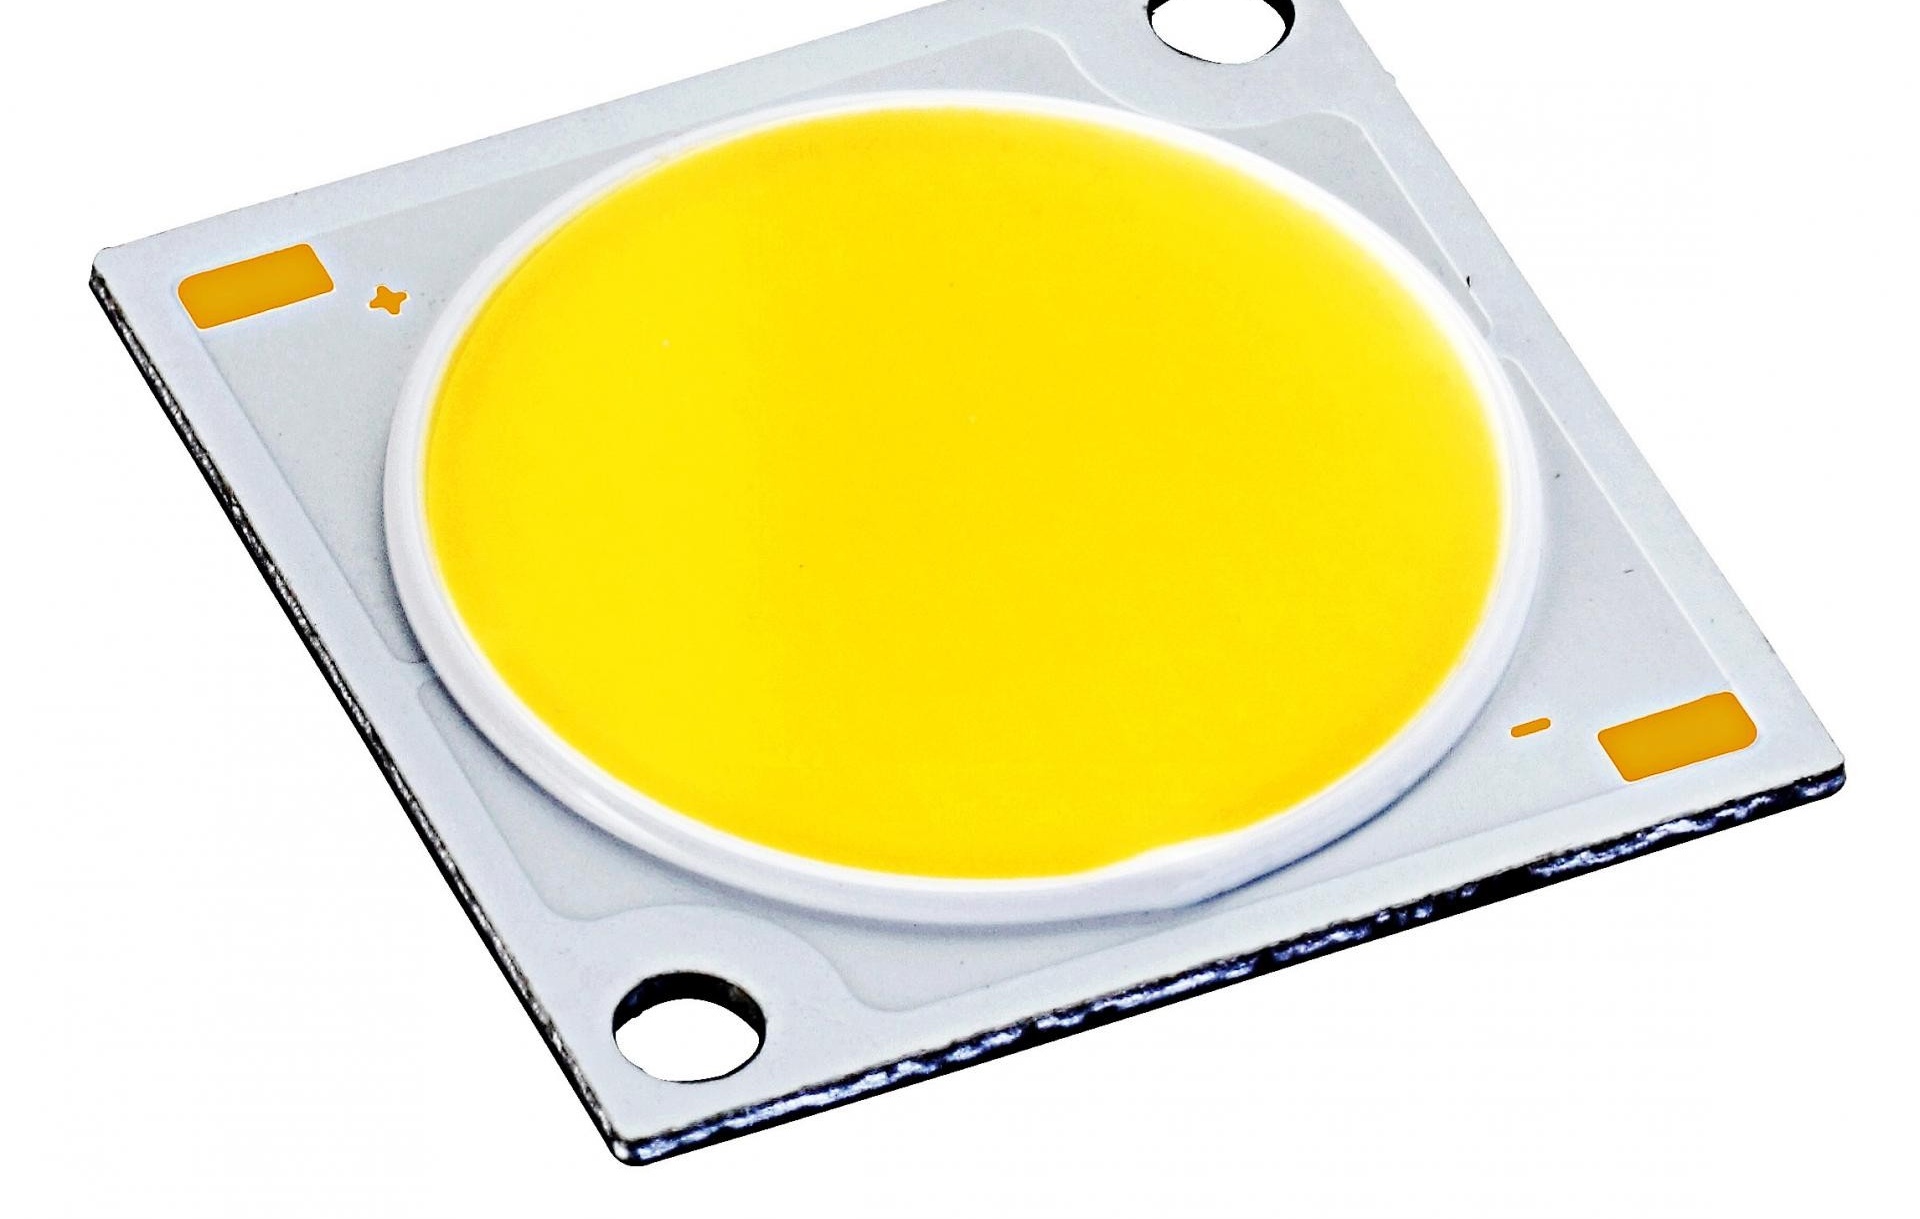
- COB (Chip-on-Board soldered into the board - the contact is less oxidized and does not overheat, the intensity of the glow is much higher).
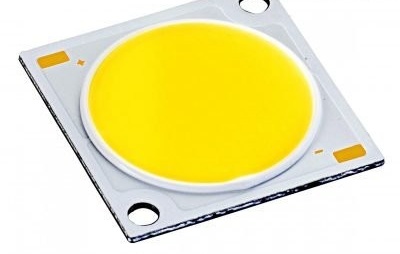
LEDs made using COB technology are a ready-made assembly of several unpacked elements connected to a single light source
A home-made and properly assembled LED lamp will serve for many years, while it can be repaired.
Before proceeding with self-assembly, you need to choose the power supply method for our future lamp. There are many options: from a battery to 220 volt AC - through a transformer or directly.
The easiest way is to assemble a 12 volt LED from a blown halogen. But it will require a rather massive external power supply. A lamp with an ordinary socket, designed for a voltage of 220 volts, fits any cartridge in the house.
Therefore, in our guide, we will not consider the creation of a 12-volt LED light source, but show a couple of options for designing a 220-volt lamp.
Since we do not know the level of your electrical engineering training, we cannot guarantee that you will get a correctly working device at the output. In addition, you will work with life-threatening stress, and if something is done inaccurately and incorrectly, damage and damage are possible, for which we will not be liable. Therefore, be careful and attentive. And you will succeed.
LED Lamp Drivers
The brightness of the LEDs directly depends on the strength of the current passing through them. For stable operation, they need a constant voltage source and a stabilized current that does not exceed the maximum permissible value for them.
Resistors - current limiters - can be dispensed with only for low-power LEDs. A simple calculation of the number and characteristics of resistors can be simplified by finding a LED calculator on the network, in which not only the data is output, but also a ready-made electrical circuit of the structure is created.
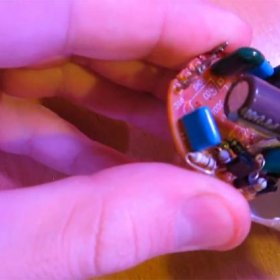
To power the lamp from the network, you must use a special driver that converts the input AC voltage into a working one for LEDs. The simplest drivers consist of a minimum number of parts: an input capacitor, several resistors and a diode bridge.

In the simplest driver circuit, through a limiting capacitor, the supply voltage is supplied to the rectifier bridge, and then to the lamp
Consider the simplest and most commonly used drivers for LED lamps:
- the linear driver is very simple and is used for small (up to 100 mA) operating currents or in cases where the source voltage is equal to the voltage drop across the LED;
- Pulse down driver is more complicated. It allows power LEDs to be powered by a source of much higher voltage than is necessary for their operation. Disadvantages: large size and electromagnetic interference generated by the inductor;
- A pulse boost driver is used when the operating voltage of the LED is greater than the voltage received from the power source. The disadvantages are the same as the previous driver.
In any 220-volt LED lamp, an electronic driver is always integrated to ensure optimal operation.
Most often, several faulty LED lamps are dismantled, burned out LEDs and radio parts of the driver are removed, and one new design is assembled from the whole ones.
But you can make an LED lamp from a regular CFL. This is quite an attractive idea. We are sure that many zealous owners in their boxes with parts and spare parts keep faulty “energy savers”. Sorry to throw, nowhere to apply. Now we will tell you how to create an LED lamp from an energy-saving lamp (E27 base, 220 V) in just a couple of hours.
Defective CFL always gives us a high-quality base and housing for LEDs. In addition, a gas discharge tube usually fails, but not an electronic device for “igniting” it. We set aside the current electronics again in the blank: it can be disassembled, and in skilled hands these details will still serve something good.
Types of socles of modern lamps
The base is a threaded system for quick connection and fixation of the light source and the cartridge, supplying power to the source from the mains and ensuring the tightness of the vacuum bulb. The marking of the socles is deciphered as follows:
- The first letter of the marking indicates the type of cap:
- B - with a pin;
- E - with thread (developed back in 1909 by Edison);
- F - with one pin;
- G - with two pins;
- H - for xenon;
- K and R - respectively with cable and recessed contact;
- P - focusing base (for spotlights and lights);
- S - spotlight;
- T - telephone;
- W - with contact entries in the glass of the flask.
- The second letter U, A or V indicates in which lamps the base is used: in energy-saving, automotive or with a conical end.
- The numbers following the letters indicate the diameter of the cap in millimeters.
The most common base from Soviet times is considered to be E27 - a threaded base with a diameter of 27 mm for a voltage of 220 V.
Creating an E27 LED lamp from an energy-saving one using a ready-made driver
For self-production of an LED lamp, we need:
- Failed CFL lamp.
- LEDs HK6.
- Pliers.
- Soldering iron.
- Solder.
- Cardboard.
- Head on the shoulders.
- Skillful hands.
- Accuracy and attentiveness.
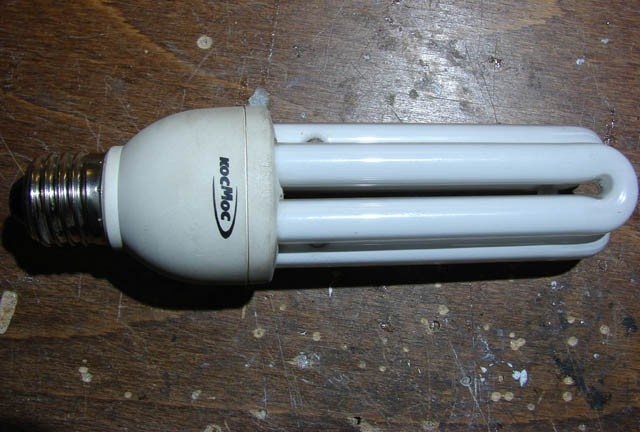
"Cosmos" is one of the most popular brands of modern energy-saving lamps, so many zealous owners will definitely find several faulty copies
Step-by-step instruction for manufacturing an LED lamp
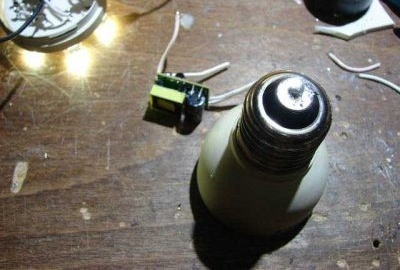
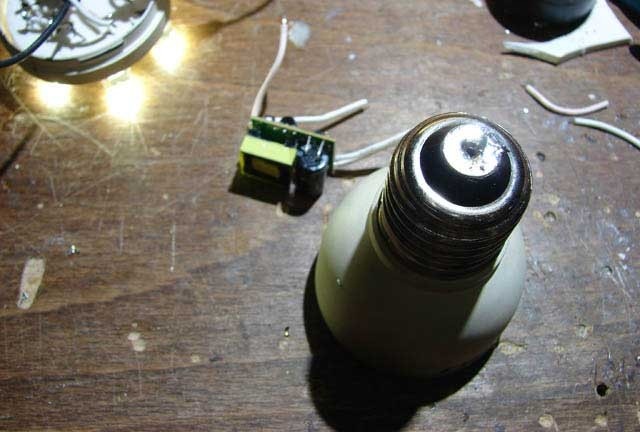
- We find a faulty energy-saving lamp, which has long been with us “just in case”. Our lamp has a power of 20 watts. So far, the main component that interests us is the base.
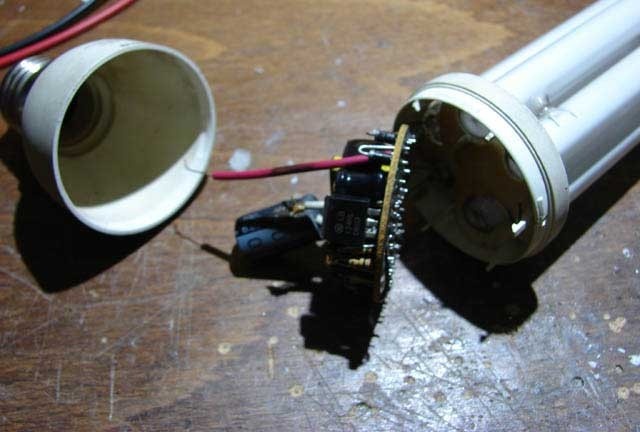
- Carefully disassemble the old lamp and remove everything from it except the base and the wires coming from it, with which we will then solder the finished driver. The lamp is assembled using latches protruding above the housing. You need to look at them and something to pry. Sometimes the base is attached to the body more difficult - the core of the point recesses around the circumference. Here you have to drill the core points or carefully saw them with a hacksaw. One supply wire is soldered to the central contact of the base, the second to the thread. Both are very short. The tubes during these manipulations can burst, so you need to act carefully.
- We clean the base and degrease it with acetone or alcohol. Increased attention should be paid to the hole, which is also thoroughly cleaned of excess solder. This is necessary for further soldering in the base.
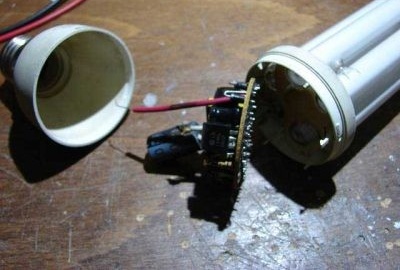
The gas discharge tube built-in board integrated into the fluorescent lamp will not work for us to create an LED device
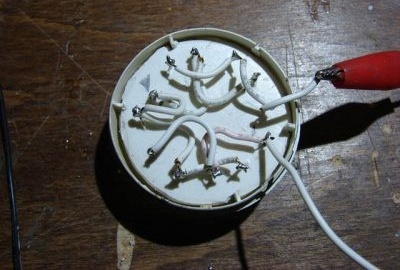
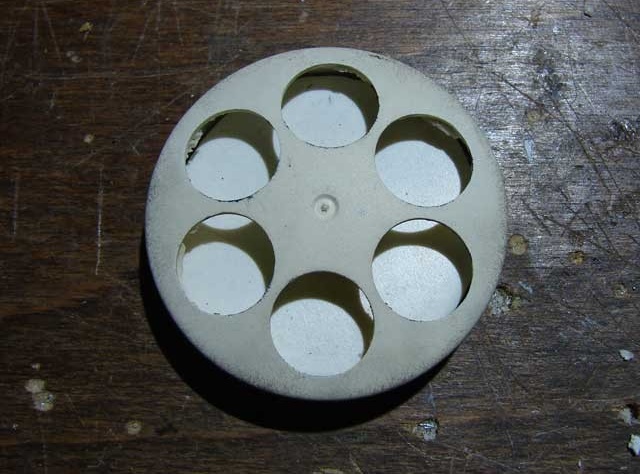
- The cap of the cap has six holes - gas discharge tubes were attached to them. We use these holes for our LEDs. Place a circle of the same diameter from a suitable piece of plastic cut out with nail scissors under the upper part. Thick cardboard will also work. He will fix the contacts of the LEDs.
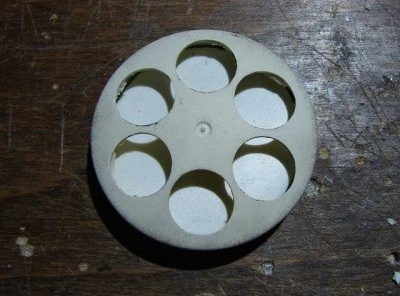
On the reverse side, the base has six round holes in which we will install LEDs
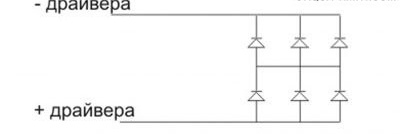
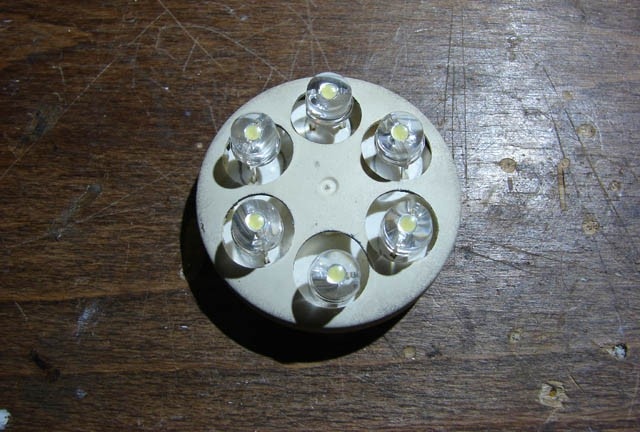
- We have multi-chip HK6 LEDs (voltage 3.3 V, power 0.33 W, current 100-120 mA). Each diode is assembled from six crystals (connected in parallel), therefore it shines brightly, although it is not called powerful. Given the power of these LEDs, we connect them in three pieces in parallel.
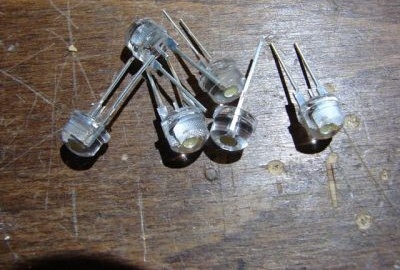
Each LED shines quite brightly on its own, so six pieces in the lamp will provide good light intensity
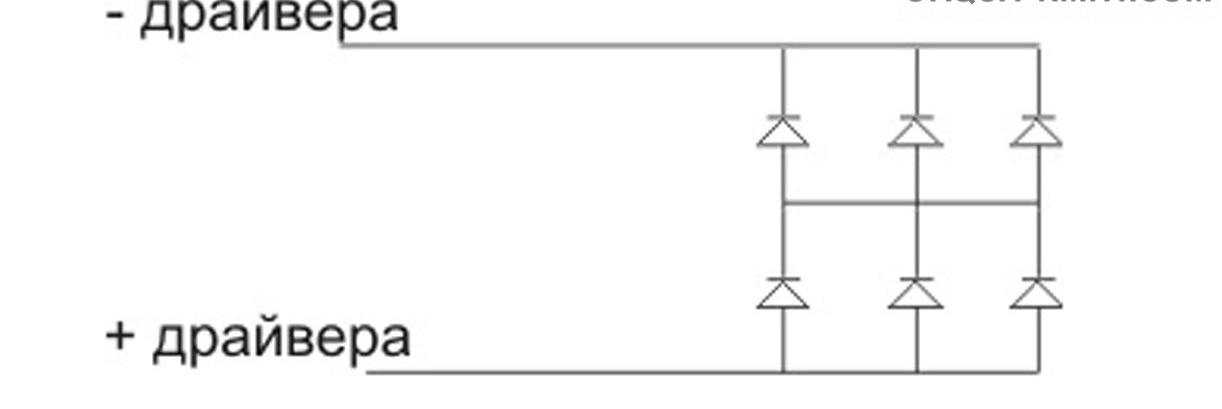
- We connect both chains in series.
Two chains of three parallel-connected LEDs each connected in series
-
The result is a pretty pretty design.

Six LEDs inserted into the sockets form a powerful and uniform light source
- A simple, ready-made driver can be taken from a broken LED lamp. Now, to connect six white single-watt LEDs, we use such a 220-volt driver, for example, RLD2–1.
The driver connects to the LEDs in parallel
- Insert the driver into the base. We place another cut-out circle of plastic or cardboard between the board and the driver in order to avoid a short circuit between the LED contacts and the driver parts. The lamp does not heat up, so any gasket is suitable.
The positive difference between Chinese and Russian socles: they are soldered much better
- We assemble our lamp and check if it works.
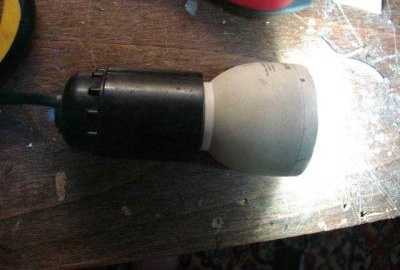
After assembling the lamp, you must connect it to a voltage source and make sure that it is on


We created a source with a light intensity of about 150-200 lumens and a power of about 3 watts, similar to a 30-watt incandescent lamp. But due to the fact that our lamp has a white glow, it visually looks brighter. The area of the room illuminated by it can be increased by bending the LED leads. In addition, we received a wonderful bonus: a three-watt lamp can not even be turned off - the meter practically does not “see” it.
Creating a LED lamp using a makeshift driver
It is much more interesting not to use a ready-made driver, but to do it yourself. Of course, if you are good at using a soldering iron and have basic reading skills in electrical circuits.
We will consider etching the board after drawing the circuit on it manually. And, of course, everyone will be interested in messing with chemical reactions using the available chemicals. As in childhood.
We will need:
- A piece of foil-coated copper on both sides of fiberglass.
- Elements of our future lamp according to the generated circuit: resistors, capacitor, LEDs.
- Drill or mini-drill for drilling fiberglass.
- Pliers.
- Soldering iron.
- Solder and rosin.
- Nail polish or stationery correction pencil.
- Sodium chloride, copper sulfate or a solution of iron chloride.
- Head on the shoulders.
- Skillful hands.
- Accuracy and attentiveness.
Textolite is used in cases where electrical insulation properties are needed. This is a multilayer plastic, the layers of which are made of fabric (depending on the type of fibers of the fabric layer, there are basalt textolites, carbon textolites and others) and a binder (polyester resin, bakelite, etc.):
- fiberglass is a fiberglass impregnated with epoxy resin. It features high resistivity and heat resistance - from 140 to 1800 oC;
- foil fiberglass is a material coated with a layer of galvanic copper foil with a thickness of 35-50 microns. It is used to make printed circuit boards. The thickness of the composite is from 0.5 to 3 mm, the sheet area is up to 1 m2.

For the manufacture of printed circuit boards used foil fiberglass
Driver diagram for LED lamp
The driver for the LED lamp can be done independently, for example, relying on the simplest circuit, which we examined at the beginning of the article. There you only need to add a few details:
- Resistor R3 to discharge capacitor when power off.
- A pair of Zener diodes VD2 and VD3 for shunting the capacitor if the LED circuit burns or breaks.
If we select the stabilization voltage correctly, we can limit ourselves to one zener diode. If we put a voltage of more than 220 V, and select a capacitor under it, then we can do without any additional details. But the driver will be larger in size, and the board may not fit in the base.
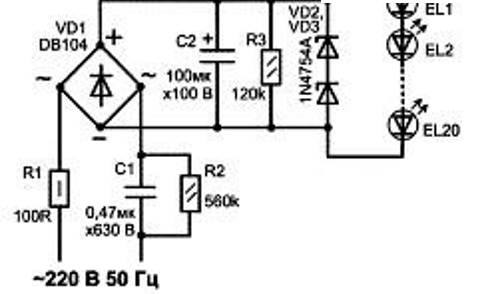
This scheme allows you to make a driver for a lamp of 20 LEDs
We created this circuit to make a lamp of 20 LEDs. If there are more or less of them, you need to choose a different capacitor C1, so that a 20 mA current passes through the LEDs.
The driver will lower the mains voltage and try to smooth out the power surges. Through a resistor and a current-limiting capacitor, the mains voltage is supplied to the bridge rectifier with diodes. Through another resistor, a constant voltage is applied to the LED block, and they begin to shine. The ripple of this rectified voltage is smoothed by the capacitor, and when the lamp is disconnected from the mains, the first capacitor is discharged by another resistor.
It will be more convenient if the driver design is mounted using a printed circuit board, and does not constitute a lump in the air from wires and parts. You can do the payment yourself.
Step-by-step instructions for making a LED lamp with a home-made driver
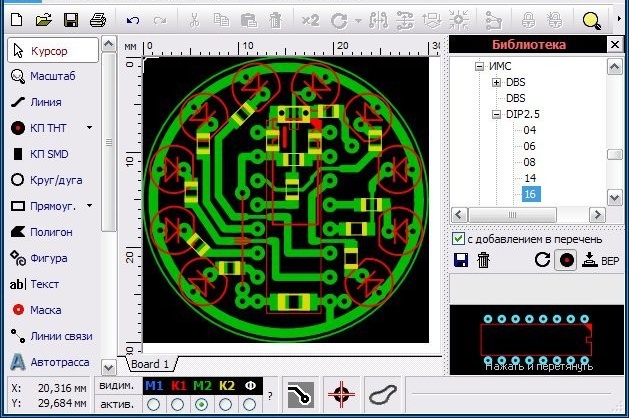
- Using a computer program, we generate our own pattern for etching the board according to the intended driver design. The free Sprint Layout computer program, which allows you to independently design printed circuit boards of low complexity and obtain an image of their wiring, is very convenient and popular among hams. There is another excellent domestic program - DipTrace, which draws not only boards, but also circuit diagrams.
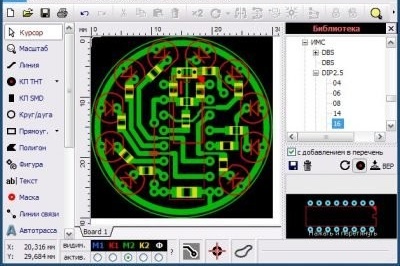
The free Sprint Layout computer program generates a detailed etching scheme for the driver board
- We cut a circle with a diameter of 3 cm from fiberglass. This will be our board.
- We choose the method of transferring the circuit to the board. All methods are terribly interesting. Can:
- draw a diagram directly on a piece of fiberglass with a stationery correction pencil or a special marker for printed circuit boards, which is sold in the radio parts store. There is subtlety: only this marker allows you to draw tracks less than or equal to 1 mm. In other cases, the width of the track, no matter how hard you try, will not be less than 2 mm. Yes, and the copper heels for soldering will come out messy. Therefore, after applying the drawing, you need to correct it with a razor or scalpel;
- print the circuit on an inkjet printer on photo paper and steam the printout with an iron to fiberglass. Elements of the scheme are covered with paint;
- draw a diagram of nail polish, which is definitely in any house where a woman lives. This is the easiest way, and we will use it. Carefully and gently with a bottle brush, draw the tracks on the board. We wait until the varnish dries well.
- We dilute the solution: 1 tablespoon of copper sulfate and 2 tablespoons of sodium chloride are mixed in boiling water. Copper sulfate is used in agriculture, so it can be bought in gardening and construction stores.
- We lower the board into the solution for half an hour. As a result, only the copper paths that we varnished will remain, the rest of the copper will disappear during the reaction.
- Acetone remove the remaining varnish from fiberglass. Immediately you need to tin (cover with solder using a soldering iron) the edges of the board and the contact point so that the copper does not rapidly oxidize.
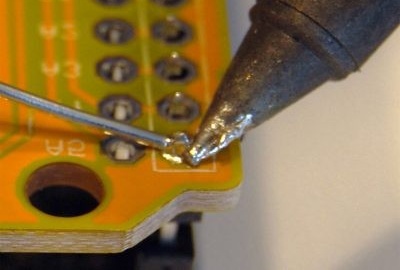
Contact points are soldered with a layer of solder mixed with rosin to protect copper paths from oxidation
- According to the scheme, we make holes with a drill.
- We solder the LEDs and all the details of the home-made driver on the side of the printed tracks on the board.
- Install the board in the lamp housing.

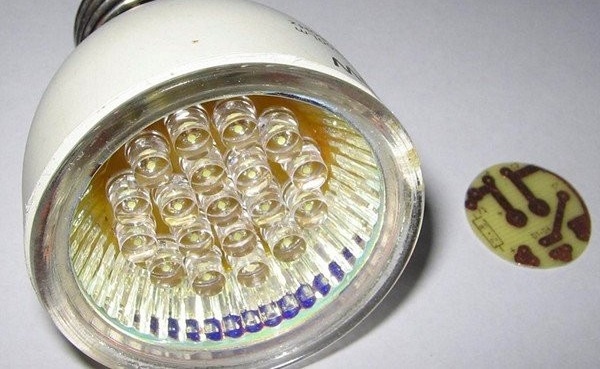
After all the operations performed, you should get a LED lamp equivalent to a 100-watt incandescent lamp

Safety notes
- Although self-assembly of an LED lamp is not a very complicated process, you should not even start it if you do not have at least basic electrical knowledge. Otherwise, the lamp you assembled during an internal short circuit can harm the entire electrical network of your home, including expensive electrical appliances. The specificity of LED technology is that if some elements of its circuit are connected incorrectly, then even an explosion is possible. So you have to be extremely careful.
- Typically, luminaires are used at 220 V AC. But designs designed for a voltage of 12 V cannot be connected to a normal network in any case, and you should always remember this.
- In the process of making a home-made LED lamp, the components of the lamp often cannot be immediately completely isolated from the 220 V power supply network. Therefore, you can be seriously shocked by electric current. Even if the design is connected to the network through the power supply, it is quite possible that it has a simple circuit without a transformer and galvanic isolation. Therefore, the structure must not be touched with your hands until the capacitors are discharged.
- If the lamp does not work, then in most cases the poor-quality soldering of parts is to blame. You were inattentive or hastily acted as a soldering iron. But do not despair. Try again!
Video: learn to solder
A strange thing: in our century, when there is absolutely everything in stores, as a rule, inexpensive and very diverse, after twenty years of euphoria, people are increasingly returning to doing their own things with their own hands. Needlework, carpentry and locksmith craftsmanship flourished. And simple applied electrical engineering confidently returns to this series.