Do-it-yourself well - instructions for self-construction

There may be several reasons for thinking about the device of autonomous water supply. Most often, this is a banal lack of a water supply system in a particular area. Less commonly, poor quality of supplied water. In addition, interruptions in the operation of utilities make many of us strive for independence from them. Therefore, even the owners of houses “with all conveniences” increasingly have the desire to build a well on the site (with their own hands or with the help of hired workers). It should be noted that village wells that have been familiar from childhood are becoming less common. In many cases, they are replaced by wells.
Content
A familiar well or water well?
A clear answer to the question: “Which is better: well or well? " - not. In each case, you need to make an informed decision based on the terrain and your needs. In this case, the following factors should be taken into account:
- The depth of the aquifer.
- Planned average daily water consumption.
- The type of soil, or rather, the degree of rockiness.
- Available hardware.
- The likelihood of power outages.
Now let's deal with each item in more detail. So, it is important to understand that of the three existing aquifers, the most common medium is used as the source of drinking water - groundwater. The first layer or top layer from the surface is not suitable for these purposes due to the low water quality and replenishment seasonality (depending on the precipitation and snowmelt). The quality of water in the artesian layer (the deepest) is not satisfactory. But the cost of arranging and maintaining an artesian well cannot be compared with the price of building an ordinary well - it’s expensive.
As a rule, the depth of the well is 10-15 m, sometimes up to 20 m. If the groundwater is lower, it is better to give preference to the well, which you can drill yourself. The advantages of this method include the possibility of its implementation in a fairly short time.

The small diameter of the well makes it difficult to organize and further maintain it.
However, for people who do not have special skills, the device of a well with their own hands is somehow more familiar and technologically understandable than drilling a well. In addition, this avoids a number of problems during construction and further operation:
- If a large stone gets in the way of the drill while drilling, it will be very difficult to deal with it. A sufficiently large diameter of the well allows even a sufficiently large piece of rock to be extracted.
- You do not need special equipment to dig a well. Any owner needs everything for this: shovel and bayonet shovels, crowbar, a pair of buckets, a strong rope and strong hands.
- During operation, both the well and the well are inevitably silted. Only now you can clean the well without special equipment, but not the well. And with the objects that fell into it will have to say goodbye forever. But cases of cable breakage, on which the pump is mounted, are not uncommon.
- Now about the power outages. If the lights are turned off in your home, you cannot use the well. From the well, you can always get water the old fashioned way - a bucket.
Do-it-yourself well construction has only two obvious drawbacks: the complexity and the large amount of excavated land that will have to be transported.
Looking for water or where to dig a well
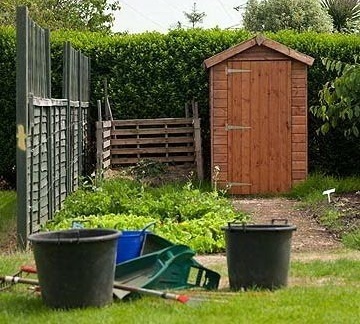
When reading the previous section, you inevitably had the question of how to determine this very depth of groundwater. Unfortunately, it is impossible to carry out such studies independently. Relying on all sorts of folk signs in this matter is not worth it. The only more or less sure way is to ask the neighbors. If the depth of the wells in most of them is the same, you can safely expect that the situation is the same on your site. If the neighbors use water supply, they will have to contact specialists. The well should be located at a sufficient distance from the sources of pollution: street toilets, cesspools and septic tanks.

The well needs to be located at some distance from sources of pollution
According to current regulatory documents, this distance is at least 20 m.
For more information on how to find water for a well, read our article:https://aquatech.tomathouse.com/en/vodosnab/kolod-skvaj/kak-najti-vodu-dlya-kolodca.html.
How and from what to build: we choose the design and material
There are many ways to build wells, but the most common of them is the mine method. It is its construction that we will consider in stages. In order to understand how to make a well with your own hands, you first need to familiarize yourself with its device. This rather simple-looking structure consists of four parts:
- The tip is the upper part that prevents freezing of water in frost and protects it from dust and debris;
- The main trunk is a shaft for transportation;
- The water intake and sump are parts responsible for the accumulation of water.
The design of the water intake can also be different:

An imperfect well is perfect for the domestic needs of one family.
Incomplete or imperfect water intake It is a structure where the lining of the trunk does not touch the water-resistant formation from below. In this case, water enters the well through the bottom and walls.
Complete or perfect water intake called when the lining rests on the bottom (water-resistant layer). In this case, the replenishment of water reserves occurs through the walls of the mine.
Full with sump or shaft extension to the bottom the water intake is suitable for farms with a large daily water consumption. A sump is a depression in the water-resistant soil layer, which is designed to accumulate a large supply of water. For the same purposes, the expansion of the trunk in the water intake part also serves.
Important! Do not think that the greater the capacity of the well, the better. With a large difference between daily consumption and the volume of the well, the water in it will stagnate.
For private households, the first option is best.

Do-it-yourself reinforced concrete rings are the easiest way to build a well.
In terms of price, quality and ease of installation, primacy belongs to incomplete wells made of reinforced concrete rings.
In our next article you will find detailed instructions for installing the well - calculations, digging, installing rings and other features:https://aquatech.tomathouse.com/en/vodosnab/kolod-skvaj/kak-vykopat-kolodec.html.
The decision is made, proceed to implementation
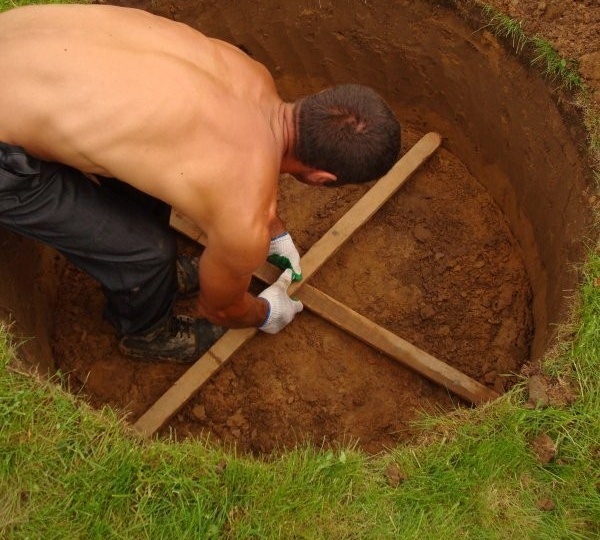
First of all, you need to understand that the correct answer to the question “how to build a well with your own hands” requires at least four hands. That is, two should take part in the work. If there will be more than one assistants - excellent, things will go faster. So, let's get started.
Swarm the shaft and set the rings
The device of the shaft of such a well is possible in two ways.
Method number 1
Even before the start of land work, a concrete ring is installed in the selected place, and then soil is selected from its middle and from under the walls.
Advice! In order not to have to throw the earth through the walls of the ring, you can first dig a hole of the required diameter with a depth of 0.5-0.7 m, and then install the ring.
On loose soils, excavation of the earth must be carried out from the center to the edges. On strong ones, it is better to "dig" the bottom edge of the ring first, and then clean the center. As the soil is removed under its own weight, the ring will fall down. When it completely falls below the surface level - we install the second ring and fasten it with the first. To ensure the tightness of the joints that will be in the water, hemp rope must be laid between the segments along the special grooves. Places of connections above the surface of the water after completion of excavation are sealed with cement mortar.
Important! When constructing wells, it is strictly forbidden to use materials containing hazardous chemicals - all kinds of mounting solutions, sealants, mastics. This can adversely affect the taste of the water and even make it hazardous to health.
On loose soils in the process, sometimes a rather unpleasant situation arises - one of the upper rings “pinches”. In this case, the lower rings are lowered, and the upper ones remain out of place, which leads to a gap. To prevent such a development of events immediately after installation, you need to fasten the rings together with four metal plates located at an equal distance from each other.

This method of fastening rings will help to avoid the appearance of cracks during construction
The plates, in turn, are attached to concrete with metal brackets or bolts through pre-prepared holes.
Method number 2
Here is another way to make a well from reinforced concrete rings on solid soils, where the possibility of collapse of the walls of the shaft is minimal. You can first dig a shaft, and then lower the rings into it. In this case, it is necessary to increase the diameter of the pit by 20-30 cm and, after installing the rings, backfill it. And this is extra work.

Work can be stopped when at least three keys appear at the bottom
Stop work when water begins to arrive actively in the pit, and 3 or more keys appear at the bottom. Now you need to pump out all the water and remove a little more soil (3-5 buckets). Turn off the pump, cover the well and leave it for 12 hours. Then again we pump out all the water and clean the bottom with the pump running until the aquifers become clearly visible.
Important! During the cleaning of the well, it is not necessary to remove the soil from under the rings. Otherwise, you risk lowering them below the aquifer.
We cover the well again and leave for another day. Now we pump out water and arrange a bottom filter.
A bit about safety
"What can be the safety precautions when working with a shovel?" - you ask. And you will be right in something. But do not forget that you will have to work not on the surface, but in a rather deep pit, where the temperature is much lower. In order not to “earn” hypothermia, regularly take breaks and rise to the surface. This advice is especially relevant in the summer heat.
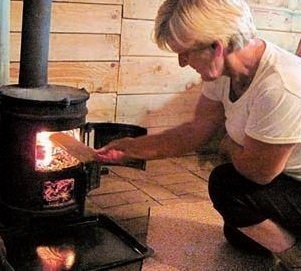
Potential gas pockets, which are easy to stumble in in some regions of our country, also pose a considerable danger.How to build a well and not suffer from this "invisible enemy"? Very simple - take a burning wooden torch with you into the pit. While the flame burns evenly, there is nothing to fear. If it quickly goes out - immediately rise to the surface and ventilate the recess. This can be done by any means at hand, for example, a fan or even a vacuum cleaner with a sufficiently long hose.
The following rule may be trite, but its non-observance very often leads to tragic consequences. Put on a helmet and check the strength of all the ropes and the fastenings of the handles of the buckets. In the process, you will often have to lower it into the pit and lift heavy objects out of it. And you will have nowhere to dodge in such a limited space from a bucket of land flying from a height of 5-7 meters.
Bottom filter device
The design of the bottom filter largely depends on the composition of the soil and the rate of water intake. If liquid dirt forms abundantly at the bottom, and water flows quickly, you need to start with a wooden floor with holes and gaps between the boards.
Now you need to lay 2-3 layers of rubble or gravel. We make the lower layer 100 mm thick from the material of the smallest fraction. Then we fill up a larger gravel with a layer of 100 mm.

Bottom drainage will help make the water in your well perfectly clean.
The third layer of this de thickness should consist of the largest stones. If the soil at the bottom of the well remains dense enough, it is fashionable to do without a wooden pallet.
How to deepen the well, in which cases this is not recommended, more on this in our next article:https://aquatech.tomathouse.com/en/vodosnab/kolod-skvaj/uglublenie-kolodca-svoimi-rukami.html.
The headband is not only functional, but also beautiful
So, how to make a well figured out. Only the final stage remained - the tip. The functional component of the well head should be laid down during the construction of the mine. To do this, it is enough to leave the upper ring protruding to the surface at 600-800mm. Now you need to cover it with a lid of any material available to you and make a blind area of clay 200 mm thick. But you want the well not only not to spoil the appearance of the site, but also, if possible, to decorate it. In the first year after construction, finishing is not recommended - the ring may sag a little more. But after 10-12 months, you can turn your source of clean water into an additional decorative element of landscape design, decorating it with stone or wood and building a beautiful roof. Here is a selection of some particularly successful solutions:

If you don’t want to decorate the well yourself, you can buy such a beautiful “mill”

Such a "house" of metal not only looks great, but also protects the well from clogging

Head in the form of a tower
3 comments