How to quickly and efficiently dig a well: analysis of self-digging technology
It is impossible to live in a country house or in a country house without water supply. Well, when there is a river or lake nearby, then the issue of water is solved by itself. Well, if there are no natural water sources around the building, then the owner himself must take care of its extraction from the ground. And then the question arises: what is better to build - a well or a well? If the water level at your site is at a depth of 5 to 15 meters, it is better to dig a well, but if it is deeper, then you will have to equip the well. Today we will talk about how and where the digging of wells is made, about the main nuances of construction, security measures.
Content
Choosing a place for a well
It is impossible to independently determine where it is better to make a well, so that the water is closer, and that its quality is satisfactory. On this issue, it is better to consult a specialist. But there are other guidelines when choosing a place for a future well:
- you can find out from neighbors who already have wells, what depth they have, what soil is on the site, what problems arose during construction and to locate your well near the neighbor's (preferably in higher places of the site relief);
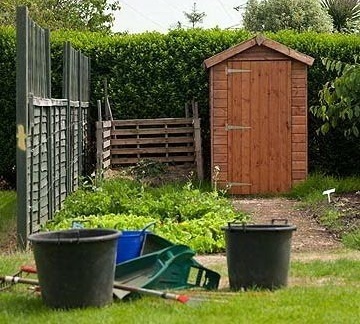
- the well should be located at a distance of at least 30 m from toilets, garbage pits, places of keeping animals and other sources of groundwater pollution;
- it is necessary to take into account not only the type of plot at the present time, but also the structures planned in the future (a barn, a bathhouse, a gazebo, etc.), since the place of the well can no longer be changed;
- for convenience, the distance from the intended location of the well to the house should be optimal.
Well digging should be planned for the driest period (late summer - early fall), when groundwater is at its lowest level.

It is best to start the construction of a well in late summer and autumn, when the groundwater level is at its lowest
Read more about choosing a suitable place for a well in our material:https://aquatech.tomathouse.com/en/vodosnab/kolod-skvaj/kak-najti-vodu-dlya-kolodca.html.
Preparatory work
To know how to dig a well with your own hands, you need to familiarize yourself with a certain technology and follow the safety rules at the same time.
Determined with the construction of the structure
Any well is a wide shaft (round or square), reaching The groundwatersuitable for human consumption. Its depth is usually about 10 m, but there are cases when the bottom of the well is at a depth of 30-35 m. The design of the well includes:
- head - the upper (aboveground) part;
- mine - a well trunk;
- water intake - the lower section of the well shaft where water is collected.
In the lower part of the mine, a bottom filter for water purification is necessarily arranged. It usually consists of 3 layers of gravel or gravel: the lower layer (small fraction) 10 cm thick, the middle (fraction 5-7 times larger) - 15 cm and the upper (fraction even larger) - also 15 cm.
Sometimes it happens that the soil at the bottom is very viscous - then you should build a plank floor with holes for water, and only top layers of the bottom filter should be poured.

The easiest and most convenient option for a do-it-yourself well device is the use of special concrete rings when constructing a well shaft
The well shaft can be made of stone, brick, wood, concrete. The most common and easiest option is the use of ready-made concrete rings. We will consider it in more detail.
How to calculate the cost of digging?
To figure out how much it will cost to dig a well, you need to calculate the cost of the necessary materials. For work, you will need: small and large gravel or gravel (for filtering), concrete rings, staples for fastening them together, sand and cement to putty joints between the rings.
Obviously, independent work, certainly, not without the help of several comrades or neighbors, will cost less to the owner of the site, otherwise he will need to spend money on a brigade of hired workers. Of course, there are special firms that are engaged in drilling wells and, if desired and with a decent amount, will make a turnkey well. But if it is too expensive for you and you want to save, you can do it yourself.
What tools are needed?
Since all work will be carried out manually, it is necessary to ensure the availability of the following tools: shovels (large and small), buckets, chain, tripod and lifting device, rope ladder. It will be necessary to build a wooden cart from the boards to move concrete rings that are quite heavy (up to 600 kg).
Safety regulations
The process of digging a well implies an increased danger to life and health, therefore it is necessary to observe several simple safety rules:
- To prevent possible falling on the person’s head of stones and earth when they are pulled out of the mine, it is necessary to wear a protective helmet.
- During the work, the ropes used should be checked daily for strength by hanging a heavy load from them.
- Be sure to check the strength of the fastening of all parts of the containers for pulling the soil.
- Since dampness and cold are detrimental to health, you should not be in the mine all day.
A few useful tips will help you avoid mistakes when building a well, especially if you hire workers:https://aquatech.tomathouse.com/en/vodosnab/kolod-skvaj/obman-klientov-pri-stroitelstve-kolodca.html
Digging Procedure
We proceed directly to the algorithm of the work:
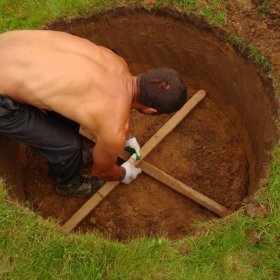
- At the site where the well will be located, marking is made: the diameter of the shaft should be 10 cm larger than the diameter of the concrete rings used. Dig a hole to such a depth that the first ring is not completely submerged - 8-10 cm above ground level.
- Using a trolley (which also has a height of 8-10 cm), the first ring is delivered to the pit and installed, carefully checking its verticality, since even a slight skew affects the quality of the well as a whole. A second ring is mounted on top and connected to the first with brackets (at least 3 pieces).
- Then deepen the hole by 80 cm in the center, then dig it in a circle so that the first ring plunges deep into its own weight. If the soil is soft, it is removed first from the middle of the ring, and if it is hard, the earth is first removed under the ring so that there are no obstacles to its immersion, and only after it settles the middle is removed. The joints of the strung rings are sealed by laying a tarred hemp rope and closing their cement-sand mortar.
- A wall of rings should be expanded until water begins to appear at the bottom of the well shaft. Water along with the washed sand is removed and the well is left for 12 hours to fill with water.
- On the second day, the bottom needs to be cleaned again. This operation is repeated until water veins are visible at the bottom of the mine. Covering the well, the well is left untouched for a day.
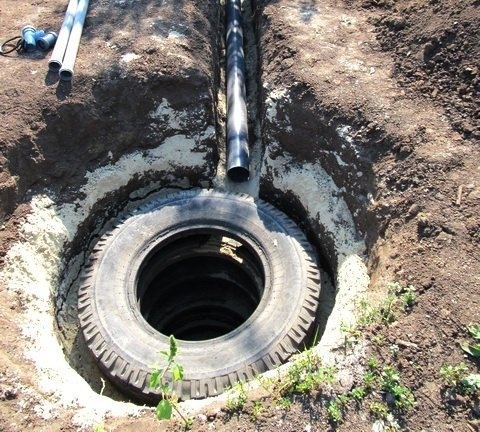
- The collected water and sand are again pumped out and the filter is placed on the bottom: 10-15 cm of fine gravel, then 30-40 cm of large gravel (crushed stone can be). A 1.5-meter water level (approximately one and a half rings) is considered sufficient in the well.
It is important to note that on the outer sides of the rings (in the space between the edges of the pit and the walls of the well), a gravel-sand mixture is poured, and at the ground level, they are rammed with clay and sprinkled with sand. The resulting clay castle will prevent rain and melt water from entering the well.

The first stage of the well construction: in the selected area, a pit 10 cm in diameter is dug larger than the diameter of special concrete rings for the well

The joints between the strung well rings are carefully sealed by laying a tarred hemp rope in them and sealing them with a cement-sand mortar

The sides of the concrete wall of the rings are rammed with clay at ground level and sprinkled with sand, which will protect the well from precipitation
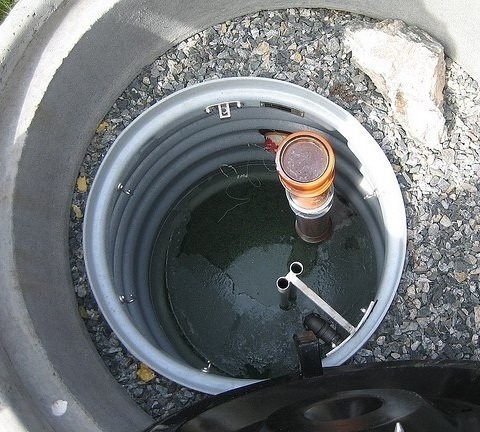
The upper (ground) part of the well can be built of wood in the form of a house or concrete. In the second case, it is necessary to put another upper ring. The well is covered with a lid to protect it from rain and debris.

The above-ground upper part of the well (the so-called head) can be made of wood in the form of a house: it is aesthetically pleasing, hygienic, safe

The well is necessarily covered with a lid to protect water from debris, rainwater, and also for safety
You can find out about the options for arranging the upper part of the well in our next material:https://aquatech.tomathouse.com/en/vodosnab/kolod-skvaj/kolodec-svoimi-rukami.html.
Another visual workshop on digging a well in a country house can be seen in this video. Take a look and make sure that the independent conduct of all work is quite a real thing. There are such craftsmen!
6 comments