We make a homemade garage heater from fiberglass and nichrome wire
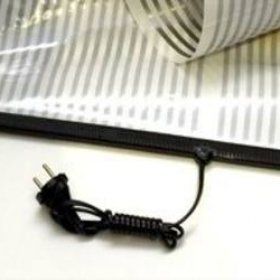
Without a warm garage, it is difficult to operate a car in the harsh Russian winter. Therefore, the problem of heating the garage box is relevant for many motorists. If it is impossible to have a complete heating system in the garage, then the problem is solved with the help of various models of heaters. If funds are available, finished equipment is purchased that is factory-made and meets all fire safety requirements. If there is no free finance at the moment, then it can be used as a heat source. homemade heater for the garage, made on its own from inexpensive materials available in stocks or purchased on the market at a bargain price.
What requirements should a garage heater meet?
When choosing the design of the future device, it is necessary to pay attention to the safety of its operation indoors.
Therefore, a home-made heater must meet the following series of requirements:
- the risk of ignition of the device and its explosion should be completely eliminated;
- heating elements of the structure should not burn oxygen, and also emit toxins and pungent smell of burning;
- the device should facilitate the rapid heating of the room to the required temperature and maintain its value for a certain period of time;
- the product should be compact and not take up much space in the cramped space of the garage;
- the cost of acquiring constituent structural elements should be significantly less than the cost of the factory model.
Another important parameter that must be considered when choosing a method of heating a garage is profitability. What options are possible, read in our article:https://aquatech.tomathouse.com/en/otoplenie/bani-i-garazh/ekonomichnoe-otoplenie-dlya-garazha.html.
Electric circuit and principle of operation
All of the above requirements are met by a homemade air heater, which is assembled from fiberglass, glue and nichrome wire. This heater is structurally similar to the factory model, the main element of the glow of which is pressed into non-combustible material. This design approach makes it impossible to ignite the product.
Important! When connected to a assembled timer device, it will be possible to adjust the operation of the heater with the desired frequency. The duration of the working intervals is set depending on the time of year and the air temperature outside the garage. Using a timer will automatically maintain a comfortable temperature in the room and save energy.
What materials will be needed?
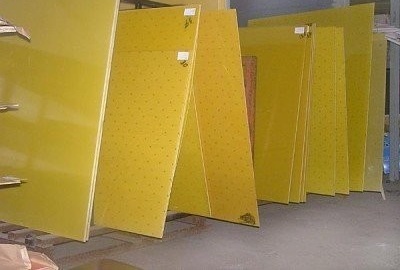
To collect garage heater do it yourself, you need to prepare two sheets of fiberglass of the same area. The thickness of the sheets should not exceed 1.5 cm.This material is used as a base to which a spiral of nichrome wire is attached.
It should be noted that a home-made device emits heat from its entire surface area. The shape of the sheets of fiberglass can be square, while the length of the side is not more than half a meter.
Also, the heater may have a rectangular shape, with the sum of all its sides should be no more than two meters.
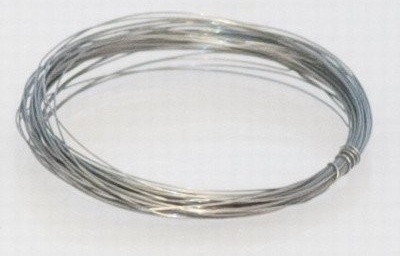
Important! For a home-made heater with a power of 100 VA, you need to take 24 meters of a nichrome wire with a cross section of 0.3 mm.
Assembly procedure
After completion of the preparatory work, they proceed directly to the assembly process. To do this, perform the following operations.
-
- Sanding the inner side of each sheet of fiberglass.
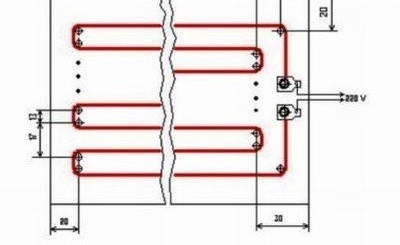
- Top and bottom are indented from the edges of the sheet, equal to 2 cm, and on the sides - 3 cm.
- On one of the pieces of fiberglass to which it is planned to mount the wire spiral, a frame is drawn and the number of turns necessary to accommodate all 24 meters of the wire is calculated. The length of one turn depends on the height of the device, excluding the indents left below and above.
- After calculating the exact number of turns of wire, the distance between them is calculated. It should be noted that this value should be in the range of 8-13 mm. According to the data obtained, small holes are drilled along the indentation line, a match is inserted into each of them.
Then you need to drill a couple more holes that you will need in order to bring the wires out. This is necessary to connect the product to live devices.

That's about how it should look. Fastening the edges of the turns can be done using paper strips, after removing the matches
- Next, the wire is laid with a snake, while you should not stretch the wire. Matches inserted into the holes help form coils of wire. Having laid 5-7 turns, carry out the fixing of the filament under construction with centimeter paper strips, pre-treated with Monolith glue.
- After the laying and fixing of the entire wire, the matches must be removed, and the heating element obtained should be trimmed and, if necessary, further strengthened with paper strips soaked in adhesive.
- To fix the edges of the turns after removing the matches, paper strips and glue are also used.
- Metal rivets are inserted into the holes drilled to bring the wire out. Further around these rivets, the free end of the wire is wound.
- On the front side of the fiberglass base, each rivet is equipped with a washer, which allows you to firmly fix the conductive contact.
Important! The network wire is connected from the side of the formed spiral, while its stripped ends are wound around installed rivets.
How to check the performance of a homemade device?
To check the operability of a self-made heating device, as well as to verify its safety, you must first connect the product to an ohmmeter, and then to the power supply. Epoxy glue is used to enhance the mechanical strength and degree of electrical safety of the product. It is recommended that at least 150 g of this binder be used. The epoxy composition is applied along the turns of the heating element. Then lay the second sheet of fiberglass. For bonding elements, a load is required, the mass of which should be at least 40 kg. The load is laid on plywood, which covers the glued parts.
Important! After a day, the assembled product is ready for use.It remains only to attach devices to it that allow the heater to be hung on the wall. Decorating the front surface can be done using vinyl film.
To work in the garage was comfortable, you need to equip not only heating, but also good lighting. A detailed guide will help you to carry out the correct installation:https://aquatech.tomathouse.com/en/ehlektrosnabzhenie/provodka-v-garazhe-svoimi-rukami-shema.html.
We hope that after reading this material you understand how to make a heater to the garage on your own from improvised materials. With such a device, it is not scary to meet the winter. Remember that switched on appliances must not be left unattended. Therefore, leaving the garage, turn off your invention.

1 comment