Installation and connection of a heated towel rail - analysis of the technology of work
Nowadays, the bathroom is rarely without such a useful attribute as a heated towel rail. Indeed, in addition to drying towels and various linen, the heated towel rail creates a favorable microclimate in the room, which avoids the formation of dampness, the appearance of an unpleasant odor and fungus. Modern heated towel rails have a stylish look, effective design. To ensure normal humidity and a comfortable temperature, they must function year-round. You can install a heated towel rail with your own hands, or by involving plumbers. Whichever option you choose, you should read this article: installation and connection of a heated towel rail is described in detail, a step-by-step installation technology is described, and a general understanding of the installation process is given.
Choosing the Right Connection Method
Currently, the market offers three types of heated towel rails: water, electric and combined. The most common form is water towel rails. We will stop on them.
There are two options for connecting water heated towel rails:
- to the heating system;
- to the hot water supply.
Most often, the 2nd option is chosen, because in this case, round-the-clock and year-round heating is guaranteed. Connection to the heating system is undesirable, since hot water only occurs in the heating season. In addition, the question arises: how to replace the heated towel rail in the bathroom in winter, because no one will allow you to make an insert into the heating pipes - you can freeze the entire riser.

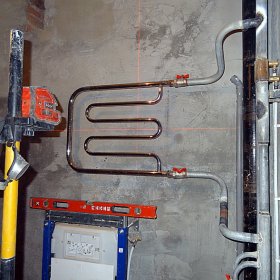
Installation of a heated towel rail with side connection is a little more complicated, but it looks very aesthetically pleasing
Before installing a heated towel rail in the bathroom, you need to choose a method of connecting it. When replacing an old Soviet-style heated towel rail, you will need to pick up a new model of the same diameter, designed for lower connection. If during repairs in the bathroom the pipes were “recessed” into the wall, and only the exits remained outside, then in this case a water heated towel rail with side connection can be installed. Its installation is more complicated, but such a model will look incomparably better.
Important! Installing a heated towel rail of this type requires careful insulation of the joints, since the leakage of the heated towel rail, whose pipes are hidden in the wall, is very laborious.
Work technology - step by step
Replacing the heated towel rail implies the following sequence of work:
- dismantling of obsolete heated towel rails;
- installation of a bypass (jumper) and ball valves;
- installation of a heated towel rail.
Consider the steps listed above in more detail.
Dismantling the old heated towel rail
Replacing a heated towel rail in the bathroom begins with the removal of the old:

The first step in installing a heated towel rail is to dismantle the old version that you want to replace
- We turn off the hot water by shutting off the corresponding valve. This issue needs to be agreed with the Housing Office.
- When there is no more water in the riser, we remove the old heated towel rail. If it is not integral with the hot water supply pipe, unscrew the threaded connection and dismantle it.
- If the heated towel rail is simply welded to the pipe, it should be cut off with a grinder. Trimming is carried out in such a way that the pipe length is sufficient for threading
- Remove the old heated towel rail from the brackets.
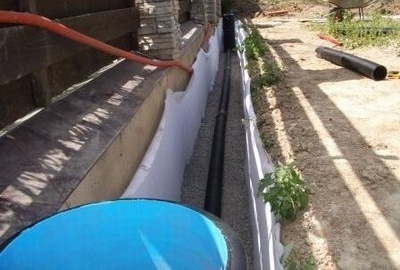
Installation of a bypass (jumper) and ball valves
The jumper (bypass) is a piece of pipe equipped with connecting elements. She is a lifesaver in unforeseen situations. To install a bypass, ball valves are installed at the ends of the heated towel rail, which, if necessary, will stop the flow of water through it. At the same time, when the jumper is installed in the riser, the circulation of water does not stop even when the heated towel rail is turned off.
This allows you to not block the water throughout the house in case of repairs.

Threading on a pipe using thread cutting - more on the technology of work can be found here

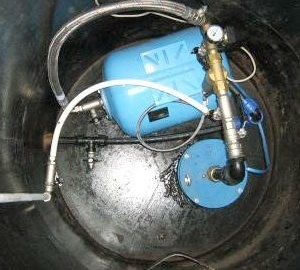
The bypass is equipped with three valves: two of them are installed at the junction of the towel rail with the bypass, and the third stops the water in the bypass itself
Important! A bypass to the bypass is recommended to be made of stainless pipes.
To remove air from the system, it is recommended to install an additional ball valve into the jumper itself. This will ensure free circulation of water in the heated towel rail and in the main pipeline.
Installation, fastening and connection of a coil
We continue the installation of a heated towel rail with our own hands. The next step is to attach the brackets and mount the heated towel rail to the wall.

When attaching the heated towel rail to the wall, you will need to drill holes in the tile, which requires some accuracy
We fasten the brackets to the heated towel rail, which are usually available in the kit (if they are not, you need to purchase separately). Putting it at the place of placement, we make marks with a pencil for the holes. To level the fixture with a building level, you need an assistant.
In the tiled wall, the holes are made using a drill with a special drill for the tile. We insert plastic dowels into the holes, then we attach the heated towel rail to the wall and fasten it to it with screws using a screwdriver or screwdriver.

The distance from the wall to the axis of the towel rail pipe is regulated and depends on the diameter of the pipe
It's important to know! The distance from the wall cladding to the axis of the towel rail pipe is regulated and is:
- 35 mm for pipes with a diameter up to 23 mm;
- 50-55 mm for pipes with a diameter up to 50 mm.
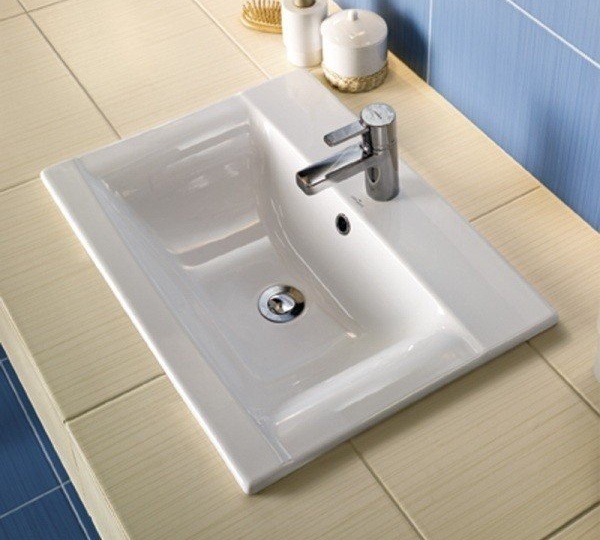
Then it remains to connect the heated towel rail to the riser. To do this, connect it to the valves on the jumper using fittings (straight or angled, depending on the type of heated towel rail connection).
Tighten the mounts carefully so as not to spoil the thread. We make a seal of all threaded joints using linen winding.

When making a connection, you may need to purchase special fittings to connect the heated towel rail to the water pipe
Note! Water should pass through the heated towel rail from top to bottom, so you should connect the supply riser to the upper bell of the heated towel rail.
After completing the listed works, it is necessary to check the tightness of the joints: when probing the joints there should be no drops or leaks. It remains to smoothly open the taps so that the device is filled with water gradually, and there is no water hammer.
That's all. Now you can safely say that you got an idea on how to connect a heated towel rail. Decide whether you can do this job efficiently yourself, or whether it is better to invite a specialist.
5 comments