Do-it-yourself fan installation for exhausting the bathroom
A fan for extracting a bathroom is an important component of it, since it allows you to provide a normal microclimate in a given room, as well as reduce the unconditional humidity level. In addition to natural ventilation in this room, it is necessary to install a forced system that will prevent the formation of mold, pathogenic bacteria, damage to electrical appliances due to high humidity, as well as eliminate odors. Currently, there are a large number of ventilation systems for bathrooms that you can install yourself.
Content
What is a bathroom ventilation system for?
The bathroom more than other rooms is subject to natural condensation and almost always has a high level of humidity in the absence of a normal ventilation system. As a result, unpleasant musty odors and condensation water on the walls begin to appear in this room, contributing to the rapid development of fungi and mold.
A proper ventilation system will help to preserve the tiles and other facing materials, wooden furniture, electrical appliances, as well as create the most comfortable conditions for people to stay in the bathroom.
Currently, there are two types of ventilation: natural (natural) and forced (artificial). If there is no possibility to create normal natural ventilation (there are no windows or they do not open), then a forced ventilation system is used, which provides for the installation of certain types of fans designed for these domestic premises.
Forced fan in the bathroom
By its design, ventilation can be:
- Channelless. In this case, ventilation is carried out in the bathroom through openings in the wall of the common ventilation ducts of multi-storey buildings.
- Channel. It is used to supply the ventilation system to places that require the most intensive and frequent air purification.
Also, in some cases, owners of apartments and private houses prefer to install a disconnected forced system, even if the bathroom has a natural type of ventilation. Thus, you can be sure that a normal microclimate will always reign in this room.
This is due to the fact that in many old houses that were built more than 20 years ago, general ventilation systems are no longer able to cope with constantly increasing loads, so you have to choose more modern methods of dealing with high humidity.
Criterias of choice
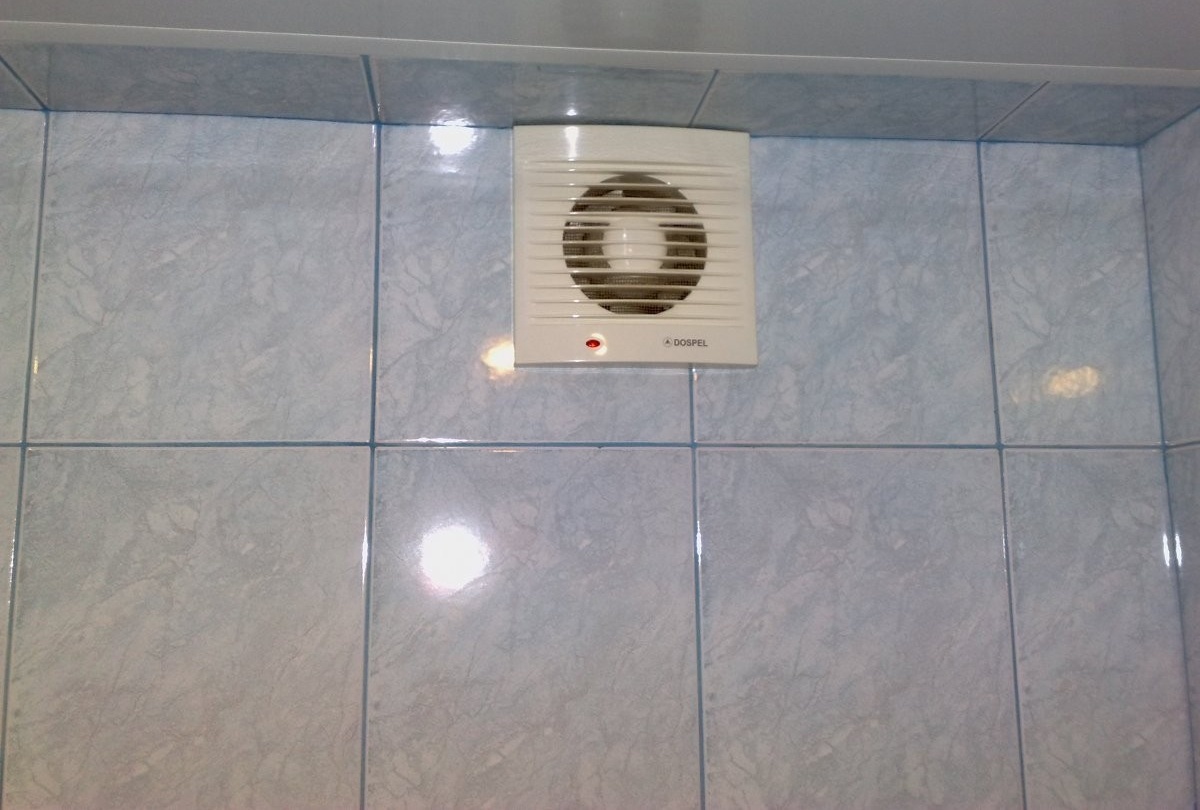
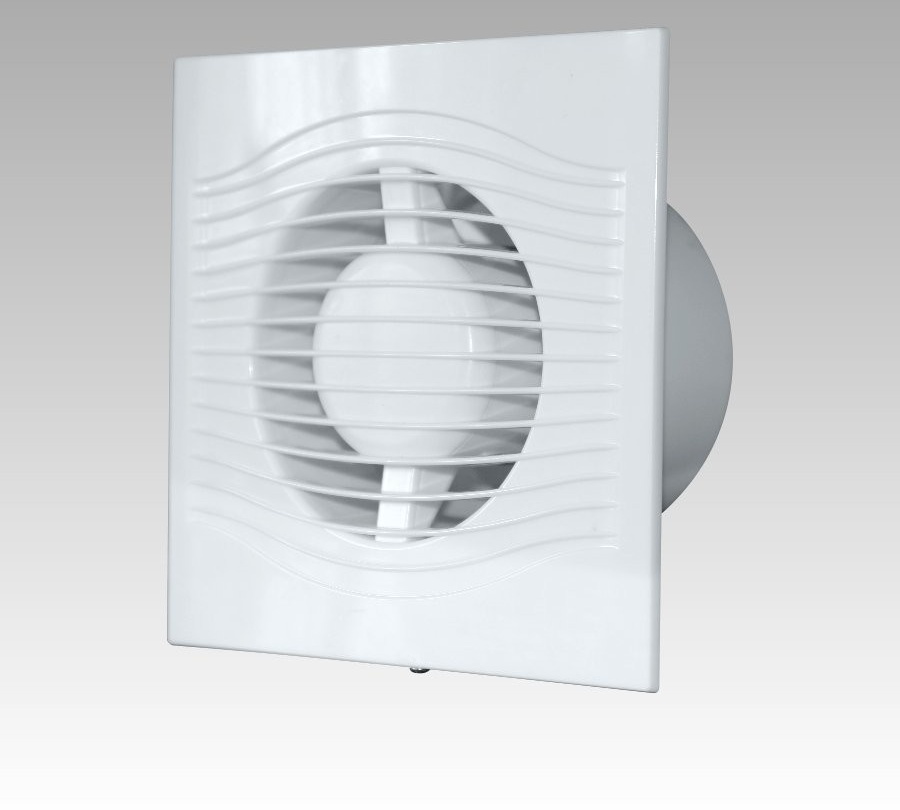
The most effective way to make proper ventilation is to purchase and install a forced-type electric fan. Typically, wall axial fans of various capacities are purchased for such purposes.
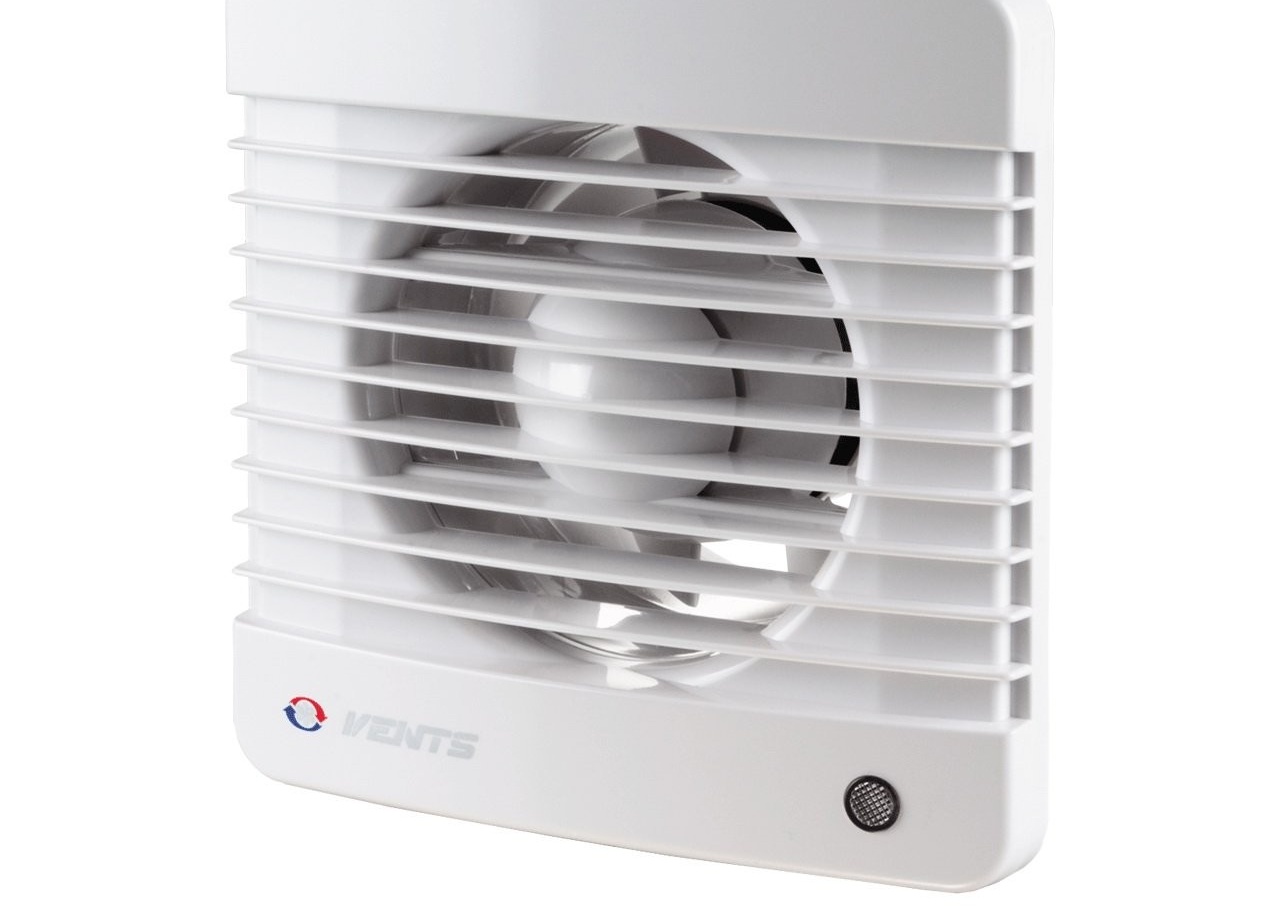
Wall-mounted axial fan for forced air supply
Choosing such a device, you need to pay attention to:
- Security system. The fan is a household appliance, and the bathroom is a closed room with a high degree of humidity, so the device should have the maximum degree of protection of the body from water and steam.
- Soundproofing. The noise level of the device should be minimal so as not to annoy people living in the apartment. If necessary, you can install a special silencer and supplement it with soundproof materials that fit inside the fan.
- The power of the ventilation device must correspond to the dimensions of the bathroom and the number of residents. With insufficient power, the meaning of this system will simply be lost, since it will not be able to fully perform its functions.
Requirements for forced fans
- The noise level in a small room should be no more than 35 - 40 dB.
- The ventilation system should create a regular air change at least 5-8 times in one hour and comply with SNiP standards.
- The exhaust device must have a non-return valve if air will be drawn out through only one wind channel.
- The case must be waterproof class not less than IP34.
- A 36 V engine will allow the device to operate quite silently.
Exhaust system classification
Fans by their design features can be:
- Axial. The air flow is blown by the fan blades. The pressure that it creates is not more than 50 Pa. It is usually mounted in a ductless ventilation system.
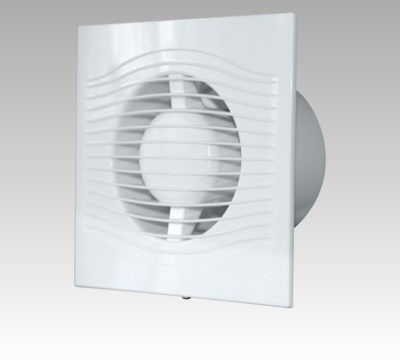
Axial fan for the bathroom
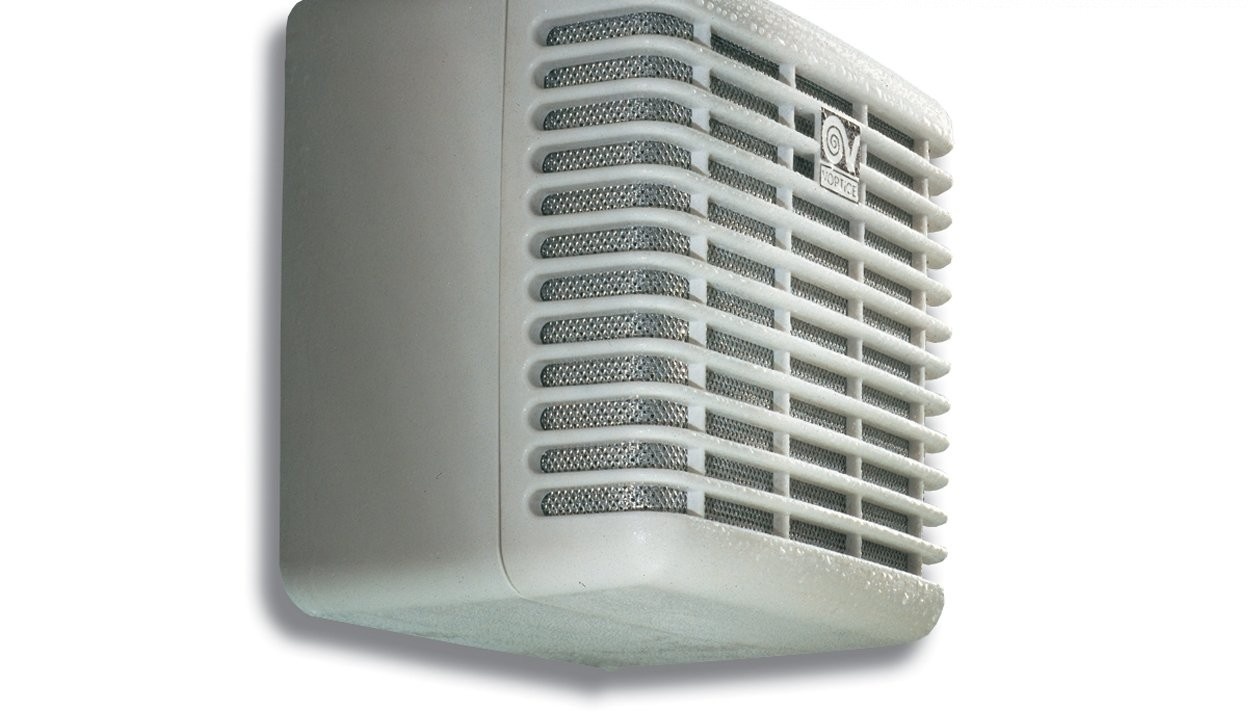
- Diametrical. Fan with simple impeller type impeller and low efficiency.
Diametrical fan for the bathroom
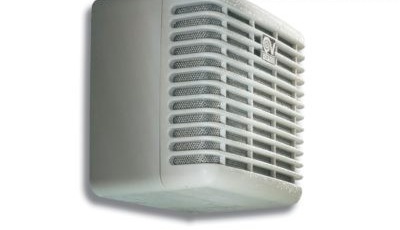
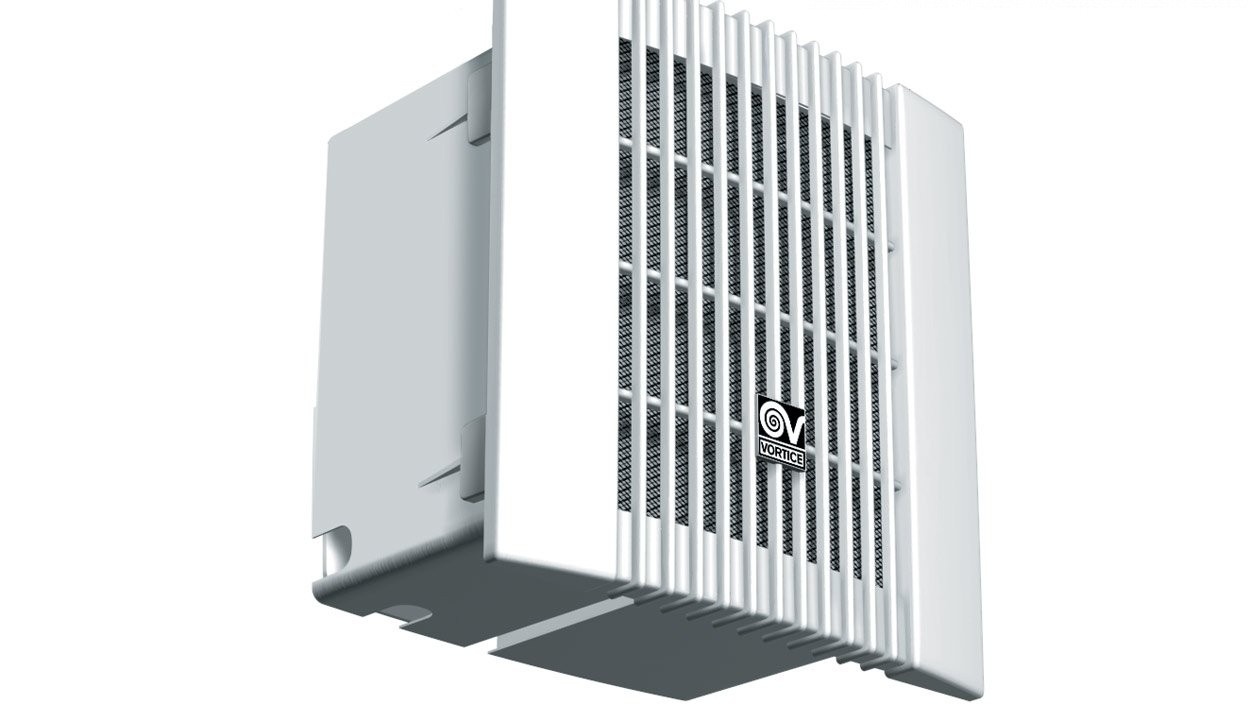
- Centrifugal. Available in a spiral case, it is one of the most powerful in its performance, but also the noisiest.
Centrifugal fan for the bathroom
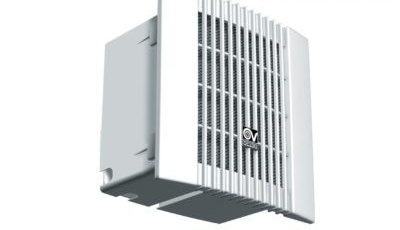
- Centrifugal axial. This fan combines all the positive characteristics of two fans: small size, low noise level and a high degree of performance.
Many modern fans come with extra features.
- Electric fans with a built-in motion sensor can recognize the human body in the radius of their "visibility" and turn on the engine. Such a system can significantly save electricity.
- A fan with a timer is able to recognize a moving person and turn on the motor to start work. If the movement stops within its range, the device turns off.
- A fan with a temperature (humidity) controller, depending on its design features, removes hot air from the bathroom or vice versa, heats it. For the installation of such a device, a special scheme is provided that allows you to adjust the optimal air temperature in the room. If the established norm is exceeded, the device motor starts to work, creating the necessary air exchange in the bathroom and preventing people from overheating.
- A device with a check valve is necessary to prevent the return flow of air, as well as foreign odors from the outside, when it does not work.
- A fan with shutters is also designed to prevent air from entering the street during the shutdown period. Only in this case, the blinds open and close manually.
How to correctly calculate the power of the hood for the bathroom
Before you buy a fan, you should calculate the optimal degree of system power.
To do this, we use the formula 6V or 8V, where V is the volume of the room, and the numbers are the coefficients that show the number of people using the bathroom. If more than 3 people use it regularly, then we need a factor of 8.
If the fan is connected to the light switch, then it will start working only when a person enters the bathroom. Thus, energy will be saved, and the system will perform its functions when they are really needed. But not all people want to take a bath or shower to the sound of a humming fan motor. In this case, you can make an autonomous switch for it, which will work when the room is empty.
The fan performance (power) can also be calculated using another formula:
- Determine the area of the bathroom.
- Multiply this number by 5.
- We add another 20% to the result.
- It turns out the recommended fan power.
Installing a forced ventilation system
First, consider some of the rules for installing a fan.
- The fan is mounted as close as possible to the ceiling and as far as possible from the opening window or door, otherwise only partial ventilation will be carried out, which is not able to affect other places in the bathroom.
- It should be kept as far as possible from any water sources in order to avoid a short circuit.
- The wires that go to the fan must be drowned in strobes or hidden under the ceiling (suspended or suspended).
- If there is no ventilation pipe in the bathroom, then you can install a PVC pipe for sewage with a diameter of 10 cm.
Phased installation
- We will look at how the fan is connected and mounted correctly using the example of the ERA 4S ET device, which is equipped with a protective insect screen and an electronic timer. This model has a ball bearing motor with maximum protection against overheating.
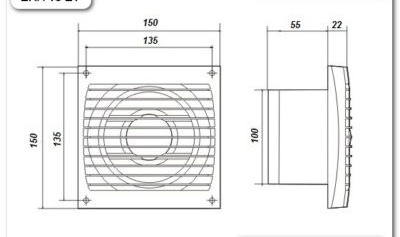
Fan Dimension Diagram
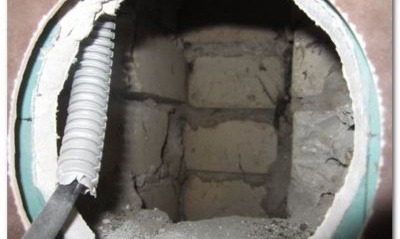
- Since according to the architect's standard design, a ventilation vent is provided in the bathroom wall of each multi-storey building, you will not have to do it yourself. Maybe only increase in diameter if necessary. We will need a hole with a diameter of 10 cm.
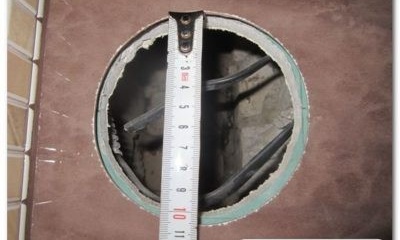
Fan mounting hole
- We lay the cable type VVG 3x1.5 in a special corrugated pipe, which comes from the switch. To do this, before starting the repair and laying of tiles, it was necessary to make a strob from the switch to the hole and lay the VVG cable for the future fan. Insulate the ends for further work with it.
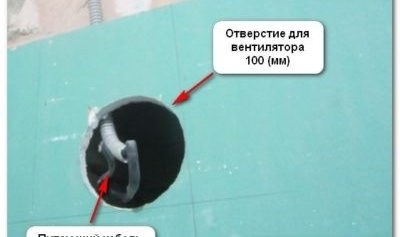
Hole with cable for connecting a fan
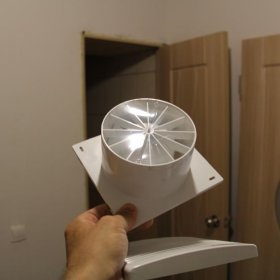
- In this hole we will mount our fan.
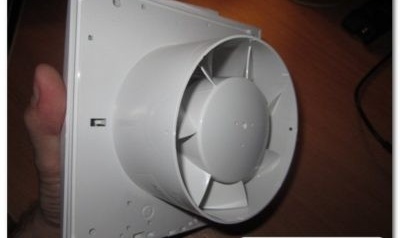
The back of the fan, which we will insert into the hole in the wall
- You can fasten the fan to the wall with self-tapping screws, which are included in the configuration of the device with dowels.

Fan Mount Kit
- But it’s best to use Herment type silicone sealant if you don’t want to drill extra holes in a new tile, as it can be badly damaged and you will have to change the tile.
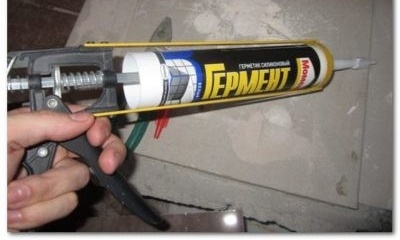
Sealant for attaching the fan to the wall
- First, we unscrew the screw on the side of the case and snap off the front of the device.
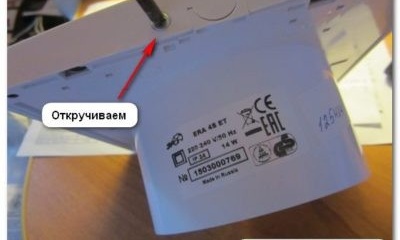
Unscrew the front panel of the fan
- We cut off the excess part of the corrugation, and move the wires a little to the side so that it does not interfere with air circulation.
Cut off the excess corrugation from the wire
- We apply a fan to the outlet and wind the wire. If the special hole is not suitable for the wire, then you can drill it in the fan housing itself.

Wall-mounted fan cable
- We apply a thick layer of sealant around the entire edge of the perimeter of the fan hole, press and fix it well. We check the correct location and leave the sealant to harden for about 2-3 hours. You can fix it additionally with masking tape, and then remove it.
- To connect the fan power, we pre-laid a wire with three cores, which was stretched from the switch to the installation site. The fan is supplied with the phase from the switch, grounding and ground.
- Below is a diagram of connecting the device to a two-key switch so that you can turn on the light with one key and the fan with the second.
- A variant of the second circuit allows you to connect the device to a single-key switch. Simultaneous inclusion of light and fan.
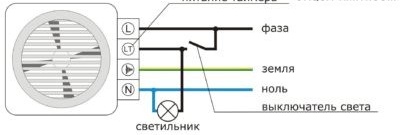
Connecting the fan to the electrical wires
- In order to connect the electrics of the fan “as expected” to the wires, it is necessary to introduce a cable with 4 wires (phase, ground, zero and a controlled phase). Since we have a plastic case of the device, it is not necessary to ground it. Therefore, we use the third wire to connect the timer control system
- Below is a diagram of the connection of a device with a timer to a two-button switch.
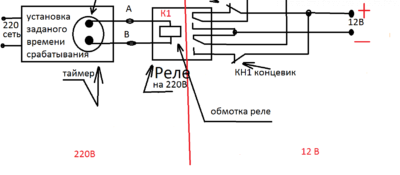
Connection scheme for a two-key switch
- For the fan to work, we need to have a 220 V network at terminals L and N, and the timer, which is fed from the switch to the third terminal “T”, will control the timer.
- After we have connected all the wires, it is necessary to snap the front cover back and tighten the screw.
- When installing electrical wiring, we will use distribution boards in a minimal way, and make simple exceptions in the socket.
Timer fan connection
- As a result, it turns out that the VVG 3x1.5 wire goes from the shield to the socket.
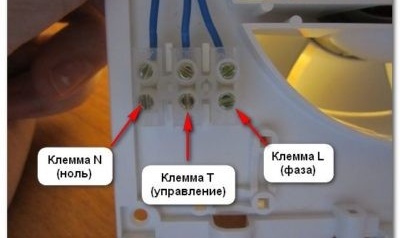
- We connect a white core to the general output of the switch (red is schematically indicated). We connect the blue core with the grounding in the undergrowth (to turn on the fan and light), and the yellow-green one we connect with the protective light conductor. For convenient and durable connection of all wire cores, we used special terminals.

Fan Terminals
- We connect the outgoing cable in this way: we bring the white core to the general output of the switch; blue - we connect zero to zero wires; yellow-green - to one of the outputs of the switch
- As a result, with one key we can turn on the lighting, and the second to control the timer.
- In the fan, we connect the withdrawn wire as follows: a white core to the “L” terminal; a blue core to the “N” terminal and yellow-green to the “T” terminal.
- If necessary, we can connect a fan with a time timer to a single-key switch according to the developed scheme presented below.
Fan connection diagram
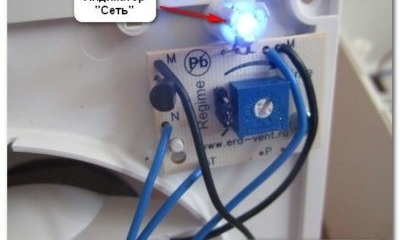
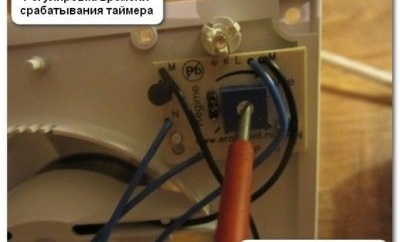
- After connecting, we check the operation of the device. When the fan is running, the blue “Network” indicator light is on.
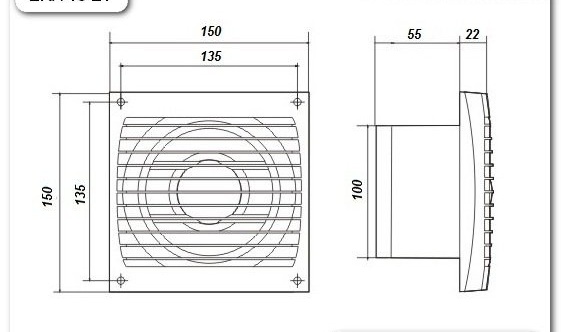

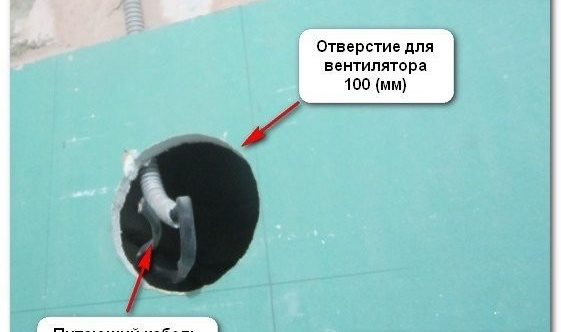
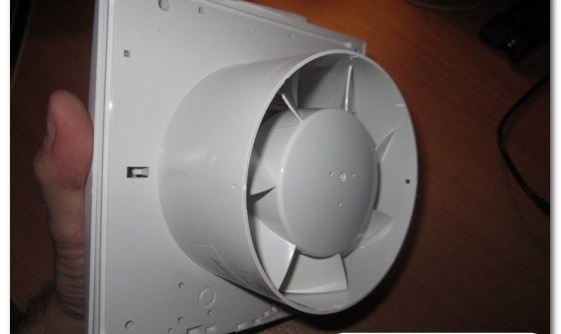


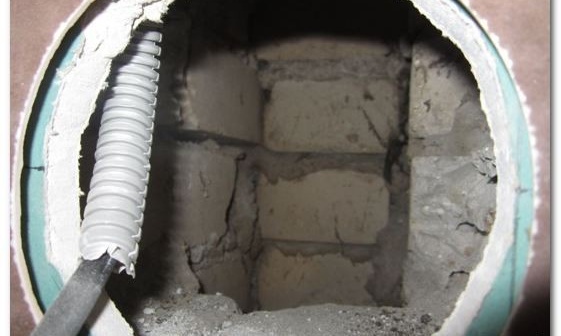
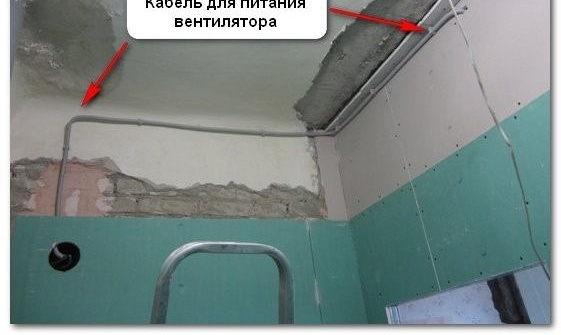
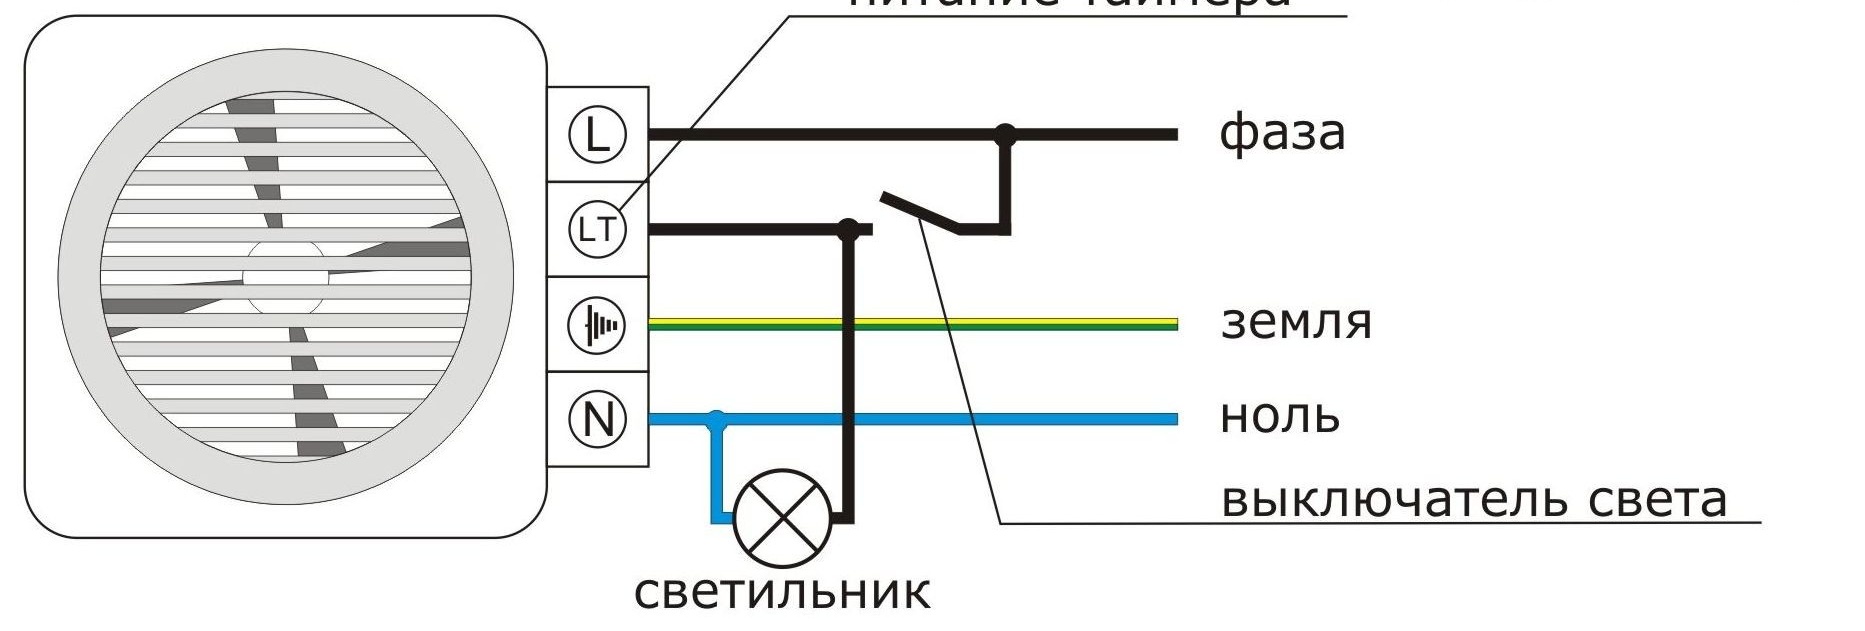
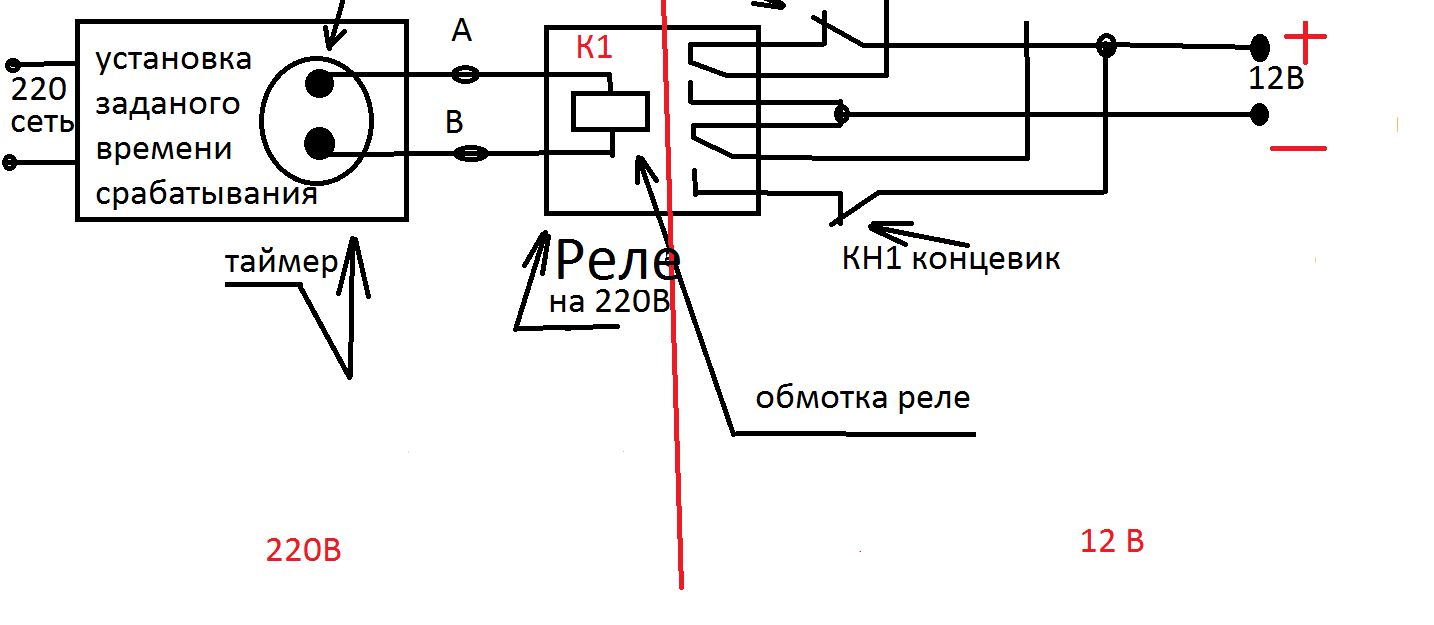
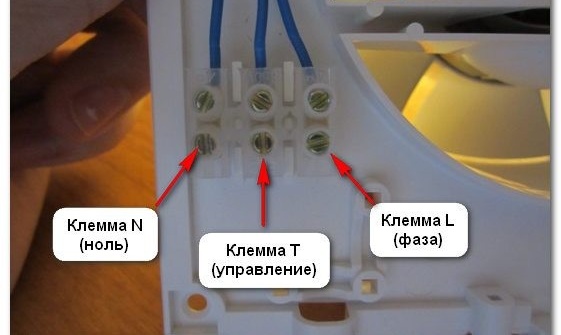


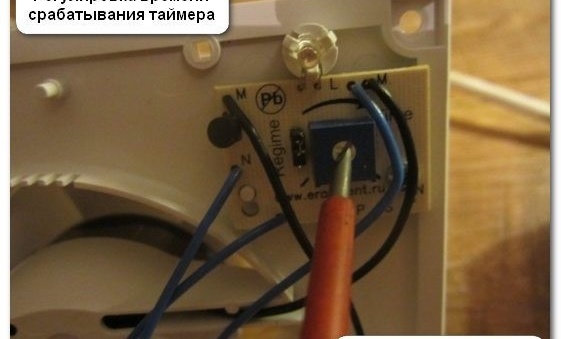
Diagram of fan operation modes
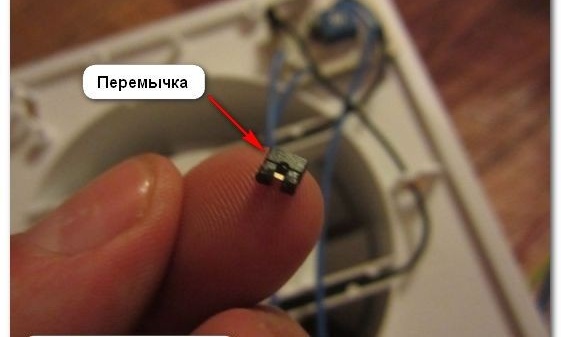
- Our fan can work in two modes, which are switched by rearranging a jumper (special jumper) on the board's microcircuit.

Fan circuit board interchangeable
- For example, we have assembled a circuit for connecting a fan to a single-key switch.
- If the device will operate in the “Bathroom” ventilation mode, the jumper must be installed in this way (Fig. 1).

Installing the fan in the bathroom mode
- So the fan can work in a slightly different way. This mode is designed so that the noise of the device and drafts that appear during its intensive work do not interfere with people bathing in the bathroom.
Fan connection system
- Work system: when the switch button is turned on, the engine does not work.If the button is in the on mode for more than 1.30 minutes, then when it is turned off, the device’s engine will turn on for a certain time, which will be set by a special controller system (from 15 to 45 minutes). But if the button is turned on for less time, the engine will not start.

How to connect a regular fan with a lace
Connecting a fan with a cord is much easier, since it does not require special knowledge of electricity circuits.
- We install the fan in an outlet under the ceiling, as in the first case, but we just don’t bring any wires to it, since it will work from a 220 V power supply through a conventional wire with a plug.
- We "sit" the fan on the sealant so that it snaps firmly. We plug the wire into the outlet, and that's it. Now, when we need to turn on the fan, we just pull the cord and the engine starts. After the room is fully ventilated, we will also need to pull the cord and turn off the fan.
The disadvantage of this system is not only the manual inclusion of the device, but also the need for a close location of the electrical outlet, since otherwise you will have to use an extension cord so that you can connect a fan located on the wall opposite the outlet.
Work check
In order to verify the correct selection and connection of the ventilation system, we can conduct a simple test: we take a sheet of paper and apply it to the grate of the exhaust system. If the air circulates well in the room and is discharged through special ventilation ducts, then the sheet will firmly “stick” to the grate.
The fan would have to be turned upside down. Then the cable channel would look more aesthetically pleasing then. I watch the video for training)))
Kantovius: And the mold problem is unlikely to be solved by the fan; just the same, the fan solves this problem with 100% probability. Of course, if you have mold, you put the fan on and do nothing else, then the mold will remain in its place. First, the mold must be removed and this place treated. And you will not have it again. Kantovius: A cheap model will work for a few years and put a new one like that. There is one good saying. We are not so rich as to buy cheap. why buy a new one when you can pay twice as much right away and use 10-15 years without problems. And I would really advise you to pay attention to the noise level of the fan. Think for yourself.
Video: how to install a fan for a bathroom in a private house
Thus, using modern forced ventilation systems, we can quickly and effectively solve the problem of increased humidity in the bathroom. Choosing exhaust systems that are equipped with a timer or motion sensor, you can not worry about saving energy, since the device will only work when necessary. And installing a fan with your own hands without the involvement of specialists is not difficult.