DIY grease catchers
Such a simple design, and so many benefits and advantages for the home. The grease catcher not only serves for more than 30 years, but also extends the life of the sewer system and prevents clogging of the drain pipes. It is environmentally friendly and easy to care for. Connect this affordable device with your own hands to the power of any owner of a private estate or apartment.
How to install a grease catcher
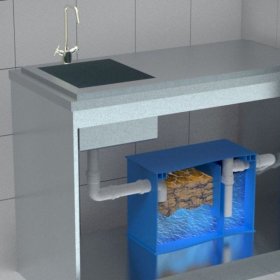
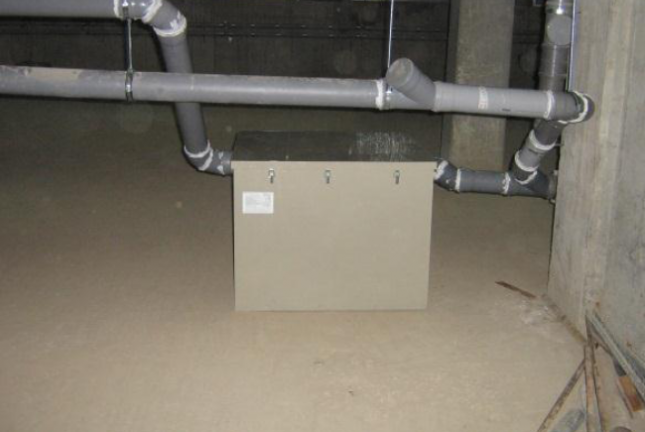
Fat separators are available in small volume and capacity for installation inside the kitchen. Usually, the structure is hidden in a cabinet on which a sink is installed or in an adjacent cabinet. Such a device is designed for uniform drainage when dishes are washed under a stream of water from a tap. Installing a grease catcher is not as difficult as it sounds. Under a dishwasher or sink in a cafe, workshop or a large private house, a device is installed that can receive and process large-volume salvo drains when they remove the cork in a full sink and drain a lot of liquid at once. Remote models are also available that protect drain pits and septic tanks from overgrowing.
Household grease traps are cleaned by hand and used at a flow rate of up to 1.5 cubic meters. m / hour.
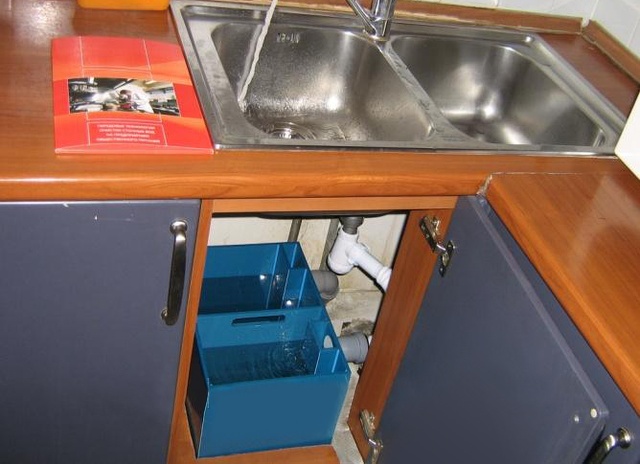
Under the sink
Installing a grease trap under the sink allows you to avoid permanent blockages
For installation under the sink, models with a capacity of up to 2 liters per second and a volume of 35-50 liters are suitable.
There is no need to call the plumber to connect the unit, the installation technology is so simple.
For work, you need the following components and tools:
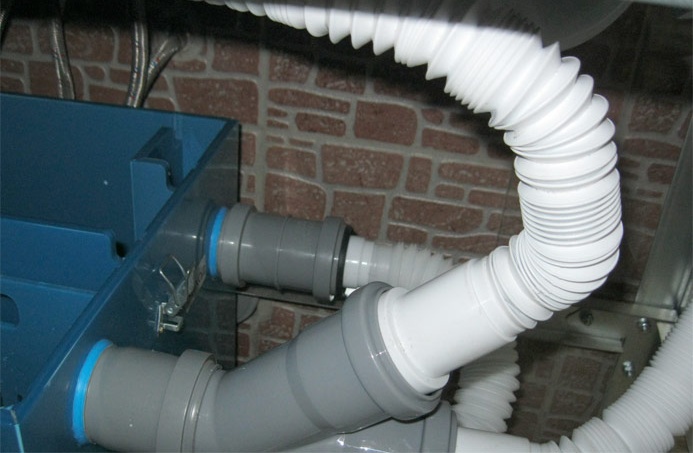
- corrugated pipe for connection to a sink - 2 pcs .;
- a set of rubber seals (usually sold with the device);
- silicone sealant;
- separator substrate.
Here are the stages of work:
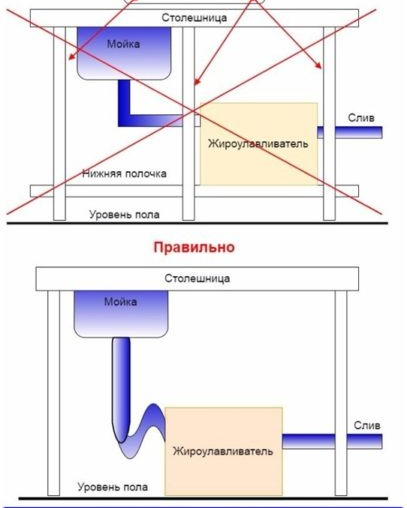
- Preparing the base for installing the grease trap. An empty plastic container weighs a little, but together with water and fat its weight can exceed 50 kg, plus the vibration of the case when draining. Such a load requires a strong non-slip base, the lower shelf of the cabinet under the sink will not stand. It is better to set the tank at floor level, spread the substrate. On both sides of the case, you must leave a free space of 4-5 cm for access to the unit.
The choice of the best installation option depends on several criteria: the dimensions of the equipment and the convenience of its use
- Remove the cover and place the box on a flat base. Then connect the dirty water inlet pipe with a corrugated pipe to the sink or sink drain. A pipe for the release of purified water through a corrugated pipe is connected to the sewer system. It is possible to ensure tightness with the help of rubber gaskets from the factory kit of the device.

Plastic grease traps are characterized by: attractive appearance and low throughput
- Check for leaks by performing a test run and water inlet.Eliminate defects, thoroughly grease the joints with sealant and close the lid.
Grease traps vary significantly in power and performance - devices with a capacity of 0.1 to 2 l / s are considered household equipment
For sewage
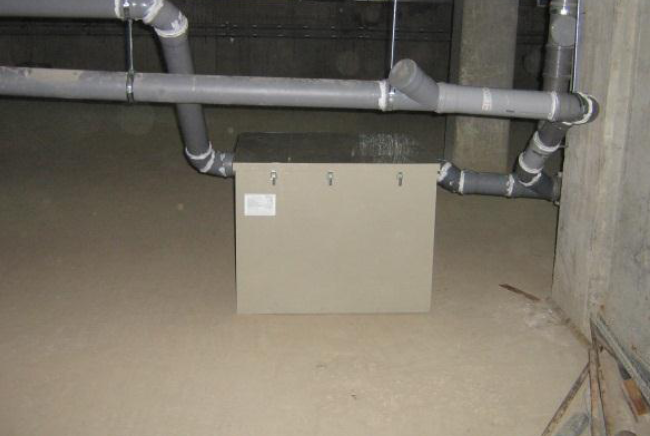
For private households with an autonomous sewage system and a septic tank, a grease catcher for external installation is suitable. It has a capacity of up to 15 liters per second and a large volume of 100 liters at the rate of 35–40 liters per wash. It will not fit in the kitchen, a basement, a sewer well, a boiler room or other non-residential premises will be a suitable place for placing the unit; installation on the street is possible. For normal operation, it is necessary to ensure a positive temperature in the well throughout the year.
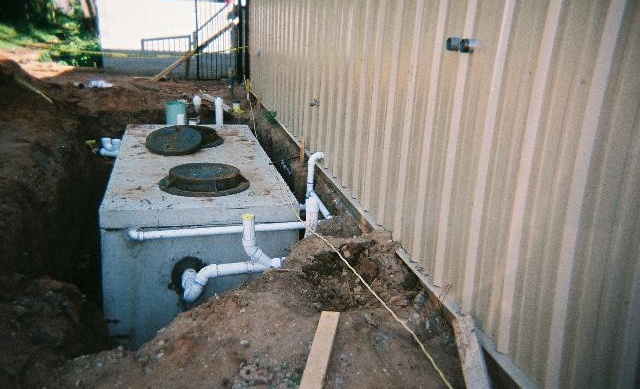
Installing a grease trap for sewage is more troublesome work, but still not complicated
Here is the list of mounting accessories:
- silicone sealant;
- rubber gaskets;
- corrugated pipes;
- shovel, sand, crushed stone, cement for a hole or well;
- mineral wool for insulation;
- Fan riser with a cover for venting gases.
Sequence of steps:
- The correct place with free space on all sides will provide easy access to the structure during routine inspection and care. The floor in the basement or well should be solid and even. A concrete screed, rings for wells, a sand and gravel cushion will be enough for stable soils.

Grease traps are mandatory elements of restaurant-type sewage systems
- If the fat separator is installed in a well or pit, then the lid should be 5 cm above the ground level, and it is advisable to insulate the bottom and walls of the pit with mineral wool or foam.
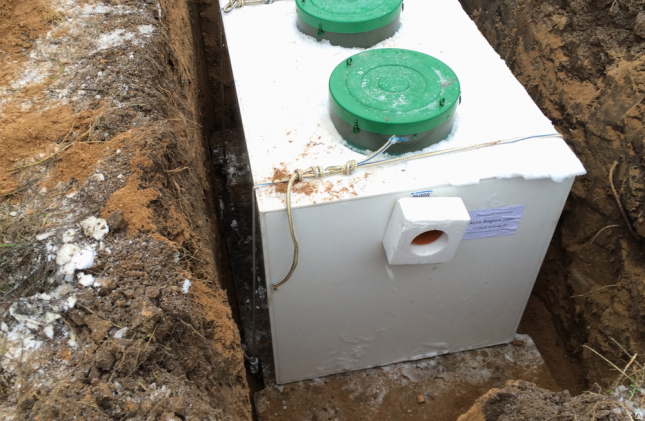
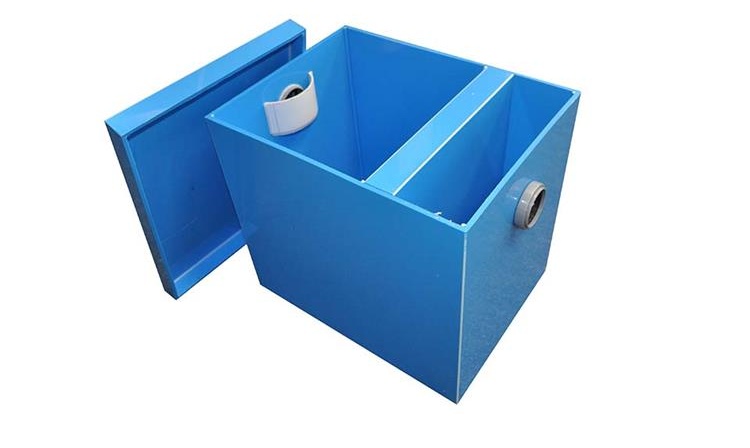
Sewer grease separator consists of a one-piece sealed housing with a cover
- Bring the drain pipe to the inlet pipe and connect them with gaskets, grease the joints with sealant. The outlet pipe is hermetically connected to the sewer pipe.
The productivity of the equipment must correspond to the number of sewage entering the device or be higher than this value
- There is a gap between the walls of the pit and the body of the device, it must be filled with soil and compacted. Install a fan pipe to remove accumulated gases from the system.
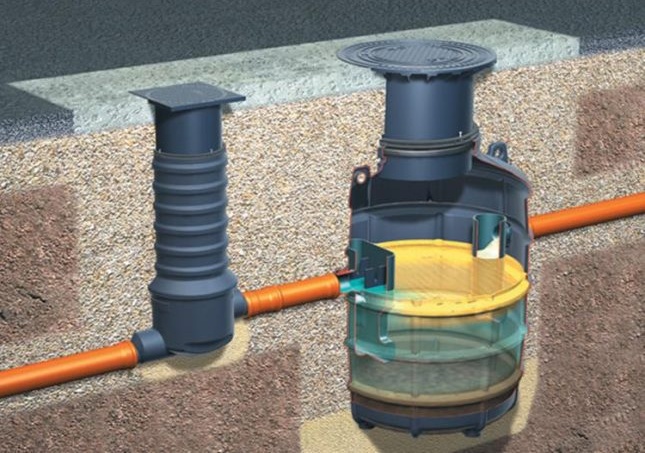
The removable lid allows you to carry out preventative maintenance if necessary or to perform manual tank cleaning


Installing a grease trap does not take you much time, but it helps you not to bother with blockages. The two described methods for installing and placing grease catchers with your own hands will help to save on the cost of installation and extend the life of the sewer system. Remote models improve the operation of the septic tank, because with less fat in the effluent, bacteria process waste faster. The device will not cause trouble provided that it is regularly inspected and cleaned.