Do-it-yourself installation of a floor toilet and connecting it to the sewer
Repairing a bathroom is rarely complete without replacing plumbing, for which many are in a hurry to call a professional plumber. Meanwhile, you can do without the additional costs necessary to pay for the services of the master. After all, installing a toilet with your own hands is not something sky-high difficult and requires special technical knowledge.
Content
Floor Toilet Installation Instructions
After reading the instructions and delving into the rules for installing a plumbing fixture, you can safely proceed to the independent execution of work. Connect the toilet to the sewer with the help of modern connecting elements is not difficult. In most cases, even sealants are not required.
This video demonstrates how to install a toilet and connect it to the sewer and water supply. After watching this video instruction, you can install this plumbing product without any problems.
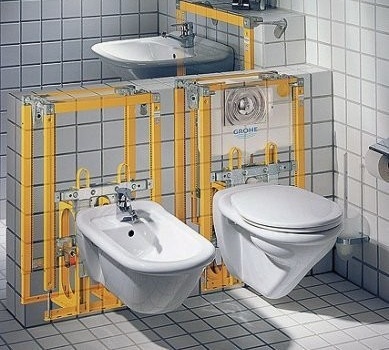
The installation of wall and floor toilets has its own characteristics. About how to attach plumbing to the wall, read in our material:https://aquatech.tomathouse.com/en/santehnika/unitaz-rakovina/ustanovka-podvesnogo-unitaza-svoimi-rukami.html.
You can also read some printed instructions and tips below.
In modern models of plumbing, holes are provided for fixing products to the floor. Installation of equipment is started after finishing work and laying floor tiles. Therefore, the following steps explain how to install a toilet on a tile and connect it to all the necessary communications.
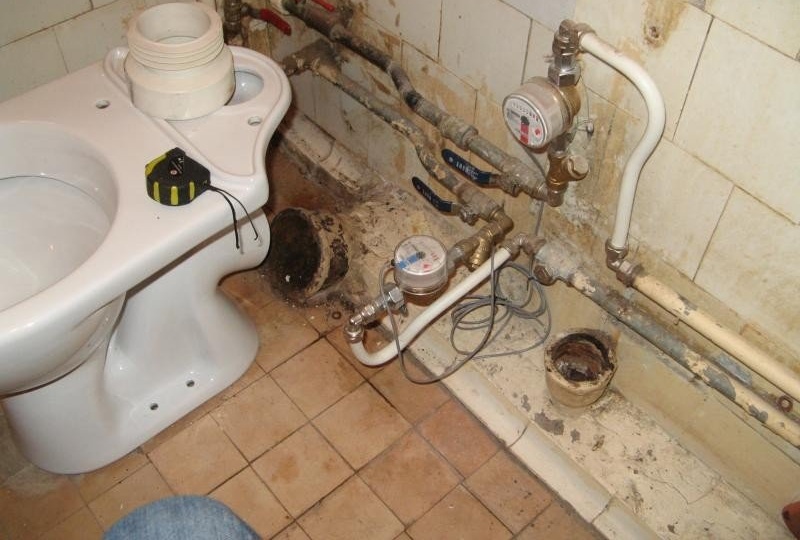
- They begin installation work by connecting the device to the sewer, using a corrugated outlet for this.
- A corrugated rubber sealant slightly moistened with water is put on the toilet outlet.
- Then the device is installed in the chosen place and the second end of the corrugation is connected to the sewer pipe.
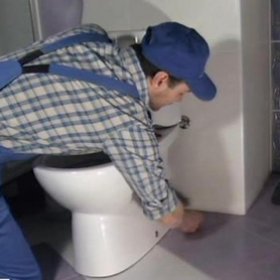
- Through the mounting ears that are available at the base of the toilet, make marks on the tiled floor with a pencil or marker.
- Next, the corrugation is disconnected from the sewer outlet and the toilet is pushed to the side, so that in marked places, drill holes with a puncher, the diameter of which must correspond to the plugs that come with the fasteners. To carry out this operation, you will need special drills that have victory tips that are designed to drill tiles and concrete.
- Return the toilet to its original place and combine the holes made with the mounting ears. Fasten the toilet to the floor with the help of elongated screws with a hex head.
- The installation of the toilet bowl on the tile is completed by sealing the joint formed by the device and the floor surface.
Note! When tightening the screws, it is not recommended to exert much effort, otherwise you can crack the ceramics. Screws are attracted until the plumbing device ceases to stagger.
If the product does not have fixing ears, then how to fix the toilet to the floor in this case? There are other ways. For example, you can "plant" the device on a cement mortar or on epoxy glue. In this case, thoroughly clean the surface of the floor before applying the binder material.
Connecting the drain tank to the toilet bowl
To fix the tank on the toilet bowl, you must use two mounting bolts and a large rubber gasket, put on the outlet of the drain mechanism. Long bolts with threaded washers and rubber cone seals are inserted into special holes in the bottom of the drain tank. After that, the tank is installed in the designated place, while all three holes are combined, one of which is a drain, and the other two are fixing. The fixing screws are tightened on the bottom of the toilet with plastic nuts equipped with small “wings” to facilitate their tightening by hand.

Fastener configurations are different, but there are no fundamental differences in installation
Important! Keys do not need to be used. Tighten nuts only by hand. And they do it as long as they have enough strength.
Connecting the tank to the water supply
At the last stage, the drain tank is connected to the cold water supply system, for which they usually use a flexible hose, at both ends of which there are nuts. For sealing, rubber gaskets are selected or a special FUM tape is used.
It is advisable to install a shut-off valve on the pipe supplying cold water to the tank. This will allow locally blocking water in one place for repair and maintenance products, while other points of tapping will work as usual.

Connect the toilet flush tank to the water supply
In our next article, you will find detailed instructions for installing the drain tank:https://aquatech.tomathouse.com/en/santehnika/unitaz-rakovina/ustanovka-i-kreplenie-bachka-k-unitazu.html.
Connect the toilet to the sewer system
As a rule, many people are complicated not by the process of dismantling an obsolete device and the subsequent correct installation of the toilet of a new model, but by the procedure for connecting it to the sewer pipe. Meanwhile, this operation is not particularly difficult, especially if you select a model with the same type of connection as the dismantled equipment.
The produced toilet models are divided into three types according to the location of the drain pipe, which can go:
- parallel to the floor surface (horizontal outlet);
- perpendicular to the floor surface (vertical outlet);
- at an angle of 30-40 degrees to the floor plane (oblique release).
Important! If you purchase a device with a different type of drain, you may need to replace the sewer wiring and fit it to new equipment.

The installation of the toilet depends on the location of the outlet
Upright toilets
Such models are common in European countries. In plumbing fixtures with a vertical outlet, the pipe and siphon located in the toilet bowl are directed downward. This design is convenient in that the toilet can be placed on the wall at any angle. Wherein DIY installation of a toilet carried out quite simply:
- after marking on the floor, a standard screw flange equipped with a latch is installed;
- in a round hole located in the center of the flange, a sewer pipe is mounted;
- the toilet is mounted on the flange, turning it until it is fully fixed; while the exhaust pipe is automatically pressed to the end of the sewer pipe due to the existing o-ring.
Horizontal Discharge Toilet
This type of toilet connection is most common in our country. This is due to the peculiarities of the installation of the sewage system in apartment buildings. Equipment has to be installed to a specific wall. In this case, the toilet outlet directed to the wall is connected to the sewer outlet using a special sealing cuff. For fixing to the floor in the legs of the toilet bowl there are special holes that are designed to be fixed.

Corrugation can be fastened with sealant, or can be completely without it
Oblique toilets
The installation of the toilet with an oblique outlet is carried out as follows:
- to begin with, lubricate the release of a device having grooves with minium mixed with drying oil;
- then the resin strand is wound from above, not reaching the end of the outlet pipe by 0.5 cm, so that the ends of the winding do not fall into the sewer hole and do not contribute to the occurrence of blockage;
- the wound strand must also be carefully lubricated with red wine;
- after that, the toilet is mounted and the outlet pipe is fixed into the socket of the sewer pipe.
Variety of connectors
In most cases, an eccentric or corrugated cuff is used to connect the toilet to the fan pipe, which allows connecting elements when it is impossible to directly connect them. Therefore, the toilet is not fixed to the floor until a preliminary experimental connection to the sewage system is carried out.
Eccentric cuffs consist of two nozzles welded together, with offset centers. Due to the special structure of the eccentric, it is possible to connect the toilet outlet with a fan sewer pipe or inlet pipe. Manufacturers produce eccentrics of different lengths, which must be taken into account when choosing the right part.
Important! The installation of the eccentric to the toilet and sewer pipe is carried out without the use of sealants, since the tightness of the connection is achieved due to the rubber seals available at both ends of the cuff. Sealing problems can occur when connecting the cam to an old cast-iron sewer. To eliminate the likelihood of leakage, it is necessary to put a sealant at the place of their joint after connecting the elements.

Connecting elements for connecting the toilet to the sewer: corrugation, eccentric cuff, plastic outlet
You may also need instructions on how to install a corrugation for the toilet:https://aquatech.tomathouse.com/en/santehnika/unitaz-rakovina/ustanovka-gofry-dlya-unitaza.html
In practice, it is not always possible to connect the toilet to the sewer using an eccentric cuff, since the docking elements can be displaced a large distance from each other. Therefore, most often use a corrugated cuff that can stretch to the required length. In addition to the ability to stretch, the corrugation is also easily subjected to deformation, which allows the master to achieve the desired joint angle. This is the main advantage of the corrugated cuff, which allows for connection to the sewage system in absolutely all cases. Of course, we are not talking about a significant change in the position of the toilet, since in this case you will have to change the design of the sewer wiring in the bathroom. This work will have to be entrusted to a professional.
Having learned how to properly install the toilet, as well as connect it to the water supply and sewage system, you can proceed with the installation of the device yourself. If you feel that you will not be able to cope with these works, then call professionals who understand all the nuances of installing plumbing equipment.