DIY installation of a wall-mounted wall-mounted toilet: on installation and on a concrete base
Conventional floor toilets have been replaced by suspended structures that do not occupy the floor area and look more modern. Not surprisingly, wall-mounted models began to push traditional products out of the market. Installation of a suspended structure is more complicated, takes more time and costs more, but you can save money if you consider such an option as installing a wall-mounted hanging toilet with your own hands.
Content
The internal structure and principle of operation of the structure
If you understand the design features of the product, it becomes clear how to install a wall-mounted toilet.

The design of the wall product is such that only the toilet bowl is the visible element
The first element is a strong steel frame, which is the basis to which the visible part of the structure is attached - the toilet bowl. It is with its installation that the installation of the hanging toilet begins. The frame is securely fixed on the wall, also fixed on the floor - as a result, it must support the weight of a heavy person.
Accordingly, it is unacceptable to mount this design to weak walls (for example, from drywall), since the wall simply can not stand it. The frame is equipped with a device that allows you to adjust the height (400-430 mm) on which to mount the product bowl. It is suspended from the frame using special pins - this is the main attachment of the hanging toilet.

Often two installations are simultaneously installed - for the toilet and for the bidet
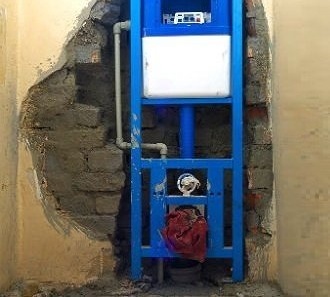
The second element is a plastic drain tank hidden in the wall. Its shape differs from the traditional one, since the container should fit in a narrow design. It is mounted in a steel frame and insulated with a special material that eliminates the appearance of condensate - styrene. The front wall of the tank is equipped with a cutout for mounting the trigger button device. In case of repair, this cutout is also used. Almost all modern tanks require dosing of the drain: for example, the volume of discharged water can be 3 l or 6 l, depending on the purpose.

Flat-shaped drain tanks fixed inside the installation
The third element is the toilet bowl, the only visible and actively exploited structural part. Its shape is traditional, oval, although designer models come in both round and rectangular configurations.
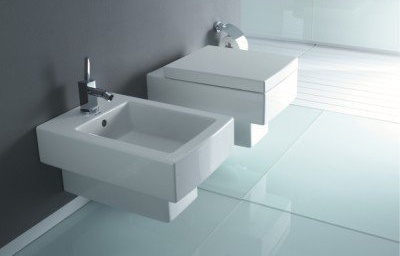
The toilet bowl can be either rectangular or even round - it all depends on the imagination of the designer and the desire of the client
There should be no problems with fasteners, since a kit of necessary parts and tools and installation instructions are attached to the product. Sometimes it is required to additionally purchase a teflon tape, an outlet made of polyethylene, a flexible hose, and studs.
Installation Installation Technology
Mounting a hanging toilet with a special frame mounted in the wall is more expensive, but more reliable and faster.

Installation must be mounted to the floor and main wall
Installation steps:
- Installation of a steel frame - through special holes it is attached to the main wall and floor using dowels. Sewer and water pipes are removed at the installation site. The frame (installation) should be checked for evenness using a level. It should be clearly parallel to the wall to which it is attached. At this stage, the height of the installation of a hanging toilet bowl is also set - 40-43 cm. It depends on the growth of the apartment owners.

The height of the toilet bowl is adjustable during installation
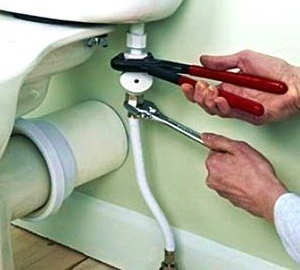
- Supply water to the tank. It can be flexible or rigid. Experts insist on a tough option, as it lasts much longer. While the eyeliner is mounted, the valve in the tank is in the closed state.

During operation, drain the water from the tank should be shut off.
- The connection of the toilet with the sewage system. The toilet outlet is inserted into the sewer, the connection is fixed with the corrugation. After installation, it is necessary to test the system - make a test drain. To do this, the toilet bowl is completely screwed to the frame for a while. Then it is removed again, since it is usually installed at the final stage.

Many installation kits are connected to a sewer without corrugation
- Sheathing of the work area with drywall sheets. For a plumbing unit, sheets of a waterproof double drywall, more durable than ordinary, are selected. The panels are mounted to the frame and the metal profile, which is mounted on the wall. The instructions supplied with the product contain a detailed diagram of the cutting of material with places for cutting out the necessary holes. There can be two options for cladding: the area of the entire wall or just to close the installation. In the second case, an impromptu shelf will appear above the toilet bowl.

Improvised shelf over the toilet and bidet can be used for decoration or for the necessary things.
- Facing the partition with ceramic tiles or panels similar to the finishing material of the bathroom.

The wall lining behind the toilet should be in harmony with the rest of the room
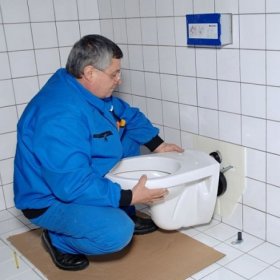
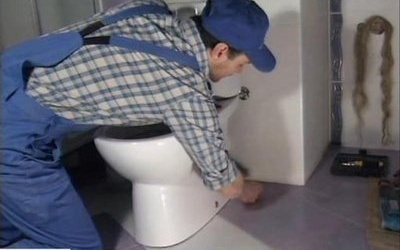
- The final stage is the installation of a wall-mounted toilet, specifically - its bowl. It is hung on the designated part of the steel frame using two studs.

Plasterboard sheets with cladding close the installation and the drain tank, leaving the toilet bowl and drain button
Particular attention should be paid to the correct installation of the installation, since the correct execution of subsequent work depends on it.
Installation of a toilet bowl without installation, on a concrete base
Sometimes they are interested in how to install a hanging toilet without installation. Of course, installing the toilet on the frame can be replaced with a cheaper option - mounting it on a self-made concrete base.
The drain tank is installed in two ways: either mounted on the wall with the outlet of the drain buttons, or placed in a standard manner over the toilet bowl in the fabricated base.

Wall toilet mounting scheme: 1 - 2 rods mounted on the wall; 2 - monolithic concrete base; 3 - drain pipe
Consider the most economical option.
To install, you must prepare:
- about 40 l of concrete M200;
- formwork boards;
- nuts, washers, wood screws;
- 2 rods with thread 2 cm thick (length from 50 to 80 cm);
- a piece of plastic pipe (length - 8 cm or more, diameter - 11 cm);
- drain coupling;
- silicone sealant.
Procedure:
Start with fixing the rods in the main wall. In the future, the toilet will be “planted” on the rod releases. You get a fairly stable design, which can withstand the weight of 400-500 kg.

The dimensions of the concrete base are calculated taking into account the further dismantling of the formwork
Next, mount the drain coupling. Set the height of the toilet and cut the sleeve to a specific length.
Install the formwork. The distance between the holes for the fasteners is calculated, the attachment points on the formwork are noted.
Calculate the length of the rods: summarize the depth of the recess (about 15 cm), the distance from the toilet bowl to the wall. To fix the rods in the wall, a chemical anchor is used - a special adhesive for concrete.
After mounting the pins and installing the formwork, try on the toilet bowl. The holes for fastening must coincide with the exits, the outlet with the drain of the coupling.

The concrete base will finally harden in only 2-3 weeks
Concreting begins, supporting the drain hole with foam. The result is a monolithic block with a fixed open coupling and outgoing pins.

The concrete base should include pins for the toilet bowl, the outlet of the coupling to drain and the place at the top for mounting the drain tank
How to install a hinged toilet on a prepared base, do not think about it - the next steps do not differ from installing a conventional floor toilet: connect the drain, seal the connections, install the bowl on the pins, tighten the nuts. The drain tank is fixed over the toilet bowl.

The concrete base and drain pipe can be closed with sheets of drywall, leaving a hole for access to the drain tank
Such an installation of a hanging toilet with your own hands will save the family budget, since an expensive installation is not required.
3 comments