Long-burning stove: a simple design for DIY
Necessity in heating garages, workshops and other premises for household purposes makes you look for simple and cheap ways to heat them. In the era of low-cost electricity, there were no problems with this - you could use an elementary air heater assembled from a piece of asbestos pipe and a nichrome spiral. Today, the operation of even an economical infrared heater will cost a pretty penny, and it is better not to recall the gluttonous handicraft equipment at all.
The way out of this situation lies on the surface - it is enough to make a stove-potbelly stove with your own hands. Craftsmen have developed more than a dozen simple and effective structures designed to use liquid or solid fuels. If your choice is a wood-burning or wood-burning heater, you will not find a better design than a long-burning stove.
Content
Secrets of long-term operation of solid fuel units
Hide the whole secret of long burning stoves in the method of filling fuel into it. Firewood in such a furnace is ignited from above, so there is no danger of simultaneously burning all the logs in the fuel chamber.
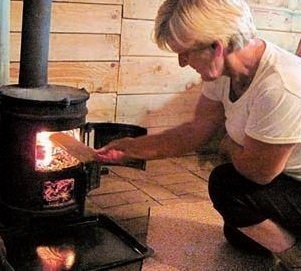
Despite the unpretentious appearance, a homemade long-burning stove is successfully competing with many factory-made wood-burning stoves
In addition, the air supply method contributes to this. Oxygen, necessary for combustion, comes only to the upper layer of fuel. Such solutions make it possible to increase the size of the bookmark as much as the dimensions of the furnace allow. Of course, the continuous operation time of such units increases tenfold.
The secret of long burning stoves is an efficient way to burn fuel
The pyrolytic decomposition of solid fuel, which occurs at high temperature and lack of oxygen, allows to further increase the duration of one heating cycle. Firewood does not burn, but smolders, while simultaneously forming a large number of volatile hydrocarbon compounds. Pyrolysis gases are burned under the roof of the furnace with the release of a large amount of heat. Thus, smoldering contributes to the lengthening of the continuous burning period, and pyrolysis allows increasing the efficiency of the heat generator many times over.
Another option for long-burning furnaces is Bubafonya. You can do it yourself at home. Our next article provides a diagram and step-by-step installation instructions:https://aquatech.tomathouse.com/en/otoplenie/bubafonya-svoimi-rukami.html.
The device and principle of operation of a long-burning stove
The methods described above for increasing the continuous operation time of the furnace have been successfully implemented in the construction of a potbelly stove that we offer for manufacturing. The unit consists of only several parts and is distinguished by its unusual simplicity, which, however, does not prevent it from successfully competing with more complex heating devices.
Firewood is laid in the case, which is most often performed in the form of a cylinder. From above, the fuel is pressed by an air distribution device in the form of a hollow rod with a piston (a heavy metal disk, in the center of which a hole for air supply has been made). Support blades (blades) are welded to the bottom of the steel pancake, the width of which determines the height of the gap between the fuel and the piston. In other words, the size of the combustion chamber depends on the size of the blades. A pipe is welded to the back of the disk, through which air enters the furnace. To regulate its quantity, the channel can be completely or partially blocked by a sliding shutter.
The device and principle of operation of a long-burning stove
A pipe has been cut into the upper part of the stove for connecting the chimney. To ensure normal traction, the height of the pipe should be at least 4 m. On top of the unit is closed by a lid, which has a hole for the air distribution device.
Primary air is supplied directly under the piston, which divides the working space into two chambers. Accurate dosing of oxygen makes it possible to reduce the intensity of the flame, contributing to the transition to gas generation. In this case, thermal energy is released not only by burning fuel, but also by pyrolysis gases, which are actively burned under the cover. Secondary oxygen for their oxidation is supplied through a special window in the upper part of the furnace, and in the simplest case, through the gap between the air supply pipe and the top cover. After burning the upper layer of firewood, the metal disk drops under its own weight, providing oxygen access to the new fuel horizon.
Combustion products are removed from the furnace through a chimney cut into the upper part of the body. In order to further increase heat transfer, the chimney is connected to the heating device through a small horizontal transition, which plays the role of an air heat exchanger.
What you need to work: tools and materials
This model of a “long-playing” stove can be made in just a few hours. All that is needed for this is a great desire and the correct organization of the work process. You will also need to thoroughly understand the design of the unit and prepare in advance everything you need.
From the tools you will need:
- welding machine - the best for these purposes is a small, lightweight inverter with the ability to adjust the current strength to 200 A;
- angle grinder (colloquial grinder or "grinder");
- cutting and grinding discs designed for metal work;
- drilling machine or electric drill;
- set of drills;
- medium-sized hammer;
- blowtorch;
- chisel;
- sledgehammer;
- tape measure and metal ruler;
- core (a device designed for marking, facilitating drilling);
- scriber for marking metal surfaces.
As for materials, there is no need to follow the list exactly. The whole charm of home-made designs lies precisely in the fact that they will use any iron that can be found in the backyard or in the corners of the garage (workshop).
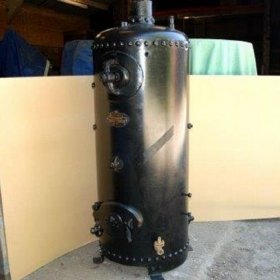
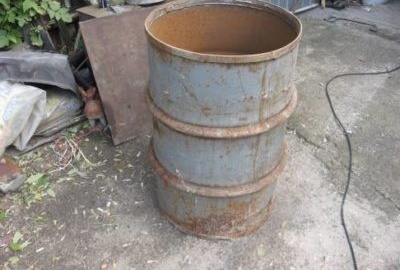
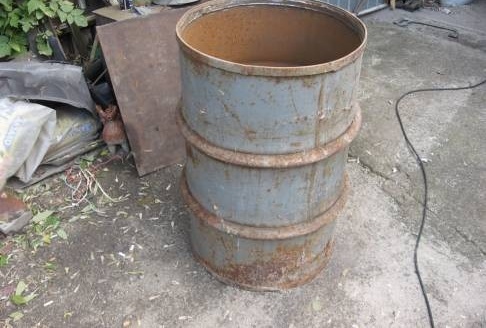
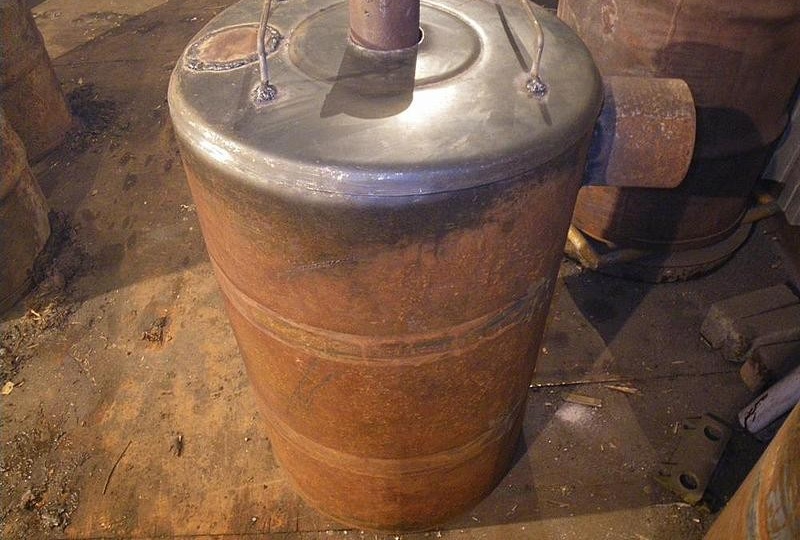
For the manufacture of the furnace body, any overall capacity, for example, an unnecessary metal barrel, is suitable
So, the list of necessary materials:
- steel pipes with a diameter of 80 to 250 mm, which are needed for the manufacture of riser air and chimney;
- a suitable metal container with a diameter of 300 to 600 mm with a wall thickness of at least 2.5 mm (you can use a gas bottle that has expired, a fuel barrel or a pipe length of at least 120 cm);
- a metal sheet with a thickness of at least 4–5 mm from which the air distribution piston will be made;
- strong metal hinges that will be needed to mount the furnace and ash doors;
- asbestos cord (it is needed to seal the loading window and other operational openings);
- corners with a shelf from 50 mm, channels and profile pipes - for the manufacture of air diffuser blades, support legs and other structural elements;
- round metal pancake with a thickness of at least 5 mm and a diameter of 120–150 mm (you can take any suitable gear or sprocket from motor vehicles);
If it is planned to equip the heating device with a water jacket, then in addition it is necessary to prepare sheet steel with a thickness of at least 2 mm and pipes for connecting the liquid circuit to the heating main (hot water supply).
Pipes are also used in the assembly of a potbelly stove with a water circuit. Step-by-step instructions are given in our article:https://aquatech.tomathouse.com/en/otoplenie/burzhuyka-s-vodyanyim-konturom-svoimi-rukami.html
How to properly design a long-burning stove: diagrams and drawings
As an external casing of a pyrolysis combustion stove, you can take any suitable container. The use of waste materials will make it possible to obtain a heater with almost zero cost. The only thing that needs to be done is to design all the other structural elements in accordance with the dimensions of the selected case. This will make it possible to build not only a cheap, but also a productive, economical furnace.
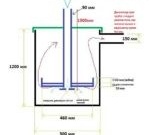
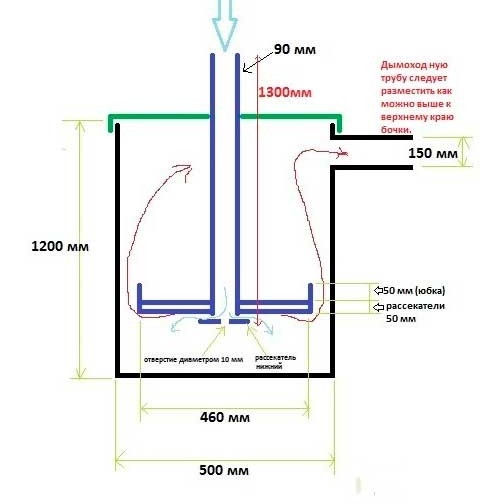
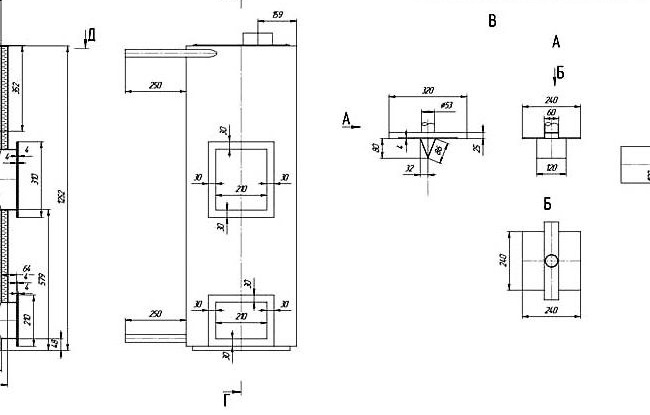
To determine the size and parameters that affect the performance and thermal efficiency of the stove, you can use a special scheme. To make a calculation, starting from the dimensions of the found capacity, it is necessary to measure its diameter (D) and height (H). These will be the external parameters of the heater.
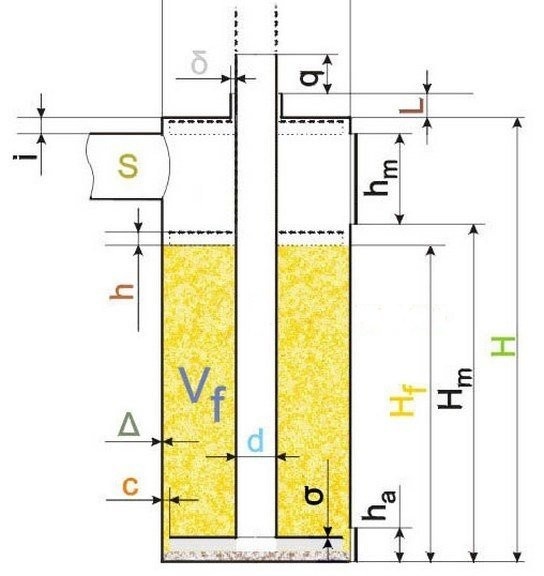
The scheme for the calculations of a long-burning burner stove will help to adjust the parameters of the parts depending on the size of the base
Full calculation procedure:
- The ratio of the diameter (D) and height (H) of the potbelly stove should be within 1: 3 (5). In a too narrow and high stove, the afterburning zone of combustion products will be stretched in height, which means that some of the gases will not be able to ignite in time and simply go into the pipe. If you build a low and wide unit, then the surface combustion will be too uneven. Air flows into the middle of the bookmark, so the fuel will burn there much faster than at the edges. This will lead to the formation of a depression in the center of the bookmark and the piston to hang on unburned remains at the walls. At the same time, there can be no talk of any normal operation, and especially pyrolysis burning.
- The durability of the heating device depends on the thickness of the metal (Δ) required for the manufacture of the housing. A container with walls of 4–5 mm is best suited for these purposes.
-
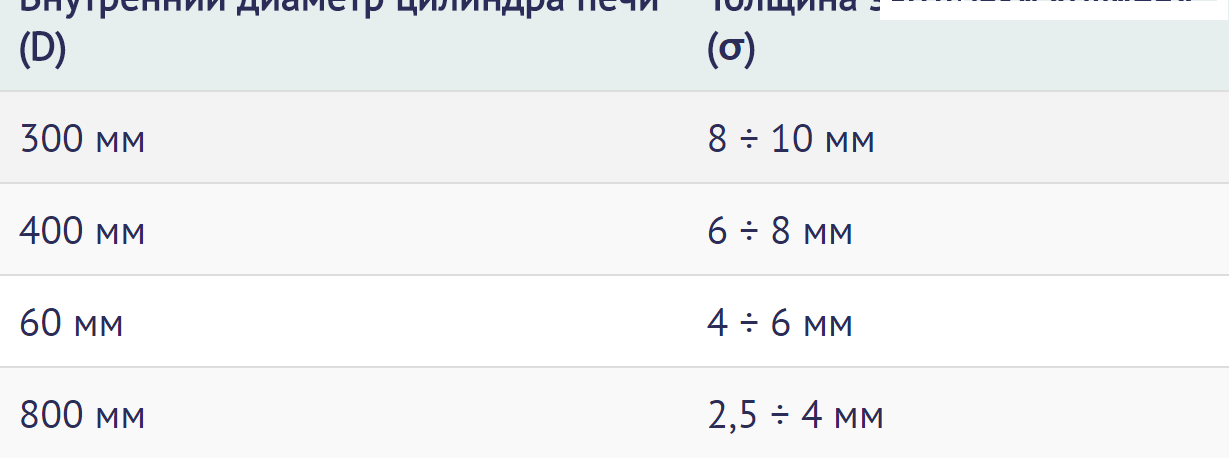
When calculating the air distributor, it is important to correctly determine not only the diameter, but also the thickness of the piston. The massive part will heat up and actively heat the air entering the combustion zone, which will have a positive effect on the performance of the stove. In addition, the thin disk will not be pressed firmly to the upper plane of the bookmark, and this will lead to an increase in air gap and uneconomical fuel consumption.A piston that is too heavy, on the contrary, will tend to reduce the clearance. Excessive fuel compaction can lead to complete attenuation of the stove. The situation is complicated by the fact that the weight of a metal pancake depends not only on its thickness, but also on its diameter. Therefore, the larger the piston will be, the finer the metal is taken for its manufacture.
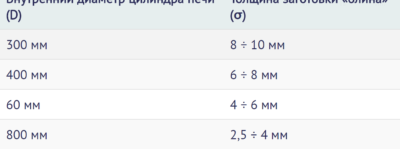
A table for calculating the thickness of the piston will help you find the optimal ratio of the diameter and thickness of the piston pancake
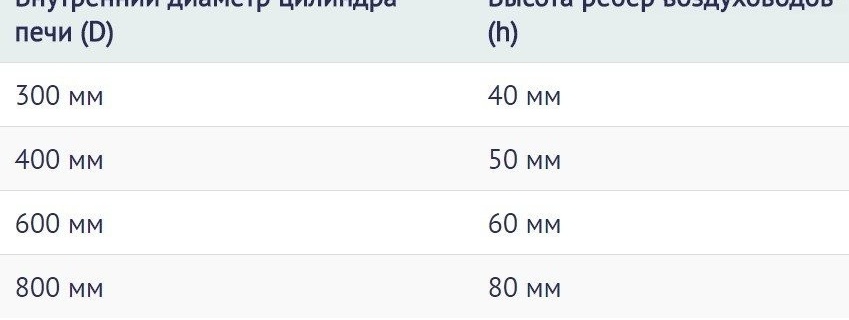
- The gap between the fuel bookmark and the air distribution disk is determined by the height of the ribs (blades) of the piston. There are also ready-made tables for their calculation. If the dimensions of the structure do not fit into their framework, then the calculation of the blades is carried out by the method of proportions.

The table for determining the parameters of the blades is suitable for standard furnaces
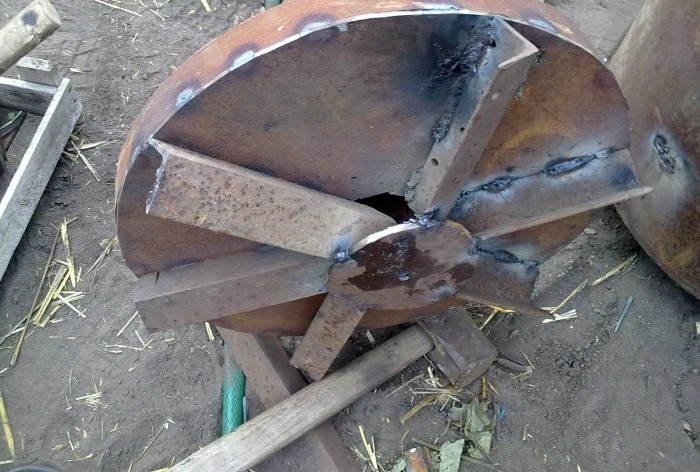
- The efficiency of the air supply to the combustion zone depends on the configuration of the edges of the air distribution pancake. You should not go along the simplest path, welding straight sections of corners or profile pipes to the piston. It is better to bend the blades in a semicircle and weld in the form of a turbine. The air flow in this case will not be laminar, but turbulent, so the decay of the fuel, and hence the gas evolution, will be more intense. The advantage of curly blades lies in the fact that the flow of pyrolysis gases will be more actively pushed to the periphery, accelerating gas circulation.
- When calculating the chimney, use the formula S = 1.75P, where P is the heating power of the heater in kW / h. The resulting value is rounded up, adjusting the numbers to the diameter of the pipes that are available.
- At the entrance to the chimney, a rotary damper, called a gate, is installed. It will be needed to regulate traction.
- The cross section of the air supply pipe d should be 2 times smaller than the diameter of the chimney. In order to redirect its flow to the blades, a diffuser is installed on the air supply channel. For this purpose, you can use a disk Ø120–150 mm with a hole in the center of Ø15–20 mm or any suitable part from automotive or agricultural machinery.
- Between the hole in the loading hatch and the air supply pipe, a gap δ must be left, which should be no more than 2.5 mm. It is needed to supply secondary oxygen to the afterburning zone. Here you need to be especially careful and not exceed the recommended values, otherwise the excess air will “siphon” towards the chimney, simultaneously pulling pyrolysis gases into the pipe. For the same purposes, do not refuse to install a collar. Its size L is taken equal to 80 × δ, but not higher than 200 mm.
- The length of the air supply pipe is calculated based on the fact that with the disk fully lowered, it should rise above the collar to a height of q = L + 150.
Of course, there is no need to comply with the dimensions of all parts of the furnace. Without consequences, they can be rounded in any direction. As for the gaps and vias, the correct operation of the heater depends on their size. These parameters should fully comply with the calculated values.
There is no need to install a furnace door for a potbelly stove with a diameter of 450 mm or more, since the unit is easily loaded with wood through the top. If, however, a gas cylinder is used as the body, then difficulties during its operation await not so much during the laying of fuel, but rather when cleaning the stove from ash. So that a long, narrow container does not cause inconvenience during operation, you will need to install an ash pan door.
In order not to equip the opening for cleaning the oven, you can use the disk with the sides, which are lowered to the bottom. A steel rod welded to its center will allow you to easily pull out the ash container. The metal rod does not interfere with the operation of the potbelly stove at all - after installing the ash pan at the bottom, it is passed through an air supply pipe.
Schemes and drawings allow you to accurately determine all the structural parameters of the heating device and build a productive potbelly stove from any suitable tank. It is not necessary to adhere precisely to the dimensions - it is enough to observe the ratios between all the components of the structure.
Photo gallery: schemes and drawings of a long-burning stove
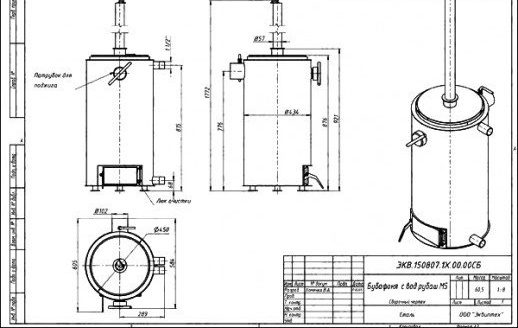
-
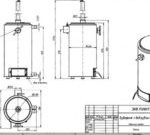
- Pyrolysis potbelly stove drawing with a water circuit
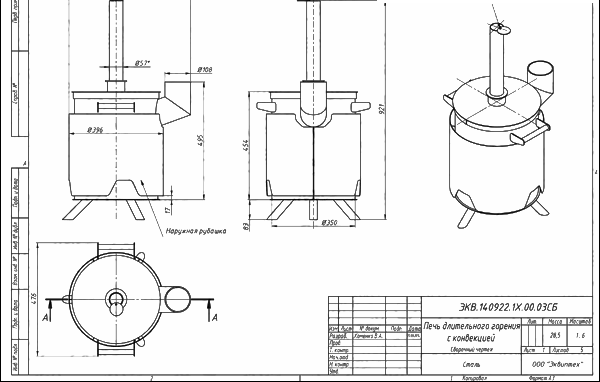
-
- Design of a potbelly stove with a convection hood
-
- Simple stove for firewood and sawdust
-
- Scheme of a long-burning hollow-cone burner stove
-
- Pyrolysis furnace drawing for coal and pallets
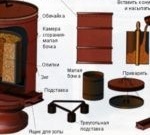
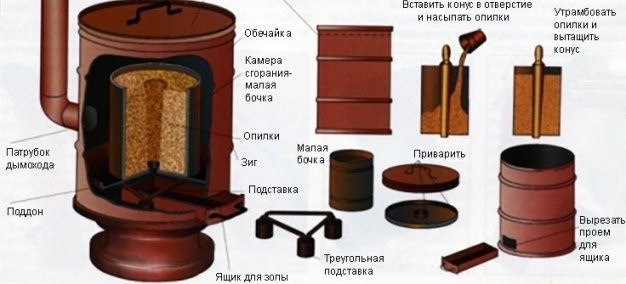
How to build a long-burning potbelly stove from a metal barrel
You can build it in just a few hours, and the material for the work will be a used metal barrel from the fuel, a thick metal sheet and various pieces of pipes, corners and channels. Of course, such a cheap option has certain disadvantages associated with a small wall thickness - this affects both the heat capacity of the structure and its service life. Nevertheless, the use of such a dimensional body has its advantages:
- the volume will allow the stove to work up to 12 hours on one tab;
- even if over time the walls of the barrel burn out, then the body of the potbelly stove can be quickly replaced;
- the cross section of the loading opening makes it easy to heat and maintain the stove, so you can do without arranging a loading and ash window.
The phased implementation of the work will allow to avoid mistakes and facilitate the manufacture of a heating unit, which can be useful for both a novice and a home master with experience.
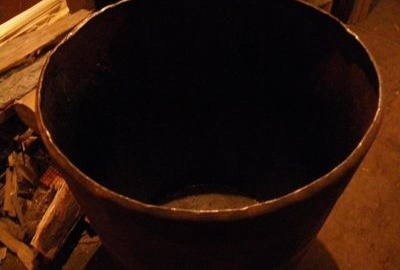
Preparatory work
For the construction of the simplest wood-burning heat generator, any steel barrel from chemical reagents, fuels and lubricants, etc. is suitable. If there are small dents on its surface, then they must be leveled with a hammer and a sledgehammer, which is attached from the back. This work must be done carefully and accurately, otherwise during operation the air distribution piston will hang over the wood, which will lead to disruption of the normal operation of the unit.
If the walls of the barrel are covered with residues of oil, glue or paint, then they are fired using a gas burner or blowtorch. After that, all surfaces are cleaned with a hard metal brush. Of course, with full confidence in the integrity of the walls, you can do without firing and scraping the walls, but if the container was stored for a long time in the open, there is no better way to prepare it.
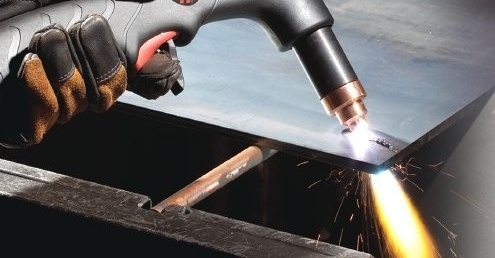
Cutting blanks from a thick metal sheet is best done using a plasma cutter
Since the piston and blades are made of thick metal, it will be quite difficult to cut them with a grinder. It is better to use the services of a car service for this or contact the production. As a rule, there you can find an experienced welder working with a gas cutter or a plasma cutter. He will be able to cut out the necessary details in a few minutes, and all that remains for you is to bring down drops of molten metal on an emery wheel.
You may need material with recommendations for working with gas welding:https://aquatech.tomathouse.com/en/uchebnik/svarka/zamena-batarej-gazosvarkoj.html.
The next stage of preparatory work is the selection and proper arrangement of a place for the installation of a potbelly stove. When installing it, it is necessary to ensure the fulfillment of several mandatory conditions:
- The base of the floor should be a flat, horizontal surface. Regardless of how the stove will rest on the floor - legs or the lower part of the body, the base of the site is protected with non-combustible materials. It is best if it is fireclay brick, but asbestos-fiber plates or metal sheets can be used. Of course, the last two options are only suitable for laying on non-combustible surfaces.
- A potbelly stove should be installed away from storage areas for fuels, lubricants and flammable materials. Installation of a wood heat generator under attachments, shelves, etc. is not allowed.
- When choosing a place, be sure to consider how the chimney will be arranged. If the entire vertical part passes outside the building, then part of the chimney is laid horizontally. Otherwise, the lion's share of the heat will simply be thrown into the air. If the pipe passes indoors, then the potbelly stove is installed in any way.
It should be understood that lengthening the horizontal section of the chimney by more than 400-500 mm is fraught with a decrease in traction, which will ultimately lead to a decrease in the efficiency of the stove.
Like any other open-flame wood-burning heat generator, a long-burning stove during operation burns a considerable amount of oxygen. At the initial stage, one should think over how air will be supplied. Without a good ventilation system, the operation of the furnace may be unsafe.
Step-by-step instructions for making do-it-yourself stoves
All the main work on the manufacture of this type of furnace consists of several stages:
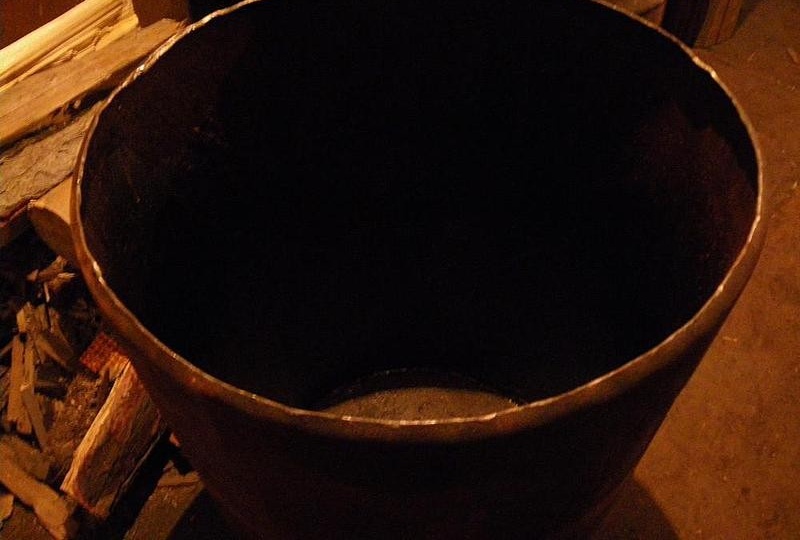
- The barrel is mounted on a hard, flat surface and the lid is cut off from it. To do this, it is best to use a grinder, cutting through the weld at the point of its attachment to the body. This will allow you to carefully separate the upper part, having received a cylindrical body with factory termination of the edge. It is not necessary to throw out the cut-off part - after a little refinement, it will serve as the upper hatch of the potbelly stove.
The lid from the barrel should be cut off as carefully as possible.
- The upper section of the barrel must be slightly bent inward, reducing its diameter by 2-3 cm. To do this, it is convenient to use a sledgehammer and a hammer, the striker of which is substituted from the inside, below the bend line.
The upper section of the tank is folded inward
- A blank designed for the manufacture of the lid is placed on a metal plate, after which with powerful blows the sledgehammers bend its side out. Such flaring is necessary so that the part fits snugly against the body. This method is not ideal in terms of aesthetics. Perfectionists can be advised to cut off the edging of the lid so that the part penetrates tightly into the cylindrical body. After that, it is necessary to weld a metal disk of the same diameter on the workpiece as the barrel itself. A flat, flat surface will subsequently serve as a stove for heating water or food. Instead of the cork, which most barrels for storing fuel and lubricants are equipped with, you can install a sliding shutter. It will allow you to precisely control the amount of secondary air supplied to the afterburning zone.
- An opening for the air supply pipe is cut in the center of the lid. Its diameter should be 1–2.5 mm larger, otherwise there will not be enough air in the secondary combustion zone. Of course, if the upper part of the potbelly stove will be equipped with an additional damper, then the pairing of parts can be made as dense as possible.
Before cutting a hole, the cover must be prepared.
- Mount the collar. To do this, a strip 50–100 mm wide is cut out of a metal sheet, with which a hole is welded along the contour.
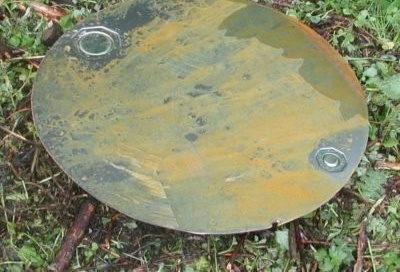
- For the manufacture of the piston take a steel sheet with a thickness that corresponds to the calculated values. If you want to get the cheapest possible heating device, and the necessary material is not at hand, then you can cut off the bottom from another barrel. Since the thickness of the obtained billet does not provide the required stiffness and sufficient mass of the piston, small transformations are necessary with the part. Firstly, the metal edging that runs along its perimeter is bent inward until the metal pancake freely enters the furnace casing.In no case can the side be cut off - it will serve as an external stiffener. Secondly, to increase the mass of the piston on its upper plane, an additional load is welded. In its quality, you can take any flat parts - gears, sprockets, pulleys, etc. The main thing is that they can provide the estimated weight of the air distribution device. An additional advantage in this case is the increased heat capacity of the piston.

The manufacture of the pressure circle depends on what material was taken as the basis
- A hole equal to the outer diameter of the air supply pipe is cut in the pressing disk. After that, the blades needed to distribute oxygen over the entire surface of the fuel bookmark must be welded to the lower part of the piston. The width of these parts will form the height of the working area, and this has a huge impact on both the productivity of the stove and its efficiency. It is best not to deviate from the design parameters by a millimeter when manufacturing the piston.
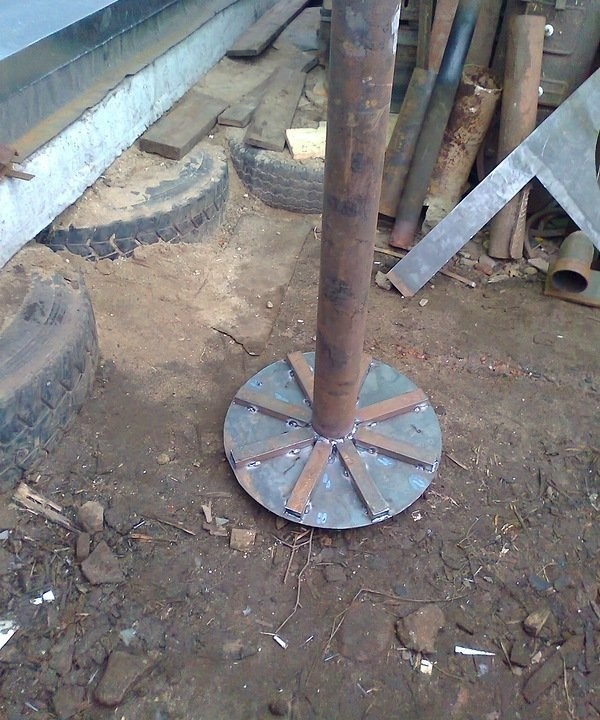
- A pipe for supplying air is welded to the pressure pancake. To do this, the metal disk is laid with the blades down on a flat surface, and the mounting accuracy is controlled by level or plumb - the parts must be connected in strictly perpendicular planes.
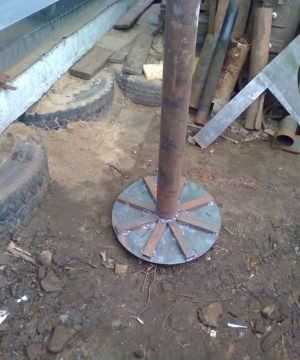
The air supply pipe must be level mounted.
- On the side of the ducts, a divider must be welded in the center of the piston. If this part is cut out of a metal sheet, then drilling up to 20 mm in diameter is performed in the center of the workpiece.
- The upper section of the air supply pipe is equipped with a damper to adjust the amount of primary air. It is better if this node is equipped with some kind of latch.
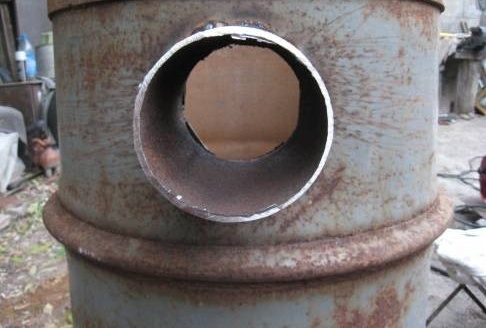
- An opening is cut in the upper quarter of the cylindrical body for mounting the outlet pipe. This part is set in place and boiled with a solid seam.
- From the outside of the bottom, a support frame is mounted with legs made of suitable pipe sections or angles.

The installation of the pipe connection for the chimney takes place at the top of the barrel
- For the manufacture of a chimney, pipes 0.4–0.5 m and 4–5 m long are used, which are connected by means of an angular transition of increased diameter. At the bottom of the chimney, a ball valve is inserted to remove condensate. The interface is carefully sealed with asbestos or basalt sealant.
To eliminate temperature differences that lead to condensation, the chimney is equipped with an external casing, and the formed space between its walls is filled with mineral insulation. In addition, the top of the chimney is protected from precipitation with a metal cap.

After installation in a permanent place, the stove is connected to the chimney and filled with fuel. Long-burning potbelly stoves are tested after the piston and top cover are installed.
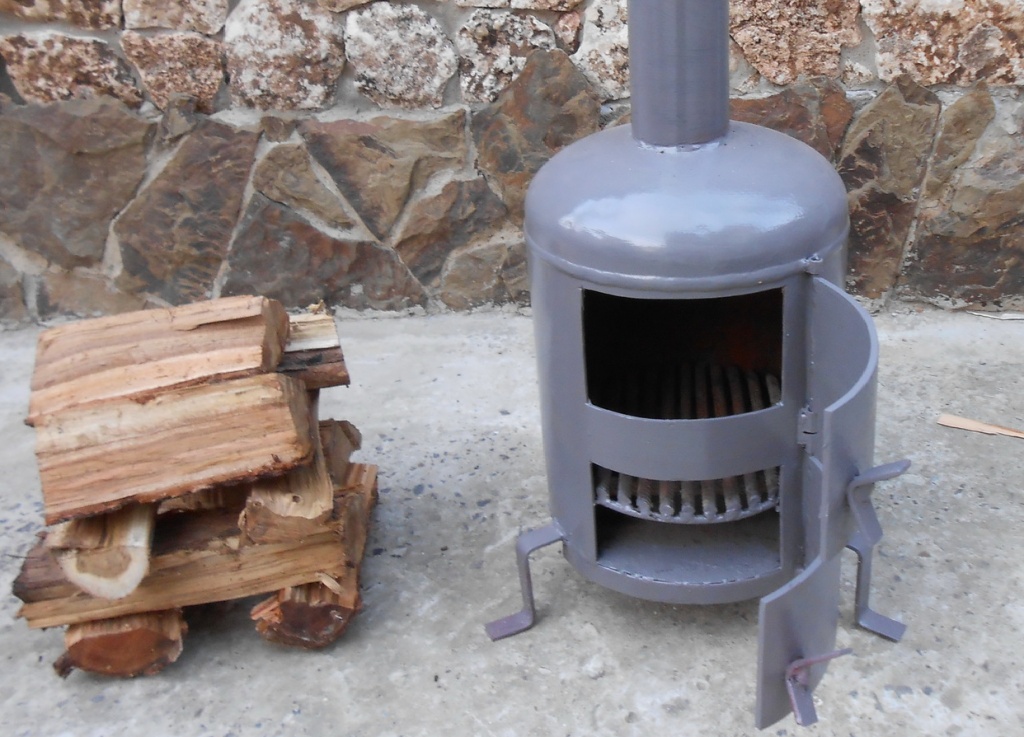
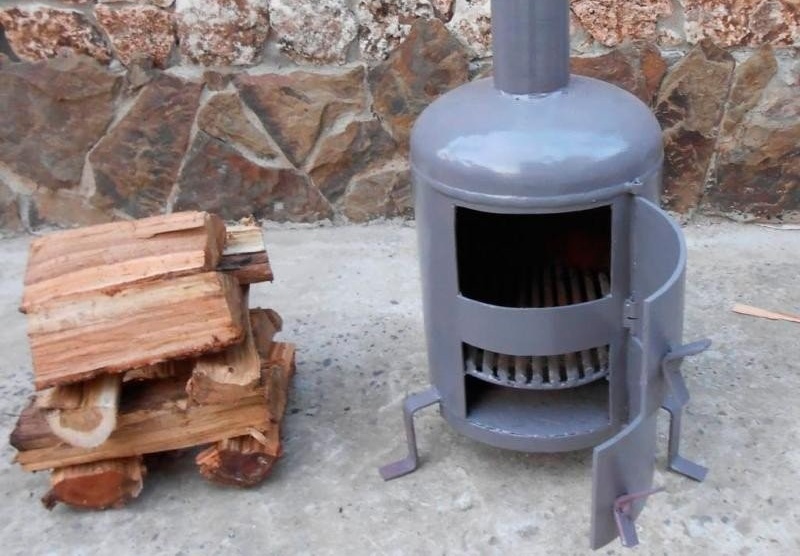
The long-burning stove is ready to go
How to properly operate the stove
Only dry wood is suitable for use in pyrolysis heating furnaces. This is due to the fact that when burning wet fuel, a lot of water vapor is released, which reduces the temperature in the working area. Of course, in this case, the efficient burning of pyrolysis gases is out of the question. In addition, there are other unpleasant moments associated with incomplete combustion of volatile components. Firstly, when cooled in a chimney, they fall on its walls in the form of tar, creosote and other difficult to remove substances. Secondly, the content of hazardous chemical compounds at the outlet of the chimney exceeds all permissible standards, which negatively affects the environment and human health. And, on the contrary, when burning well-dried wood, the exhaust gases consist mainly of carbon dioxide and water vapor, and the operation of a potbelly stove from the outside can be judged only by the small movement of heated air at the upper cut of the chimney.
Before laying the fuel, the piston is removed and laid aside, and the space inside the stove is filled with firewood. It should be remembered that the thermal power and the duration of the heater depend on the density of laying, so all the intervals between the logs should be covered with shavings, chips, wood husks, etc. A cloth moistened with kerosene or diesel fuel is placed on top, an air distribution piston is installed, and the unit is closed with a lid.
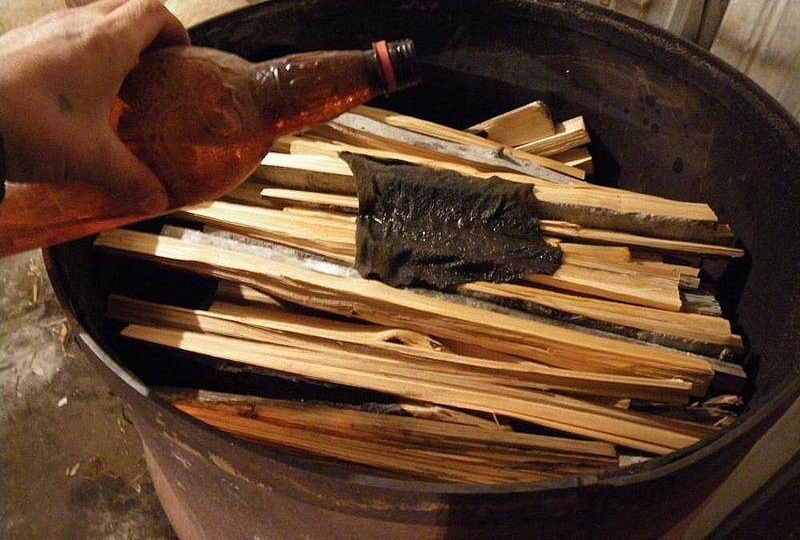
For ignition, rags moistened with a flammable liquid can be used.
The furnace is ignited when the damper of the air supply pipe is fully open, throwing burning rags into it, which are pre-impregnated with barbecue liquid or the like. After the firewood burns, the air supply is reduced.
In order to make the operation of the potbelly stove safe, follow some simple rules:
- If flammable substances (gasoline, kerosene, solvent, special products for wood-burning stoves) are used to set firewood, it is necessary to install a piston and close the stove with a lid before throwing a lit match.
- It is not recommended to use plastic, rubber, polystyrene and other household waste as fuel for two reasons. Firstly, this is due to the release of extremely toxic substances that cannot be burned even during pyrolytic decomposition. Secondly, during the high-temperature oxidation of such materials, a huge amount of soot is released, which means that you will have to clean the chimney several times a month.
Often, in order to make a potbelly stove more presentable, its body is primed and painted in the desired color. It should be understood that during operation of the furnace, the paint will burn out, therefore it is better to use only protective compounds designed to work in high temperature conditions.
Despite the fact that pyrolysis decomposition contributes to the most complete combustion of fuel, a small amount of soot and ash is formed during operation of the furnace. To remove carbon deposits, you can use a metal scraper and a brush. As for ash, it’s most convenient to clean a potbelly stove from a barrel with an iron scoop with a short handle. You do not need to remove all the ash. A layer of ash with a thickness of 2-3 cm will work as a thermal insulation, preventing the burning of the bottom of the heater.
Video: how a homemade long-burning stove is working
Such a productive and economical heating device, such as a long-burning stove, will allow you to successfully heat any technical and domestic premises. Thanks to a simple, undemanding to materials design, you can build a stove yourself, spending only a few hours on it. Accurate calculation, accuracy in work and attention during operation - these are all the terms necessary to obtain a comfortable, cozy, and most importantly, safe heat.