How to properly insulate the chimney pipe with your own hands
Equipping a private house with a gas or solid fuel boiler or stove heating provides for the high-quality performance of such work in all respects. The effectiveness of heating depends not only on the power of the heating system, its type and the availability of modern materials in the design, but also on the quality of the thermal insulation of the heated room and its structural elements. The chimney is an element of the heating system, which along with the boiler or the furnace is exposed to the harmful effects of combustion products, combustion temperatures and ambient temperatures. Chimney insulation helps to minimize the effect of temperature changes on the design of the chimney, makes it more efficient in terms of heat conservation and more aesthetic in the general form of construction. It will be about how to properly insulate chimney pipe do it yourself. What materials to choose, their advantages and disadvantages.
Content
Why do you need to insulate the chimney
The chimney system from the furnace or boilers of various types is based on the main building element - the chimney. Chimneys are made of metal, asbestos, galvanized pipes and brick. During operation, chimneys are exposed to elevated temperatures and seasonal ambient temperatures. In cold times, when the chimney is intensively working as intended, it is most actively affected by the temperature difference. The amplitude in this case ranges from + 200 degrees and more to - 35 degrees. Constant heating and rapid cooling leads to a cyclical change in the structure of the molecular lattice of the material from which the chimney is made. A material, whether metal or brick, expands when heated, and contracts when cooled.
Inside, the chimney is also susceptible to moisture. Not the absolute amount of moisture from the combustion materials enters the atmosphere. A certain part of it settles on the inner walls of the chimney. Accumulating, condensate becomes a constant phenomenon and takes an active part in the destruction of the walls (especially brick) of the chimney.
Such processes adversely affect the integrity of the design of the chimney. Having added here the natural weathering of building materials and the action of aggressive constituents of the combustion products deposited on the inner walls of the chimney, we understand that the durability of the chimneys is a very dubious indicator.
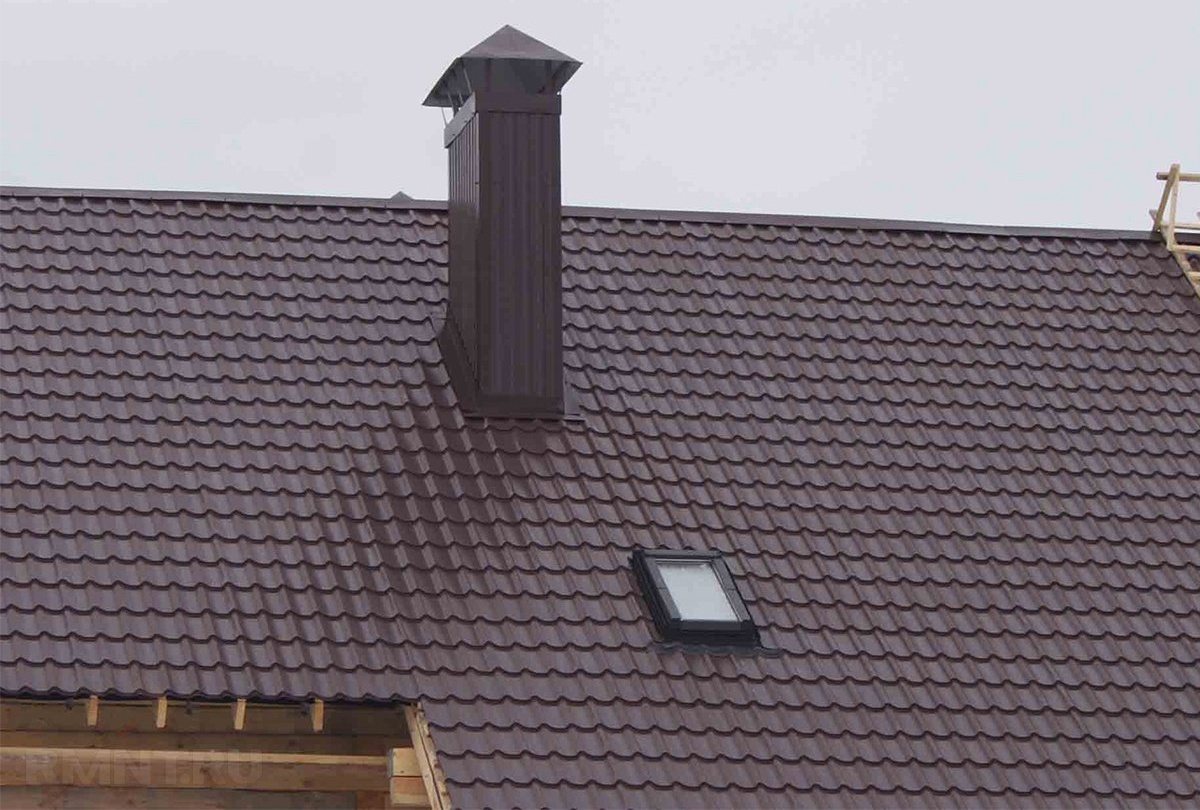
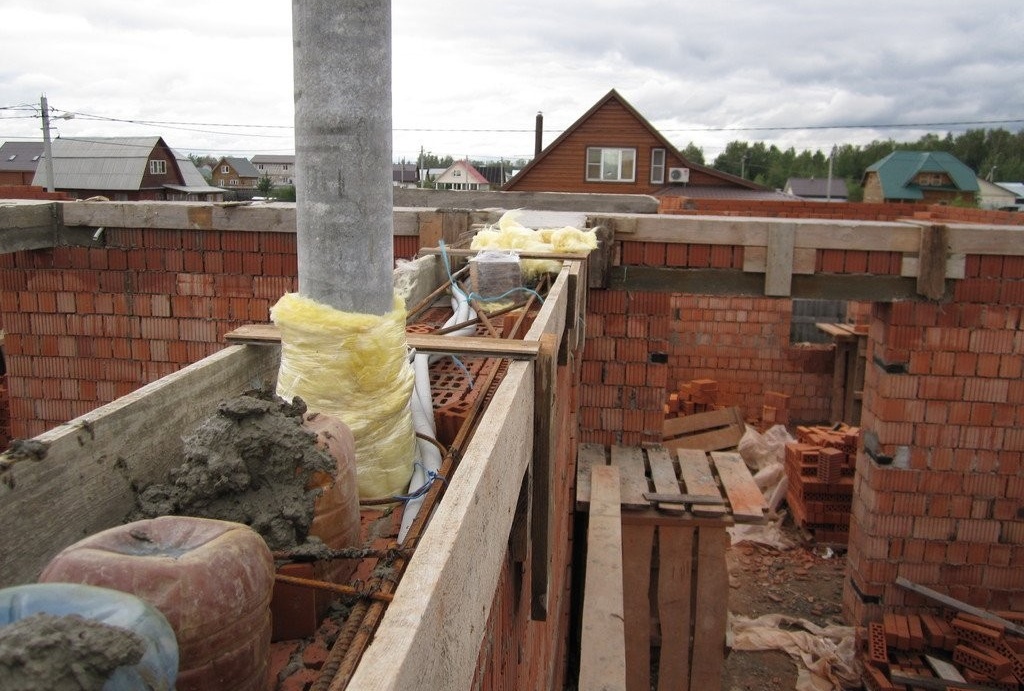
Long-lasting moisture, weathering and temperature differences on an unprotected chimney
But there is a solution to the problem.It does not ensure the elimination of the entire complex of aggressive factors, but effectively copes with most of them. The insulation is able to delay the effects of destructive chemical and physical processes and to minimize their effect in many ways.
The advantages of insulation
The insulated design of the chimney acquires not only protection from harmful factors, but also becomes more effective in terms of beneficial effects. The stored heat naturally increases the efficiency of the entire heating system.
Having completed the insulation, you will not have to spend time and money on periodic repair of the chimney.
Elements of the roof located in close proximity to the chimney will no longer be exposed to hot temperatures emanating from it.
And also the advantage is that the chimney can be made suitable for the general aesthetic appearance of the structure, whether it be a private house or just a garage.
Another important reason for the insulation of modern buildings, in particular, the chimney, is the amount of heat loss passing through it.
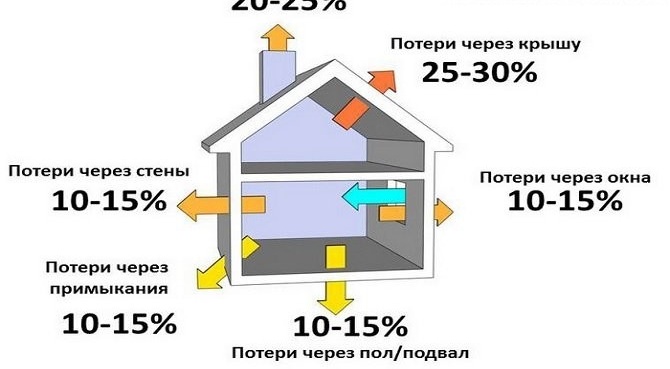
Heat loss through an uninsulated chimney is 20–25%
What heaters exist
The choice of material for insulation, perhaps, will be the most decisive factor in all work. The complexity of the installation process, the effectiveness of the result, and the appearance depend on the selected material.
The following materials are used for insulation of chimneys:
- mineral wool insulation;
- fibrous heaters;
- slag concrete and structural elements from it;
- broken brick;
- foam glass;
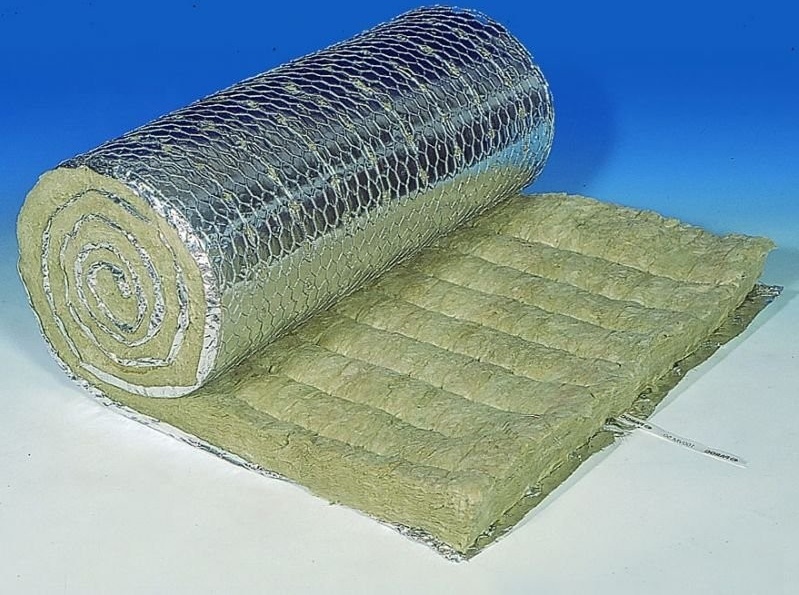
Mineral wool
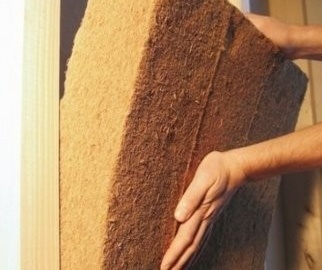
Fibrous insulation. (Wood fiber)
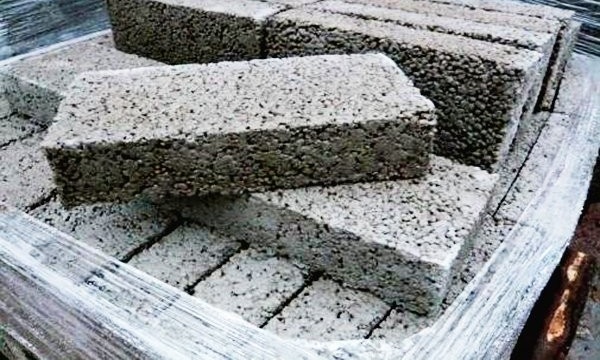
Slag concrete

Foam glass
Each of these materials has a different price category, mechanical properties and density. The material should be selected taking into account the local conditions of the chimney. It is important to consider the convenience of installation, since the insulation of such structures provides for work at height, and this is not a joke.
The main recommendations when choosing a material - insulation:
- It is strictly forbidden to use flammable materials.
- material is better to choose malleable and light. Cinder block is used by professional builders based on a developed project with calculated indicators of roof loads and load-bearing structures. Self-insulation is much easier to perform with mineral wool.
- Pay attention to the operating instructions indicated in the manufacturer's instructions.
Do not load the roof structure. Try to approach the matter from the point of view of the most lightweight insulation design.
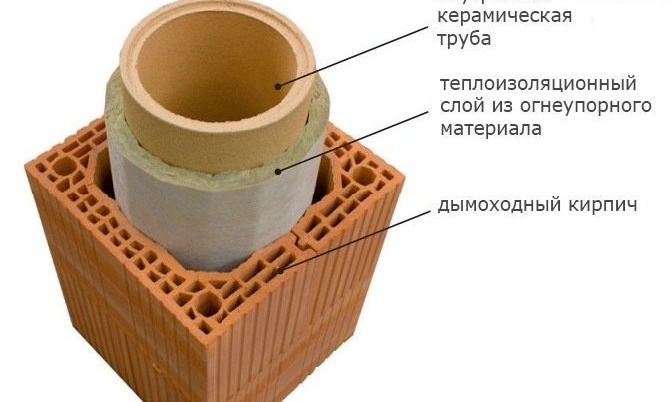
The design of the insulated chimney and its features
Chimney pipe insulation with various materials
The figure shows an example of chimney pipe insulation with mineral wool and galvanized sheet (left), and mineral wool insulation and decorated cinder concrete (right). The specified example is considered for a chimney from an asbestos-cement pipe.
A comparative example of the operation of thermal insulation is shown in the figure, as they say: "Find 10 differences."
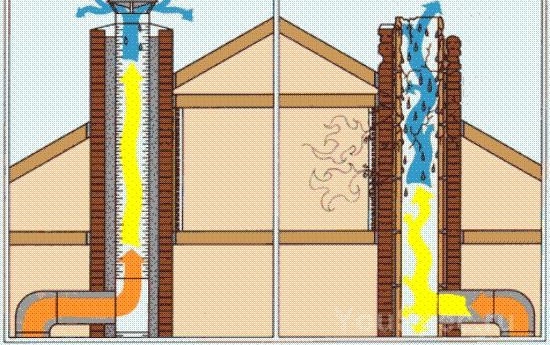
The protective effect of the insulation
A layer of insulation material protects the structure from the formation of condensation inside and from weathering outside.
How to insulate a chimney pipe with your own hands: the main design parameters
There are several ways to self-insulate. The difference between them is due to the material used.
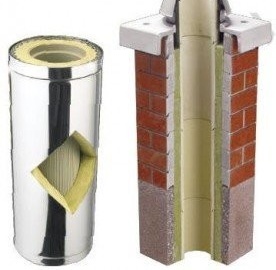
For the “Rich” option, you can use a ready-made chimney sandwich. Such a product is manufactured at enterprises and combines the optimal performance and properties of an insulated chimney. You just have to assemble it as a designer, based on the desired height of the structure.
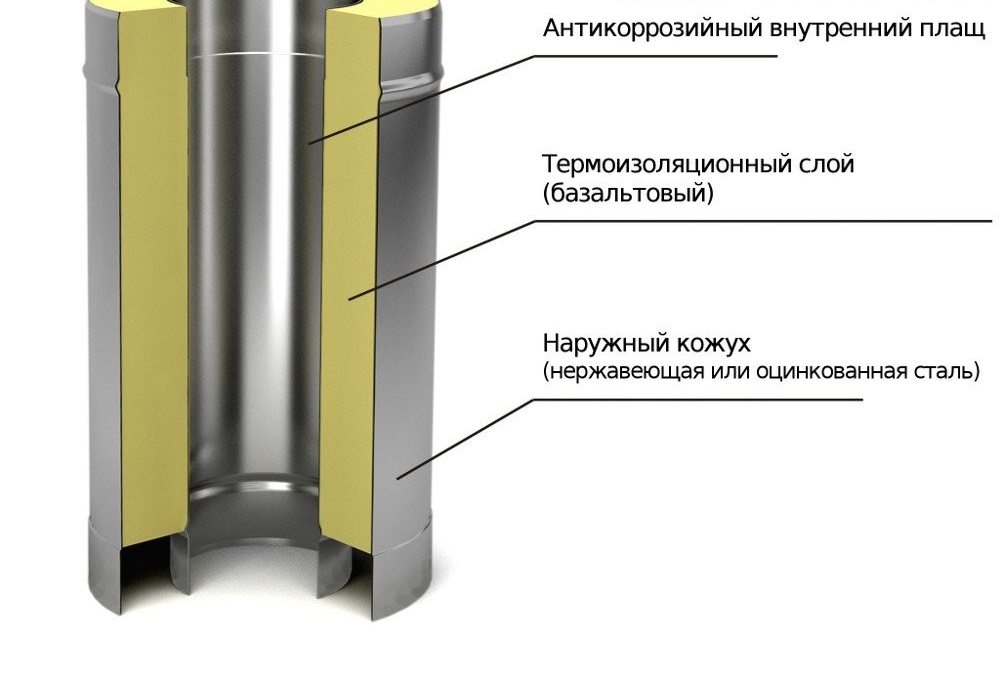
General section design
Learn more about self-installing a sandwich chimney in our material:https://aquatech.tomathouse.com/en/otoplenie/dimohod/montazh-sendvich-dymoxoda.html.
An example of installing a sandwich chimney for outdoor use and inside the house.
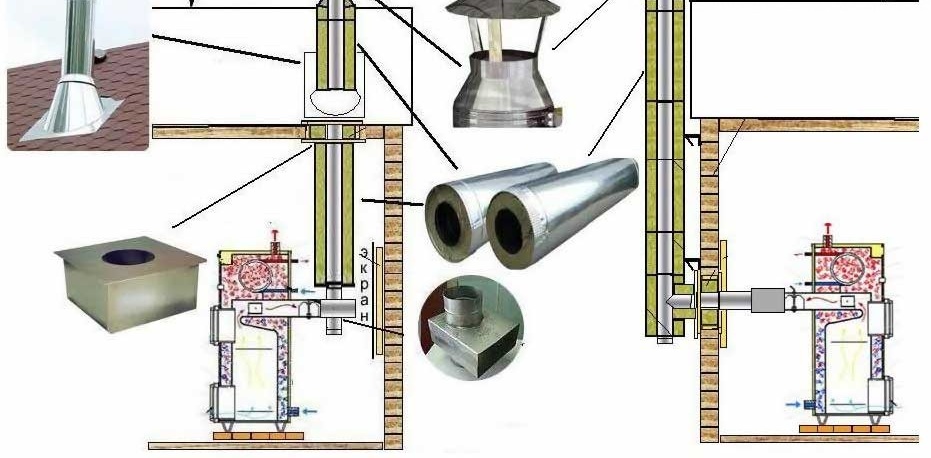
Construction Examples
The budget option of warming should be considered in stages. (Example for asbestos cement pipe).
Chimneys from asbestos-cement pipes are insulated in two ways. The first involves wrapping the pipe with a heater (mineral or basalt wool), fixing it with wire and putting a casing on top of the insulation. The second method is implemented by wrapping pipes with special cinder blocks and, if necessary, insulated with mineral wool, as in the first example. This method is more time consuming and costly.
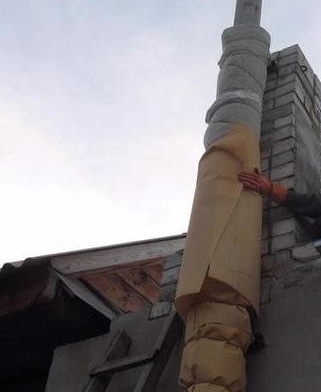
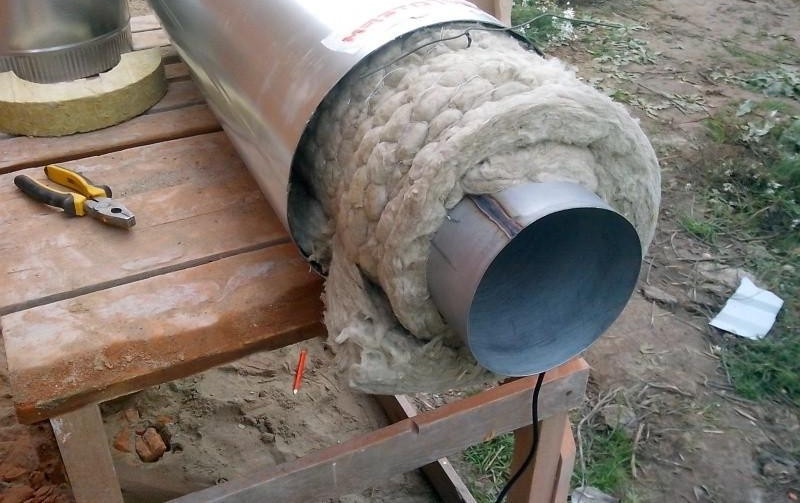
1. An asbestos-cement pipe is wrapped with a 100 mm thick insulator layer.
Start winding insulation material
It should be borne in mind that the insulation has the ability to contract when it is fixed. Its minimum thickness (in a compressed state) should be at least 60 mm.
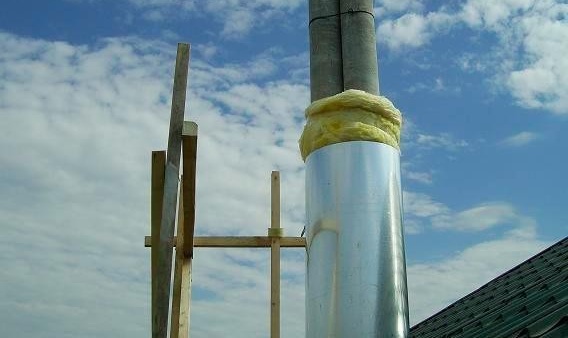
2. Fix the insulation wire over the entire length. In this case, it is necessary to adhere to the same thickness along the entire length.
Insulator fixing
Do not use a wire with an insulating layer (wire) to fix the heat insulator. When the chimney is heated, the rubber or vinyl insulation of the wire may not withstand high temperatures and will melt. Thus violating the physical properties of the insulation and its integrity.
It is better to use steel thin wire.
3. The next step involves wrapping the insulation with a galvanized sheet.
The sheet can be used up to 1 mm thick, it is more ductile and easy to install. Use a tape measure to determine the circumference, but add 20 mm to the actual size. This is necessary for the overlap, which will serve as a junction with rivets or screws.
Mounted casing section
It is not recommended to make a section of the clamp from galvanization less than 1 meter in height.
Whenever possible, treat the edges at the seam with rollers to give a perfect circle shape.
It is better to place the section on the pipe with a seam inward. The appearance of this design is more aesthetic.
4. The final stage.
The final step in insulating an asbestos chimney is to install a protective cone to prevent rainfall from entering the chimney pipe.
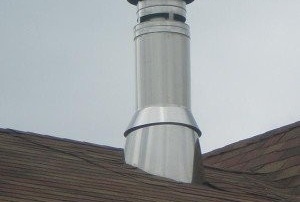
The completed view of the insulated chimney
This method of insulation is one of the most economical. It also provides for relatively simple installation.
No matter how simple the process of performing work at height may seem, one cannot expose oneself to thoughtless risk. Therefore, all work on the insulation of chimneys of any design must be performed together.
Another popular way to insulate an asbestos chimney is to use a chimney brick. The space between the brick and the pipe is filled with a heater (mineral wool).
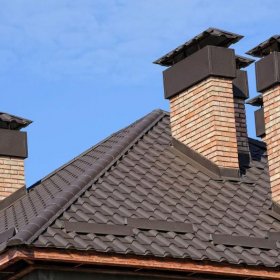
Use of chimney brick
This method is more expensive due to the cost of the brick. And also the brickwork is exposed to weathering over time.
Chimney made of steel pipe.
Insulation of the chimney from a steel pipe is performed in a similar way. It should be borne in mind that steel has a higher thermal conductivity compared with asbestos cement, so it is better to use basalt cotton wool. The clamp is also made of galvanized steel sheet.
Chimney insulation from a steel pipe
Brick chimney.
Insulating a brick chimney compared to other types is the most time-consuming process.
One of the effective ways is plastering the chimney. This method involves laying over the entire surface area of the cement, lime and slag mortar. The layer thickness should be at least 30 mm.
After applying the first coat, let it dry. This will help to identify cracks in the applied layer and eliminate them. The subsequent layer can be applied after laying a layer of mineral wool. Then another layer of plaster is applied. Subsequently, such a chimney can be whitened or painted. Alternatively, you can use a facing brick, but this greatly complicates the design.
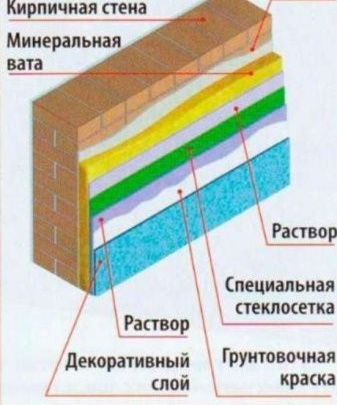
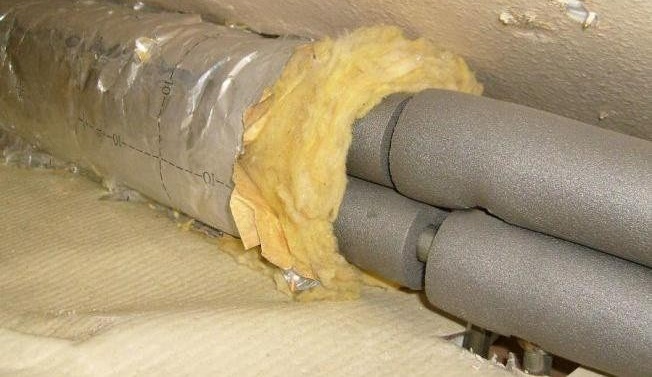
Fragment of a design of a heater
Necessary materials and tools
The materials required for insulation are listed in the examples considered.
Tool required to perform the insulation:
- bench tools (hammer, clamps, pliers, screwdrivers, etc.);
- measuring tool (tape measure, ruler, square, level, construction pencil, felt-tip pen);
- mounting knife for cutting insulation;
- a riveter and a set of rivets for connecting a galvanized casing (or self-tapping screws);
- electric drill and portable cable extension 220 V;
- drills with a diameter of 4 mm for making holes for rivets;
- for the application of cement mortar you will need a spatula, trowel and a container for mixing the mortar;
- you may need a construction syringe with a tube of bitumen mastic to close up small gaps. But also mastic may be needed for additional waterproofing of the plaster.
Bituminous mastic can be diluted with gasoline if it has hardened. In this case, the amount of gasoline is determined by eye. Add a little to the mastic and stir to a sticky consistency.
It should not be forgotten that any of the methods of chimney insulation is work at heights.
Evaluate the workplace taking into account all possible risks. Try to minimize them. Prepare the stairs in advance, check its condition, reliability and stability. If you have to move around the roof with slate flooring - go along the enclosed boards, the weight is better distributed over the area. The board should be placed across the slate waves. Check the integrity of the used cords for lifting materials and tools. If possible, fix yourself with a rope, wrapping it around the belt and securely fastening it to the supporting structure. (Under ideal conditions, this is the use of a mounting safety belt). Work in workwear.
Our next article provides more detailed instructions for the construction of a brick chimney: https://aquatech.tomathouse.com/en/otoplenie/dyimohod-iz-kirpicha-svoimi-rukami.html. Here you will learn how to make the right calculations, what preparatory work is required and much more.
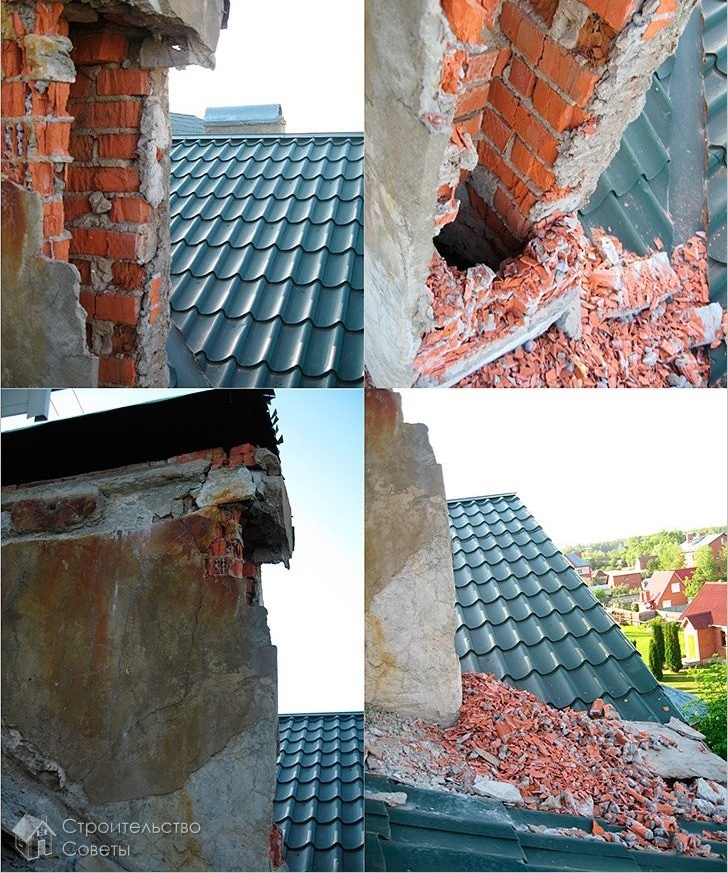
Errors leading to undesirable consequences
Sometimes, in order to save money, they pass the pipeline through the ceiling without insulation. Such actions are undesirable, insignificant savings can lead to tragic consequences.
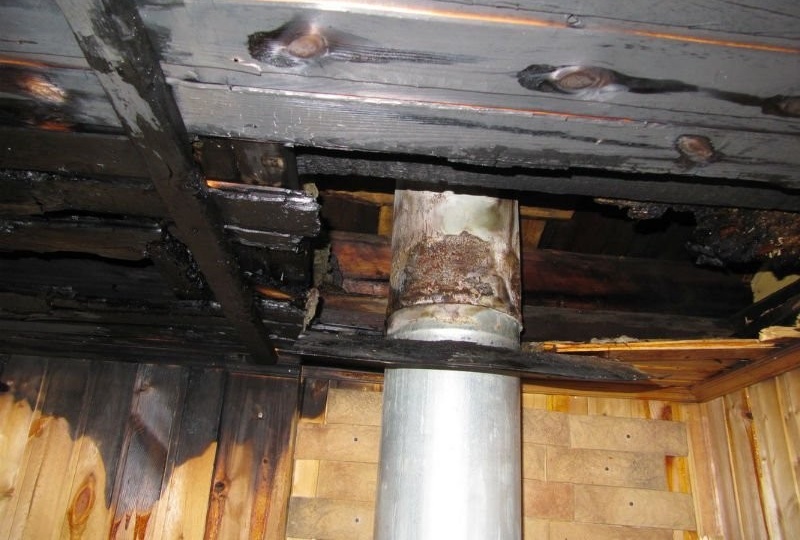
Risk of fire
To prevent this situation, the chimney should be insulated along its entire length.
An exception is the area in the immediate vicinity of the furnace or boiler. It is necessary to leave a section up to 500 mm long not isolated. This will prevent the heater from overheating, as it may lose its properties from critical overheating. Data on the critical temperature for a particular material are indicated by its manufacturer in the instruction manual.
As experience shows, thermal insulation of furnace equipment is becoming more and more popular. The cost of insulation or even the reconstruction of the smoke exhaust system more than pays for itself due to the economical use of heat.
You may also find the tips and instructions for cleaning chimneys useful in the following article:https://aquatech.tomathouse.com/en/otoplenie/dimohod/kak-prochistit-dymoxod.html.
A wide range of materials and construction solutions allows you to apply imagination and makes the matter more interesting.