How and how to close the gap between the wall and the bathroom: practical methods
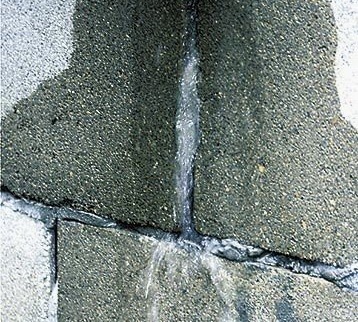
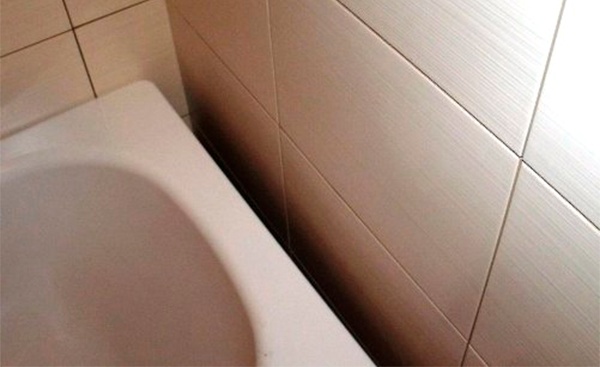
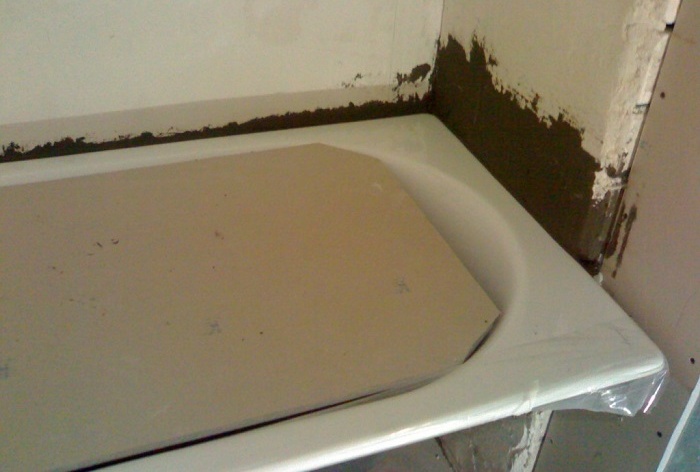
When installing a new bath, even with perfectly even walls, a problem arises that not only spoils the entire look of the interior, but can also lead to serious troubles over time in the form of mold, fungus and flooding of neighbors from below. How to properly and reliably close the gap between the bathroom and the wall, we will consider the causes and methods of solving this problem.
Why can there be a gap between the bathroom and the wall
There may be several reasons for the gap:
- with an angular installation, it turns out that the angle in the bathroom is not straight;
- when installed in a niche, the size of the bath was slightly smaller;
- the geometry of the wall, floor or side of the bath is broken;
- improper installation of the bath.
If the walls and the floor are even, then correcting the wrong position of the bathtub is easy by exposing the legs correctly adjustable, but a small gap will still remain.
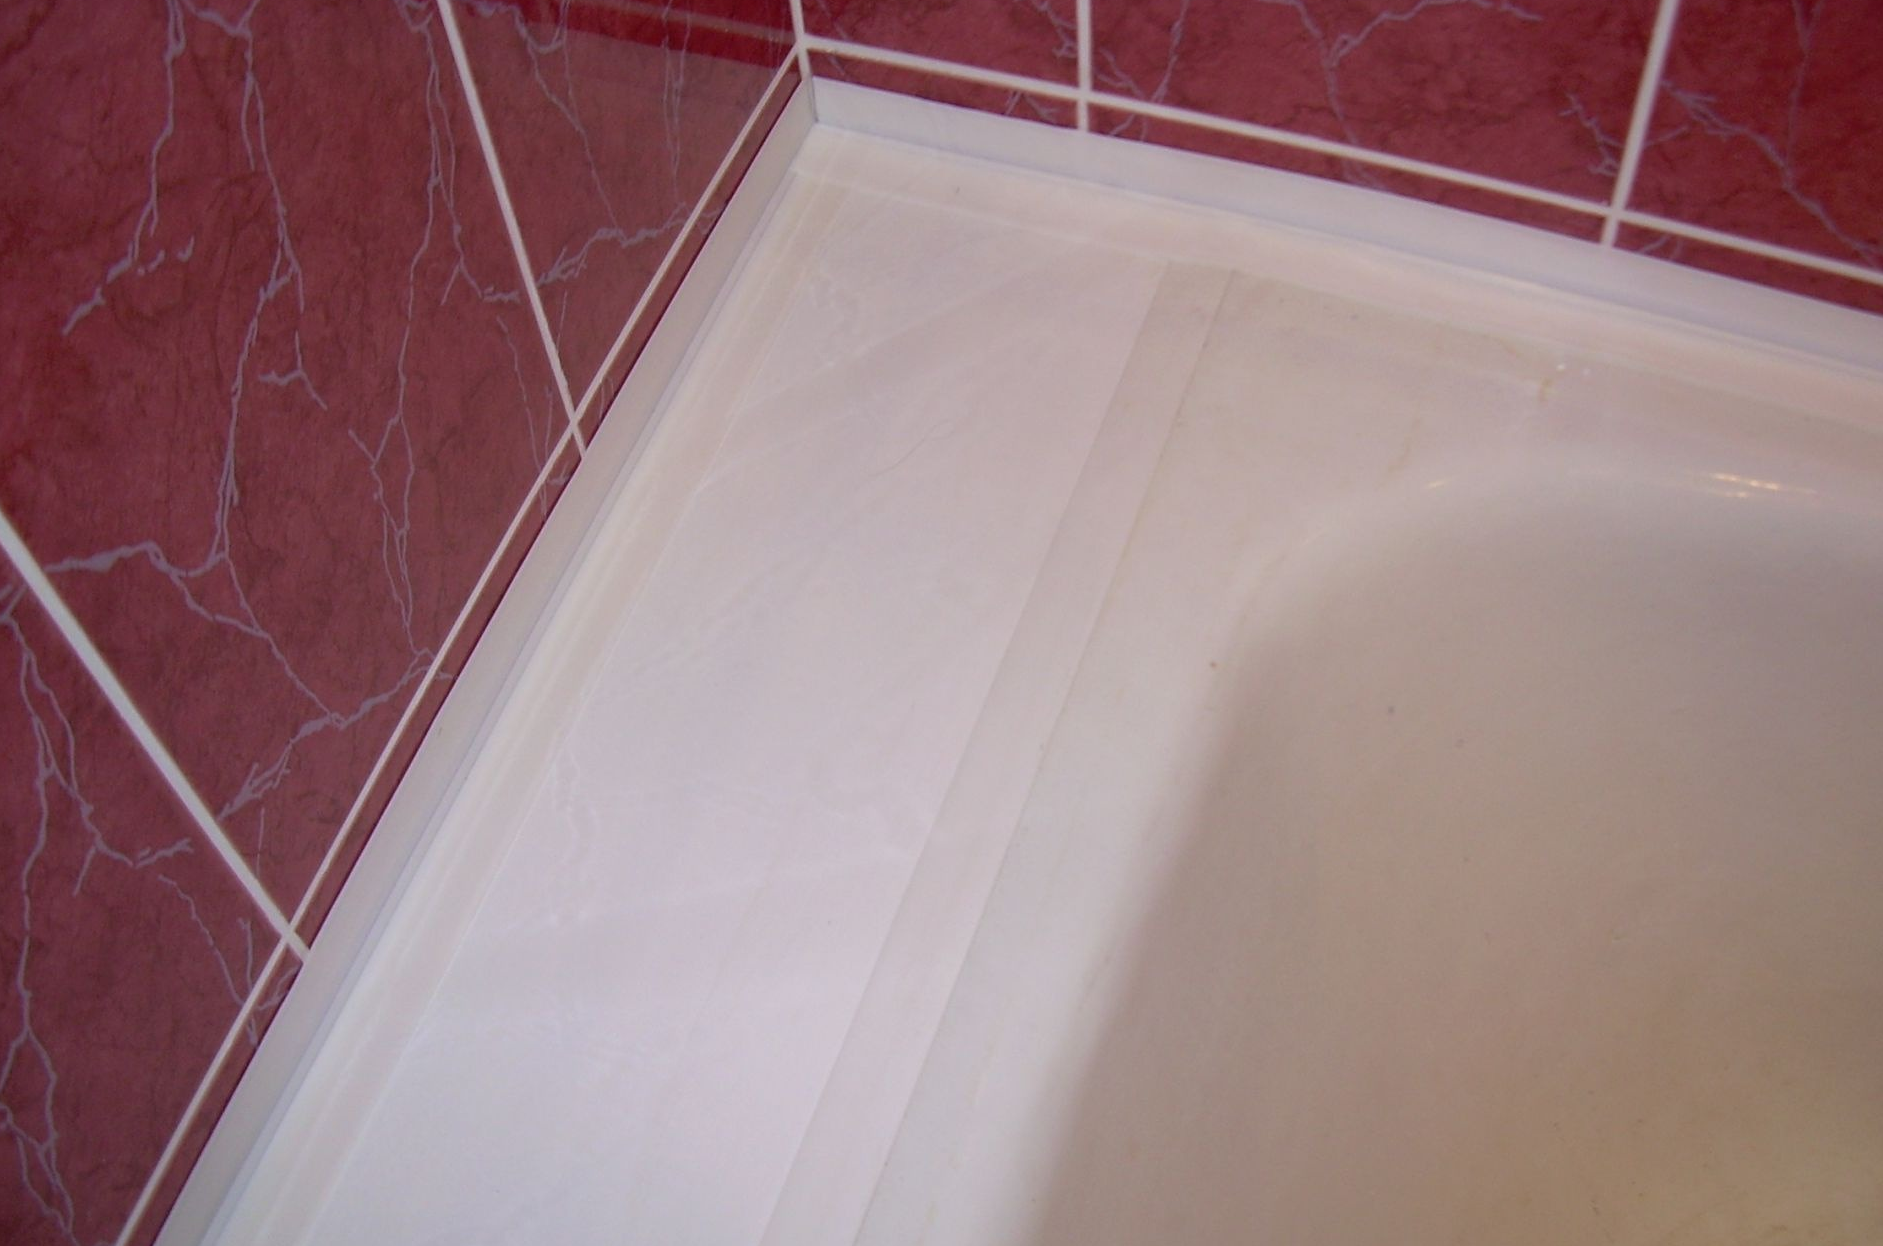
Smooth walls will greatly simplify the filling of the gap
How and what to fix the gap
There are several effective ways to seal the gap between the bathroom and the wall, the choice depends on the size of the gap and the reason for its occurrence. To buy the right material for the job, you should consider its sealing properties and moisture resistance, strength and durability. For example, a gap of more than 4 cm wide with one sealant cannot be closed.
Polyurethane foam
In this way, you can close the cracks up to 8 cm. The bathroom has high humidity, so for work you will need a finely porous one-component polyurethane foam, it is more moisture resistant. Before work, it is necessary to put on gloves and install the cylinder in the construction gun.
A fairly simple, but not the most aesthetic way of sealing
The procedure is as follows:
- Shake the foam bottle and apply an even strip on the joint edge along the entire length. Foam will begin to increase in volume. Spray on a tile or bath should be removed immediately before it dries, otherwise the cleaning process will become very complicated. To protect the tile around the seam, you can seal it with masking tape.
- Wait until the foam hardens completely for 8 hours, then cut off the excess with a sharp knife. Leaving a layer of foam open is not recommended. It is desirable to give the surface a neat appearance with the help of a decorative skirting board made of PVC or sanded with a sandpaper and painted.
Cement or tile adhesive
If the repair was carried out recently or still incomplete, then perhaps there is some cement or tile glue after laying the tiles. This method will help to wipe the gap up to 4 cm. For better adhesion of the solution to the surfaces of the wall and bath, it is advisable to prime the joint.
This method is suitable when roughing work is still in progress.
Stages of work:
- Knead the cement slurry slightly thicker than usual for tiles. Apply a mass to the joints with a spatula and smooth the seam.
- After the mixture has hardened, you can decorate the seam with a ceramic or plastic baseboard, or you can paint it in the color of the tile grout.
It should be noted that the cement border is devoid of elasticity and crumbles and cracks over time even at the slightest shift of the bath.
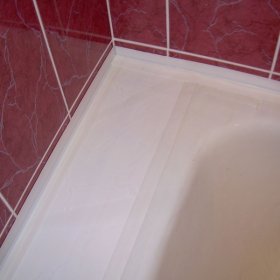
Silicone sealant
The silicone-based composition has elasticity and contains antiseptic additives to protect against mold and mildew, it can be white or colored. Like mounting foam, the tube with sealant is best inserted into the construction gun.
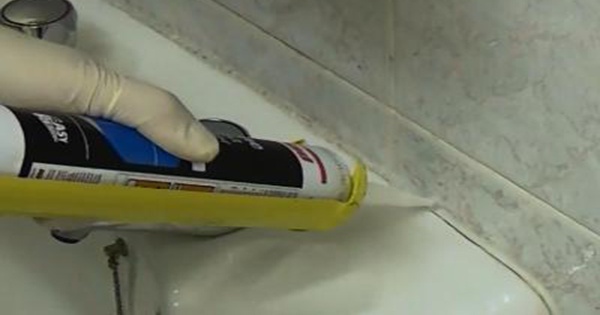
If the gap is not very wide, silicone sealant will do just fine
The sequence of actions for repairing small seams:
- Degrease the edges of the bathtub and the walls with an alcohol-containing compound. Cut the tip of the tube applicator to the size of the seam.
- Squeeze a uniform strip of sealant to the joint, smooth the seam with a finger dipped in soapy water. An invisible and hydrophobic seam will result.
Border tape
This flexible tape is available in different thicknesses, has an adhesive layer on the underside and a smooth waterproof coating with a front, even fold line in the middle. The tape should be selected wider than the joint so that there is a margin of width on both sides. Rules for fastening the tape:
- Level, wash and dry surfaces. Before gluing, coat the seam with sealant, tile adhesive.
- Remove the protective film and press the border tape with the adhesive layer to the joint so that half is on the wall, there is a fold line on the seam, and the other half lies on the bathtub. It is better to glue the pieces with overlap, grease the edges with sealant.
The tape makes the junction even and neat, creates an elastic and durable coating, but its service life is only a year or two, after which you need to change the tape and stick another.
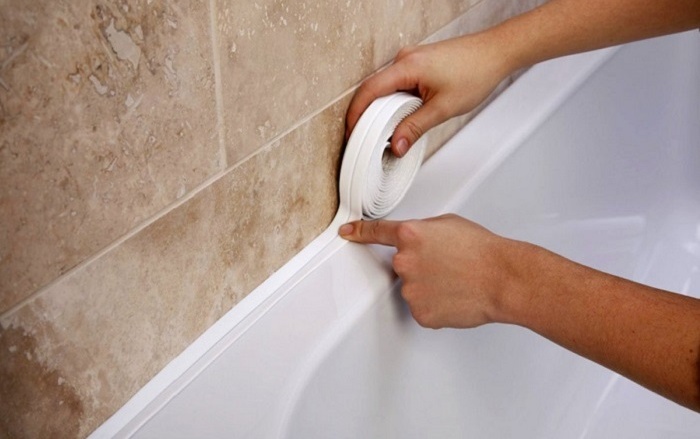
The border tape will be almost imperceptible and will not spoil the general appearance of the bath
Plastic baseboard
You can buy a ready-made plastic baseboard, which is equipped with a rubber layer and coated with glue from the bottom. It is better to choose a model without glue, since after dismantling the tiles will remain dirty and the adhesive strip does not have hydrophobicity. It is advisable to separately purchase a transparent waterproof quick-setting adhesive for plastic.
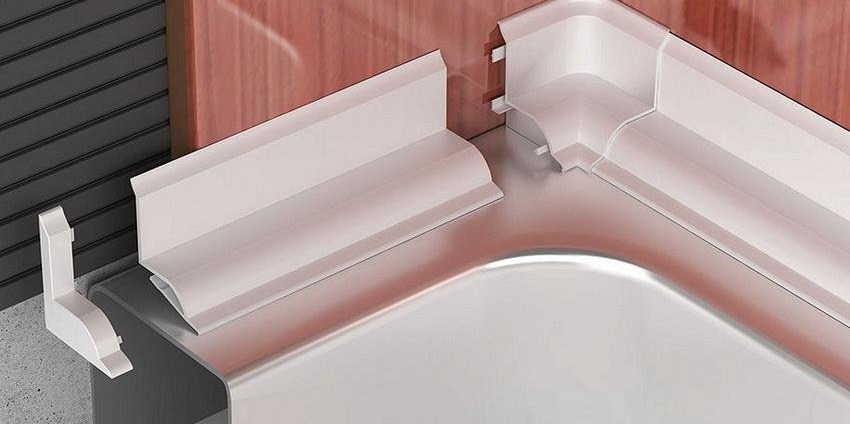
Another quite convenient and practical method
The skirted joint is covered with a plinth to give an aesthetic appearance to the cement joint or strip of foam. The procedure is as follows:
- Clean and wipe the mounting point with white spirit, glue the adjacent tile and side of the bathtub with masking tape. The length of the strap is 180 cm, so you need to cut strips to size, and in the corners make slices at 45º, and you can buy ready-made corners and end elements.
- Coat the strip with glue on the back and press it to the joint for 30 seconds. After hardening, remove the protective tape from the tile.
Ceramic tile or border
The ceramic border looks harmonious and looks like a continuation of the wall cladding. You can cut the strips remaining from the repair into strips or select in the hardware store the matching border elements, which are sold complete with corner and end elements.

The most time consuming, but reliable method
Here's how to do it right:
- This method works great in combination with cement mortar or tile glue, the tile is attached just to it. It is necessary to knead a thick solution of glue and first wipe the gap, level the surface and lay out the curb from pieces of tile.
- When the cement sets, wipe the joints with a waterproof grout or sealant. Wipe off excess with a damp sponge or cloth.
These materials can be successfully used in combination. If the distance from the wall to the bath is large, then the optimal solution would be to install a shelf of moisture-proof drywall, which will close the gap, and laying tiles on top. Another reliable combination of the above methods will be filling the gap with mounting foam, then grinding, applying a layer of sealant on a silicone base, and on top a decorative strip of border tape.