Do-it-yourself shower room for a wooden house
The development of modern technology allows you to arrange a modern shower room even in a wooden house. Wood is a whimsical material, so the main emphasis should be on high-quality waterproofing and, in conclusion, take care of aesthetics.
Content
Layout
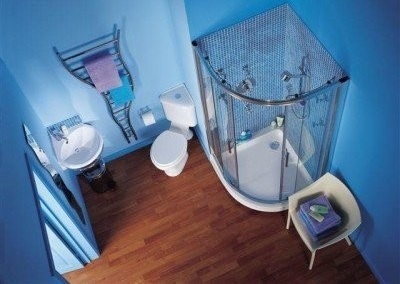
Planning the space of a shower room in a wooden house begins with marks on the places of installation of the cabin, washbasin, bidet and toilet bowl (if the bathroom is shared). If desired, a washing machine can be placed in the same room. Shower stall traditionally mounted in a corner or against a wall. Consider where the hood, elements of placement will be located. Run the sewer and water pipes.
When planning a shower room, the size of the room plays an important role. Do not install the toilet opposite the door, it does not look aesthetically pleasing. It is better if at the entrance your eyes fall on the mirror, creating the illusion of spaciousness and giving the room a more spectacular look. In a small shower room you should avoid a heap of elements - cosmetics, bathing and household supplies are best placed in hidden systems, and not put on a table.
Tips for planning a small shower room:
- The freer the floor, the larger the room appears. Therefore, when choosing plumbing, pay attention to hanging models of sinks.
- Instead of shelves, use niches; they visually increase the space.
- In order to save space in a niche, you can install a washing machine and hang a dryer or shelves above it.
When planning a large shower room, problems may arise no less than when arranging a limited space. If in a small room you need to carefully consider the use of each centimeter, then in a spacious room it is necessary to avoid the formation of empty zones.
If you do not know what to look for when choosing a shower, it is recommended that you read this article:https://aquatech.tomathouse.com/en/santehnika/vanna/kak-vybrat-dushevuyu-kabinu.html
How to arrange a large shower so that it does not look empty:
- Highlight a relaxation area with an armchair, a glass table.
- Place a large cupboard, chest of drawers or a few cabinets.
- Make a green zone with living plants.
Blueprints
-
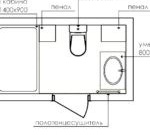
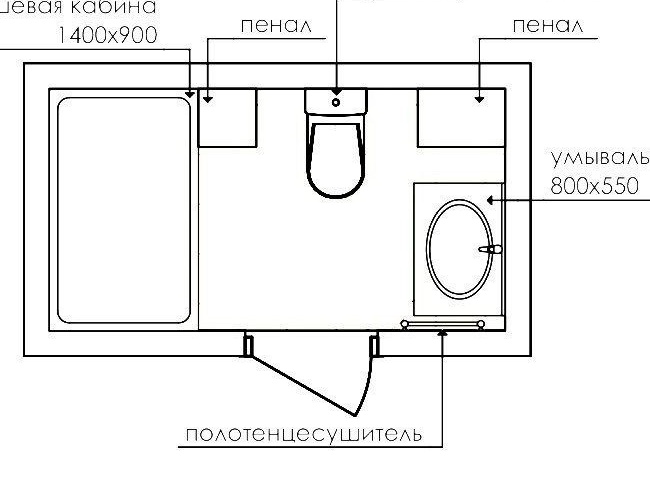
- Shower room with a large booth, toilet, closet-cases
-
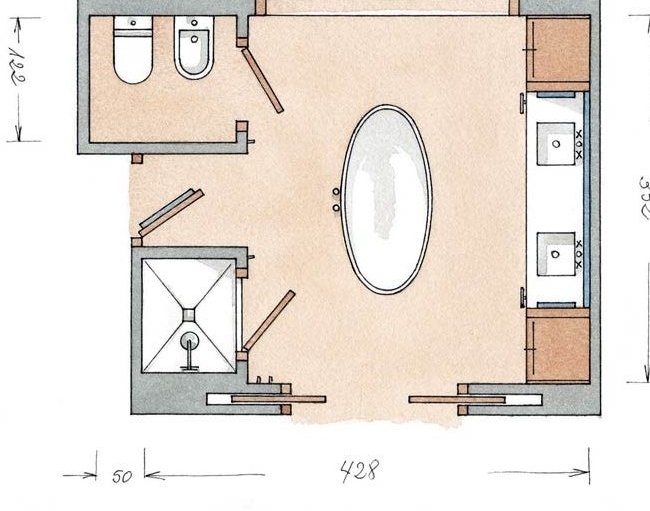
- Spacious shower with bathtub, with a long pencil case, sinks and built-in side tables
Material selection
Showers come with and without a tray. The first option is more practical, the second is easier to install. A shower cabin with a sloping floor instead of a tray is suitable for small rooms.The shower tray is made of bricks or poured out of concrete, then tiled. One of the best options for making a movable wall is glass. You can also make this part of the booth from other materials. Instead of a movable wall, you can use a plastic curtain.
Tips for choosing a material for the cabin:
- Toughened glass is the most successful option, as it holds shock load perfectly.
- Regular glass - you can use glass sheets with a thickness of 6 mm. It is recommended to paste the outer side with a self-adhesive transparent film. This will prevent the glass from spilling into small pieces in case of structural damage.
- Acrylic and polycarbonate - door elements from this material must be framed in an aluminum profile.
Necessary tools
After the preparatory period, you need to determine the configuration of the booth. Then prepare all the necessary materials and tools.
What tools will be needed to make a booth:
- Measuring tools and building level.
- Trowel, putty knife.
- Several containers for mixing grout, mortar and glue.
- Rotary hammer and drill.
- A screwdriver, a hammer and a set of screwdrivers.
- Grinder, hand saw or jigsaw.
- Spanners.
Step-by-step instructions for equipping a shower room with your own hands
Wooden structures swell, warp, lose their practical properties under the influence of moisture. High humidity can adversely affect the condition of buildings made of logs or timber. To avoid this, it is necessary to waterproof all surfaces of the shower. Due to the abundance of modern waterproofing materials, it is possible to make a functional and comfortable room in any wooden house.
Stages of arranging a shower in a wooden house:
- Establish a reliable ventilation system to remove water vapor.
- Mount the water outlet.
- Waterproof the room.
- Install a shower stall.
- Perform finishing work.
Ventilation system
It is generally accepted that in houses made of timber or logs, air circulation is provided naturally, through micropores in a tree, and they do not need a complete ventilation system. It should be borne in mind that wood floors not only breathe, but also absorb and give moisture well. This property of virtue can quickly turn into a disadvantage. Especially when it comes to rooms with excessive humidity: kitchens, bathrooms, showers, bathrooms. Without additional outflow of air, mold and fungus will appear on the wood, which will lead to damage to the floors.
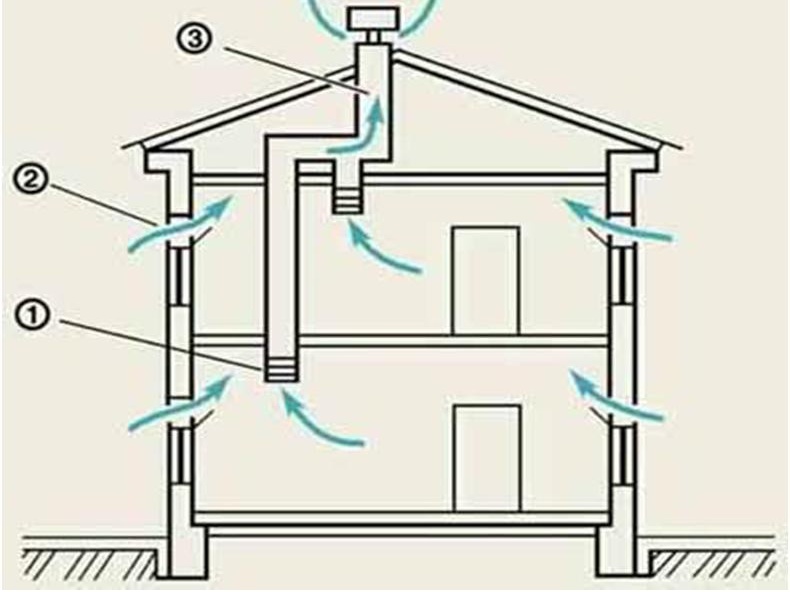
passive air exchange in a private house
For a small wooden house, a passive ventilation system is enough. With this method, air exchange occurs naturally without the use of supply and exhaust fans. Air enters the house through micro-slots in building structures or through air inlets installed in living rooms. The outflow of air is carried out through the exhaust holes in the upper part of the wall in the kitchen, shower and toilet.
It is better to start laying the ventilation system at the stage of building a house.
Tips for ventilation:
- The total exhaust pipe must extend at least 50 cm above the roof.
- The outer part of the air duct must be insulated to prevent condensation.
- All equipment must be made of non-combustible materials.
- The ventilation shafts in the shower room must be equipped with shutters that block the flow of oxygen in the event of a fire.
Air in passive ventilation systems circulates due to the difference in temperature and pressure drops inside and outside the building. Air flows into the house, heat up, rise up and out through the exhaust openings. This method of air exchange is effective in the cold season. In the summer, the circulation of air flows largely depends on the intensity of the wind and pressure drops.In the off-season, air exchange almost stops. To increase the efficiency of air exchange in the shower room, it is recommended to install an exhaust fan in the exhaust shaft. If the wooden house does not have a ventilation system, you need to equip the shower with an exhaust fan.
Installing a wall fan in the shower:
- Mark on the wall the insertion point of the device.
- Cut a hole with a drill.
- Insert the clutch and cut off the protruding parts.
- Wire up the wiring.
- Drill holes for fasteners.
- Install the body and silencer.
- Close the housing with a cover.
- From the street side, cover the opening with the ventilation grill.
Sewerage
A wooden or timber building shrinks over time. This feature should be considered when choosing sewer pipes. Therefore, it is better to use drainage systems made of materials resistant to mechanical damage: polyethylene, high-quality plastic or metal-plastic.
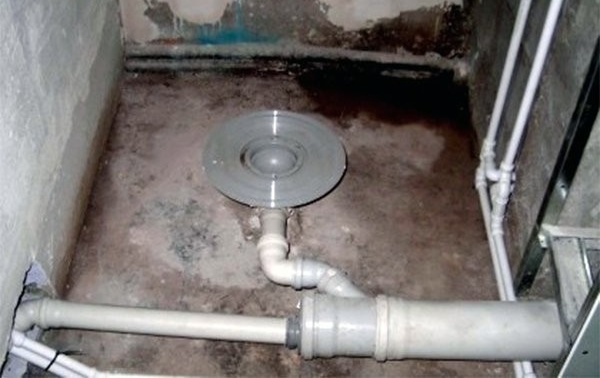
Gangway installation
Sewerage device principles:
- For shower and washbasin, you need to take pipes with a diameter of 50 mm. A pipe with a diameter of 100 mm is supplied to the toilet (if any).
- All internal drain pipes are discharged into a common riser.
- Pipes are located at a slight angle down.
- For fasteners, it is better to use movable joints to prevent damage to the sewage system in the event of floor shrinkage.
| Plumbing Equipment | Minimum pipe size in mm |
| Shower or bath | 50 |
| Toilet bowl | 100 |
| Washbasin, bidet | 32 |
| When connecting multiple appliances to the same sewer pipe | 100 |
The sewer system will last more than a dozen years, if you use high-quality materials.
Floor preparation
The floor area, which is located under the shower, requires additional reinforcement. For this, additional supports are installed under the final floor even at the construction stage in the cabin location. The wooden floor is necessarily treated with water-repellent and antibacterial compounds. Further, the floor is isolated with polymer mastic or a self-adhesive rubberized membrane. After this, a screed of cement-polymer mastic is performed.
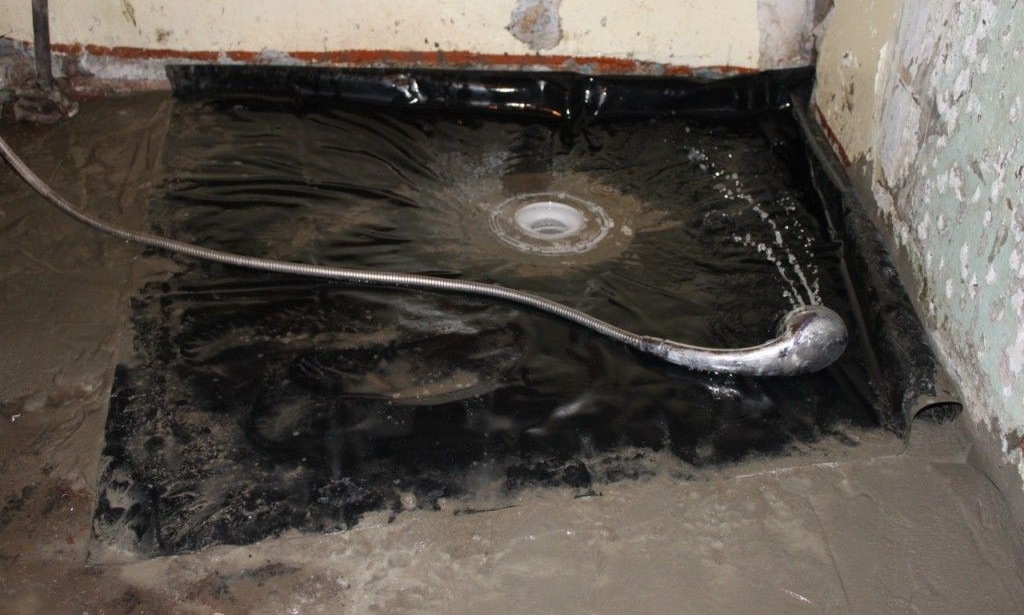
Rubberized membrane laying
Floor preparation procedure:
- The wood flooring is cleaned of dirt, oil stains and paint.
- The surface is treated with compounds that protect against water absorption and mold.
- A rubberized membrane or a layer of polymer coating is laid on the floor.
- Drain holes are closed by drains.
- 2 layers of cement-polymer mortar are poured on top. The thickness of each layer is 2-3 mm. The second layer is applied 2-3 hours after the first.
- After 6-10 hours, the floor can be decorated with finishing materials, for example, tiles.
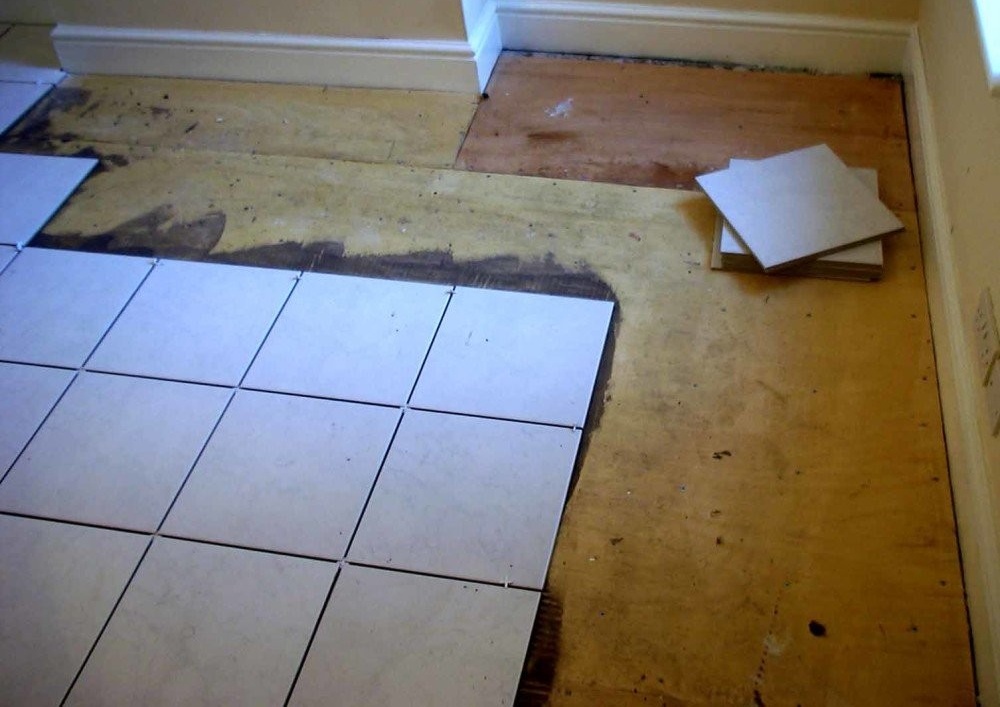
Tiling
When screeding the floor at the location of the shower cabin, you need to make a slight bias towards the drain hole.
Wall device
Almost all the walls in a house made of wood are load-bearing, so they need reliable waterproofing, which is carried out around the perimeter of the room. Wood is treated with water repellents. If it is decided to leave the walls wooden, then the treatment ends. Before facing with finishing materials, vertical surfaces are closed with waterproof gypsum board.
The following material will help to arrange a drain in the bathroom floor:https://aquatech.tomathouse.com/en/santehnika/vanna/sliv-v-polu-dlya-dusha.html
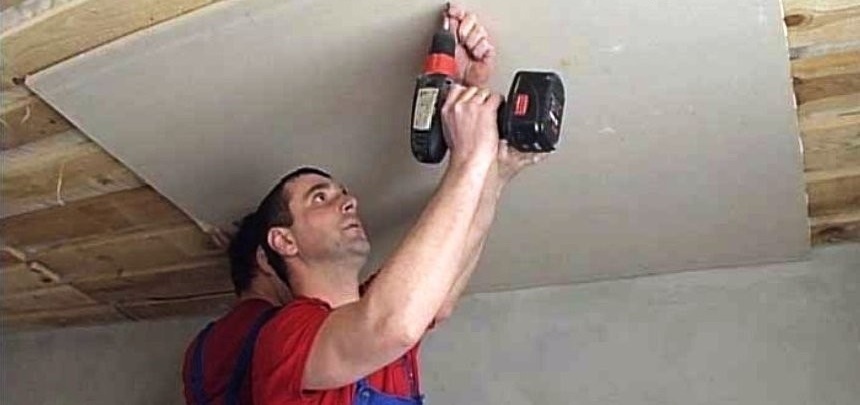
Wall and ceiling cladding with moisture resistant drywall
Production and connection of a shower cabin
The easiest way to make a corner shower is square or rectangular. The minimum size of the structure is -1x1.3x2.2 m, more comfortable - 1.9x1.4x2.5 m.
Cabin manufacturing procedure:
- Do the markup.
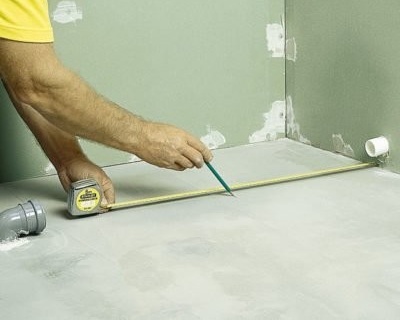
Pallet marking
- We glue a water-repellent film on pre-treated walls with protective compounds.
- We close the walls with water-repellent drywall.
- Tile the walls.

Tiling and laying screeds
- Wipe the tile joints with a silicone-based compound.
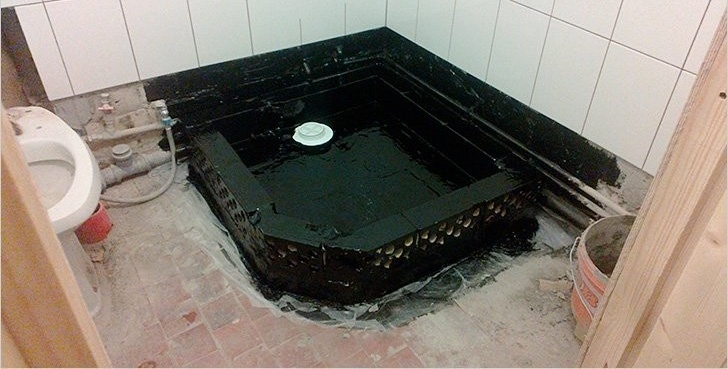
- We lay out of brick or pour out the walls of the pallet from concrete. It is better to use not a silicate, but a ceramic brick resistant to water.
- Coat the pallet with waterproofing mastic.
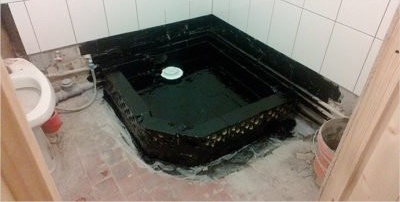
Coating a pallet with waterproofing mastic
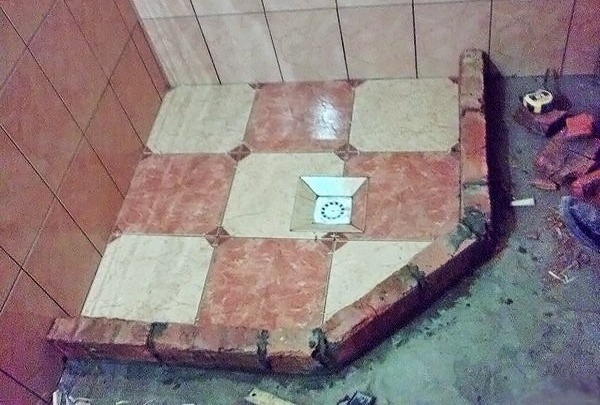
- We cover the walls and floor of the pallet with abrasive coated tiles that prevent slipping.
- At the end of the sewer pipe we install a gangway.
- We fix the mixer to the failed water pipe, install it on the top of the shower.
- We fix shelves for bath accessories on the wall.
- On the sides we install racks for transparent walls and doors. We attach structural elements to them. As an option, the exterior walls can be replaced with a plastic curtain.
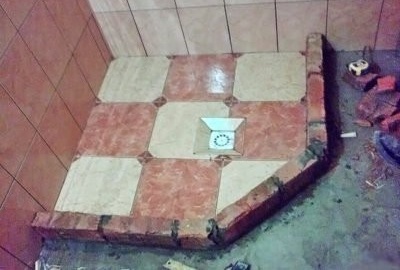
Tiling the pallet

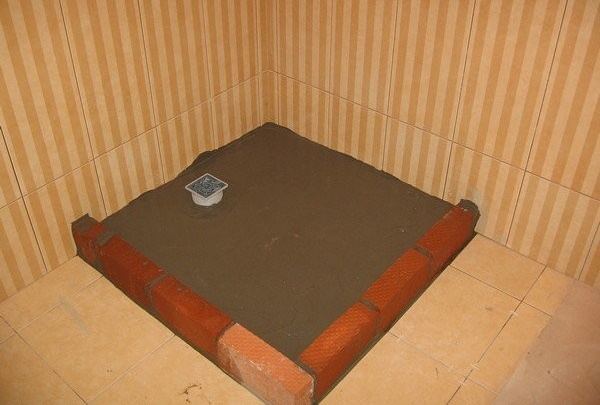
When installing the drain ladder, do not forget about the slope, taking into account which do the screed. The upper level of the ladder should be 2-3 mm below the floor level.
Design and Design Options
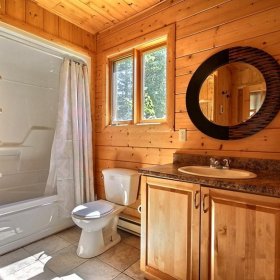
There are a huge number of ways to design a shower room. Design and decoration are selected depending on the size of the room, the location of windows and doors, cabin configuration, etc.
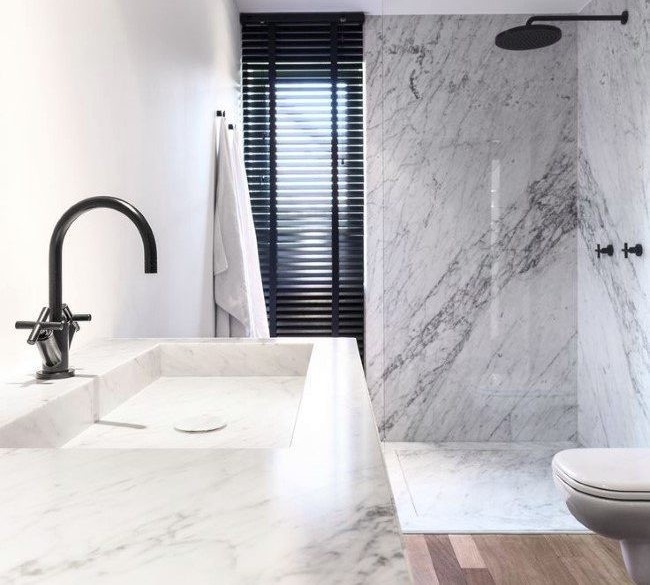
-
- Natural marble - luxurious and beautiful pleasure
-
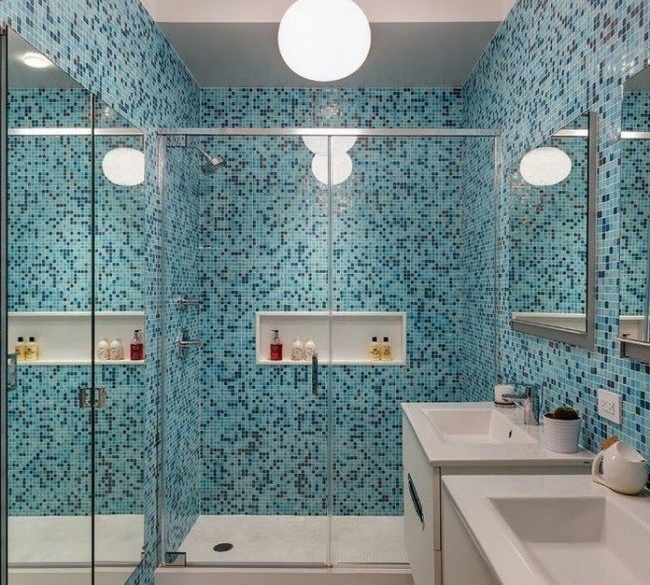
- Mosaic tiles look beautiful and protect against moisture
-

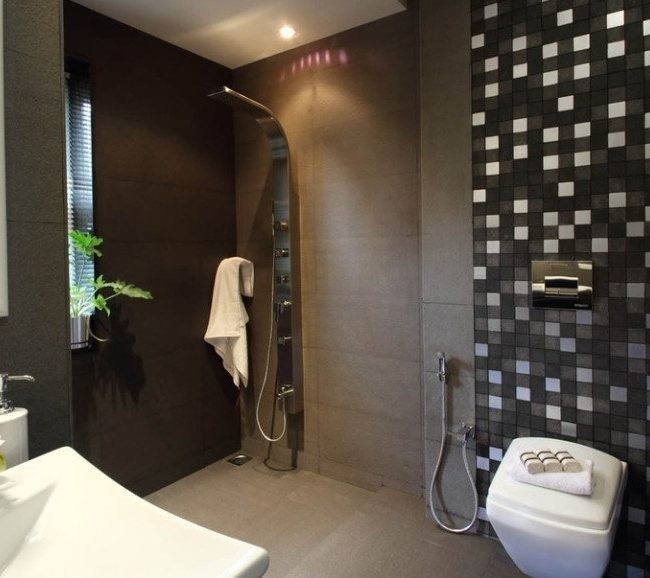
- Shower finish with two types of tiles: ceramic and mosaic
-
- Practical and durable ceramic tiles

-
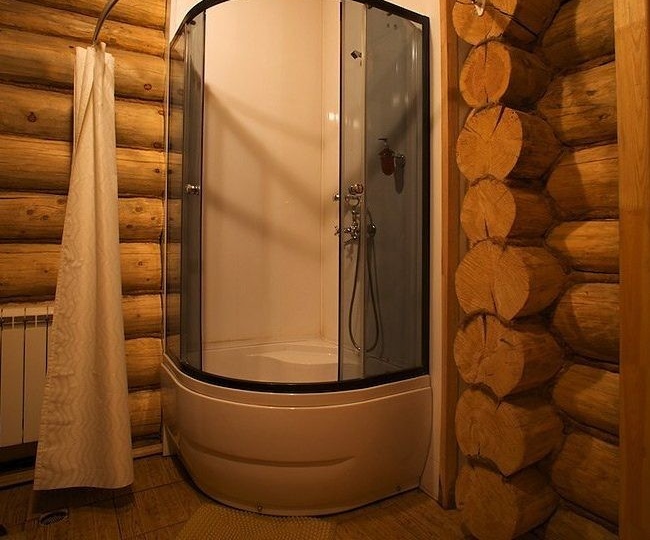
- The shower without decoration also harmoniously fits into the interior of the shower
Decoration Materials:
- Ceramic tile is a durable, reliable and moisture resistant material with a wide range of color palettes.
- Mosaic tiles - used to create images on walls, floors, ceilings. The variety of colors, shapes and sizes allows you to realize any artistic ideas.
- Marble is a durable and beautiful material. Natural stone will add sophistication to any interior. The disadvantages of marble include its high cost and processing complexity.
- Plastic PVC panels are one of the most lightweight and economical materials. Panels are usually lined with walls and ceilings. Other materials are used to decorate the floor.
After installation, in order to avoid loss of attractive appearance, the shower cabin needs proper care. Details:https://aquatech.tomathouse.com/en/santehnika/vanna/kak-uxazhivat-za-dushevoj-kabinoj.html
Video: bathroom in a wooden house
Despite the fact that the tree is afraid of prolonged contact with water, it is possible to arrange a shower in a wooden house. Moreover, there are many materials on sale that provide reliable protection to wooden floors.