Do-it-yourself replacement of electrical wiring in a panel house
In the middle of the last century, the housing problem was solved with the help of new technology for the construction of multi-apartment buildings from prefabricated reinforced concrete panels. At that time, it was a kind of breakthrough in construction, designed to provide citizens with affordable social housing. And although these houses were designed for 50 years of operation, most of them are still standing. Repair in such a house has characteristic features, this also applies to electrical wiring.
Content
The need to replace wiring in panel houses
At one time, the Khrushchevs were considered progressive housing. After a long construction of apartment buildings of the Stalin era, the speed of their construction seemed simply fantastic. The level of provision of public amenities has become much higher. The projects without fail laid the supply of apartments with cold water, sewage and central heating. Wood stoves were replaced by gas stoves and gas stoves. No matter how skeptical they spoke today about that era, it was in those years that most people, having moved from communal apartments, received separate apartments.
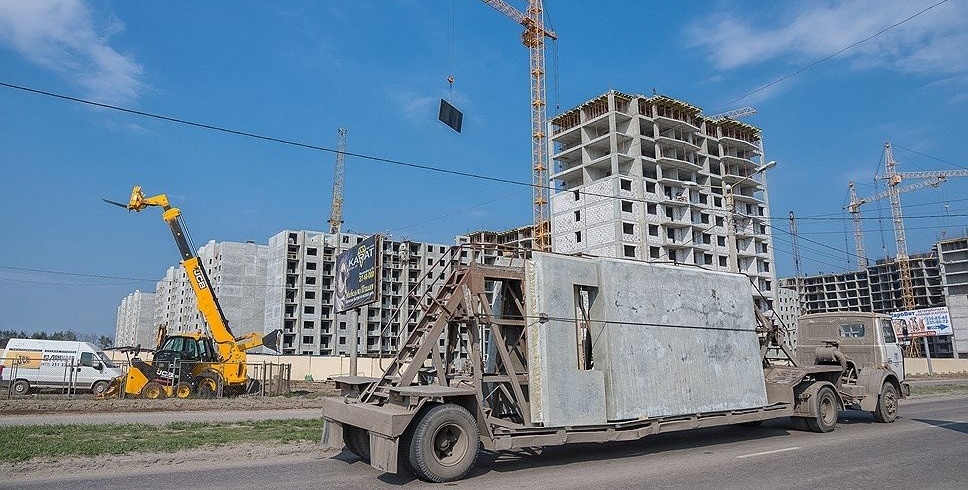
The prefabricated house is assembled at the construction site from ready-made blocks
But times have changed. And today, other demands are made on housing, often incompatible with buildings of those years. More powerful household appliances appeared in the apartments, and this was the main reason for the revision of the electrification standards. The use of aluminum wires (namely, that was all the wiring) is prohibited according to modern standards, this is associated with an increased level of danger.
According to the statistics of the Ministry of Emergencies, in residential buildings equipped with aluminum wiring, fires are 55 times more likely to occur due to short circuits in electrical networks.
Wires made of aluminum do not withstand long-term loads. The properties of this material are such that the service life of the wiring is limited to 25 years. From contact with air, aluminum gradually oxidizes, the conductivity of the electric current decreases. As a result, the resistance increases, and the wires begin to heat up (and sometimes melt). This leads at best to damage to the electrical circuit, at worst - to short circuits.
In some cases, you can do just replacing and moving the switches. You will learn how to do this in our material:https://aquatech.tomathouse.com/en/ehlektrosnabzhenie/zamena-perenos-ili-remont-vyklyuchatelya.html.
Features of electrical wiring in a panel house
In addition to the fact that all the wiring in the panel house is made of aluminum cables, a big inconvenience is its location in the apartment. Prefabricated houses consist of reinforced concrete blocks and floors, which almost all are load-bearing structural elements. Strobing them is strictly forbidden, this can lead to a weakening of strength and lead to geometric displacements of the entire house. The bulk of the partitions inside the premises are also load-bearing, with the exception of some service rooms - such as partitions of deaf pantries and bathrooms. It is easy to determine the supporting partition - it is made in the form of a solid cast block of concrete reinforced with iron reinforcement (non-bearing partitions are made of brick or other building blocks and are not reinforced). Often such walls were not even plastered, but simply pasted with wallpaper.
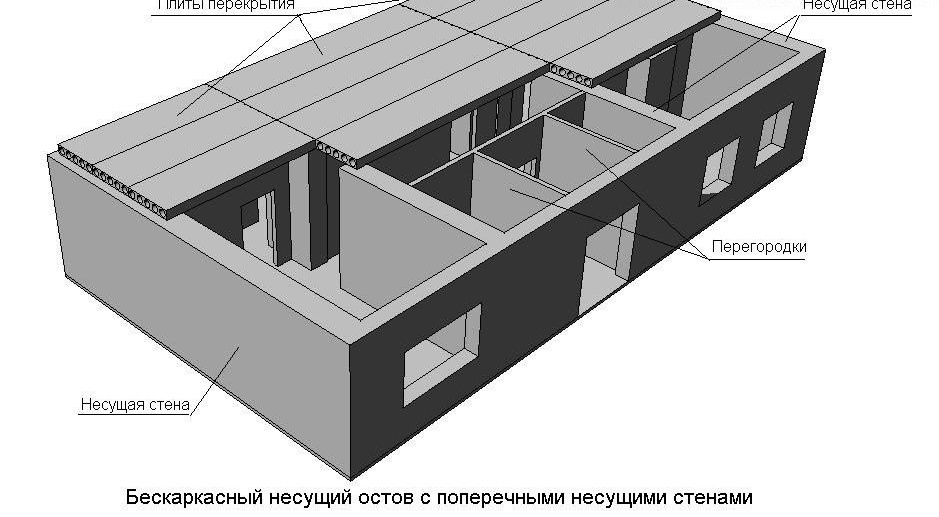
In a panel house, almost all walls are load-bearing
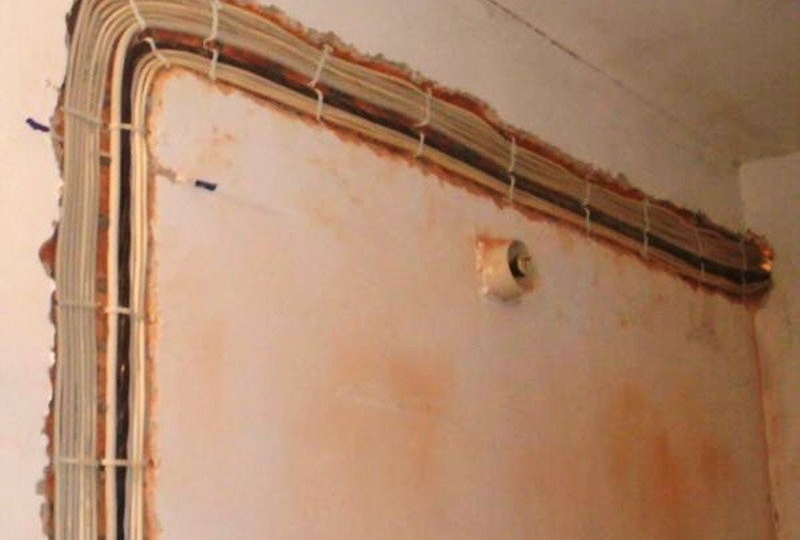
Inside the reinforced concrete panels there are cavities in which all cables are located. But it’s one thing to lay power lines at the construction stage, when the cavities are accessible and open, and it’s quite another to try to run the cables in the finished house, with a finished finish. For example, often conclusions for lighting fixtures were started from the upper apartment, before the wooden floor was laid there. It is understood that such wiring cannot be restored in the event of damage. To do this, you would have to raise the floor boards from the neighbors from above or in the attic.
Where is the wiring in the panel house
There were many typical designs of panel houses. Each of them had its own design solutions for cabling. Channels for laying power lines, holes for installing sockets and switches were laid at the stage of casting a reinforced concrete block. On the construction site, overlaps with ready-made strokes fell. Electricians made wires in them, then everything was plastered, putty and glued with wallpaper.
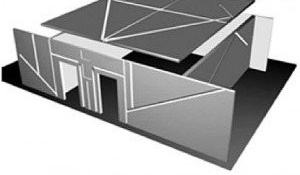
Each of the options for the location of the grooves in the panel house had its own design solutions for cabling
The main mounting load was borne by the floor shafts; only switches and sockets were led out onto the walls. If under the wallpaper you can find such channels - this is a big luck. Another question is whether they will meet the requirements of the posting update project. If you need to install additional sockets, but you can’t ditch the wall, you have to solve the problem of placing additional electrical points in other ways.
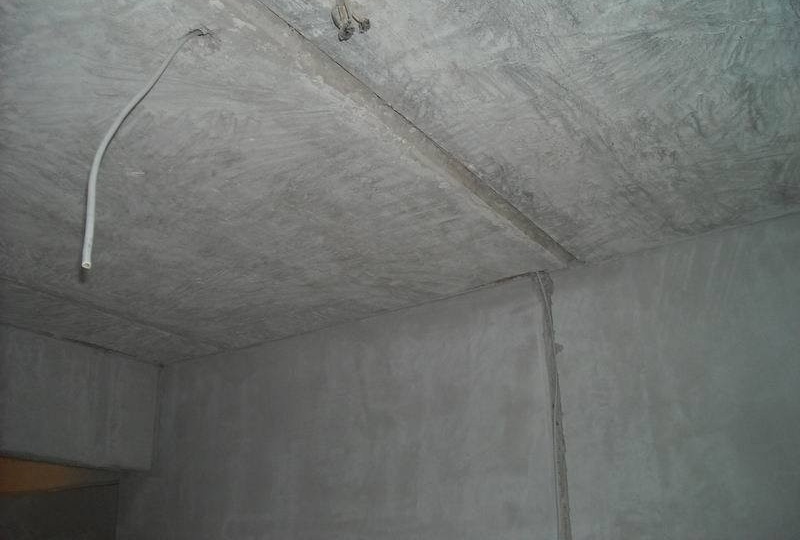
It is also useful to know that seams between floor slabs were often used to lay wires for lighting lamps.
It is worth making maximum use of the factory channels for wiring in panels.
Wiring replacement materials and tools
To carry out installation work to replace the wiring, you need a standard set of electrician tools:
- electrical screwdrivers;
- pliers with insulated handles;
- knife for stripping insulation, side cutters;
- puncher with a set of drills and crowns for drilling holes, mortising nozzles;
- shtroborez;
- voltage indicator;
- soldering iron, soldering accessories;
- roulette;
- bucket, spatulas.
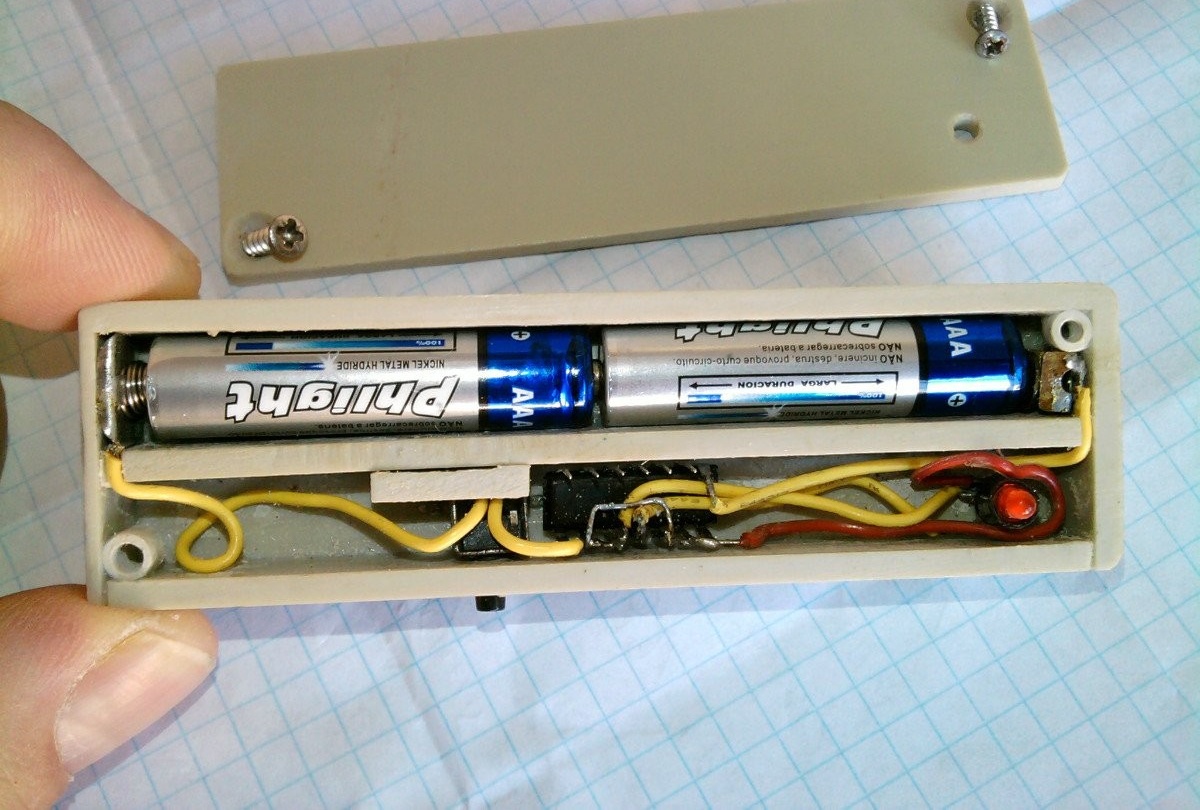
A good help in the search can be hidden wiring indicator. Even the most inexpensive detector will significantly reduce the amount of plaster knocking down during the dismantling of old wiring.
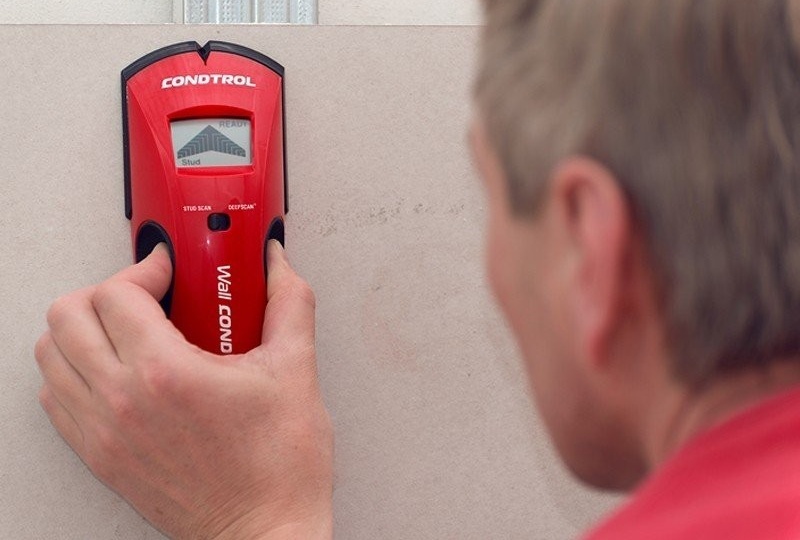
Hidden wiring indicator can be a good helper
In addition, before starting work, it is necessary to prepare in accordance with the project all the necessary consumables. Here is a sample list of them:
- copper cables (two- or three-core two types - for lighting and for sockets);
- socket boxes, electrical boxes;
- junction boxes;
- switches and sockets;
- terminal blocks, insulating tape;
- corrugation or cable channels;
- electrotechnical quick-setting alabaster;
- gypsum finishing putty.
Types of wiring in panel houses
Replacement of wiring is best timed to overhaul the apartment. During redevelopment, replacement of flooring or installation of a false ceiling, additional opportunities arise for hiding the wiring inside the resulting cavities. If you plan to finish the walls with panels with insulation or gypsum board, the task is greatly simplified.
Installation under the plaster
One of the weaknesses of prefabricated houses is the low thermal insulation of the walls. Often, residents of apartments carry out additional insulation, covering the walls with plaster or lining them with drywall with insulation. This is a very good moment in order to replace the old wiring with a new one. In this case, you don’t even need to look for the old wiring, you can just “plug it” by disconnecting it from the power source. If the plaster is “wet”, that is, from the mortar, then new cables are bred before plastering begins. They are placed in a corrugated insulating sleeve and fastened to the concrete wall with dowels, nails and clamps.
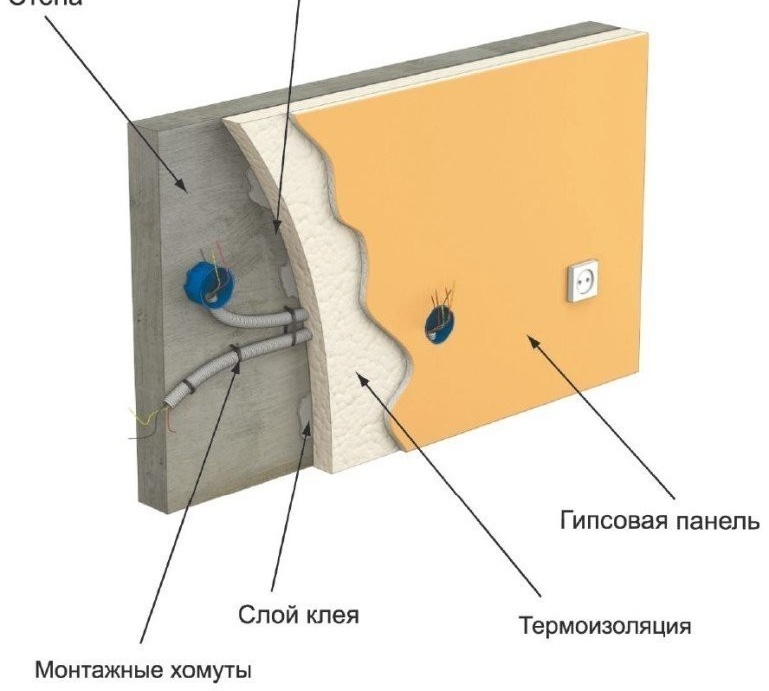
Installation of wiring can be carried out inside the wall insulation (dry plaster)
Floor and ceiling mounting
Replacing the wiring is very appropriate during the repair of floors in the apartment or the installation of a suspended (suspended) ceiling.
If a screed is poured onto the floor, the cables are stretched immediately before the beacons are installed. Usually double insulated cables are used in corrugation. This is done to provide reliable protection against mechanical damage and moisture during the pouring of concrete screed.
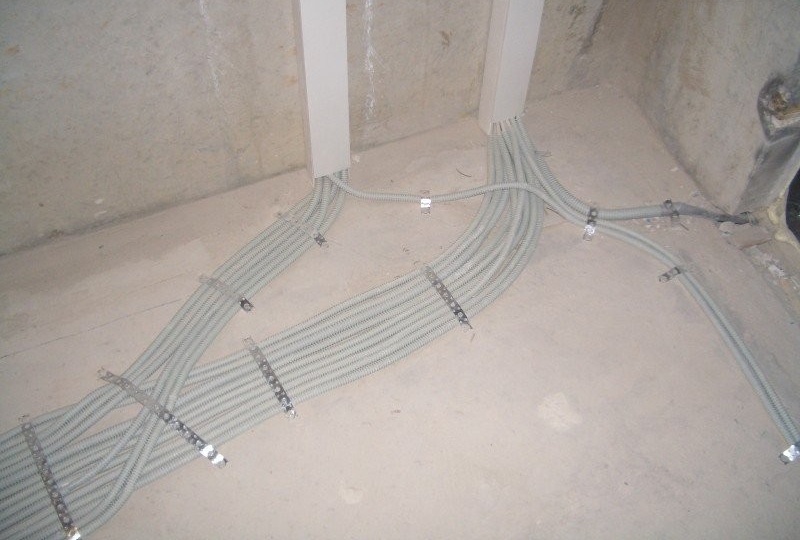
Securely fasten wires before pouring concrete screed.
It is not recommended to make wire connections under the screed, the entire route should be from a single solid conductor. Wiring is also possible under the laminate, but in this case it is necessary to use a thick (from 5 mm) substrate. Lines are laid at the joints between the sheets of the substrate.
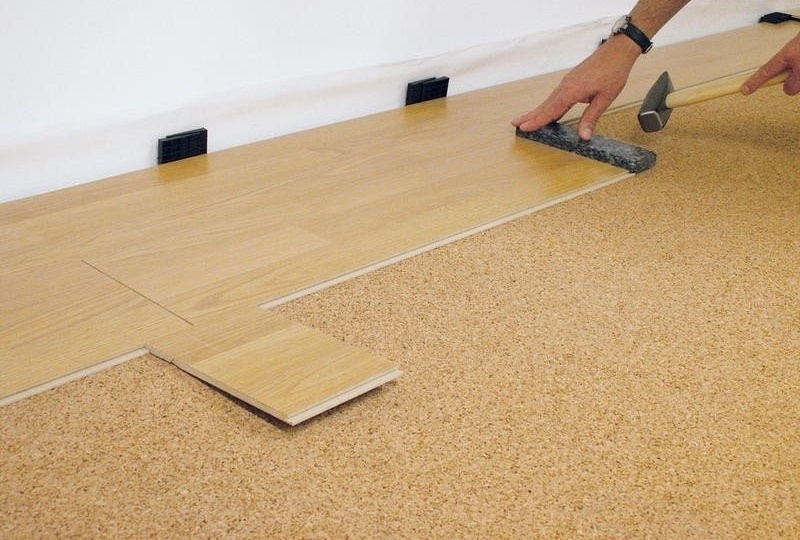
Cables can be held under the laminate - between the sheets of the substrate
The same applies for parquet and flooring of wooden floors on the logs.
If ceramic tiles are laid on the floor, you can extend the cables underneath. Usually, before laying the tiles on bare concrete, a leveling screed is poured, and wires are installed in it. The tiler will require accuracy in work, so that when applying glue to the screed, the wiring will not be damaged.
A leveling screed under the ceramic tiles will hide all wires
The dry screed “Knauf” gypsum-fiber blocks became widespread today. It is characterized by quick installation and high heat and noise insulating qualities. If the floor is repaired in this way, it is recommended to install new wiring directly on the concrete floor, before the vapor barrier film is laid. However, it is permissible to arrange cables in the backfill, which has good dielectric properties. At the same time, you must pack the wires in the corrugation.
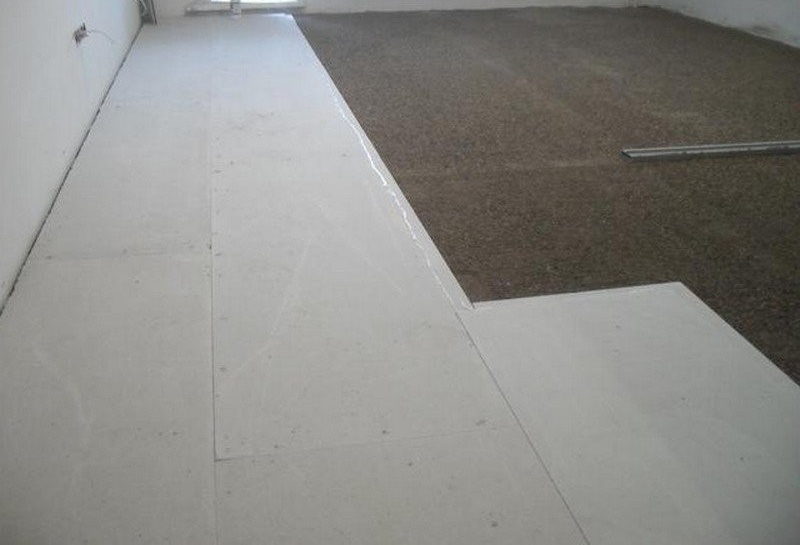
It is possible to arrange wiring in the Knauf floor
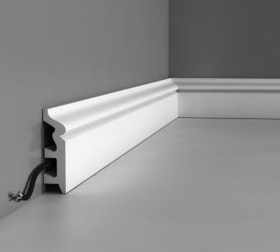
Carpet and linoleum flooring will not be able to hide the wiring, and in this case, you can try to separate the cables in the skirting boards. If you choose a model of a plinth with a large volume of the internal cavity, 3-4 standard copper conductors can fit in it.
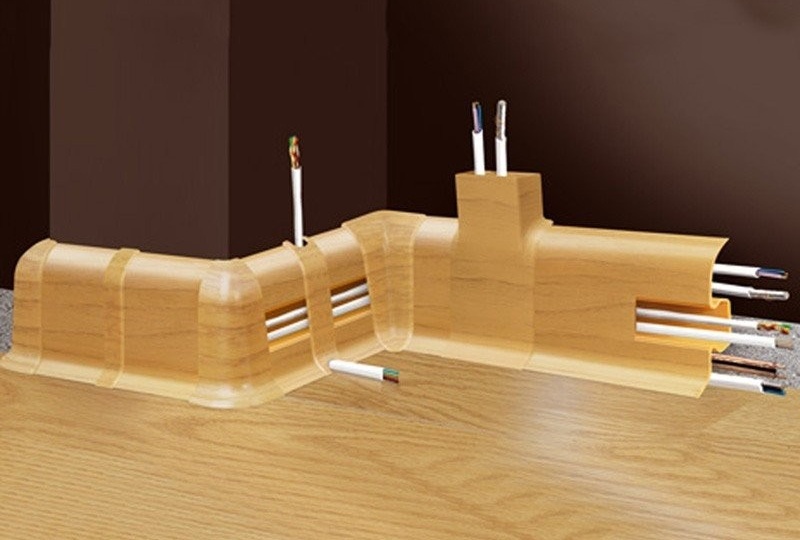
The easiest way to lay cables in the baseboard
It is very convenient to change the wiring during the installation of a false ceiling. This is done between installing the supporting structure and suturing the ceiling plane. The task of an electrician is to distribute cables to all points of consumption. If you have a working draft, you can deal with this yourself.
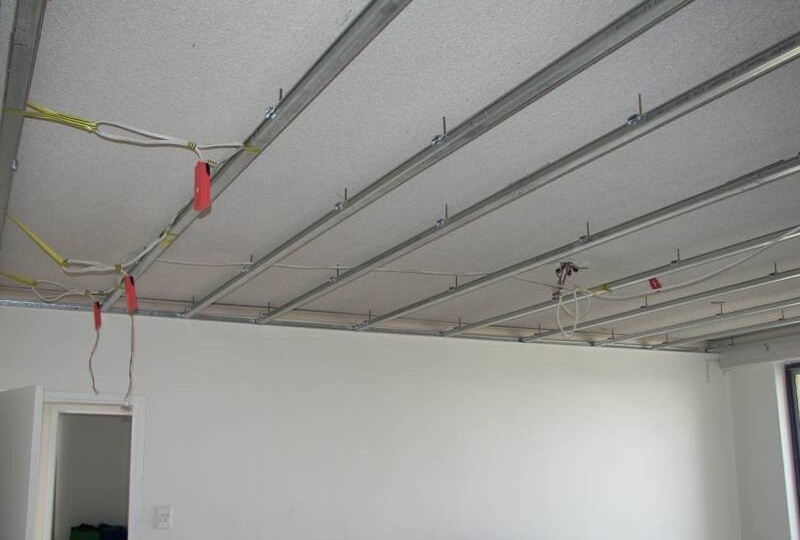
Attaching cables to the suspended ceiling frame is a good solution.
The cable extends in the corrugation and is rigidly attached to the plates with dowels. But the free arrangement of wires is also acceptable if the placement of the fixtures is not known in advance.In this case, you need to make a larger margin of wire length and leave it so that you can subsequently get them. Mineral cassette suspended ceilings and rack ceilings at any time can be easily disassembled and the wiring configuration changed in the right direction.
Plasterboard and suspended ceilings are non-separable, so before you sew them up, you must accurately determine the location of all the lamps and other consumers of electricity.
An interesting solution to the hidden laying of wires on the walls of a panel house is the installation of cabinet elements of the interior from gypsum board and other types of finishing panels (MDF, laminated particleboard, etc.). It consists in the construction of various interior forms: arches, columns, cabinets, shelves, shelves, etc. If the design of such a design is agreed upon in advance with the needs of electrification, many problems associated with concealing cables can be simultaneously solved. Drywall is especially convenient in this regard, since all the necessary accessories are on sale for it: socket boxes, junction boxes, and other electrical installation equipment.
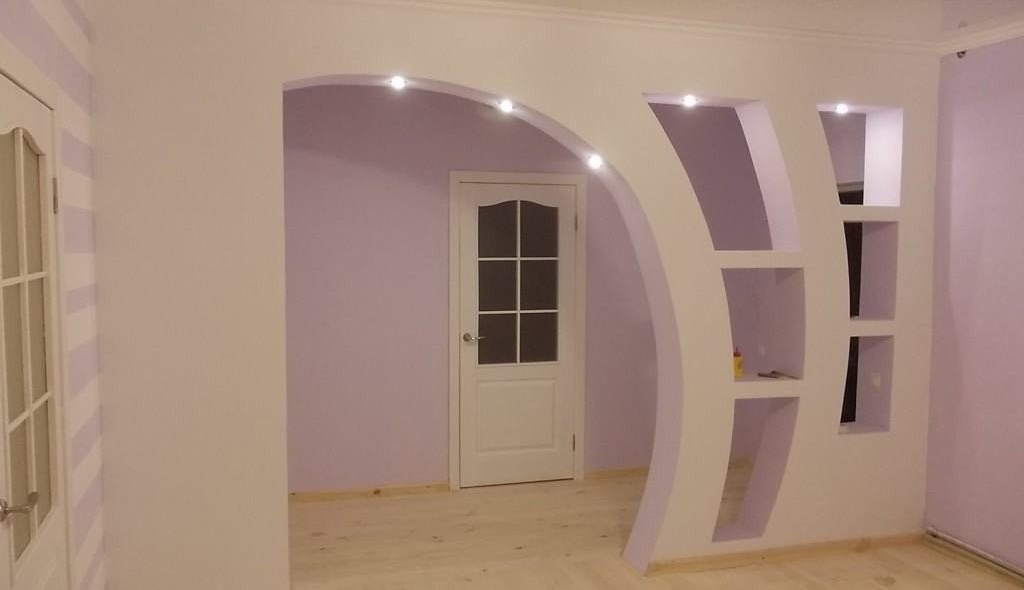
You can integrate a socket and fixtures into the drywall arch and simultaneously hide all the wires
You may also find it useful material that presents the designations of sockets and switches in the schemes:https://aquatech.tomathouse.com/en/ehlektrosnabzhenie/oboznachenie-rozetok-i-vyklyuchatelej-na-stroitelnyx-chertezhax-i-elektricheskix-sxemax.html.
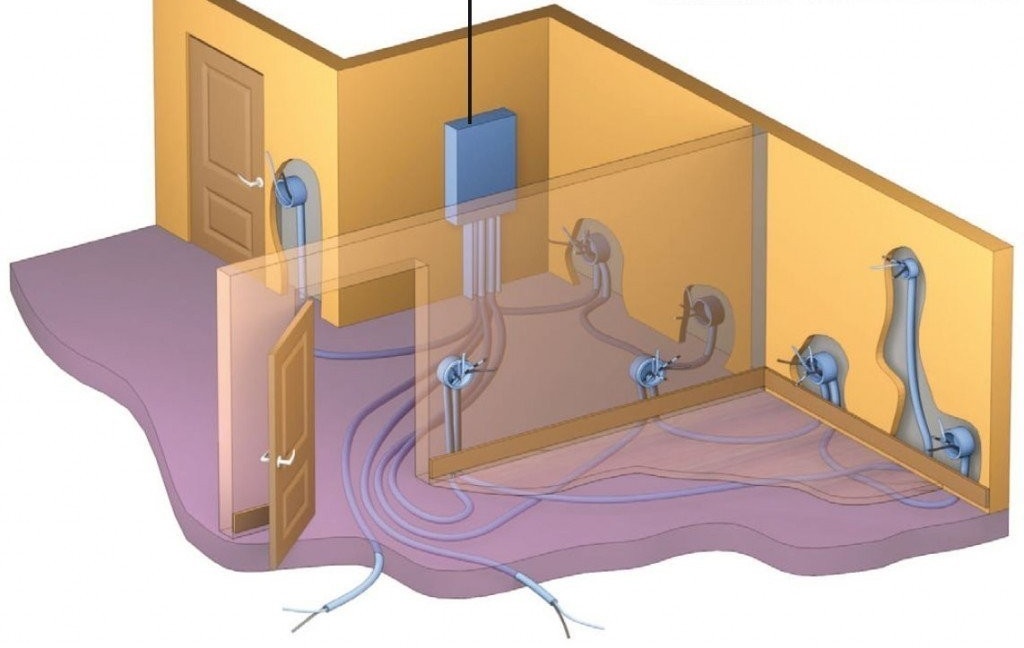
Wiring
Any replacement wiring begins with the preparation of a working draft. It should take into account all the nuances of the future location of lighting devices and sockets. The plan shows the location of the power input to the apartment, junction boxes, as well as the power of stationary units: electric furnaces, washing machines and dishwashers, etc. The appropriate thickness cables are selected, their length is calculated. Further, during the installation process, project changes are possible. They are desirable to fix and reflect in the final version of the wiring. This will help in the further operation of the power grid and in case of emergency.
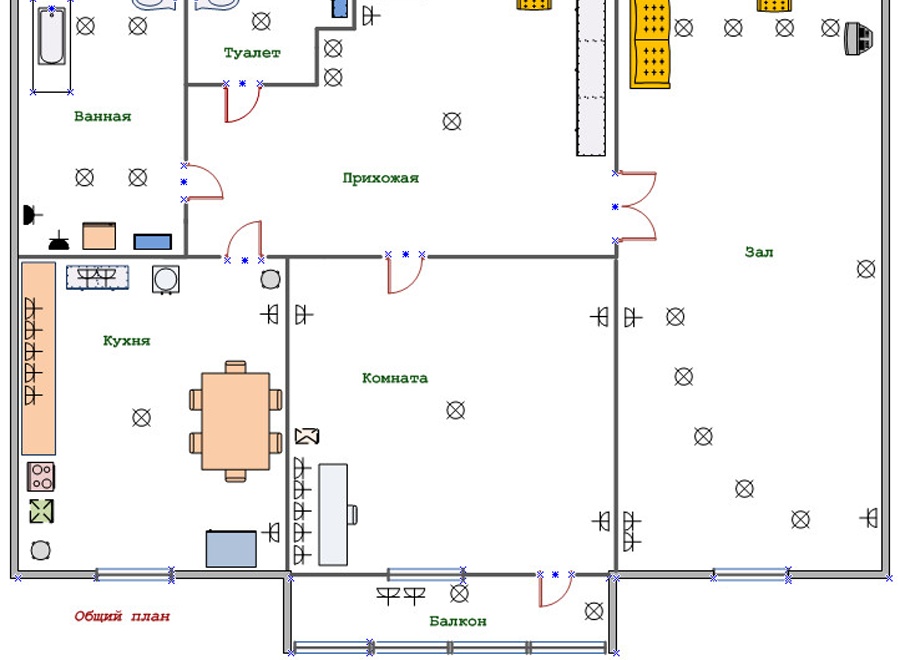
Planning is an important part of replacing electrical wiring in an apartment
Work sequence
Work always starts with turning off the power supply. To do this, turn off the power to the apartment on the switchboard by disconnecting the plugs (or circuit breakers). So that installation and dismantling can be carried out regardless of the time of day, a temporary cable outlet is made from the shield and a carriage is arranged with a socket, from which it will be possible to connect power tools and temporary lighting. In practice, this is expressed in the fact that the input cable behind the meter is cut, and instead of the apartment wiring, a carrier is connected to it.
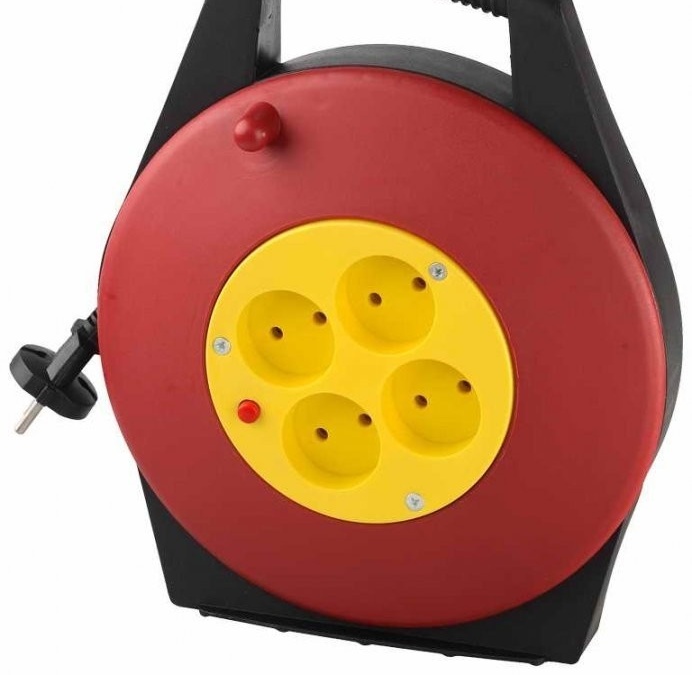
An extension cord can be used to temporarily introduce electricity.
After that, you can safely search for the old wiring and dismantle it. Some channels in which aluminum wires are located can be used for new wiring. To do this, attach a new cable to the end of the old cable and pull it out. At the same time, a new one will automatically start in its place, which is very convenient.
But such an opportunity is far from always. The spent aluminum wire becomes brittle and brittle over time, and most often you just have to leave it in the wall. Another place characteristic of prefabricated houses is the joint between the wall and ceiling plates. As a rule, during construction there was left a technological gap designed for shrinkage of the building. Electricians used this space to pull cables. But to get to it, you need to remove the ceiling plinth and break the plaster.
This must be done carefully, since cables from an adjacent apartment can also pass in there, but no one turned off the electricity in them, and they can be energized.
Particular attention should be paid to replacing the wires leading to the lighting lamps. Most often, they can be replaced as described above, by connecting a new cable to the old one and pulling it through a pipe-like hole in the ceiling. Of course, except in those cases when input was made through the upper apartment. This is more relevant if it is not planned to install a suspended ceiling.
Strobing and excavation
Strobing load-bearing walls and ceiling is strictly prohibited. But making holes for installation boxes and socket boxes is allowed - provided that the reinforcing bars are not damaged. In addition, short bumps on walls located vertically are allowed. Their depth cannot exceed 10 mm, but this is enough to bring the cable to a wall outlet or switch. The cable is fixed with alabaster, and the whole post is subsequently putty and aligned in the plane of the wall. It has proven itself in laying ducts for wire chippers. Unlike a perforator, it does not create wall vibrations and also makes it possible to precisely adjust the depth of the groove. When you attach a vacuum cleaner to it, the whole process becomes fast and clean. And most importantly - it gives neighbors a quiet sleep.
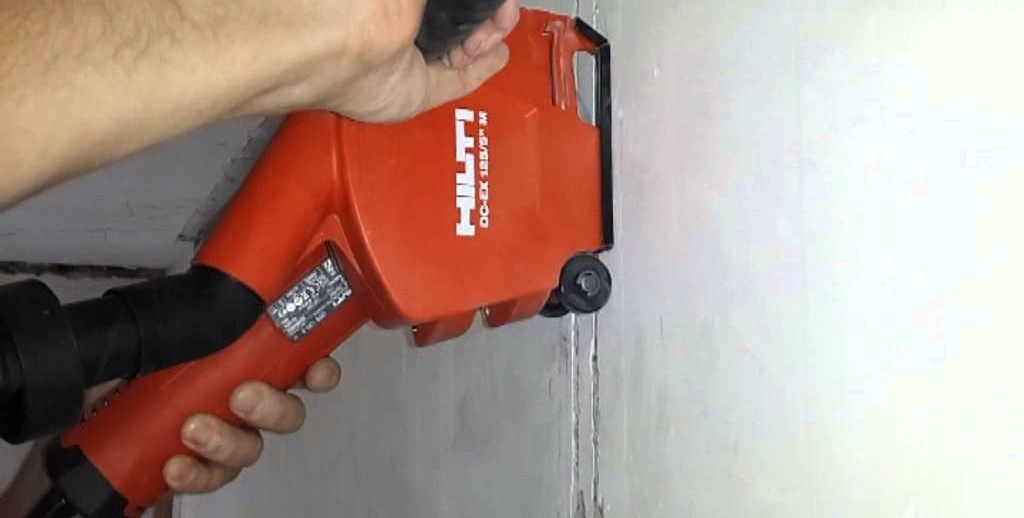
With the chamfer, you can adjust the depth of the groove
A professional wall chaser equipped with diamond blades and a vacuum cleaner connection system is optional. You can rent it, because most often you need it for one or two days.
It should also be remembered that the depth of the hole for installing the socket in the panel wall should not exceed 45 mm.
How to lay wiring in strab
There are various ways of fastening the cable in the line, which is selected according to the situation. You can fix the wiring with alabaster, you can use special brackets that are pre-mounted to the wall with dowels.
The wires in the bar must be securely fixed
Most electricians prefer the first method, since when blocking up, two tasks are solved at once - fixing the wire and leveling the shrabi.
The main condition for laying cables in the walls, no matter how this is done, is the reliability of the fastening.
This is achieved not only by the method of fastening, but also by the correct selection of the size of the bar itself. Theoretically, one and a half cable volume is enough. If there are several cables, 50% is added to their total volume. When laying a group of wires, it is recommended to tighten them with a plastic clamp.
Wiring for devices and for lighting
If there is no possibility to hide the wiring in the ceiling or on the floor, the tried and tested method of external wiring is used. It consists in the arrangement of cables in the cable channels. They are mounted from current sources and junction boxes directly to consumers: lighting fixtures, sockets and stationary units. The convenience of this method is obvious. It does not involve major repairs, but is aimed exclusively at replacing wiring.
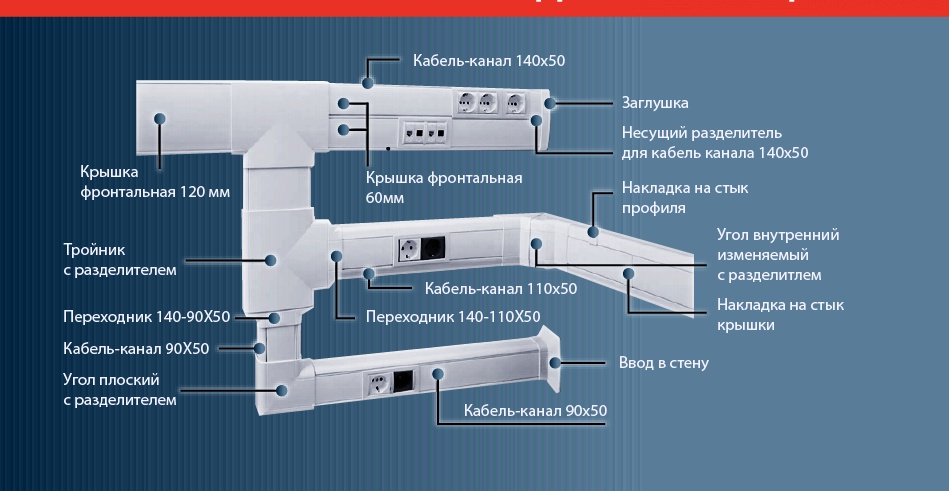
The variety of cable channels allows you to solve the most complex problems
Such an installation can be carried out quickly and in any situation, spending a minimum of time and finances. Cable channels look good and do not spoil the interior. You can choose the right size and color, for all the turns and angles on sale there is a variety of accessories. In addition, wiring in cable ducts has a significant advantage over hidden wiring in terms of accessibility for repairs and the addition of new power lines. Such wiring gives greater freedom for possible future changes in the electrical circuit of the apartment. It can be easily dismantled and moved to another place without any special damage for decoration.
Read about the features of installing switches and sockets in the apartment in our next article:https://aquatech.tomathouse.com/en/ehlektrosnabzhenie/ustanovka-rozetok-i-vyiklyuchateley.html.
Video: replacement of wiring in an apartment of a panel house
Starting work on replacing the wiring in the apartment of a panel house, you should carefully read the basic safety rules. Electric shock poses a threat not only to health, but sometimes to life. When purchasing tools and materials for work, it is worth stocking up with personal protective equipment: glasses, gloves, a respirator.