Dutch Oven: Production Guide for the Home Master
When autonomous heating in private homes is mostly gas, finding a good stove-maker can be difficult. And many homeowners, to whom gasification still has not reached, take up the construction do-it-yourself brick oven. Of course, a novice who is poorly versed in the intricacies of the furnace business should not opt for a complex, albeit economical, design. He is better to be cheap and cheerful, and most importantly - extremely simple. The so-called Dutch oven or simply Dutch is ideally suited to these requirements, which is why it has become very, very popular.
Content
What does a Dutch oven look like and why is it so popular
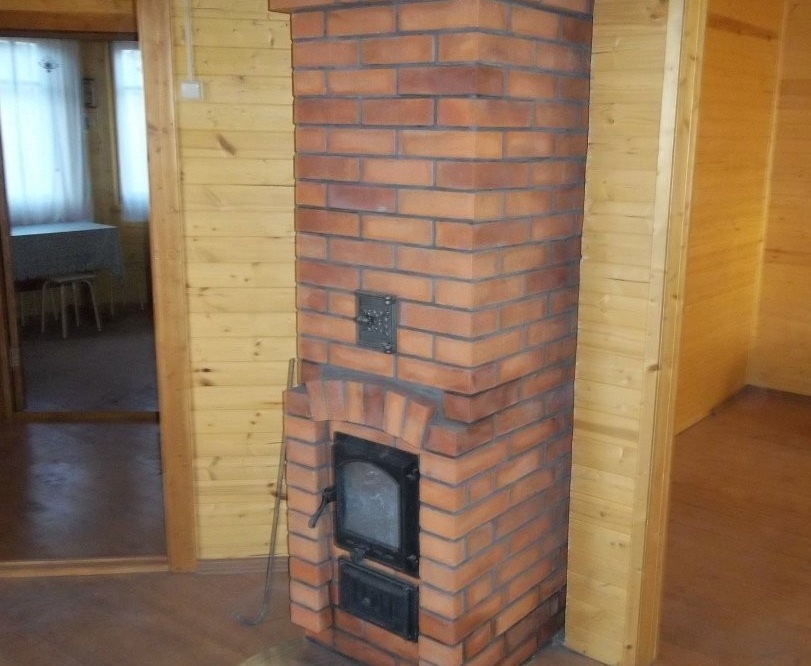
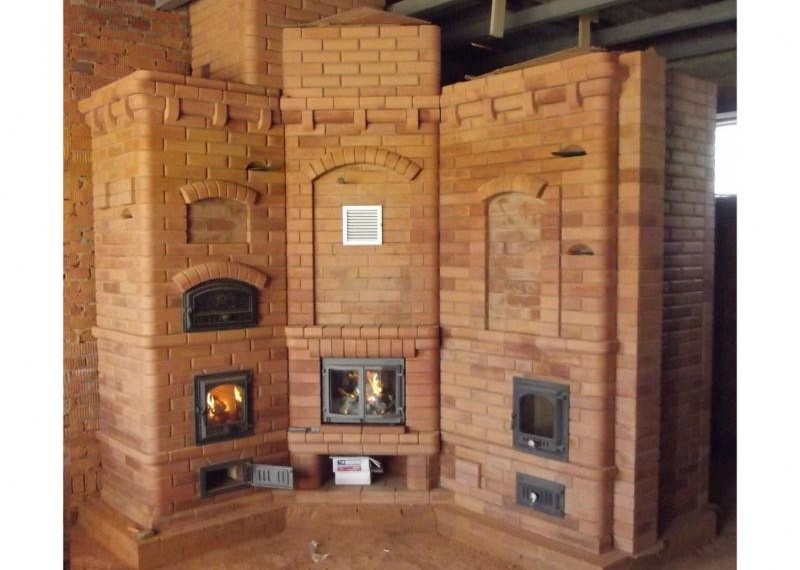
Dutch appearance
Uncomplicated, at first glance, the construction has many advantages:
- "Dutch" is able to quickly warm up from the smallest portion of fuel. Moreover, its overspending during flooding after a long period of inactivity is very small.
- The design of this furnace involves the use of a relatively small amount of material, so it is relatively light. For comparison: a large Dutch oven is built of 650 bricks, while a large Russian - of 2500. At the same time, the heated area for the "Dutch" is 60 m2, while for Russian - only 45 m2. In addition, the principle of the device "Dutch" can significantly reduce the original size - up to 0.5x0.5 m in plan. This advantage allows you to safely place the "Dutch" on the floor.
- The channel labyrinth in the body of the stove exerts a great resistance to reverse thrust, therefore, smoke almost never occurs when the wind blows into the pipe.
- Although the Dutch oven was originally created as a pure heating, it can easily be equipped with a hob - the combustion mode will not be violated.
- The channel part of the furnace can be pulled up 2 floors (and some are pulled up to 4), while its efficiency will remain at the same level.
- Design features in combination with a small wall thickness preclude the development of significant temperature deformations in the masonry, therefore the Dutchwoman is undemanding to the quality of materials. A good brick (refractory) is required only for the construction of the furnace. The rest of it is sometimes laid out even from burnt or hollow bricks.
- In the duct part, you can easily find the area with the optimum temperature for installing an oven or a water heat exchanger.
- Irregular use does absolutely no harm to the stove. At the same time, you can drown it, bypassing the acceleration phase - the masonry will not crack from this.
As you can see, the list of advantages of this furnace is very impressive. But, despite this, it cannot be called ideal. Here at what cost did you achieve these benefits:
- "Dutch" has a very low efficiency - within 40%. For comparison: the Russian stove absorbs more than 80% of the thermal energy inherent in the fuel.
- It is worth a little hesitating with the overlapping of the view after flooding, as the oven will immediately be fried with cold air. It is drawn through a chimney through a channel labyrinth that acts like a siphon.
- "Dutch" is not designed for the use of waste fuel, which completely burns out in a short time. It should not be heated, for example, with reeds, straw, brushwood and the like: the lion's share of the heat generated will disappear through the chimney. With maximum effect, the stove runs on long-playing fuel (firewood, coal, peat), and in smoldering mode.
- When using low-cost fuels with high ash content, the chimney quickly grows with soot.
If the furnace is excessively intense, a Dutch oven can emit carbon monoxide into the room.
See also our material with step-by-step instructions and the order of the brick stove:https://aquatech.tomathouse.com/en/otoplenie/effektivnoe-teplo-stroim-pech-kamin-svoimi-rukami.html.
Construction device
The design of the Dutch furnace can rightfully be called unsophisticated. The main feature is that the furnace does not communicate with the chimney directly, but through a labyrinth of channels (from that furnace of this variety they call it channel), passing through which the flue gases have time to give more heat to the brickwork. A sectional classic Dutch oven is shown.
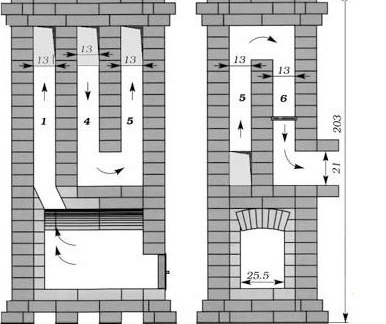
The scheme of the device of the Dutch stove
Any complex calculations in the design of the "Dutch" are not required and anything in it is essentially impossible to break. Therefore, there is no specific order that must be strictly followed. It is enough to maintain the ratio of the main dimensions within certain limits.
Quick heating of the furnace is due to a combination of two factors:
- increased area of the inner surface of the duct (due to the installation of the channel labyrinth);
- reduced material consumption of the furnace.
Note that the volume of materials used is reduced to a reasonable extent - the heat capacity of the furnace is quite sufficient. However, for a whole day it will not be enough - you have to heat the stove at least twice.
The exhaust chimney is directed not upward, as in many other furnaces, but to the side, that is, the presence of a nozzle pipe is not provided. This feature makes it possible to connect several furnaces to one attached (main) chimney. For ancient Holland, this was fundamentally important, since the tax there was levied precisely on the number of chimneys.
The combustion chamber arch is not arched, but flat, which makes the furnace even easier to manufacture.
It is interesting. In Russia, under Peter the Great, there were frequent fires due to the black furnaces of Russian stoves. Intending to prevent such incidents, the king ordered by a special decree to continue to build furnaces in the manner of the Dutch. But the stove-builders often carried out the royal decree only partially, building the stove only outwardly similar to the Dutch. The emphasis was on the decoration with tiles, which was characteristic of the Dutch women. As a result, confusion arose to this day: often “Dutch” refers to stoves with a completely non-typical design, for example, bell-type and even some varieties of Russians.
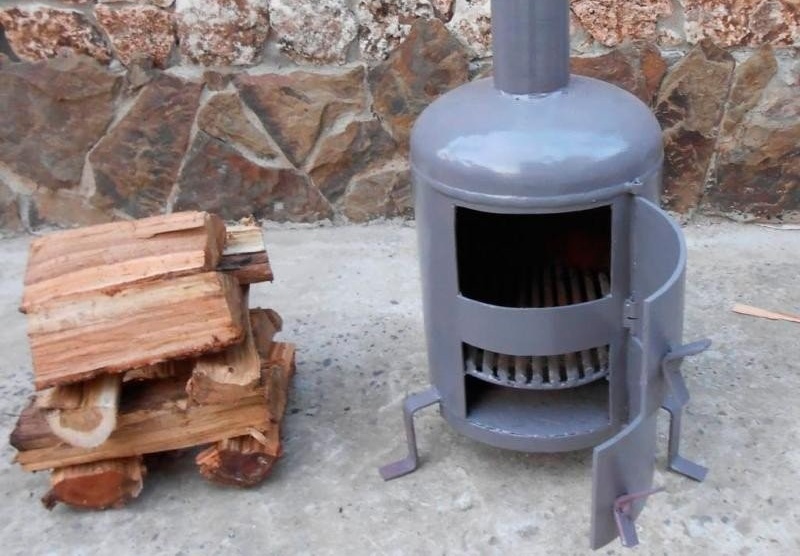
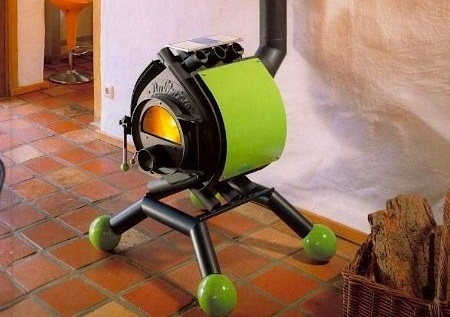
For some reason, some inventors modified the Dutch oven. For example, I. G. Utermark gave her a round shape.
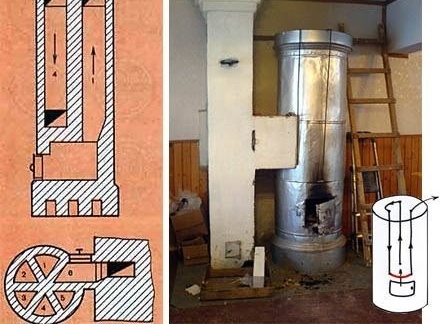
Termination
The diagram shows a simplified smoke flow, consisting of 3 channels, but in some varieties of terminations their number could reach 12. The furnace is equipped with a steel casing, making it possible to reduce the wall thickness to ¼ brick. This sharply reduced the cost of uttermarking, which is why it firmly strengthened in the "budget" segment. But at the same time, the heat capacity also decreased - it is necessary to heat such a furnace quite often. In addition, due to the peculiarities of the design, it has a low efficiency, is very weak and quickly overgrows with soot.
The Dutch technical inventor V.E. Grum-Grzhimailo possesses higher technical characteristics. Unlike the marking, it is equipped with a grate, and in the superfluid part there is a cap. The bell-type version turned out to be very economical - in terms of efficiency, it was almost equal to the Russian stove (over 80%).
Grum-Grzhimailo furnace
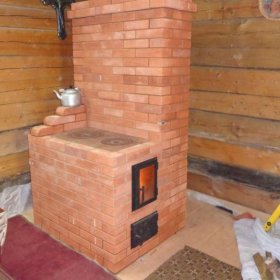
In accordance with the needs of the owners of houses in garden plots, the large Dutch stove has been transformed into a small cottage, and there are several varieties of such stoves.
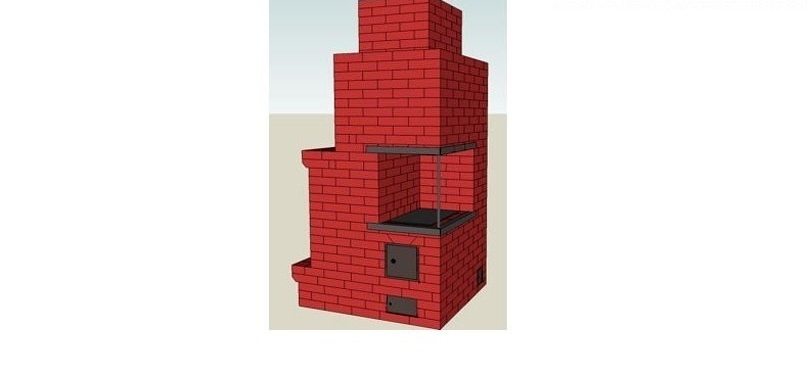
An example of a Dutch country stove with a hob
One of them - equipped with a hob - we will learn to build on our own.
Read also about how to fold a Swedish oven yourself:https://aquatech.tomathouse.com/en/otoplenie/pech-shvedka-svoimi-rukami.html. The material shows a diagram of the device, calculation of materials and much more.
Calculation of parameters
The main parameters of the furnace are the heat transfer power and the size of the chimney.
To calculate the power it is necessary to know the specific calorific value of the fuel.
Table: calorific value indicators of wood
| Wood | Value (kW * h / m3) | ||
| With a humidity of 12% | At a humidity of 25% | At a humidity of 50% | |
| Poplar | 1856 | 1448 | 636 |
| Fir | 1902 | 1484 | 652 |
| Spruce | 2088 | 1629 | 715 |
| Birch | 3016 | 2352 | 1033 |
| Oak | 3758 | 2932 | 1287 |
| Aspen | 2181 | 1701 | 747 |
With flame burning, a portion of the fuel burns out in about 1 hour, so the capacity of the furnace operating in this mode will be:
W = Vt x Eud x 0.63 x 0.4 x 0.8, where:
- W is the heat transfer power of the furnace, kW;
- Vt - furnace volume, m3;
- 0.63 - load factor of the combustion chamber;
- 0.4 - furnace efficiency;
- 0.8 is a coefficient showing how much of the fuel burns out in full.
Suppose a furnace furnace has dimensions of 400x300x400 mm. Then, if birch logs of medium humidity (25%) are used as fuel, we obtain the power:
W = 0.4 x 0.3 x 0.4 x 2352 x 0.63 x 0.4 x 0.8 = 22.76 kW.
In accordance with the calculated power, the cross section of the chimney is selected:
- with thermal power less than 3.5 kW: 140x140 mm;
- between 3.5 and 5.2 kW: 140x200 mm;
- between 5.2 and 7.2 kW: 140x270 mm;
- between 7.2 and 10.5 kW: 200x200 mm;
- between 10.5 and 14 kW: 200x270 mm;
- more than 14 kW: 270x270 mm.
If the used chimney has a circular cross-section (it can be drawn from pieces of steel pipe or concrete blocks with round openings), then it should have the same area as the indicated rectangular cross-sections.
It should be noted that when operating the furnace in smoldering mode, its power is from 10 to 30% of that calculated for flame combustion. But the cross section of the chimney should be selected precisely for maximum power.
Necessary materials and tools
The stove is laid out with two types of bricks.
Firebox walls - fireclay brick
It has a yellow color, can withstand temperatures up to 1600 degrees.
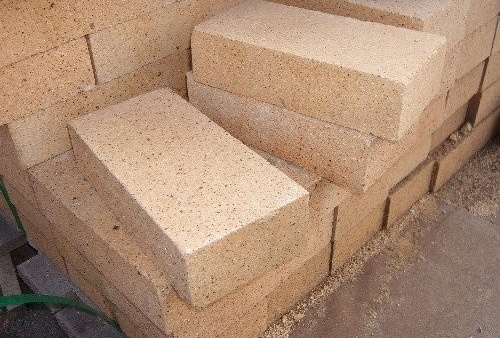
Fireclay brick
Note! Outwardly, fireclay brick is similar to acid-resistant, which is sometimes used by unscrupulous sellers. Ask for a certificate upon purchase.
The dimensions of fireclay bricks may vary depending on the brand. So, a brick of the ШБ-8 brand has the same dimensions as a conventional building brick - 250x124x65 mm. Chamotte brick of the Sh-5 brand is slightly reduced: 230x114x40 (65) mm.
Signs of quality fireclay bricks are:
- fine-grained structure;
- lack of visible pores and inclusions;
- clear sonorous sound when tapping with a hammer;
- when falling it breaks into large pieces (low-quality crumbles into small crumbs).
As for the appearance of the brick, a darker color does not always mean higher quality. It all depends on the clay deposit: it also happens that a lighter chamotte brick has better characteristics.
It should be noted that since the thermal regime of the Dutch furnace is not intense, its furnace part can be laid out with kiln ceramic brick of the M150 brand, capable of withstanding temperatures up to 800 degrees (not to be confused with ordinary building bricks).
The walls of the furnace can be laid out of clinker brick, which has high strength and heat resistance. At a cost it is much more affordable than fireclay.
Furnace body
The rest of the furnace, in addition to the furnace, can be laid out with ceramic stove bricks, or you can use medium-quality bricks with a slight fracture.

Ceramic stove brick
Use of second-hand material is allowed.
Clay materials
Sand
You can use river sand with grains of 1 mm in size, preferably angular. But if you want to get a durable furnace that can serve more than 10 years, you should use sand without organic impurities. Previously, only very expensive mountain sand had this quality, but today you can use more affordable brick instead. It is a ground fireclay or ceramic brick.
The first option is used in solutions for chamotte masonry, the second - for ceramic.
Clay
Solutions for laying fireclay bricks are best prepared on the basis of white kaolin or fireclay marl. Ceramic brick can be laid on a solution from any ground clay with refractory properties, Cambrian clay (blue or gray) and gray kaolin are considered the most suitable.
Tip. Before you buy clay you need to sniff. If you smell any kind of smell, even if it is pleasant, it means that the material contains a large amount of organic impurities and you should not buy it: such a solution will begin to crumble very soon.
Clay grades of medium fat content are preferred.
Instruments
Of the tools, the order should be noted - an even rail with a cross section of 50x50 mm, on which the risks corresponding to the rows of bricks are applied. Four orders are fixed at the corners in a strictly vertical position (nails are driven into them that need to be inserted into the seams), after which the masonry will be very easy to make even.
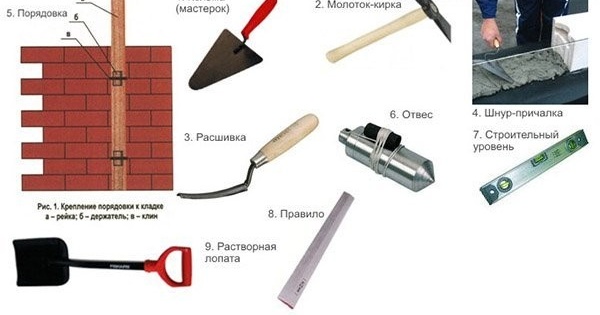
Instruments
Other tools are the usual builder kit: pickaxe, trowel, level and plumb.
You may also find the article on how to make a brick chimney the right way:https://aquatech.tomathouse.com/en/otoplenie/dyimohod-iz-kirpicha-svoimi-rukami.html.
Preparatory work
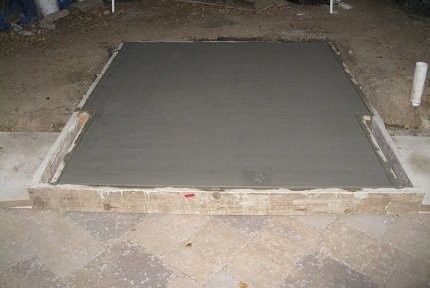
Ovens with a volume of up to 500 bricks can be laid without a foundation, if only the floors in the room are strong enough (capable of bearing a load of up to 250 kg / m2) A small Dutch cottage oven with a hob, the construction of which we will further examine in detail, satisfies this condition.
But if the floor in the room clearly does not have the required strength, then it must also be installed on a reinforced concrete foundation.
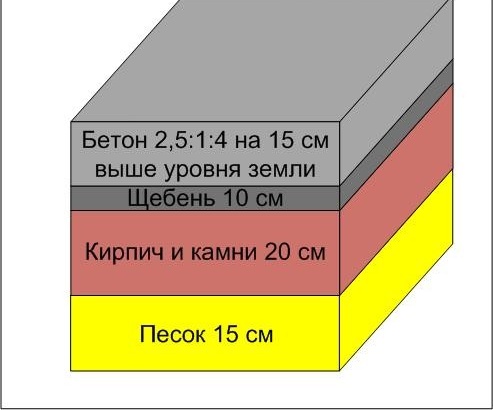
The scheme of the foundation for a heavy furnace
Its depth is usually 400–600 mm, and the edges should extend beyond the outlines of the furnace by at least 100 mm on each side. It is impossible to connect the structure with the foundation of the building - due to various shrinkage, skew can occur.
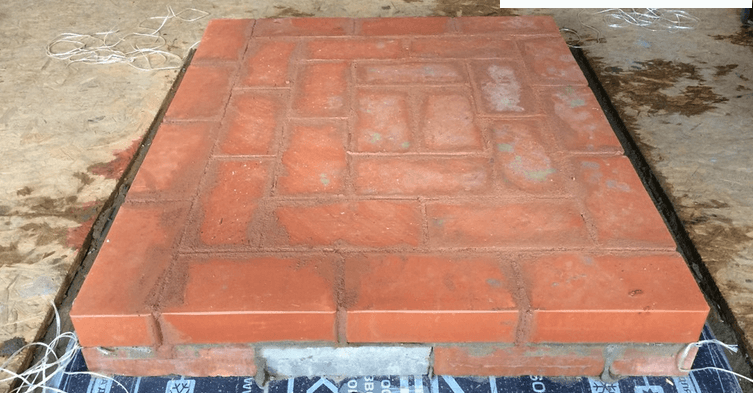
After pouring the foundation, it must be ironed - sprinkled with cement.
Concrete foundation
When the concrete has matured - it takes about 1 month, it needs to be covered with two layers of waterproofing (roofing material or roofing), after which it will be possible to proceed with the construction of the furnace.
Foundation waterproofing
Before proceeding directly to the installation of bricks in place, you need to prepare a clay-sand mortar. The correct ratio of sand and clay depends on the fat content of the latter. To determine it, proceed as follows:
- After soaking the clay for a day, stir it to the state of the test, after which 5 portions of the solution with different sand contents are prepared: 10, 25, 50, 75 and 100% of the clay volume.
- Having twisted a 30-cm sausage with a diameter of 10–15 mm from each portion, it is wrapped around blanks with a diameter of 40–50 mm and left to dry at room temperature for 2 weeks.
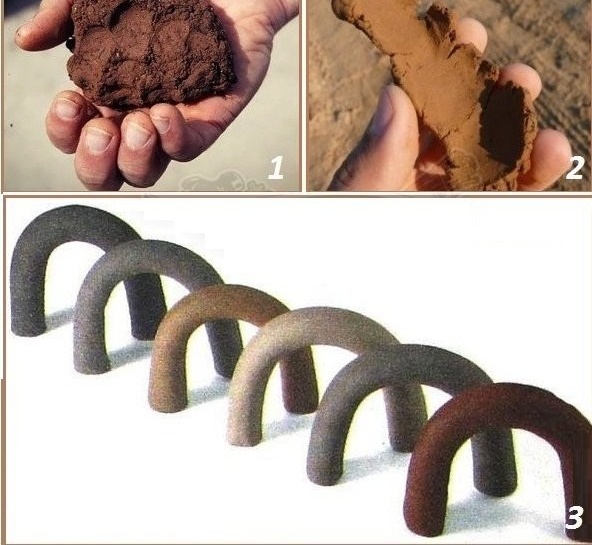
One way to determine the quality of clay
In the presence of:
- a fine mesh of cracks or their complete absence, the solution is considered suitable for any part of the furnace;
- large cracks, but not exceeding 2 mm in depth: the solution is suitable for furnace elements with a temperature not exceeding 300 degrees;
- deeper cracks and gaps the solution is considered unsuitable.
Having determined the optimal ratio of sand and clay, prepare the solution in the right volume. Clay is also soaked for a day, only after that it is still rubbed through a sieve. The sand is sieved and washed. The finished solution should have a sour cream consistency.
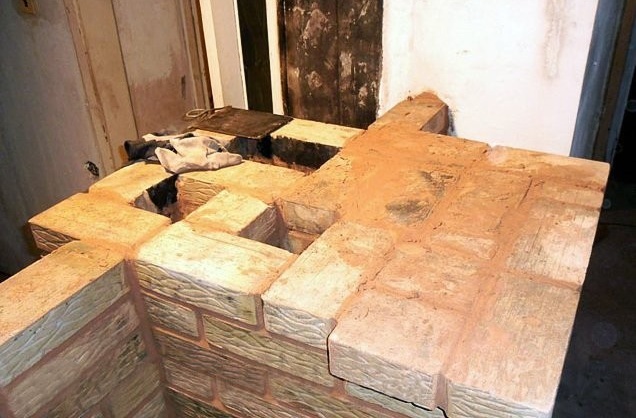
Step by step instructions
The stove is laid out row by row according to the order.
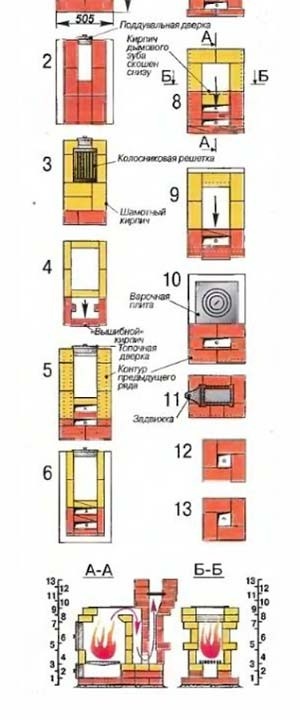
Layout of a small Dutch oven with a hob
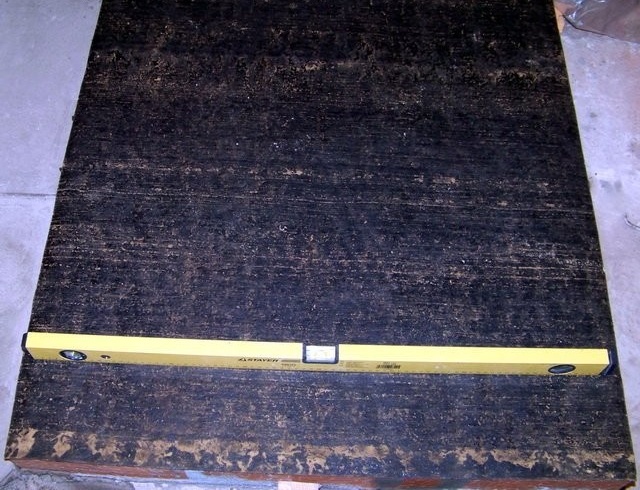
Particularly high demands are made to row No. 1, since errors in its installation will lead to an imbalance of the entire structure. Bricks should form a perfectly regular rectangle, a sign of which is the equality of diagonals. The upper faces of all blocks must lie in a strictly horizontal plane - this is checked using the building level.
First row
Tip. It will be easier for series No. 1 to give the right shape if, before laying it, a contour of the future furnace is put on the waterproofing coating with chalk.
It is recommended that a stoveman with a beginner level first lay out a row without a solution to check how well the bricks fit together. After fitting, you can lay the blocks on the solution.
Another trick is to start each row better with corner bricks. Once they are leveled, it’s easier to properly stack the remaining blocks.
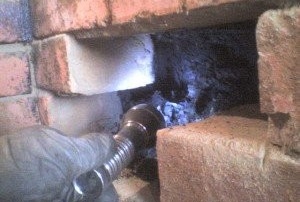
In Dutch, the blower door is installed immediately on the 1st row. Its frame must first be placed in the winding of an asbestos cord. It will allow cast iron to expand freely when heated and eliminate the parasitic suction of air through the gap between the frame and the brick, that is, it will act as a sealant.
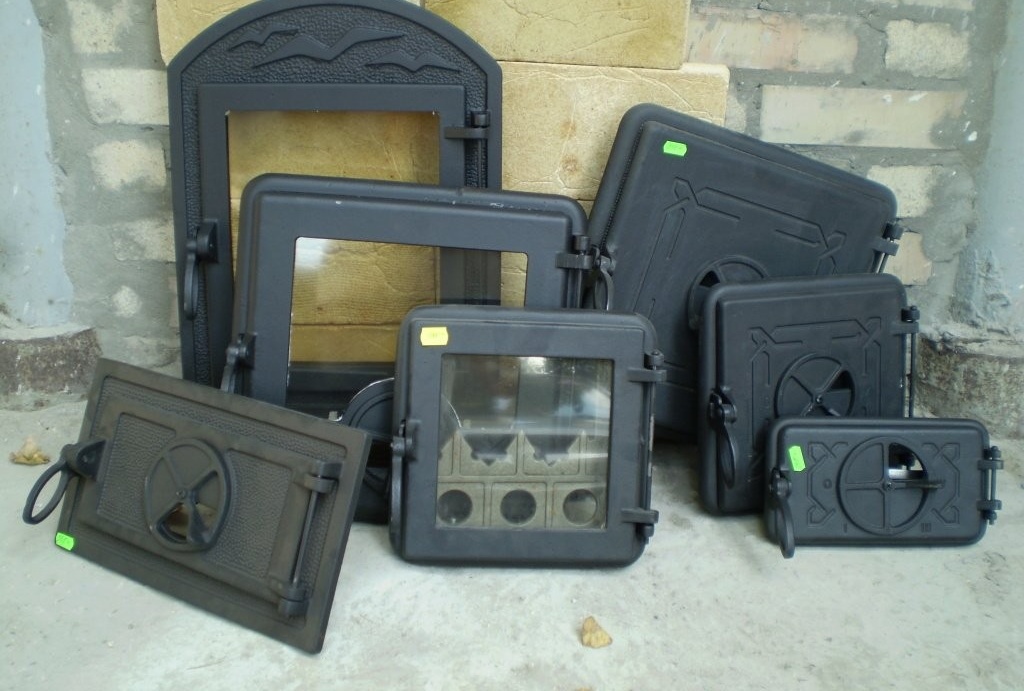
Oven doors
In brickwork, the door will be fixed with wire. It must be inserted into the box, folded in half and twisted. Then this wire is laid in a groove specially cut in the brick (in the upper edge), bent and interwoven with masonry.
Before proceeding, it is necessary to establish vertical reference points, according to which it will be convenient to lay out the corners of the furnace. This can be the ordering that was described above, or 4 nylon cords stretched along a plumb line between nails driven into the ceiling and masonry joints.
According to the established landmarks, corner bricks of the 2nd row are laid out, and then the whole row.
Second row
Row number 3 and some others in the order are indicated in yellow. This means that they are laid out from refractory bricks.
Third row
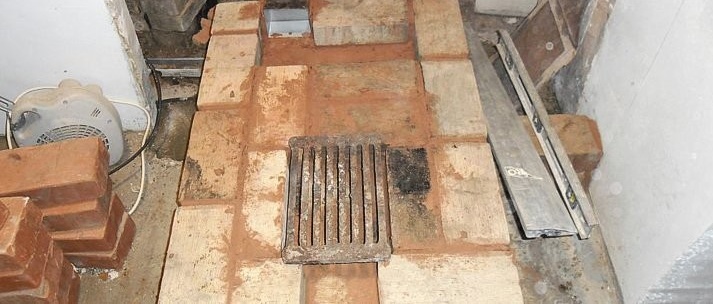
On top of the bricks of the 3rd row, it is necessary to lay a grate with a size of 300x200 mm.
Bricks of row No. 4 should be laid on a spoon (long end or rib). The blocks marked in red on the ordering diagram are basic for the internal wall of the chimney (see above).
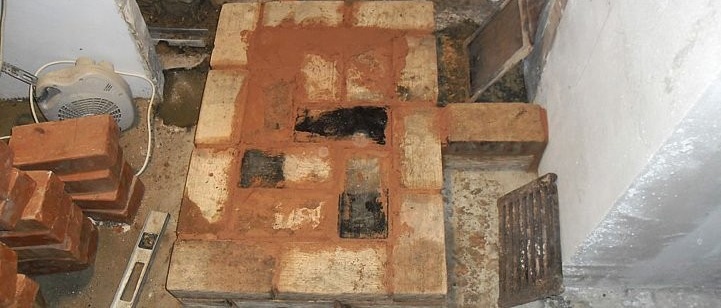
One of the bricks on the back side should be laid without mortar and slightly extended - it will replace a clean door. This brick is called kick. To access the flue duct, it will need to be removed from the masonry, and after cleaning, it must be replaced.
The method of cleaning the stove through a kick brick
In front of the 4th row, you need to install the firebox door. It is equipped with a sealant and is fixed in the same way as a blower.

Installing the combustion door
Note.The wire fixing the combustion door quickly burns out from close contact with the flame. In order not to resort to repairing this element too often, use a steel or tin strip instead of wire.
Rows number 5 and 6 do not need comments - you just need to lay out the bricks according to the order. Pay attention only to the fact that in the 5th row, the blocks are placed on the bed (flat), and in the 6th - like in the 4th, on the spoon.
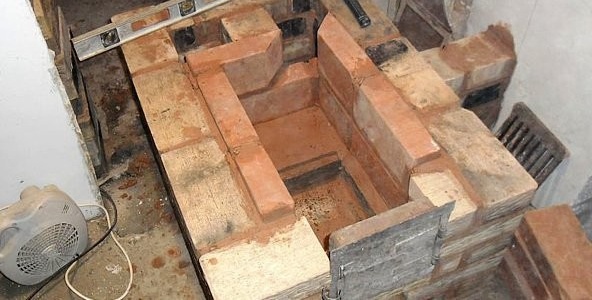
Row six
Row number 7 is for the most part laid out on the bed, but the back wall is on the spoon. In subsequent rows, bricks are laid only on the bed.
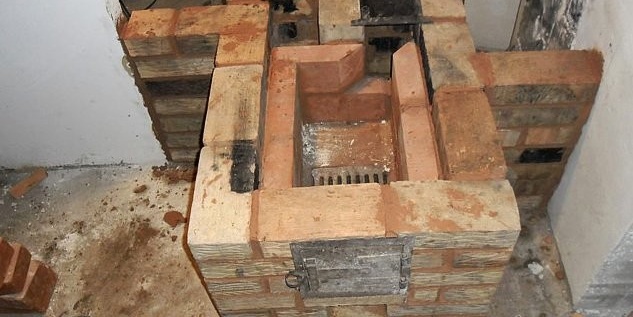
Seventh row
The front bricks of row number 8 need to block the furnace door. Blocks hanging over the furnace must be trimmed at random, as shown in the diagram. Due to the presence of an inclined surface, the fire with the furnace door open will deflect back. This will allow the user to admire the flame, using the Dutch as a fireplace.
Row number 9 must be slightly shifted back. In this way, a sufficient counterweight is created for the heavy cast iron fire door when it is in the open state.
On top of the 9th row, you need to lay the mineral lining under the hob. Strips of asbestos, basalt or kaolin cardboard can be used. A hob is installed on top of the lining. Mounting it on a solution is unacceptable - due to a significant difference in the coefficients of thermal expansion of cast iron and clay. An asbestos cord should be laid in the gap between the stove and the brick.
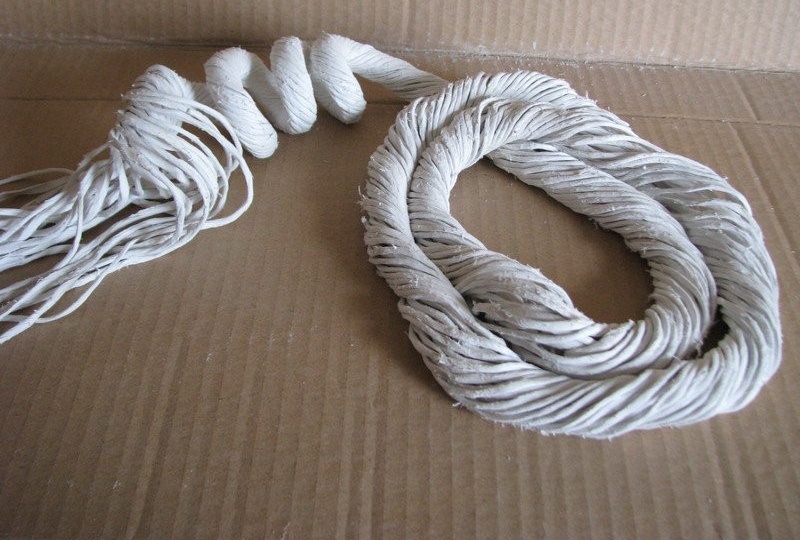
Asbestos cord
Note! Some cooktop models have stiffening ribs on the underside. In this case, grooves should be cut into the bricks into which these ribs will be recessed. If such a plate is laid without grooves, it can crack along a line running between the ribs and parallel to them.
Row number 10 is the source of the chimney. But we will not build the pipe itself from bricks, otherwise the Dutch oven cannot be made light. We install a stainless steel chimney, especially since a brick chimney under the Dutch, which is characterized by abundant condensation, would still have to be used.
On top of the bricks of the 11th row, a valve should be installed. Like doors, it should be wrapped with asbestos cord.
Valve installation
On the 12th row, it is necessary to make the transition from a rectangular section of brickwork to a round one - of a steel chimney. The chimney should be carefully insulated - this is a prerequisite for good traction.
Tip. If you have free funds, you can purchase a prefabricated smoke removal system - the so-called sandwich chimney. The kit contains all the necessary details - from the tee to the umbrella, which are ideally suited to each other in size and equipped with effective insulation.
The chimney is discharged into the street through the ceiling and roof.
The height of its head relative to the grate should be at least 5 m. At the intersection of the overlap and the roof, it is necessary to arrange fire-fighting cuts - fireproof heat-insulating gaskets are installed between the pipe and wooden elements. The gap between the chimney and the roof must be carefully sealed.
Note. The factory-made sandwich chimney kits also include cutting, and a special apron for closing the gap between the pipe and the roofing. Installation of the elements is straightforward, as the kit comes with detailed instructions.
If the floor in the room where the Dutchwoman is built is made of wood, it must be protected with a fireproof coating near the firebox. Usually a steel sheet is laid with a thickness of 1.5 mm or more on top of the asbestos lining. The dimensions of the coating must be such that it protects the floor within a radius of 1.2 m from the center of the furnace door.
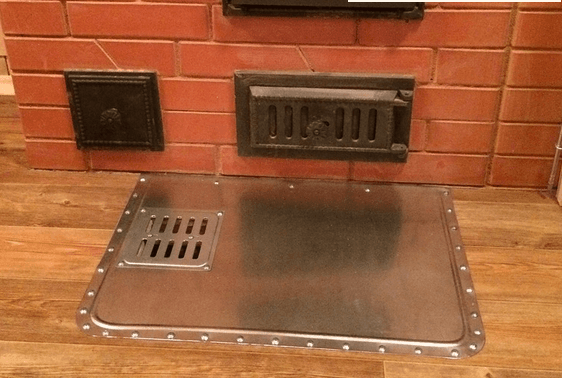
Steel plate is reinforced before the firebox
Large Dutch oven - how to build
All elements - gate valve, doors, grate - are mounted in the same way as in the just described version.But the design, of course, will be slightly different: there is already a smoke circulation (duct labyrinth) in which the flue gases give off their heat. The ordering of the large Dutch oven, as well as its diagram are shown in the figure.
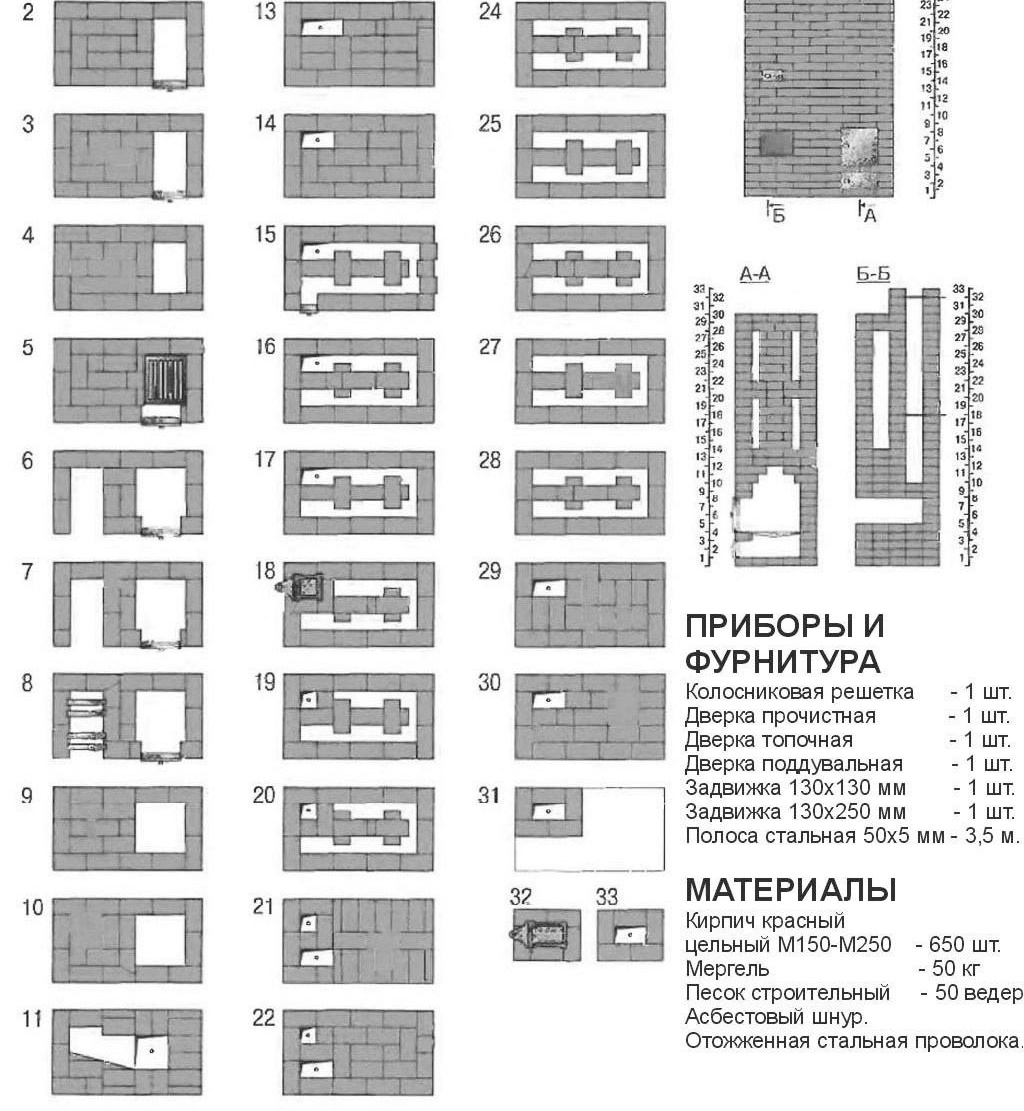
Ordering a large Dutch oven
Decorating a Dutch oven
It has long been customary to decorate a Dutch oven with tiles.
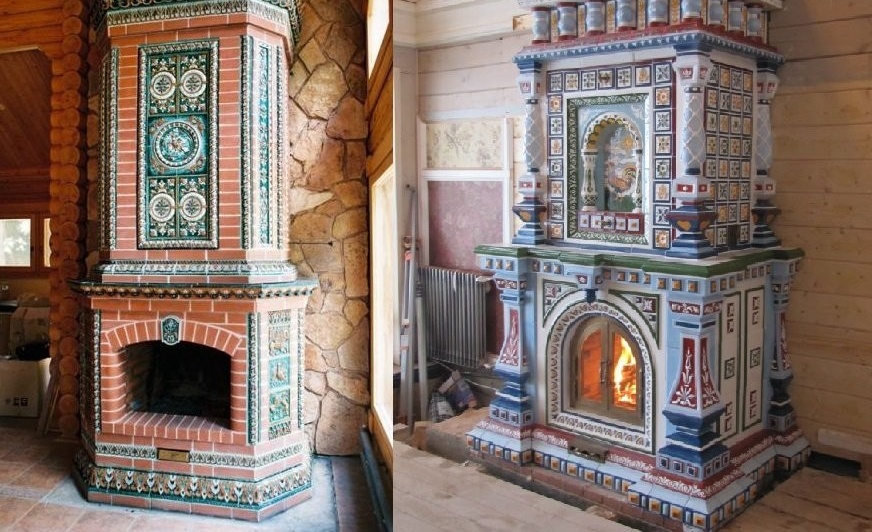
Examples of decorating a stove with tiles
If this method of decoration is not available, the more familiar one will do as well - the stove can be plastered and whitened.
One way or another, if the interior of the room for the owner of the furnace is at least somewhat important, the Dutch woman must be ennobled.
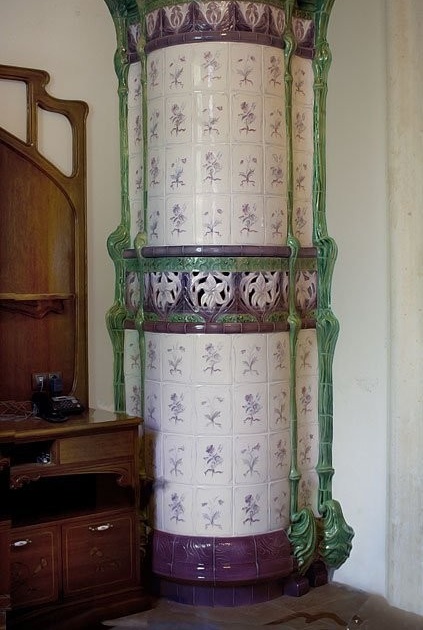
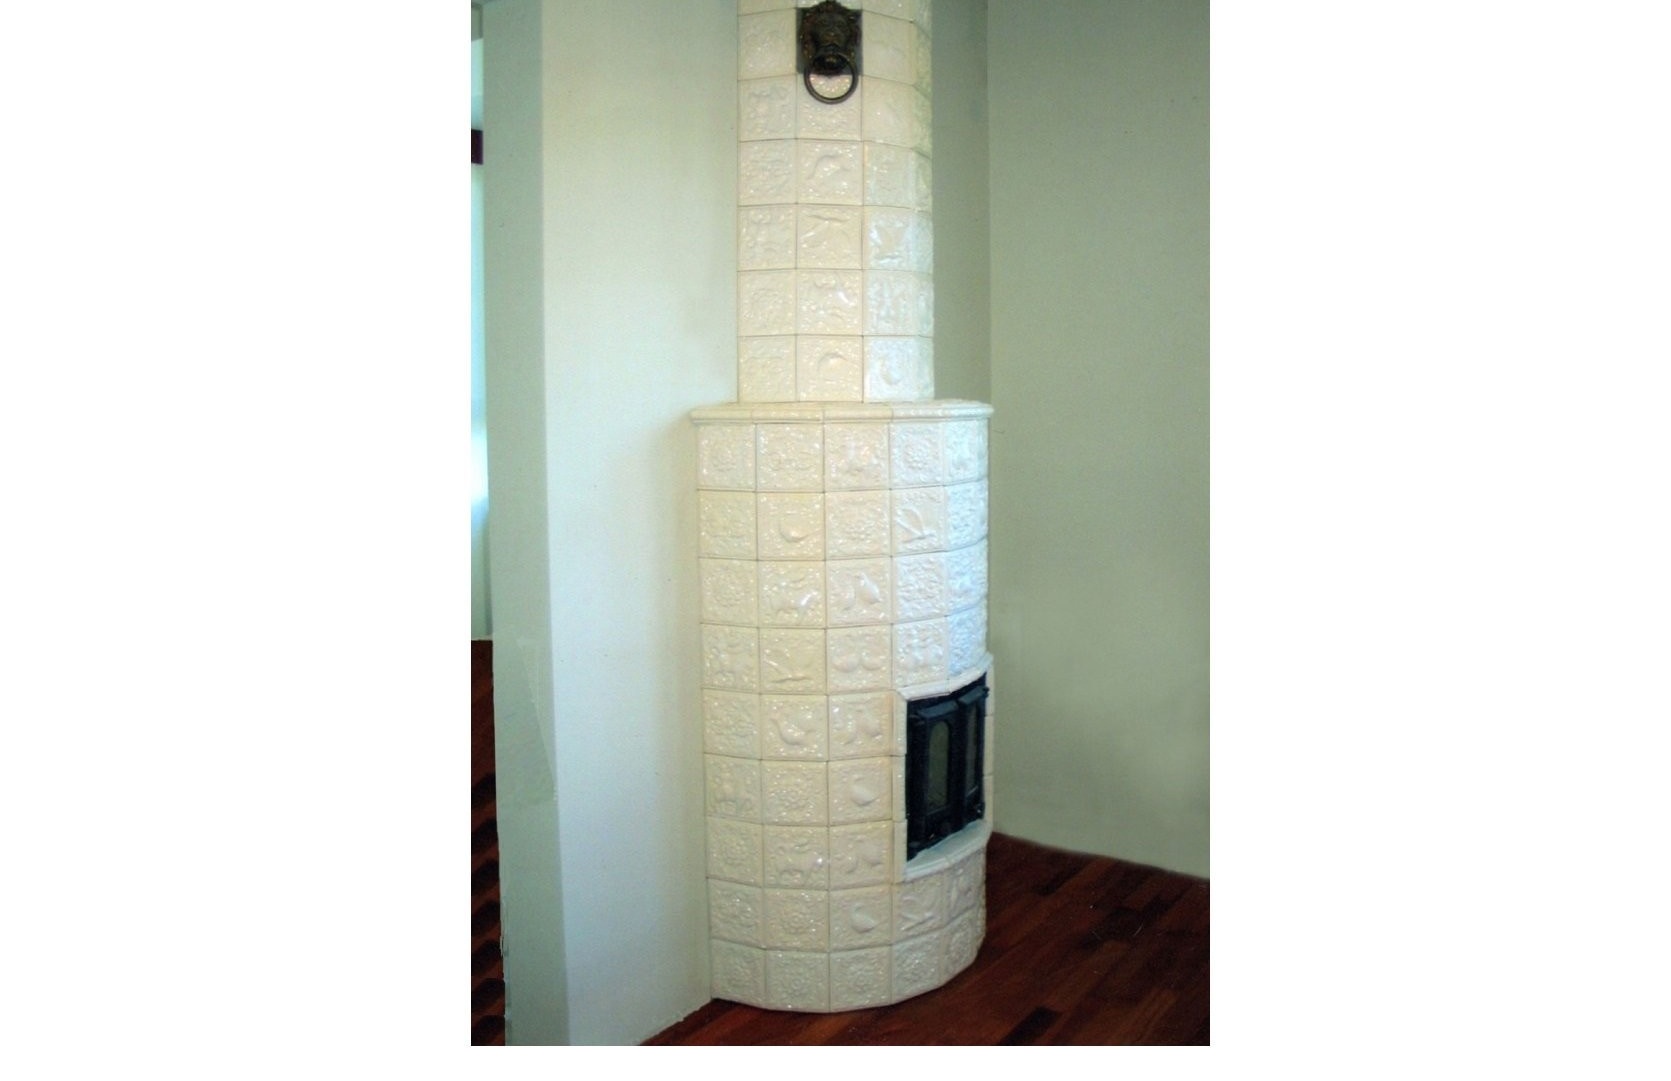
Round Dutch trim
In a purely brick version, it looks mean and uninteresting.
Operational Features
A characteristic feature of Dutch furnaces is that due to the considerable length of the gas duct during re-flueing, the flue gases are not completely removed through the chimney and some of them, including poisonous carbon monoxide, can enter the room. To avoid such phenomena, during operation it is necessary to monitor the temperature in the middle of the front surface (forehead) - it should not exceed 60 degrees. This is such a temperature that is tolerable for the palm of your hand, but for the back surface of the hand - no longer.
Video: do-it-yourself Dutch oven
As you can see, the construction of a Dutch furnace is quite affordable even for an absolute beginner in the furnace business. In this case, you get a very practical, although not the most economical device. The key to success is careful adherence to order and our advice. We wish you success!