DIY Swedish oven: device, design features, ordering
Most homeowners who want to get a brick stove erect a traditional Russian - as the most economical. But if the house is modest in size, this alluring option becomes unacceptable: Russian stove takes up quite a bit of space. It is necessary to choose a more compact variety, and in this case, the Swedish stove is the best choice. Observing step-by-step actions, you can build it with your own hands.
Content
What is remarkable about the Swedish oven?
Swedish oven options
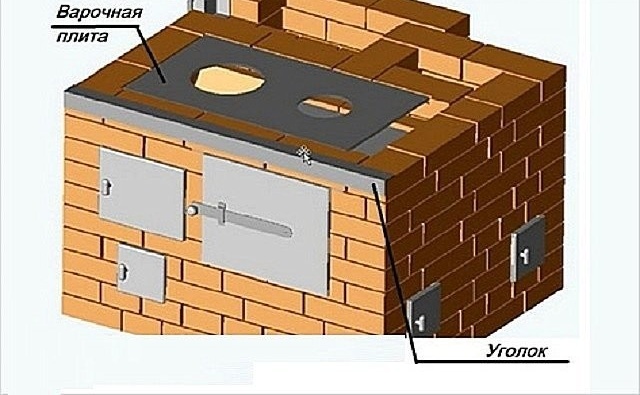
By designation, “Swede” refers to heating and cooking stoves, and there is every reason to consider it the most successful among them. Cooking on it is more convenient than in the Russian stove, as the hostess does not have to bend over and use the grip. In addition to the hob, there is an oven where you can cook pastries and quickly warm dishes. And to top it all, in the classic "Swedish" there is a niche designed to dry things.
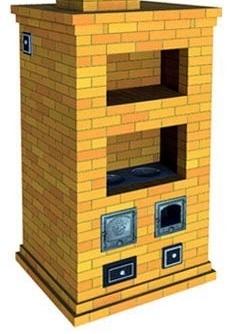
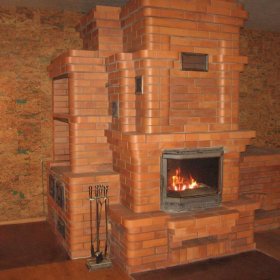
The original model of the Swedish furnace
The design of the stove allows its rear side, facing the living room (the front part with a stove located in the kitchen), to equip a warm stove bench or fireplace.
In addition to the functional, the "Swede" has technical advantages:
- Quick warm up.
- Simple device and low cost. In this regard, the Swedish furnace is comparable to the Dutch one, but has higher efficiency (60% versus 40%) and heat transfer (the Dutch woman with a power of 2.9 kW and the Swedish woman with a power of 4.1 kW have equal material consumption).
- The presence of an oven, which, with the door open, just a few minutes after the start of the furnace (even waste fuel can be used), provides forced infrared heating of a wet or frozen user.
- Downward smoke flow after the furnace, providing high-quality heating of the furnace not only from above, but also from below.
- The low temperature of the flue gases in the duct part, due to which it can be built from ordinary brick using cement-sand mortar.
- Plastic. Strict canons have to be followed only in the construction of a smaller, high-temperature part of the furnace. The rest can be adjusted without loss of quality for almost any home.
- The ability to produce heat for the preparation of hot water without compromising the combustion mode in the furnace.
- The ability to "connect" the couch.
The listed advantages can be contrasted with the following disadvantages:
- Due to the solid heat load, the high-temperature part of the furnace has to be built only from the highest quality materials. High demands are made on the quality of work (the master must have sufficient experience).
- If you forget to close the view after a complete burnout of the fuel, the oven is chilling very quickly.
- Mandatory foundation required. This is due to the uneven load on individual parts of the furnace and its elongated shape.
Without a reliable foundation, the unit will be unstable.
Furnace design
If the Russian and Dutch ovens are considered to be the product of folk savvy, then the “Swede” has a very definite group of authors. It was headed by academicians of the Swedish Academy of Sciences K. Konstedt and F. Wörd. The then leadership of the country set the task for the developers: to create a furnace that would be better adapted to the cold and humid local climate and fuel shortages than the most common Dutch woman at that time in Europe. In addition, the new unit was supposed to have compact dimensions (lack of land does not allow the Swedes to build too spacious houses) and be as simple and inexpensive as possible.
Read how to correctly calculate the materials and independently fold the Dutch oven in our next article:https://aquatech.tomathouse.com/en/otoplenie/pech-gollandka-rukovodstvo-po-izgotovleniyu-dlya-domashnego-mastera.html.
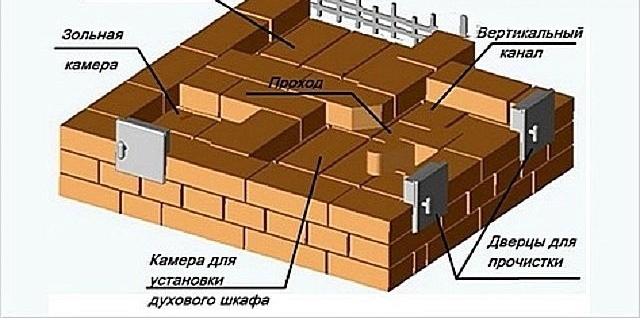
What turned out in the end consists of two parts: one is a chamber furnace, in which the chamber blown by hot flue gases is simultaneously an oven; the second is a channel convector stretched out to the sides and placed behind the first part from the Dutch oven. As if nothing complicated, but I had to carefully and carefully select and calculate the parameters at which the efficiency of the unit, heating rate and heat transfer would be maximum.
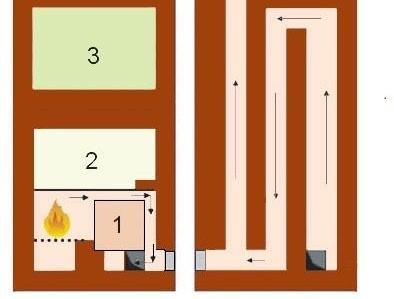
Swedish oven diagram
Consider the technical features:
- The purpose of the chamber part, in addition to cooking, is to absorb the very first heat generated by the combustion of light fractions of coal and firewood. This is the first difference from the "Dutch": in it this heat was almost completely thrown into the chimney, because the brick did not have time to assimilate it due to low thermal conductivity.
- In the Dutch furnace there was no zone for afterburning such fractions. The “Swede” was equipped with a semblance of a hood in which the gases completely burn out, and for the best absorption of thermal energy, a large metal oven was introduced into the brick body of the furnace (item 1). Due to the high thermal conductivity of steel, it is heated almost instantly, which made the effect of forced heating possible.
- If the cooking niche with the stove installed in it (pos. 2) is closed with a wooden shutter, then the dishes prepared for breakfast and left on the stove by the morning will be still warm. They can be quickly heated in the oven, which will heat up almost simultaneously with the beginning of the morning flood.
- The oven was also equipped with a spacious niche-dryer (item 3), in which a couple of sets of very wet clothes can be completely dried overnight.
- For the sake of simplification and cheapening of the Hailo construction, which is a rather complex element, the Swedish engineers did not apply. Under the oven, a transfer window was simply arranged. This is precisely the reason why the Swede’s inability to keep heat after a flood for a long time with the view open.
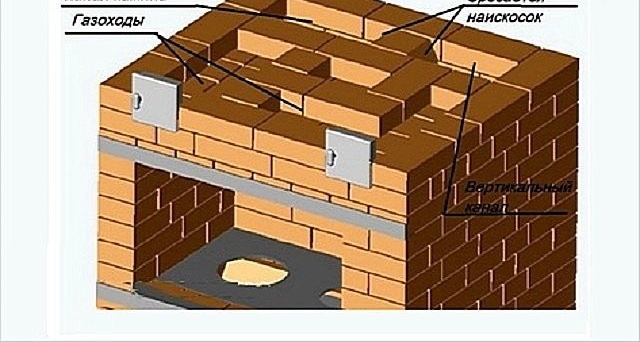
- The role of the heat accumulator is played by a vertically elongated channel convector installed behind the chamber furnace. It is arranged according to the Dutch principle: inside there is a labyrinth of channels through which flue gases pass before entering the chimney. It assimilates the heat generated during the combustion and afterburning of the main fuel mass.
Initially, the channels were made vertical. At the same time, the heating of the lower part of the furnace deteriorated, but the fuel burned out in a more complete volume. In a modification with a horizontal arrangement of channels, the bottom heats up much better, but the furnace is quickly overgrown with soot (a sign of incomplete combustion of fuel). In general, manipulations with the channel part, which does not have any tricky heat engineering devices, do not affect the characteristics of the furnace.You can safely vary its size and position relative to the chamber part, so that it becomes possible to heat 3 rooms.
Swedish stove placement option
The "Swede" can simultaneously take on the function of preparing hot water for domestic needs. The heat exchanger in the form of a bent pipe should be installed in the oven - here it will not affect the performance of the furnace. The storage tank is placed either in a niche dryer or on the ceiling.
The arches in the Swedish furnace are not made in the form of arches, but with the help of ceilings from rolled steel - a corner and a strip. Usually, stove-makers try to avoid introducing metal elements into the masonry - because of the significant difference in the values of the thermal expansion coefficients of brick and metal.
But in this case, the authors still decided on such a step for two reasons:
- the arch vault significantly increases the height of the stove, which was unacceptable for low Swedish ceilings;
- it leads to a noticeable rise in price of the structure, since it is a rather complex unit.
As time has shown, the coexistence of brick and steel in a Swedish kiln is quite possible, unless there is direct contact between them: both materials should always be separated with a 6 mm wide joint filled with mortar.
Calculation
As already mentioned, the performance of the Swedish furnace largely depends on the size of the elements of the chamber part and their ratios. Here are some parameters that should be considered optimal:
- Cooktop: 710x410 mm. It is important that its material has moderate thermal conductivity - use special steel or cast iron. Otherwise, the burners will heat up too much, the stove will quickly burn out, and the combustion mode will be violated due to excessively intense heat extraction.
- Furnace chamber: height - from 280 to 330 mm; width - 305 to 355 mm; depth - from 405 to 505 mm.
- Oven: height - from 281 to 305 mm; width - from 330 to 380 mm; depth - from 455 to 505 mm.
- Oven wall thickness: 4-6 mm. With a smaller wall thickness, this element will be short-lived (it will quickly burn out), with a larger one it will heat up longer, which will lead to a drop in efficiency.
- The distance between the oven and the edge of the grate next to it: from ¾ to the 1st brick. This size can be reduced by isolating the wall of the oven from the furnace with vermiculite (the best option) or asbestos.
- Clearance between the back wall of the oven and the wall of the furnace: ¼ brick (necessary so that the oven is blown with hot gases from the back).
Now something about proportions:
- the depth of the furnace is selected in accordance with its other dimensions. If the height and width are accepted as minimally acceptable, then the depth should be the smallest;
- if the values of the first two sizes are taken from the middle of the allowable range, then the depth should be assigned average;
- a firebox with maximum height and width and depth should have a maximum. If the depth of the furnace is disproportionately increased, there will be a burnout; if reduced - the efficiency of the furnace will be reduced.
The depth of the oven is not tied to its height and width: it can be reduced by deviating from the proportion. But at the same time, this size should not be less than the specified minimum acceptable value.
This article will discuss the construction of the "Swede" with a fireplace measuring 1020x890x2170 mm.
Materials
During the geological history in Sweden, the richest deposits of excellent chamotte clay based on aluminosilicates were formed, so the Swedish furnace was designed taking into account the availability of high-quality refractory chamotte bricks. It is he who allows you to develop in the furnace such a high temperature, necessary for complete afterburning of fuel in conditions of active heat extraction by the oven.
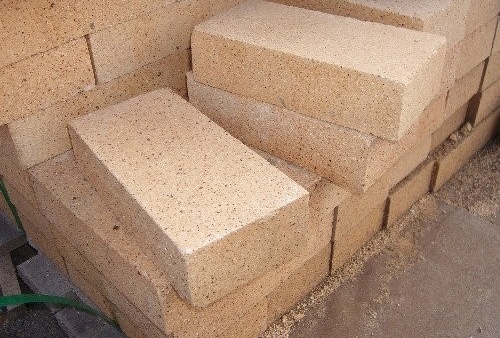
Fireclay brick
It would be most correct to lay out the entire furnace part with fireclay brick, starting from the 3rd side and ending with the one laid on top of the stove. But in this case, the oven will turn out to be too expensive - due to the high cost of this material.Therefore, chamotte is usually used only for lining the walls of the furnace from the inside.
Other elements of the chamber part should be laid out from kiln bricks (red ceramic corpulent) of the M200 brand. It is important that the edges of all blocks of ½ or ¾ of the brick are smooth, so they can not be harvested with a pickaxe. You must either cut it with a grinder, or purchase it ready-made.
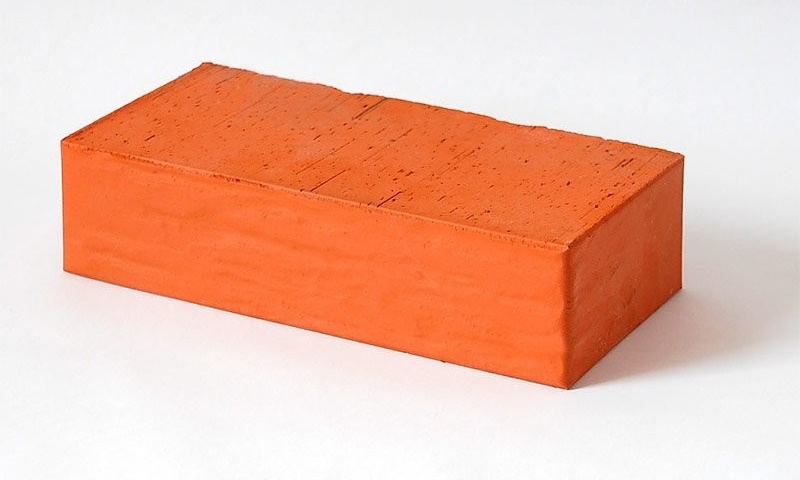
Solid kiln brick
The channel convector can be built of ordinary brick: since the afterburning of gases occurs in the chamber part, they come here with a temperature below 800 degrees.
The solution is kneaded on a special grade of clay - the usual is not suitable. As a rule, marl is used.
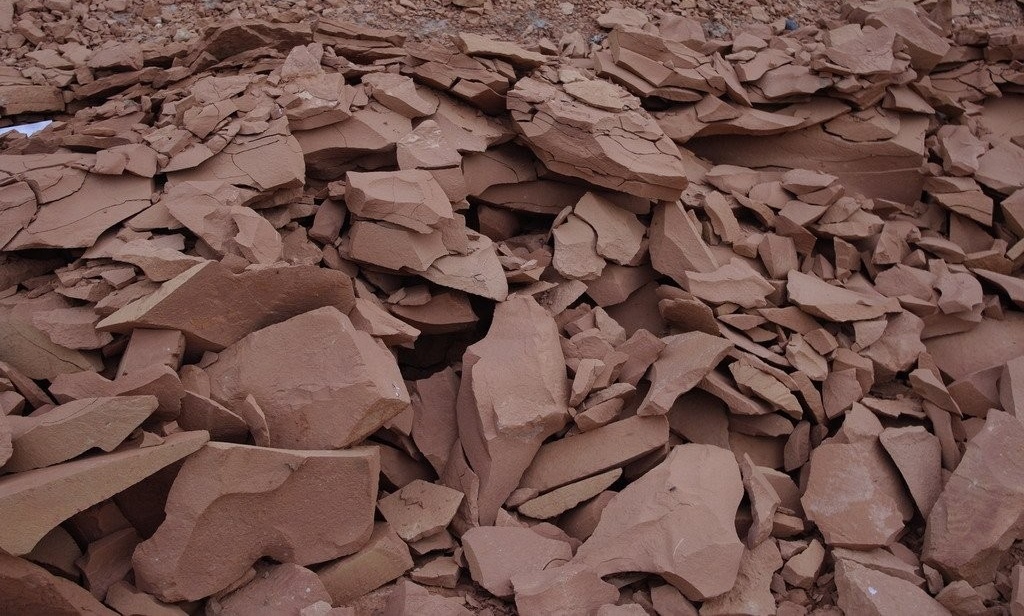
Marl
Fireclay clay will also be needed - a solution for fireclay bricks will be mixed from it.
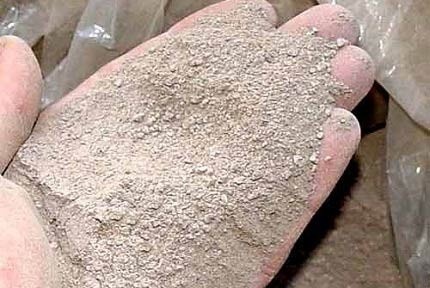
Fireclay clay
Sand should be used mountainous, which is characterized by a minimum of organic impurities and the angular shape of the granules. The solution prepared on smooth river sand quickly cracks.
For the construction of a channel convector, a conventional cement-sand mortar is used.
High heat loads place special demands on the furnace door. Inexpensive model made of sheet steel by stamping, quite quickly shaken. It is better to install a cast iron door with fasteners that are clamped between the bricks.

Oven door: cast iron
If, nevertheless, a decision has been made to use a stamped door, it must be equipped with such clamps independently: two pieces of steel wire (annealed) with a diameter of 3-4 mm and a length of 50–70 mm are welded to each corner of the frame. During installation, these "antennae" are spread apart, so that their ends are 40-50 mm apart, and laid in seams. Above the stamped door, you need to arrange the overlap of a steel corner or strip.
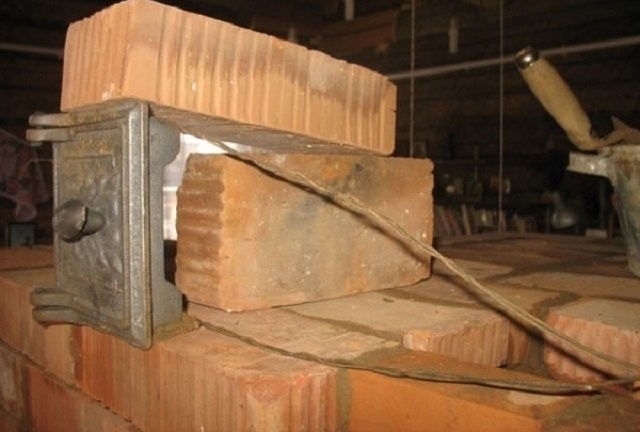
Door installation
Products and materials should be purchased according to the following specifications:
- Brick oven M200: 717 pcs. (excluding the chimney).
- Chamotte brick, grade Ш8: 154 pcs.
- Asbestos cord.
- Pieces of steel equal-angle corner 50x5 mm, length 1020-1030 mm: 2 pcs.
- Sections of a steel strip 50x5 mm: 3 pcs. 920 mm long, 2 pcs. 54 mm long, 2 pcs. 48 mm long.
- Grate with dimensions 200x300 mm.
- Door for the firebox, size - 250x210 mm.
- Door for the blower, size - 140x140 mm.
- Cleaning doors 140x140 mm in size: 8 pcs.
- Oven with dimensions 450x360x300 mm.
- Chimney valves with a size of 250x130 mm: 3 pcs.
- Cooker with dimensions of 710x410 mm.
- Lattice for a fireplace 690–700 mm long. For lack of purchase, you can weld from a steel bar.
- Material for fireproof coating in front of the furnace: steel sheet with a thickness of 1.5 mm or ceramic tile.
The floor must be protected within a radius of 1.2 m from the center of the furnace door.
Site selection and preparatory work
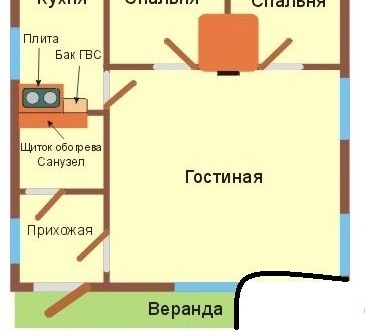
The design of the Swedish stove provides for its placement in the partition between the kitchen and the living room or living room. In this case, it is important to make sure that the chimney does not rest against the attic floor beam or the rafter leg.
Having decided on the place, they begin to build the foundation. Its sole should rest on a sufficiently strong layer of soil and be located below the depth of freezing. If the room is constantly heated, that is, the soil does not freeze at all, they are deepened by 600–700 mm; if in winter it remains unattended for a long time, the depth of foundation should be chosen in accordance with the depth of freezing of the soil, characteristic of this region.
If the furnace is being built simultaneously with the house, the foundations of both structures should be made separate. Being connected, they, due to differences in the amount of shrinkage, will have an undesirable effect on each other, which will result in distortion and deformation of the masonry.
On each side, the foundation must extend 100-150 mm beyond the boundaries of the furnace.
Having prepared a recess with the required dimensions and depth, tamp its bottom and arrange a sand-crushed stone cushion on it: first, fill the sand with a layer of 100-200 mm, which must be moistened with water and tamped; from above, a layer of rubble 150-170 mm thick is laid on it, which is also rammed.
Reinforcing belt
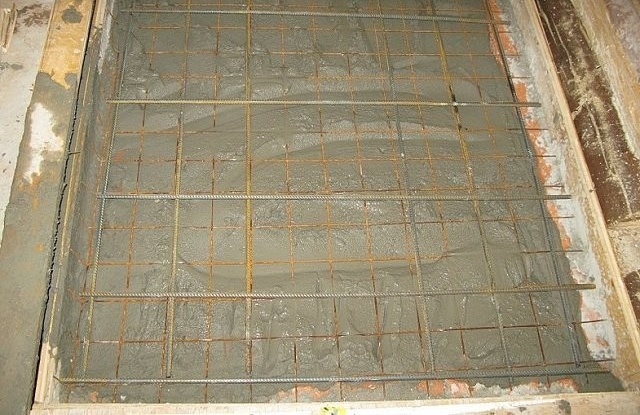
After installing the formwork, the walls of which are insulated with waterproofing from the inside (roofing material is usually used), they begin to fill the foundation. This process is divided into three stages:
- A layer of 150 mm is used to lay coarse concrete, consisting of large gravel, cement and a small amount of sand. A mesh of reinforcing steel must be pressed into this solution.
- Cement-sand mortar is poured on top of concrete in such an amount that its surface is flush with the ground. When this layer hardens a bit, the reinforcing mesh is also pressed into it.
- Next, the formwork to the very top (about 100 mm above the floor) is poured with concrete, which should be well aligned from above. The foundation will be ready for further work in 25–28 days, when it has completely hardened.
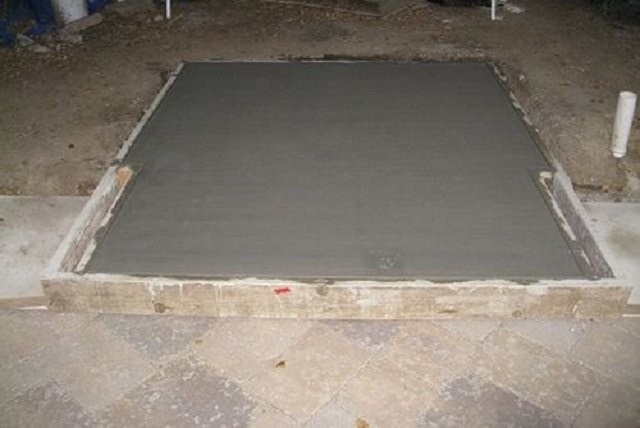
Poured foundation under the furnace
Since the lower part of the Swede warms up very well, in addition to waterproofing, a sufficiently powerful heat-insulating layer must be laid on top of the matured foundation. The best option is three sheets of basalt cardboard with a thickness of 5 mm each, and the middle one should be foil.
Tip. If you are going to cut a brick into halves and three-fours with a grinder, then it is better to do this ahead of time outdoors: this operation is accompanied by the formation of a huge amount of dust. When performing work indoors, the master will soon have nothing to breathe.
Masonry of a Swedish stove with a do-it-yourself stove: ordering
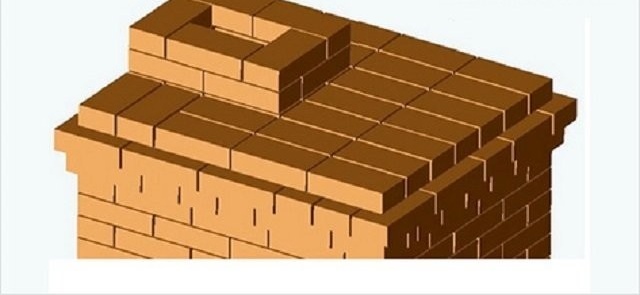
During the construction of the furnace, the bricks are laid as shown in the order. The following explanations will help you to do the job correctly:
first row masonry
Rows No. 1 and 2 represent the foot of the furnace. They are characterized by an increased width of the joints - from 6 to 13 mm. Due to this, the furnace body will be located as if on a slightly protruding pedestal. Bricks before applying the solution should be rinsed with water for 10-15 s. This procedure will help get rid of dust and provide reliable contact with the solution. The clay mixture sticks much worse to a dry dusty surface and the masonry is fragile, which is unacceptable under conditions of high thermal stresses.
Note! You can not keep a brick under water for a long time, much less soak it for a long time. The moisture absorbed by it will be released into the solution, causing it to liquefy, so that the masonry may eventually collapse even before the completion of construction work.
On the 2nd row, it is necessary to lay the support rods for the fireplace grate, which should immediately be welded to them.

Order: row two
Next to No. 3, the formation of cleaning channels, a blower chamber, a vertical chimney channel and a niche for installing an oven begins. A fireplace insert is formed on the back of the stove.
Third row masonry
Installed doors can be temporarily supported with bricks until the fasteners are fixed in subsequent rows.
In the back of the niche for the oven, you need to arrange a passage connected to the cleaning cameras. To this end, cut the corner of the brick installed in this place.
Row number 4 is identical to the 3rd, only the bricks are laid in a slightly different way - the dressing of the joints is ensured.
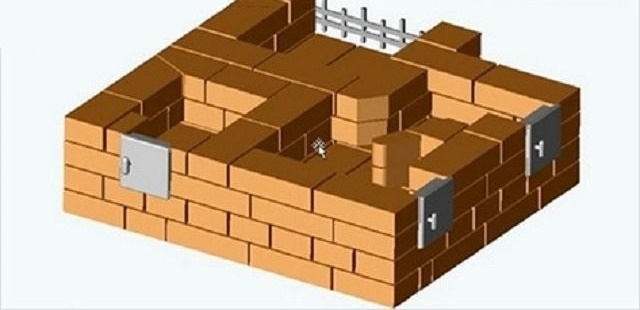
Fourth row
Tip. Do not rush to immediately lay the bricks on the mortar. First, each row is laid out dry: perhaps some bricks have unacceptably large size deviations and they will need to be replaced.
From the 5th row, the formation of a smoky tooth lump begins. A grate is installed on the same row. Chamotte brick is marked in yellow on the order.It is important to remember: because of the significant difference in the coefficients of thermal expansion, the joints between ceramic and chamotte masonry should have a width of at least 6 mm.
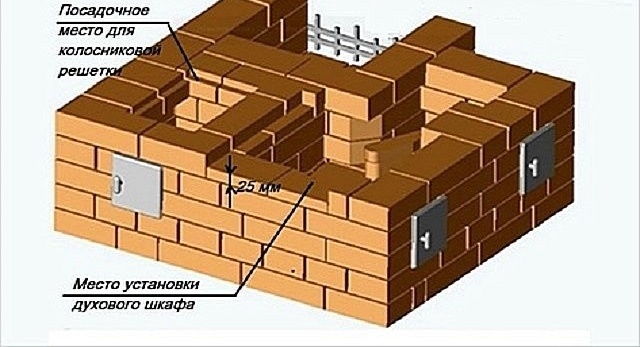
Fifth row
Attention! Do not neglect the rounding of the edges on the bricks, if it is prescribed by the order. “Swedes” are characterized by weak traction and smoothing of corners is necessary to prevent the formation of vortices, which worsen it even more.
Before installation, wrap the oven and the furnace door with an asbestos cord. It will play the role of a sealant (for a door) and at the same time provide metal elements with the opportunity to expand freely when heated.
In row number 6, a wall originates between the furnace and the oven, which consists of bricks laid on spoons (rib). To reduce its thickness to ¼ brick, we were allowed to heat the oven in the form of a winding with an asbestos cord.
Row six
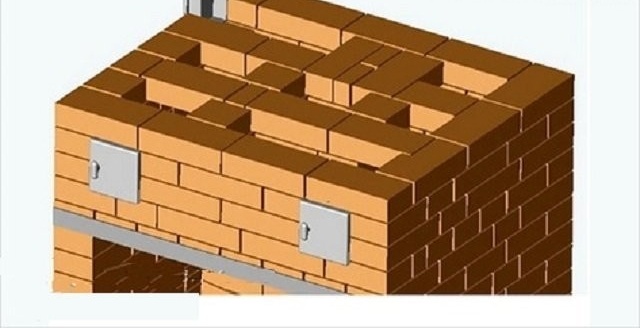
Rows number 7, 8 and 9 are laid out according to the order. Please note that in the 7th and 9th rows niches overlap with steel strips. As already mentioned, a gap of 6 mm filled with mortar must be left between steel and brick.
Order: rows 7-12
Having laid out the 9th row, it is necessary to allow the solution to dry, after which the smoke tooth should be smoothed using a grinder. It is also recommended to smooth out the internal laps (this will slightly increase the efficiency), but the grinder cannot get close to them - it is necessary to cut them off.
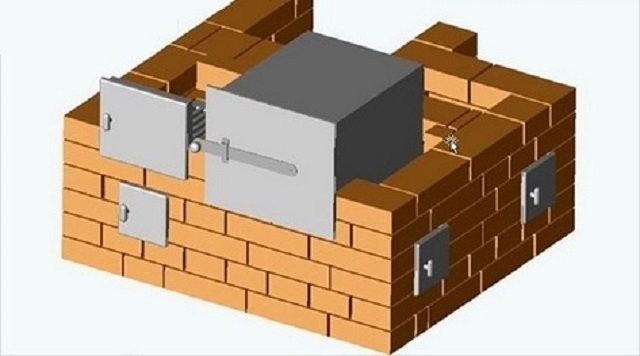
In the bricks of row number 10, it is necessary to cut quarters for installing the hob. If it has stiffening ribs, grooves are cut out under them. The plate is planted on the solution, but first, asbestos strips should be laid under it.
Row ten
A cleaning door is installed in the same row.
Those parts of the row that overlap the furnace door and the niche of the oven are reinforced with steel corners.
In the 11th row, the bricks above the firebox need to be obliquely trimmed. Inclined faces will deflect rising smoke in the direction of the chimney.
Row eleven
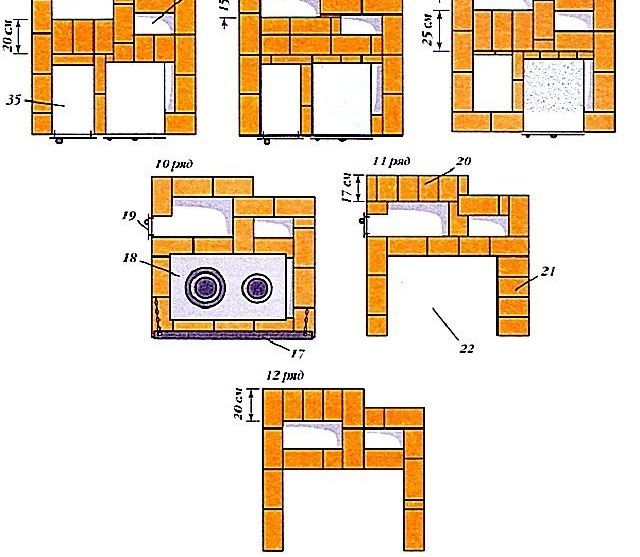
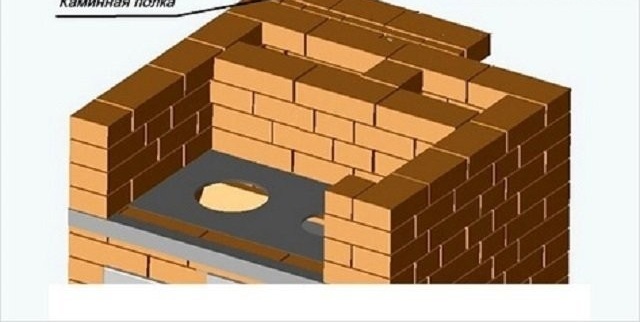
Subsequent rows should be laid out according to the scheme. Please note: in the 14th row, 25 mm bricks extend - a mantelpiece is formed.
Row fourteenth
In the 16th row, with the help of a steel strip, an overlapping of the cooking niche is arranged, and the front of this row is strengthened by a steel corner.
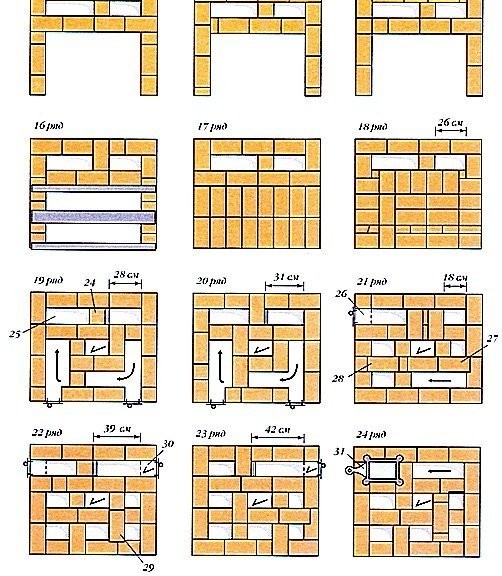
Order from the 15th row
Having laid the 17th and 18th rows in accordance with the order, they proceed to the formation of the openings of the chimneys (row No. 19). At the same time, a brick installed between the stove (vertical) and the chimney smoke exhaust channels must be obliquely trimmed on both sides.
Row nineteenth
On the 19th, 21st and 22nd rows, clean doors are installed.
Row twenty-first
In rows No. 24 and 25 valves are installed.
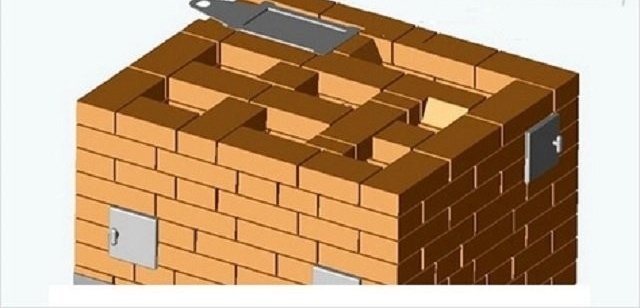
Row Twenty Four
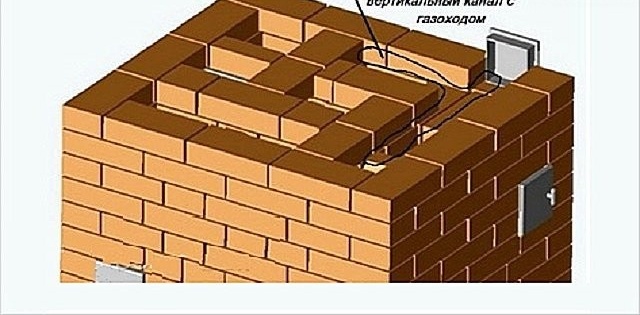
In the 26th row, the vertical channel is combined with the gas outlet, here the last cleaning door is used, which is used to clean the channels.
Row of the twenty-sixth
Having laid out the 27th and 28th rows according to the order, they overlap all the channels (rows 29 and 30). The bricks in the chimney hole must be slanted.

Row thirty-first
In the 31st row, a common chimney valve is mounted, and from the 32nd the construction of the chimney begins.
Row thirty-second
Chimney
Swedish furnaces are characterized by significant resistance to the flue gas flow, so it cannot boast of decent draft. In this regard, the tip of the chimney is recommended to be raised at least 60 cm above the ridge. At the same time, it should be equipped with a fairly wide flare (broadening), which will cut through and, as it were, toss up the wind flow, preventing blowing into the pipe.
The width of the fluff, if you count from the edge of the mouth of the chimney, should be half a brick in each direction.
The minimum wall thickness of the chimney is half a brick.
At the intersection of the chimney of the ceiling and the roof, a fire cutting device is required. They will prevent overheating and ignition of wooden building structures.Cutting can be done either in the form of a fluff, or in the form of a shell of asbestos, or in the form of a steel duct filled with a mixture of expanded clay and sand.
It is convenient to seal the gap between the chimney and the roofing with the special Onduband adhesive tape.
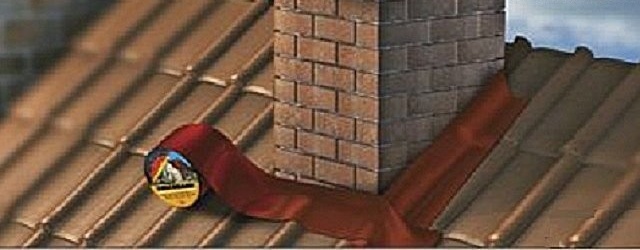
Sealing the pipe with an onduband
You may also be interested in material with step-by-step instructions for installing a brick chimney:https://aquatech.tomathouse.com/en/otoplenie/dyimohod-iz-kirpicha-svoimi-rukami.html.
Commissioning
The finished oven for 2 weeks is left alone to dry. If dry warm weather is observed outside during this period, no additional measures are necessary. But in conditions of dampness, the oven will have to be dried by a fan heater.
The next 2 weeks, the furnace is continuously heated with high-quality fuel - aspen or anthracite (give a minimum of soot), loading it in an amount of 2–4 kg. As soon as one load burns out, immediately or at least with a certain frequency lay the next one and set it on fire. At the same time, crumpled dry newspapers or brown paper must be pushed into the cleaning doors.
Paper liners will act as indicators: as soon as they cease to be wet, the drying of the furnace can be considered complete. They can not catch fire, if only the fuel will be loaded in the indicated small volumes.
The following is an accelerating firebox. It takes 2 days, during which the furnace is heated twice a day (morning and evening, only 4 furnaces) with a gradual increase in the fuel bookmark from smallest to maximum. The multi-pass furnace at this stage must be switched to the winter course.
If you choose a suitable brick oven design, then pay attention to corner fireplaces:https://aquatech.tomathouse.com/en/otoplenie/effektivnoe-teplo-stroim-pech-kamin-svoimi-rukami.html. One of the pluses is the ability to use two heating modes.
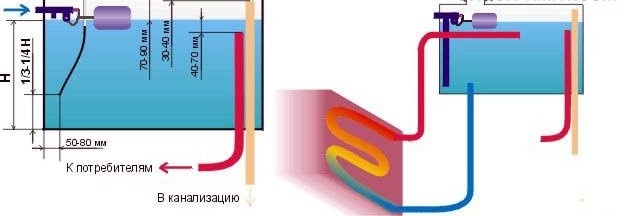
Water circuit equipment
The hot water coil should be placed at the back of the oven. The storage tank can be installed in two ways:
- In the drying niche: the maximum possible volume is 120 liters. The tank is located low, so it is convenient to fill it manually - relevant for houses without running water. But the pressure at this height will be weak.
- On the roof of the furnace: the tank is L-shaped to increase the area of contact with the chimney. Unlike the first option, it is oriented horizontally and has a height of only 400-450 mm.
Swedish furnace equipment with water circuit
Thermal insulation is best done from foil basalt cardboard with a thickness of 10 mm, but you can also use basalt cotton wool with a density of 30-50 kg / m3. Outside, the tank with thermal insulation needs to be sheathed with moisture-proof drywall.
When connecting the tank to the water supply system, it must be equipped with a float valve for the toilet tank. It is important to ensure that cold water enters the lowest part of the tank, otherwise it will constantly mix with hot water, lowering its temperature. For this purpose, an oblique partition that does not reach the bottom is welded into the tank, along which cold water flows down.
In a vertically oriented tank (installation in a drying niche), a simpler solution can be applied - put a vertical tube on the valve, the second end of which is located at the very bottom. But this technique is less effective: hot water will remain only in the upper two-thirds of the tank.
Video: do-it-yourself swedish oven
For a small house in which a Russian stove would look too bulky, a “Swede” is the most suitable option. It has a relatively simple device, quite functional and at the same time not as voracious as the "Dutch". But with prolonged shutdowns, the Swede actively absorbs moisture, which has to be disposed of by multiple overclocking furnaces.